Houdini Engine 6.2
 All Classes Files Functions Variables Typedefs Enumerations Enumerator Macros Groups Pages
Materials

Materials Introduction

Materials in HAPI are mapped one-to-one to Houdini SHOP nodes or VOP nodes. You track them using HAPI_NodeId's like any other node.

The materials API is spilt into three stages and what you do in one stage does not affect what you can do in the next stage. The first stage is material assignment extraction where you get the materials assigned to each face of your mesh. Next, we have rendering to image where you render a texture of a material to an internally cached "image". Finally, you extract the image out of HAPI and into either a memory buffer or a file.

Additionally, it is important to keep track of material updates to avoid unnecessary rendering and image extraction. Two important changed flags exist for this purpose.

Get Material Assignments

Material assignments can be retrieved on a Part using the HAPI_GetMaterialNodeIdsOnFaces() call. It expects an array of HAPI_NodeId's the size of at most HAPI_PartInfo::faceCount.

If the material is assigned at the OBJ level all faces will have the same material id assigned and you have a convenient are_all_the_same output parameter on HAPI_GetMaterialNodeIdsOnFaces() that saves you from checking each face to find out they are all the same. Here's a quick sample that queries a part's material assignment where the part has its material assigned at the object level:

// Load the library from file.
HAPI_AssetLibraryId library_id = -1;
HAPI_Result result =
hapiTestSession, "HAPI_Test_Materials_Simple.otl",
false, &library_id );
HAPI_TEST_ASSERT( result == HAPI_RESULT_SUCCESS );
HAPI_TEST_ASSERT( library_id >= 0 );
// Instantiate the asset.
HAPI_NodeId node_id = -1;
result = HAPI_CreateNode(
hapiTestSession, -1, "Object/HAPI_Test_Materials_Simple",
nullptr, true, &node_id );
HAPI_TEST_ASSERT( result == HAPI_RESULT_SUCCESS );
// Get the display geo info.
HAPI_GeoInfo geo_info;
result = HAPI_GetDisplayGeoInfo( hapiTestSession, node_id, &geo_info );
HAPI_TEST_ASSERT( result == HAPI_RESULT_SUCCESS );
// Get and check the HAPI_PartInfo. In this case, we know we're
// specifically looking for the part 0.
HAPI_PartInfo part_info;
result = HAPI_GetPartInfo(
hapiTestSession, geo_info.nodeId, 0, &part_info );
HAPI_TEST_ASSERT( result == HAPI_RESULT_SUCCESS );
HAPI_TEST_ASSERT( part_info.faceCount > 0 );
// Now call HAPI_GetMaterialIdsOnFaces() with the number of faces as the
// number of material ids since it is guaranteed to be a 1:1 relation.
bool are_all_the_same = false;
std::vector< HAPI_NodeId > material_ids( part_info.faceCount );
hapiTestSession, geo_info.nodeId, 0,
&are_all_the_same, material_ids.data(),
0, part_info.faceCount );
HAPI_TEST_ASSERT( result == HAPI_RESULT_SUCCESS );
// Note that for this asset, all faces have the same material assignment
// so we can make some optimization/assumptions based on the returned
// are_all_the_same variable without having to go through the entire list
// of material ids.
HAPI_TEST_ASSERT( are_all_the_same == true );
// Check to make sure indeed all material ids are identical.
for ( int i = 0; i < part_info.faceCount; ++i )
HAPI_TEST_ASSERT( material_ids[ i ] == material_ids[ 0 ] );

Material assigments can also be assigned via the SHOP path primitive attribute in which case you might get different material ids on each face. Here is an example of an asset that has different material assignments on each face:

// Load the library from file.
HAPI_AssetLibraryId library_id = -1;
HAPI_Result result =
hapiTestSession, "HAPI_Test_Materials_Multi.otl",
false, &library_id );
HAPI_TEST_ASSERT( result == HAPI_RESULT_SUCCESS );
HAPI_TEST_ASSERT( library_id >= 0 );
// Instantiate the asset.
HAPI_NodeId node_id = -1;
result = HAPI_CreateNode(
hapiTestSession, -1, "Object/HAPI_Test_Materials_Multi",
nullptr, true, &node_id );
HAPI_TEST_ASSERT( result == HAPI_RESULT_SUCCESS );
// Get "Multi_Partial" object info.
// See docs on Objects/Geos/Parts for how to implement HAPIgetObjectInfo().
HAPI_TEST_ASSERT( HAPIgetObjectInfoOnNode(
node_id, "Multi_Partial", &object_info ) );
// Get the display geo info.
HAPI_GeoInfo geo_info;
hapiTestSession, object_info.nodeId, &geo_info );
HAPI_TEST_ASSERT( result == HAPI_RESULT_SUCCESS );
// Get and check the HAPI_PartInfo. In this case, we know we're
// specifically looking for the part 0 on geo of "Multi_Partial" object.
HAPI_PartInfo part_info;
result = HAPI_GetPartInfo(
hapiTestSession, geo_info.nodeId, 0, &part_info );
HAPI_TEST_ASSERT( result == HAPI_RESULT_SUCCESS );
HAPI_TEST_ASSERT( part_info.faceCount > 0 );
// Now call HAPI_GetMaterialIdsOnFaces() with the number of faces as the
// number of material ids since it is guaranteed to be a 1:1 relation.
bool are_all_the_same = false;
std::vector< HAPI_NodeId > material_ids( part_info.faceCount );
hapiTestSession, geo_info.nodeId, 0,
&are_all_the_same, material_ids.data(),
0, part_info.faceCount );
HAPI_TEST_ASSERT( result == HAPI_RESULT_SUCCESS );
// For this asset, not all faces will have the same material assignment.
// Therefore, this returned variable will be false.
HAPI_TEST_ASSERT( are_all_the_same == false );
// Check material memberships.
for ( int face_idx = 0; face_idx < part_info.faceCount; ++face_idx )
{
// Some faces have no material assignment at all. They will have
// a material id of -1. Skip them.
if ( ( 50 <= face_idx && face_idx <= 53 ) || ( face_idx >= 59 ) )
{
HAPI_TEST_ASSERT( material_ids[ face_idx ] == -1 );
continue;
}
// First, get the HAPI_MaterialInfo of the current material.
HAPI_MaterialInfo material_info;
hapiTestSession, material_ids[ face_idx ], &material_info );
HAPI_TEST_ASSERT( result == HAPI_RESULT_SUCCESS );
// To get access to the material parameters, get the HAPI_NodeInfo
// of the material's SHOP node via the ::HAPI_MaterialInfo::nodeId.
HAPI_NodeInfo node_info;
result = HAPI_GetNodeInfo(
hapiTestSession, material_info.nodeId, &node_info );
HAPI_TEST_ASSERT( result == HAPI_RESULT_SUCCESS );
// We now check certain memberships for specific materials.
// See docs on HAPI_GetString() for implementation of
// HAPItestGetString().
if ( face_idx <= 4 )
HAPI_TEST_ASSERT( HAPItestGetString( node_info.nameSH ) == "Multi_Partial1");
else if ( 5 <= face_idx && face_idx <= 8 )
HAPI_TEST_ASSERT( HAPItestGetString( node_info.nameSH ) == "Multi_Partial2");
else if ( 9 <= face_idx && face_idx <= 13 )
HAPI_TEST_ASSERT( HAPItestGetString( node_info.nameSH ) == "Multi_Partial1");
else if ( 14 <= face_idx && face_idx <= 17 )
HAPI_TEST_ASSERT( HAPItestGetString( node_info.nameSH ) == "Multi_Partial2");
else if ( 18 <= face_idx && face_idx <= 22 )
HAPI_TEST_ASSERT( HAPItestGetString( node_info.nameSH ) == "Multi_Partial1");
else if ( 23 <= face_idx && face_idx <= 26 )
HAPI_TEST_ASSERT( HAPItestGetString( node_info.nameSH ) == "Multi_Partial2");
else if ( 27 <= face_idx && face_idx <= 31 )
HAPI_TEST_ASSERT( HAPItestGetString( node_info.nameSH ) == "Multi_Partial1");
else if ( 32 <= face_idx && face_idx <= 35 )
HAPI_TEST_ASSERT( HAPItestGetString( node_info.nameSH ) == "Multi_Partial2");
else if ( 36 <= face_idx && face_idx <= 40 )
HAPI_TEST_ASSERT( HAPItestGetString( node_info.nameSH ) == "Multi_Partial1");
else if ( 41 <= face_idx && face_idx <= 44 )
HAPI_TEST_ASSERT( HAPItestGetString( node_info.nameSH ) == "Multi_Partial2");
else if ( 45 <= face_idx && face_idx <= 49 )
HAPI_TEST_ASSERT( HAPItestGetString( node_info.nameSH ) == "Multi_Partial1");
else if ( 54 <= face_idx && face_idx <= 58 )
HAPI_TEST_ASSERT( HAPItestGetString( node_info.nameSH ) == "Multi_Partial1");
}

Finally, once you have your material node ids, you call HAPI_GetMaterialInfo() to get the HAPI_MaterialInfo to see if it actually exists and whether it has changed. The HAPI_NodeId lets you access the parameters on the SHOP or VOP node that this material is tied to and lets you manipulate the materials properties and extract individual textures. Here's an example of extracting the HAPI_MaterialInfo:

// Load the library from file.
HAPI_AssetLibraryId library_id = -1;
HAPI_Result result =
hapiTestSession, "HAPI_Test_Materials_Simple.otl",
false, &library_id );
HAPI_TEST_ASSERT( result == HAPI_RESULT_SUCCESS );
HAPI_TEST_ASSERT( library_id >= 0 );
// Instantiate the asset.
HAPI_NodeId node_id = -1;
result = HAPI_CreateNode(
hapiTestSession, -1, "Object/HAPI_Test_Materials_Simple",
nullptr, true, &node_id );
HAPI_TEST_ASSERT( result == HAPI_RESULT_SUCCESS );
// Get the display geo info.
HAPI_GeoInfo geo_info;
hapiTestSession, node_id, &geo_info );
HAPI_TEST_ASSERT( result == HAPI_RESULT_SUCCESS );
// Get the material id on the first face on object 0, geo 0, and part 0.
HAPI_NodeId material_id;
hapiTestSession, geo_info.nodeId, 0, nullptr, &material_id, 0, 1 );
HAPI_TEST_ASSERT( result == HAPI_RESULT_SUCCESS );
// From this material id you can get the HAPI_MaterialInfo using
// ::HAPI_GetMaterialInfo().
HAPI_MaterialInfo material_info;
hapiTestSession, material_id, &material_info );
HAPI_TEST_ASSERT( result == HAPI_RESULT_SUCCESS );
// This is the first time we request information on this material so
// it will have just been created in HAPI. Therefore, the
// ::HAPI_MaterialInfo::hasChanged flag will be true.
HAPI_TEST_ASSERT( material_info.nodeId == material_id );
HAPI_TEST_ASSERT( material_info.nodeId >= 0 );
HAPI_TEST_ASSERT( material_info.exists == true );
HAPI_TEST_ASSERT( material_info.hasChanged == true );
// To get access to the material parameters, get the HAPI_NodeInfo
// of the material's SHOP node via the ::HAPI_MaterialInfo::nodeId.
HAPI_NodeInfo node_info;
result = HAPI_GetNodeInfo(
hapiTestSession, material_info.nodeId, &node_info );
HAPI_TEST_ASSERT( result == HAPI_RESULT_SUCCESS );
// Here we just check the name of this material's SHOP node.
// See docs on HAPI_GetString() for implementation of
// HAPItestGetString().
HAPI_TEST_ASSERT( HAPItestGetString( node_info.nameSH ) == "JPEG" );

Rendering to Image

Before the rest of the material APIs works, you have to render an image. You do this using HAPI_RenderTextureToImage(). The images rendered will be cached per material so you can render a whole bunch of materials and extract the images afterwards. This also means that an image render will always overwrite the previous image render on the same material.

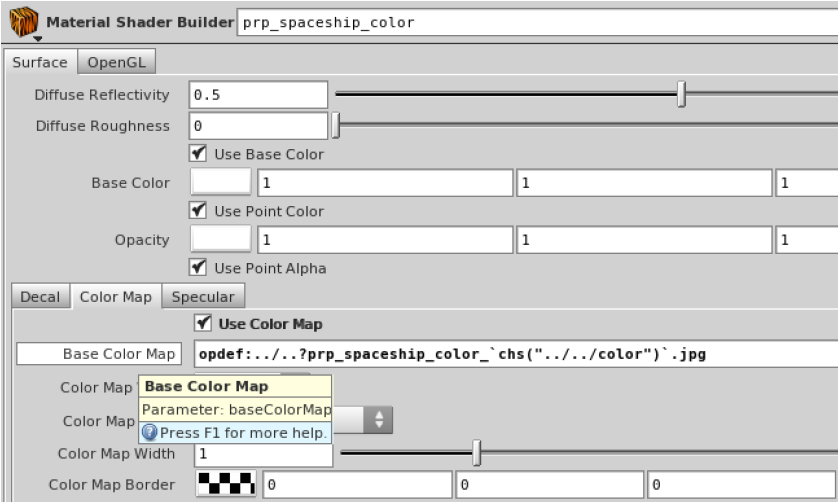
You can use the regular parameter access functions, as described in the Parameters section, to get the parameter id that contains the texture map path you’re looking for. Here’s what a typical material node parameters looks like:

HAPI_Materials_MaterialParameters.png

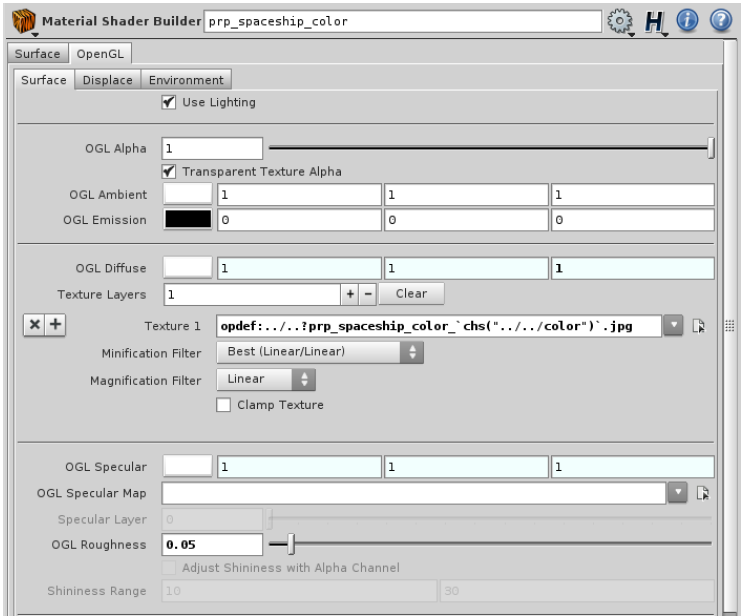
What you’re looking for are the different texture map parameters, like Diffuse, Normal, Bump, etc. For example, most materials will store the diffuse map in the Base Color Map (baseColorMap) parameter:

HAPI_Materials_TextureMaps.png

Now you can finally render the texture map to the internally cached image, using HAPI_RenderTextureToImage().

Render COP Node to Image

Independent of material assignments, given a HAPI_NodeId to a COP node, you can use HAPI_RenderCOPToImage() to render the COP to an image for later extraction.

Extracting Images

After you've rendered an image using the options above in the Rendering to Image section you're ready for the image extraction step, either to a file or in-memory. But before actually extracting the image you might want to manipulate the rendered image to save you from doing it on the client side.

Image Manipulation

Currently, the only property of an image you can change is the resolution. If you choose to use in-memory image extraction and you use our built-in HAPI-specific RAW file (and only the RAW file format) format then you can also change the data format (ie. int8, int16, float16, etc.), whether the image is interleaved (RGBRGB vs. RRGGBB), and what packing to use (number and order of channels).

All image properties are accessed / modified using HAPI_GetImageInfo() / HAPI_SetImageInfo().

You should call HAPI_GetImageInfo() first to get the original image properties as a HAPI_ImageInfo struct and make only the changes you wish before calling HAPI_SetImageInfo() to apply. The HAPI_ImageInfo::imageFileFormatNameSH parameter is readonly because the file format is specified right at extraction time. See the section below on Image File Formats for more on this.

Image File Formats

Houdini supports several image file formats out of the box as one would expect. However, you can also implement custom file formats for Houdini using dynamically loaded libraries. See the HDK documentation for more information, specifically: http://www.sidefx.com/docs/hdk20.0/_h_d_k__intro__creating_plugins.html and look at the "Image Formats" category example plugin. As a general rule, all plugins you write or use in Houdini will work with Houdini Engine, including custom file formats.

For efficiency reasons, it is recommended you check the original file format of a rendered image using HAPI_GetImageInfo() and only request a different file format when extracting if your client does not support the original format.

You can query the list of Houdini-supported file formats by first getting the count with HAPI_GetSupportedImageFileFormatCount() and then filling your list of HAPI_ImageFileFormat's using HAPI_GetSupportedImageFileFormats().

The HAPI_ImageFileFormat::nameSH of the format will be its full name, the HAPI_ImageFileFormat::descriptionSH usually contains copyright or licensing information, while the HAPI_ImageFileFormat::defaultExtensionSH is the extension Houdini will use when creating a new file of this format. Houdini may recognize multiple extensions per format (ie. .jpg and .jpeg) so the HAPI_ImageFileFormat::defaultExtensionSH is only for new files.

When specifying a file format in the extraction step you must use the format name as contained in the HAPI_ImageFileFormat::nameSH field. Here are some standard Houdini-supported format names, as defined in HAPI_Common.h:

The HAPI_RAW_FORMAT_NAME deserves special attention. This is a format only available through Houdini Engine. It has no header or meta data of any kind. It only works for in-memory image extraction so you cannot create a texture file using this format. The layout is exactly what the name implies: raw, uncompressed, color information. See the Image Manipulation section above for details on how to control the color information memory layout of the HAPI_RAW format.

A final note on file formats is whether they support deep image planes or not. Most formats will not support deep image planes which means that they will only be able to store a single image plane per image. The only format natively supported by Houdini that can handle multiple image planes per image is Houdini’s .pic format.

Image Planes

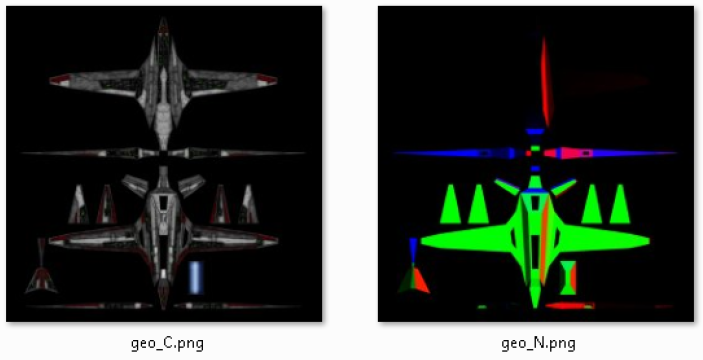
An image can have multiple image planes or layers. The standard two are the diffuse plane, named "C", and the alpha plane, named "A". Of course, an image can have any number of standard and non-standard planes like normal, bump, and tangent planes. During the extraction step you will need to specify the image planes you want to include in the extracted image by name.

To get the list of available image planes for an image, first get the plane count using HAPI_GetImagePlaneCount(). Then, get the plane names (array of string handles) using HAPI_GetImagePlanes().

Image Extraction

We are finally ready to extract our image. You extract your image to a file or completely in-memory in binary form.

To extract your image to a file use HAPI_ExtractImageToFile(). To extract your image in-memory use HAPI_ExtractImageToMemory(). You will get back a buffer_size which you need to use to allocate a byte array of this size and pass it to HAPI_GetImageMemoryBuffer() which will fill it with the image data.

You can call HAPI_ExtractImageToFile() and HAPI_ExtractImageToMemory() as many times as you wish for an image. You can also control which image planes you want to extract per image. For example, you can extract the color plane first, with image_planes set to "C", and then extract the normals plane as a separate image next, with image_planes set to "N", as shown below:

HAPI_Materials_NormalMap.png

If your image format supports multiple image planes per image, like Houdini's .pic format, you can call HAPI_ExtractImageToFile() or HAPI_ExtractImageToMemory() with image_planes set to "C N" to get both planes at once.

Material Updates

All of this work in getting material assignments, rendering, and then extracting images, can cause performance problems if done all the time. This is why it is important to use the various changed flags to determine when a material needs to be refreshed.

There are two such changed flags that affect materials:

  1. One is HAPI_MaterialInfo::hasChanged flag, which will be set to true if something (anything) on that material or one of its dependencies has changed. For example, if the diffuse color is controlled via a top-level asset parameter and the user changed this color. If this flag is true, you just need to render/extract the texture/material you were extracting before. You do not need to re-fetch material assignments or query anything on the geo or part. Only the material has changed.
  2. The other flag is the HAPI_GeoInfo::hasGeoChanged which will tell you that, among other mesh changes, the material assignments could have changed. You need to get material assignments again. That said, apart from new materials that may have been assigned, any previously tracked/extract materials that have just changed their assignments do not need to be re-rendered and re-extracted. In this case, only material assignments have changed and not the materials themselves.