Barry Bacon is our character, which we will groom and render in Houdini. This is a short course, made up of two parts. Part 1 covers how to prepare your scene, comb guides and add parting lines. Part 2 goes over how to generate hair, clump them, add variations and render it in Mantra.
There is also a separate introduction series, for beginners, to go over basics on grooming in Houdini.
Chapter 1: Introduction to Scene Prepare
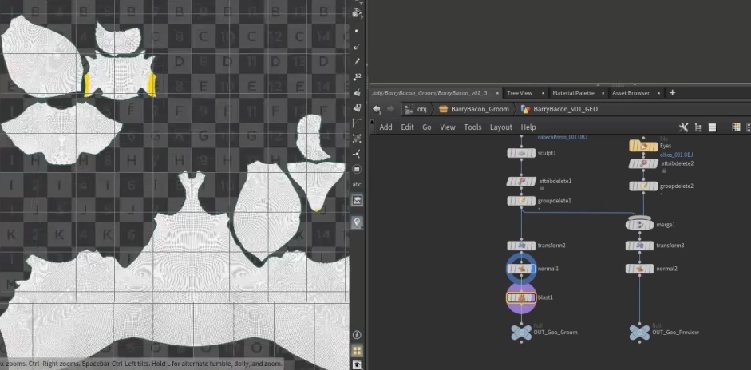 We begin by looking at how to prepare our scene for grooming. We will have a general overview on scene UI layout, some optimization tips, prepping our geometry so as to reduce issues later on and how to work when grooming with reference.
Chapter 2: VDBs
 We will use the Guidegroom, which will allow us to have guide creation and guide combing. We will look at what settings to use for better performance. Additionally we will optimize our geometry for conversion to VDB.
Chapter 3: Alternative GuideGroom
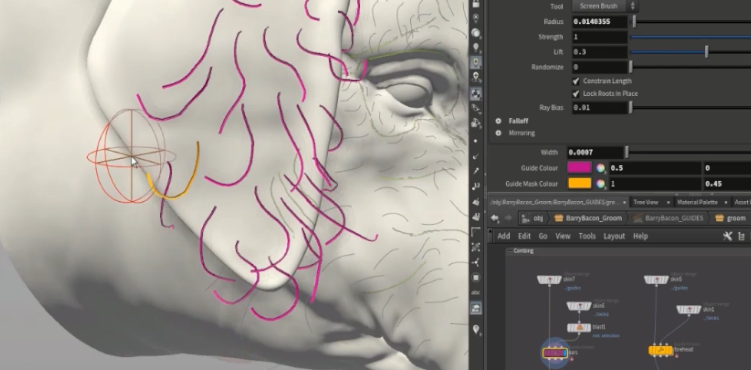
 Now we are ready to start combing guides on Barry Bacon. I will show you how I like to have my guides displayed, in a custom guidegroom node, so I know what are the guides that are masked and what are not. I can also adjust the width of my guides so that it is more visible and easier to work with, in the viewport. This custom guidegroom is available for download below.
Chapter 4: Flow
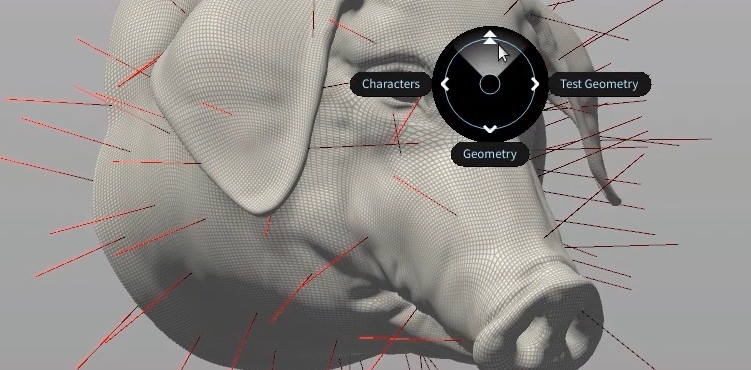
 Before starting on grooms, it is important to analyze your reference material and break down what you will be grooming. Barry Bacon has many different fur characteristics, so we draw out what those areas are.
Chapter 5: Flow Sketch
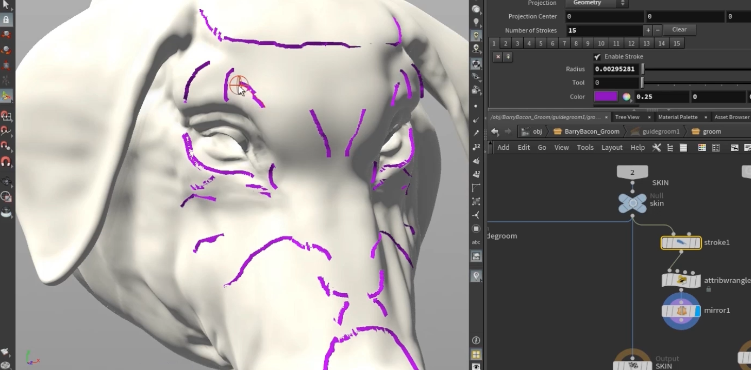 We work side by side now with the reference sketch we just made, and we do that now in 3D on our Barry Bacon geometry. We will use the stroke node to draw out where the different fur types will be.
Chapter 6: Combing Face
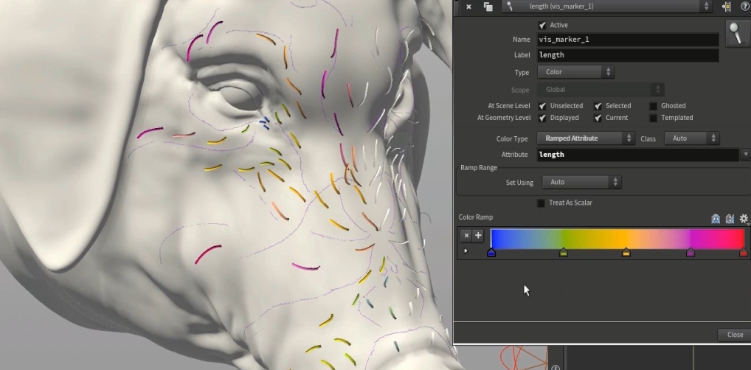 Using hotkeys that has been covered in a previous video (in the introduction part3 video), I start planting and combing each guide to match the hair profile as seen in our reference image. This is a manual process, but it will give a much more finer control. We also use mirror to place guides on the other side of the face, which helps us to place guides throughout the face. There is also a tip, where I use a visualizer to immediately read the length of my guides. This will be very useful, as your number of guides will increase and you can evaluate and make an more accurate groom this way.
Chapter 7: Combing Long Hair
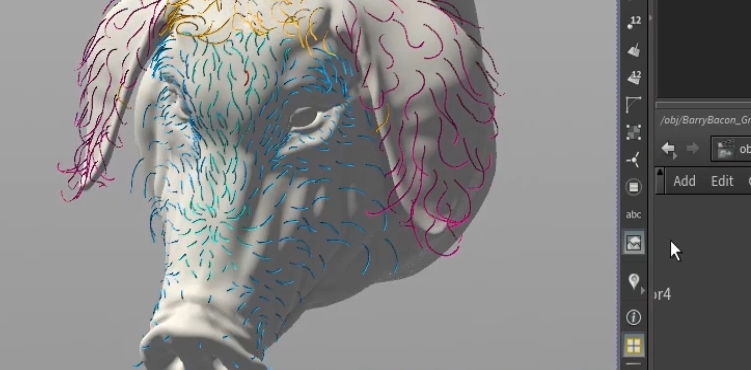
 Now we will do the guides for the forehead, as well as the ears, in separate guidegroom nodes. I use this method to keep my scenefile organized, so I can easily go back and make adjustments when needed. Each guidegroom is also coloured accordingly, which you will see visually organize your groom. On a more complex creature, this will help to keep your sanity.
Chapter 8: Breaking Symmetry
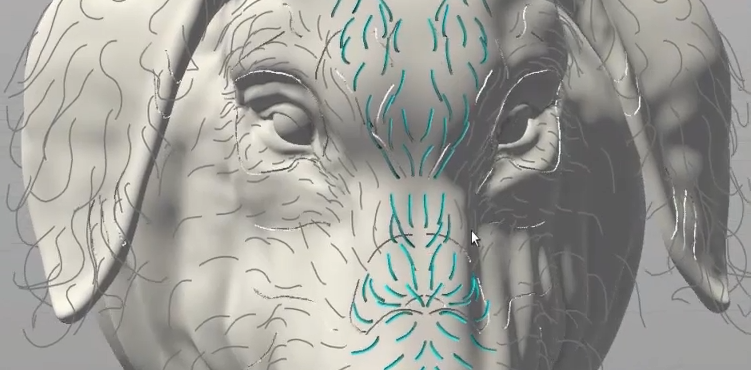 Next we will break the symmetry. This is very important, to achieve a natural look. Otherwise you will end up with a very visible seam in the middle. Since we already have most of our work done, we are just removing some guides, and placing new ones to largely overlap, to cover up any visible lines. We will also use parting lines to help as well.
Chapter 9: Combing GuideProcess
 Now we will use a guideprocess to adjust our guides. Guideprocess is essentially modifiers for guides, so they can affect the result of the guides, and this helps us to save time. In this case, we are adjusting the forehead patch because our initial guides no longer fit with the rest of the guides on the face and ears.
Workfiles include Barry Bacon geometries, *.hip files and reference images.
CREATED BY

COMMENTS
Julian Williams 3 years, 10 months ago |
very helpful, thanks :)
Igor Velichko 3 years, 10 months ago |
cool !
nborel 3 years, 10 months ago |
Thank you. Very detailed instructions.
mrhalaby 3 years, 10 months ago |
thanks!! I learned a lot of Yeti from Gabriela's website, now some Houdini as well : )
eoyilmaz 3 years, 10 months ago |
great tutorial, thanks.
ifree 3 years, 10 months ago |
Precious material.
Thanks a lot!
fcovrebr 3 years, 10 months ago |
Really nice tutorial. Thank you!
Harold1007 3 years, 10 months ago |
Thank you so much for sharing this! I really like your work.
Y_San 3 years, 10 months ago |
I have completed the tutorial for part 1. Great Tutorial!
When will part 2 be available? I'm looking forward to material part!
wolskikrzys 3 years, 9 months ago |
Hey guys! any clue how to use these parting guides in hair generation process?
Cannot wit the second part and started tinkering with hair, but cannot find out how to use these partitions.
Prashanth GV 3 years, 9 months ago |
Hey Gabriela,
Im just wondering how did you get to swap between planting guides and screenbrush. Is there a shortcut. I have been struggling to find that out.
FJSam 3 years, 5 months ago |
Watch the introduction videos for the shortcuts she made.
tommmaso 3 years, 9 months ago |
These resources you've been uploading are great - its really cool to see some of the techniques you use when tackling the groom.
Thanks so much for your time and making these free! Hope to see more
MoltenCrazy 3 years, 8 months ago |
Are the project files not compatible with v18.0.499? I get a huge string of load warnings and the GEO nodes are all nerfed into broken Merge nodes...
13freyr 3 years, 4 months ago |
awesome!
KostyaSobakov 3 years ago |
Gabriela, you the coolest person on the planet
Athokeb 5 months, 3 weeks ago |
I am having some struggles to follow it in houdini 19.5. Really sad would love to follow the tutorials
lars korb 5 months, 1 week ago |
super awesome grooming tutorial.
Thank you so much for taking the time to create this!
I'm wondering if it's still possible to assign keyboard shortcuts to the various tools in the guidegroom node?
(In Houdini 20, the shelf tools for switching brushes no longer exist)
Though they look super slick, I also really don't like radial menus.
Please log in to leave a comment.