|
Houdini Engine for 3ds Max
|
|
Houdini Engine for 3ds Max
|
One of the ways that Houdini Digital Assets can be used in the Houdini Engine for 3ds Max plugin is by instantiating an HDA as a modifier on an object.
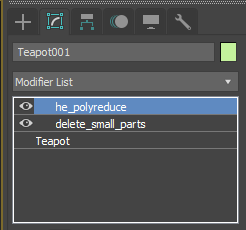
When a modifier asset is created, it will behave like a regular modifier in an object's modifier stack. For example, a modifier stack with an HDA in it can be collapsed to "bake" out the results of the HDA. You can also chain together multiple HDAs within an object's modifier stack.
An HDA that is used to instantiate a modifier asset must be a SOP-level asset with at least one input. The object, or the output from the modifier below the modifier asset, will be fed into that first input of the HDA.
In general, modifier assets will support all of the features that geometry assets support, with the exception of instancing or packed primitives.
Modifiers operate "in place" on the actual object that is being modified. This means that Houdini Digital Assets that rely on creating or instancing other objects will not work on the modifier stack.
As an example, the default shelf includes a curve instancer tool. This asset will only work as a geometry asset because it instances an object along the curve (which involves creating a new object). The boolean tool included with the shelf, however, will work as a modifier. Although the result is a new oject, it is operating on the object that is provided as input and changing that object, rather than creating new objects.
There are several methods to create a modifier asset.
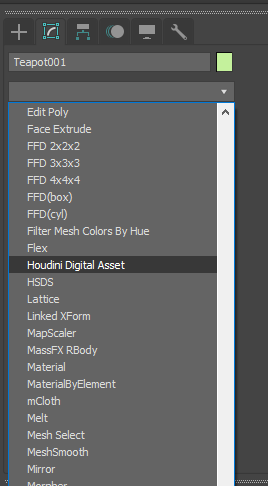
Select the object and open the 3ds Max "Modify" tab. From the modifier list, select "Houdini Digital Asset" and then you will be prompted to select the modifier that you want to use from a list of loaded assets. Highlight the asset you want to use and press "Select".
Highlight the asset in the Loaded Assets list that you want to use as a modifier. Then select all of the objects in the scene that you want to apply that modifier to. After selecting the objects, press the "Create Modifier HDA on Selected Objects" button. The modifier will be applied to all of the objects that are in your current selection set.

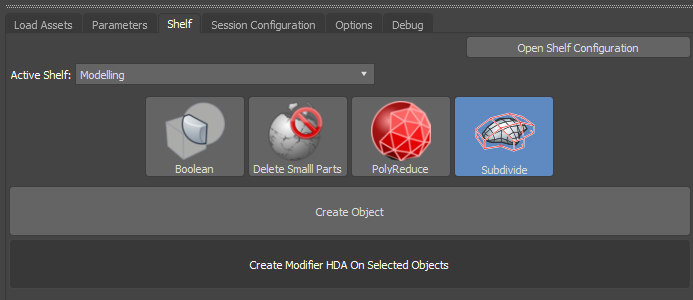
Highlight the asset in the shelf menu. Then select all of the objects in the scene that you want to apply that modifier to. After selecting the objects, press the "Create Modifier HDA on Selected Objects" button. The modifier will be applied to all of the objects that are in your current selection set.
A modifier HDA can be applied to the following types of objects:
Whenever you have a modifier asset selected and are currently on the Parameter tab of the user interface, there will be various controls available to you:

Recook
This will force the top level node of the asset to cook.
Reload Asset Definition
If an asset definition (found in a .hda or .otl file) has been changed, this will allow you to reload the asset definition and recreate the modifier with the new definition. Warning: all of the parameters will be reset to their default values.
Copy To Different Object
This allows you to copy the modifier asset to a different object. All non-default parameter values will also be copied to the new modifier on the other object.
Clone
This allows you to make an exact copy of the modifier asset on the same object/stack. It will copy all of the non-default parameter values to the new modifier.
The first subnetwork input for a modifier asset is reserved for the object that is being modified. Modifier assets can have more than one subnetwork input, however, which can be used for providing secondary inputs to the HDA. For example, the included boolean shelf tool has 2 inputs: the primary one is reserved for the object that the boolean is being applied to, and the second subnetwork input is able to be used for a second input object.
The parameter user interface for modifier assets is tied to the modifier rollout. That means that the parameter interface will only be displayed when the modifier is selected. Therefore, in order to select a secondary input, the Lock To Current Selection button must be pressed. This will lock the parameter interface to always shows the parameters for the asset that it is locked to. After locking it, you are then free to select other objects in the scene and add them as subnetwork or parameter inputs.
 1.8.6
1.8.6 
