| On this page |
Before you begin 
You have to have done LOPs Lighting Tutorial 2 before you can begin this tutorial.
Continue tweaking your lighting 
Now that we have laid out our lights, we probably have some tweaking to do. Houdini has some nice tools to help you organize and adjust your lights in a friendly way.
Use the Light Mixer 
-
Append a
 Light Mixer LOP to your LOP chain.
On the left of the interface you will see a list of lights.
-
Drag a light from the left side to the right side. You can now adjust the light from the slider.
-
The “null” and the “star” icons are “disable” and “solo” respectively.
-
You can adjust the brightness and/or exposure using the sliders.
-
-
You can drag lights out of the right side of the interface, (or use the “X” button at the top), at will. This does not delete the light(s), it just removes them from the Light Mixer.
Let’s create a collection.
-
CTRL click on all of the lights with “Rim” in the name.
-
RMB → New Collection from Selection
-
Name this “rimLights”
-
You will now see a collection in the left side of the interface. You can drag this collection into the right side. By default, the lights are ganged, and you have one control for them all. If you want, expand the collection and adjust individually.
Note
You can delete collections by RMB clicking on them and choosing “Delete Collection”. If this option is not available, it means the collection was created in another LOP or was loaded from a USD file on disc and cannot be deleted in this LOP. Deleting collections DOES NOT delete the lights in the collections.
Set up procedural collections 
Let’s create a collection procedurally. It would be nice to automatically include any light with the word “rim” in it in a collection.
-
Delete the Light Mixer LOP, (or delete the “rimLights” collection you already have in the current Light Mixer LOP.)
-
Add a new Light Mixer LOP (unless you did not delete the old one.)
-
Prepend a
 Collection LOP to your Light Mixer LOP.
rimLights
/lights/*Rim*
Add another Collection LOP:
allLights
/lights/*
Now go back to the Light Mixer LOP. You should see the two collections in the left side of the interface. !f
Note
The collections you see in the Light Mixer are the same collections that are created by the Collection LOP, but just stored in a different place.
Get ready to render 
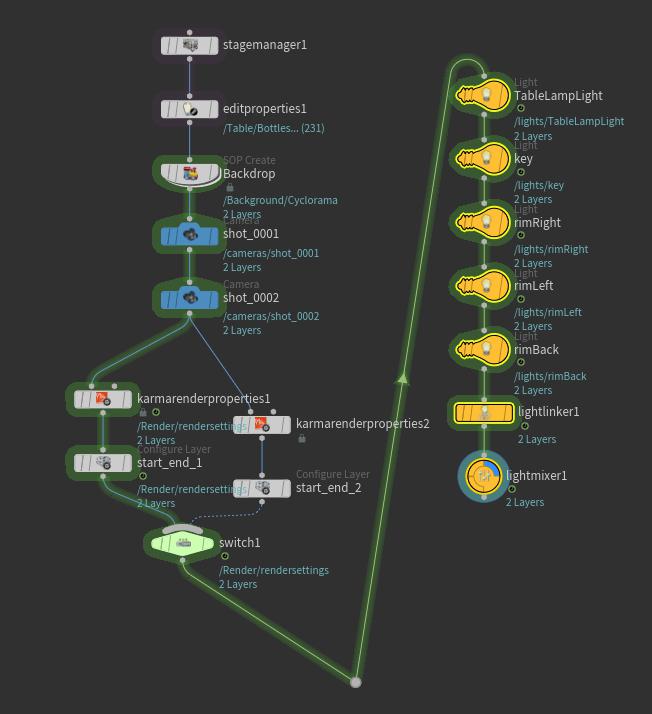
Organize your lights 
At this point, you may have a long string of lights in your LOP network, or lights scattered all over the place. Here are some options to help you manage the network.
-
1) Keep the lights in-line, but all in one place.
-
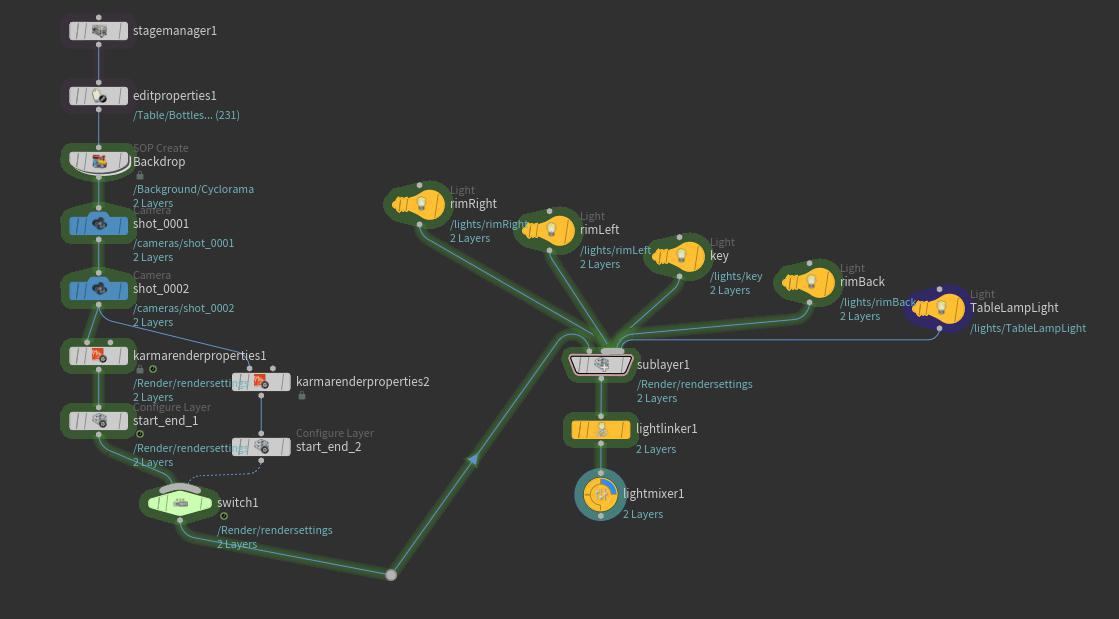
2) Use a
 Sublayer LOP to organize the lights.Sublayer Type
Sublayer Inputs
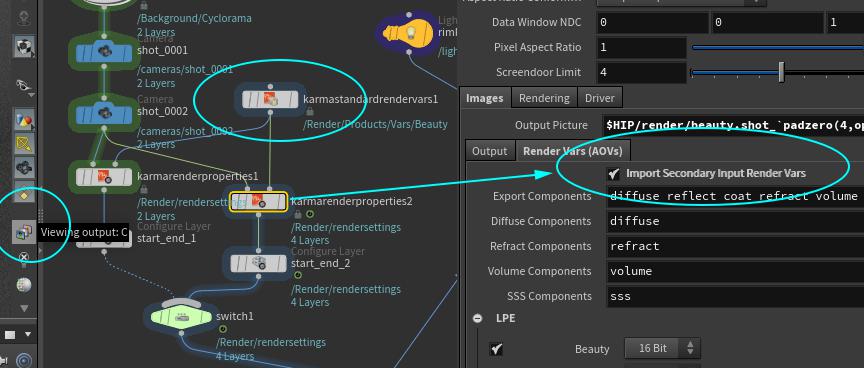
Render with AOVs 
If you look in the viewport, you will see a drop-down that allows you to choose which AOV to view. Of course, you may want more or less AOVs than are shown by default. Let’s edit the AOVs for all shots.
-
In your LOP chain, add a
 Karma Standard Render Vars LOP and don’t connect it to anything yet.
 -
In the “LPE” section, choose the AOVs you would like to output.
-
Plug this into the second input of the existing Karma Render Properties nodes.
-
In the Karma Render Properties nodes set:
Import Secondary Input Render VarsOn -
Render to disc 
Since we already have set up our /Render/rendesettings primitive where are render settings are stored (look for it in the Scene Graph Tree), we don’t want to stomp on the values with another Karma LOP. We are going to use a USD Render ROP to render to disc.
-
Append a USD Render LOP.
/Render/rendersettings (choose from the drop-down menu)
Note
If you are familiar with mantra rendering, you will know that by default the camera resolution is the render resolution. This is not the case with Karma.
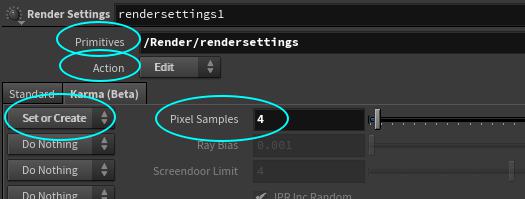
Create a quick-render node 
Let’s create a USD Render LOP to do quick test renders.
-
Copy the existing USD Render LOP.
-
Rename it “quick_render”
-
Prepend a
 Rendersettings LOP.
 -
In the “Standard” tab, turn all options to “Do Nothing”
-
In the “Karma” tab:
Primitives/Render/rendersettings(You can drag this from the Scene Graph Tree.)ActionEditPixel Samples4Set or CreateSet or Create
-
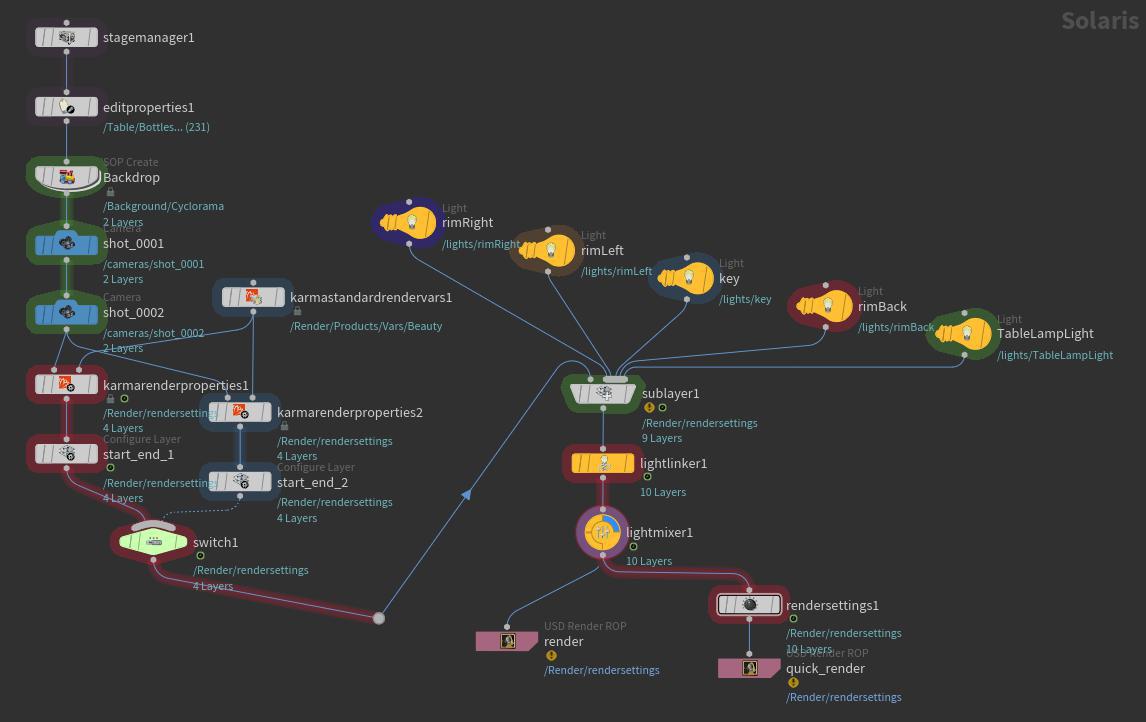
Final network 
Notes 
-
For the bounces/limits/motion blur controls, there are
 Render Geometry Settings LOP and Render Settings LOP which control this behaviour. Standard USD inheritance models should work for the geometry settings.
 -
Also note, that for motion blur, you’ll likely have to use a
 Cache LOP to make sure Hydra has enough knowledge about adjacent frames.
 -
To use render regions, hit SPACE + 5 to jump into the Image Viewport. Marquee-drag (LMB click-drag), to create a render region. This feature is undergoing development at this time.