|
Houdini Engine for Unity
|
|
Houdini Engine for Unity
|
The Unity plug-in has specially built tools to paint and edit attributes of editable nodes from within Unity. This allows for assets to be manipulated at the attribute level from within Unity.
Note that the plug-in only supports painting and editing Point attributes of Editable nodes. The attribute types currently supported for painting and editing are Float, Int, and String. In addition, the position (P) attribute will not be editable.
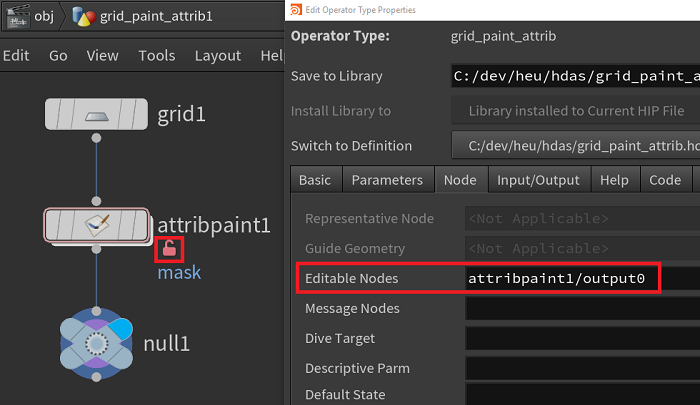
To make a node editable, in Houdini, add its name to the Editable Nodes field in the Node section of the Edit Operator Type Properties window for the asset.
Note that if using the Attribute Paint Sop in an HDA, you must save the HDA with the Attribute Paint Sop node unlocked, and specify the Output0 inside its subnet as the Editable Node (e.g. specify attribpaint1/output0 in the Editable Nodes field).
In Unity, check the Enable Editable Node Tools checkbox in the ASSET OPTION section. This will display the UI for the Painting and Editing tools.
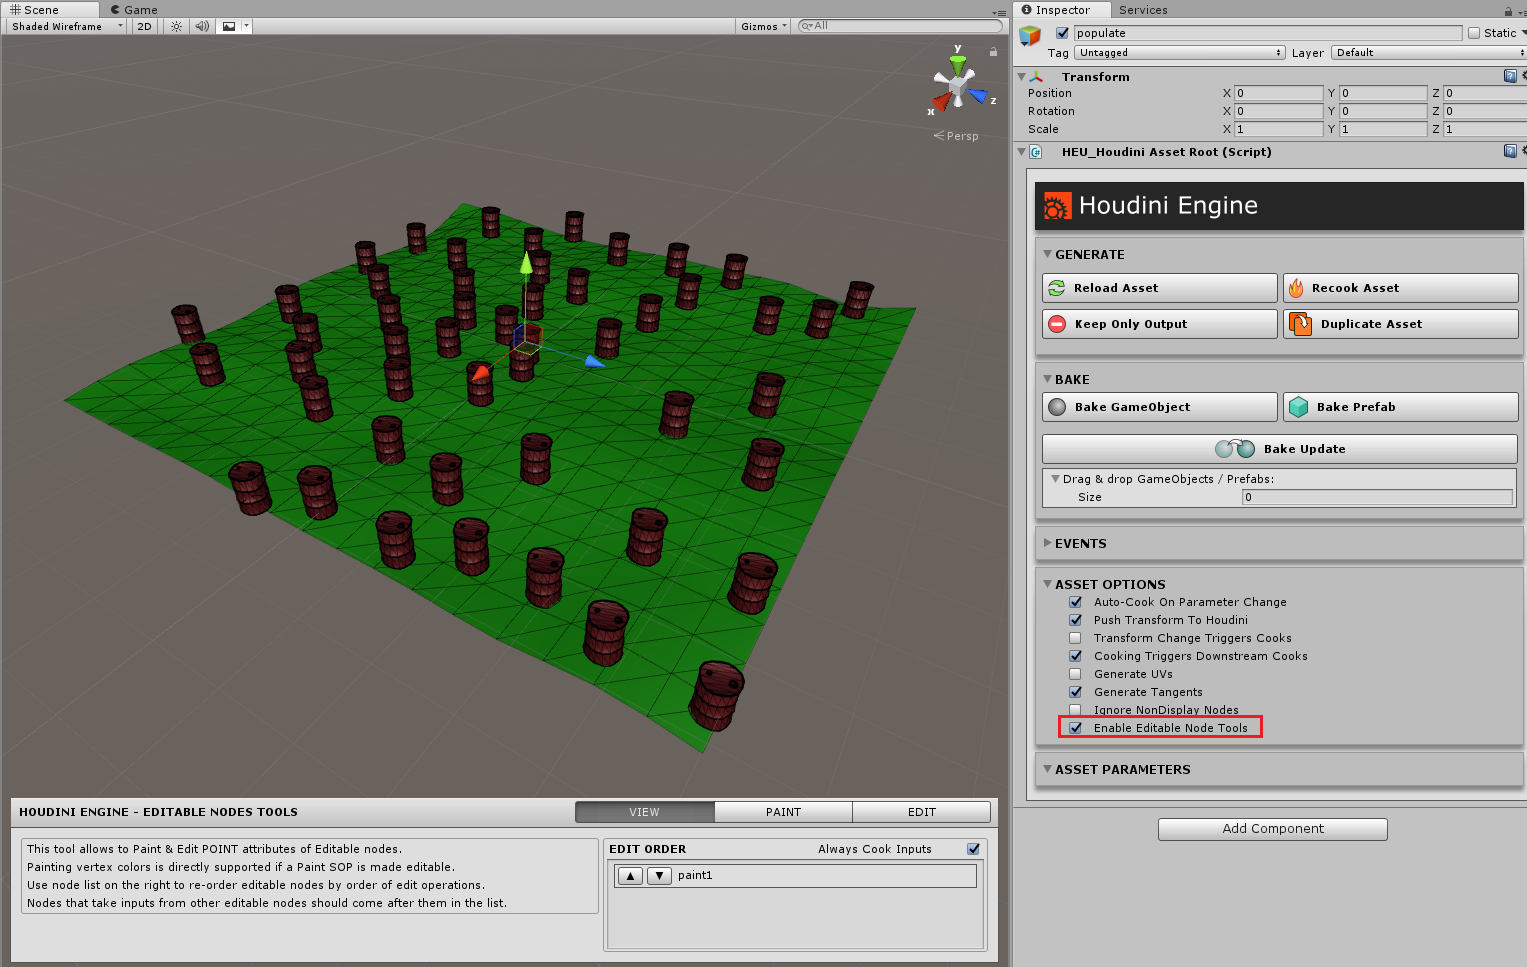
The Painting and Editing Tools UI will then displayed in the Scene view. When painting or editing attributes, the geometry displayed will be switched to show the editable node's output geometry.
Note that if the editable node's output mesh does not have vertex colors (i.e. Cd attributes), then the paint tool automatically adds vertex colors. This is needed for visualization while painting.
Special care must be taken when dealing with multiple editable nodes in the same asset network. When an editable node's attributes are uploaded into Houdini, it is locked and its inputs are no longer cooked. Any subsequent cooks on this node will not use changes in the upstream inputs. Therefore, if multiple editable nodes are present, applying changes to nodes downstream in the network will lock them and they will not be able to take input from the upstream editable nodes. Another issue is that the order of when the changes are applied can also affect the final outcome. Upstream nodes should have their changes applied before downstream nodes. Otherwise the upstream changes will be irrelevant. The View UI allows to work around these issues.

Always Cook Inputs allows to override the lock by unlocking the node, revert its local changes, cooking the upstream inputs, and then applying the local attribute changes. This ensures the node always uses the latest upstream inputs.
Additionally, the EDIT ORDER list contains editable nodes found in the asset. This list will be displayed in order of when their edits are applied (first to last). This list should be re-ordered such that upstream nodes are higher in the list than downstream nodes. Note that by default, when initially loading the asset, nodes will be alphabetically ordered by their names (e.g. firstEdit, secondEdit). This allows to specify the edit order in Houdini by using appropriate names for the editable nodes.
The Paint Attribute tool allows to paint directly on the surface of the editable node's geometry. The attribute value of each point that the brush encounters is modified according to the settings in the Paint tool.
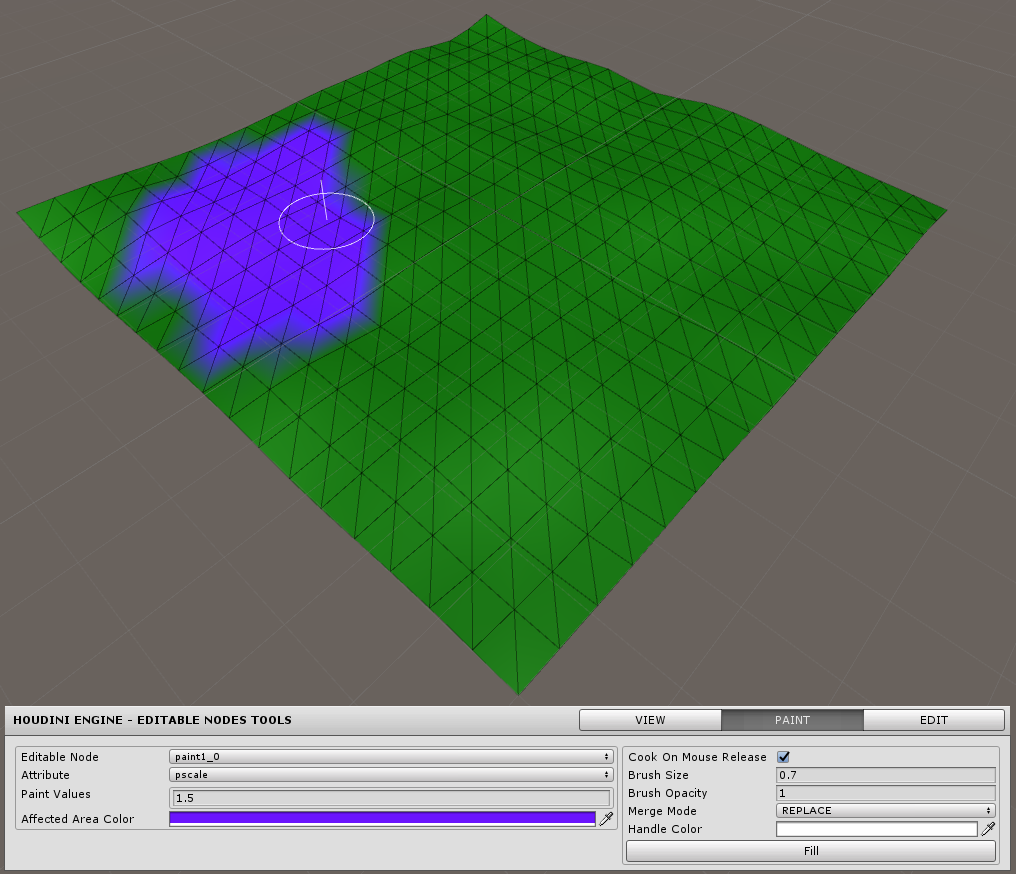
The following describes each field in the Paint Tool's UI:
The Color attribute (Cd) is treated specially by the Painting tool. It is automatically converted from a Float array (internal representation) into a Color field in Unity.

To paint vertex colors on your geometry, simply add the Paint SOP to your asset network, and add the node's name to the Editable Nodes field. In fact, any editable node that has Cd attribute will allow to paint vertex colors.
The Edit Attribute tool allows to select one or more points and set the attribute values directly. Each point in the geo is displayed as a selectable cube. Their values can be changed by entering the new value into the Selected Pts Values field.

The following describes each field in the Paint Tool's UI:
 1.8.6
1.8.6 
