

I want to paint/texture this:
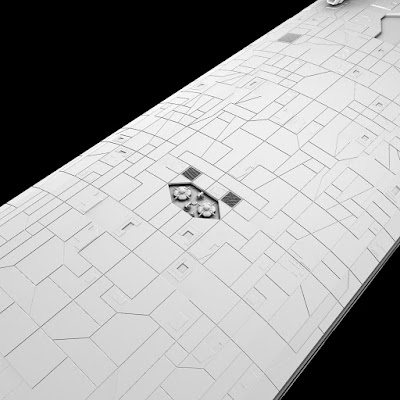
I'd like an effect similar to this, with the metal hull paneling:

So, I figured I could do something like this (this just tackles the top facing hull plates)
create a group that is made by specifying a bounding box, and normals, with normals of 0,1,0 (positive y direction), and a 45 degree spread. The scene view shows all the faces I'd expect to get.
Create a UV map with UVTexture, and the group from above.
This gets me something like this:
The idea is that this is roughly similar to the actual ship's size, and what I want to is fill in the various “panels” with subtly different shaded of gray, plus maybe even break up some of the panels as well into smaller shapes. I'm not using UVUnwrap because it spreads stuff all over the place so it's hard to know what relates to what.
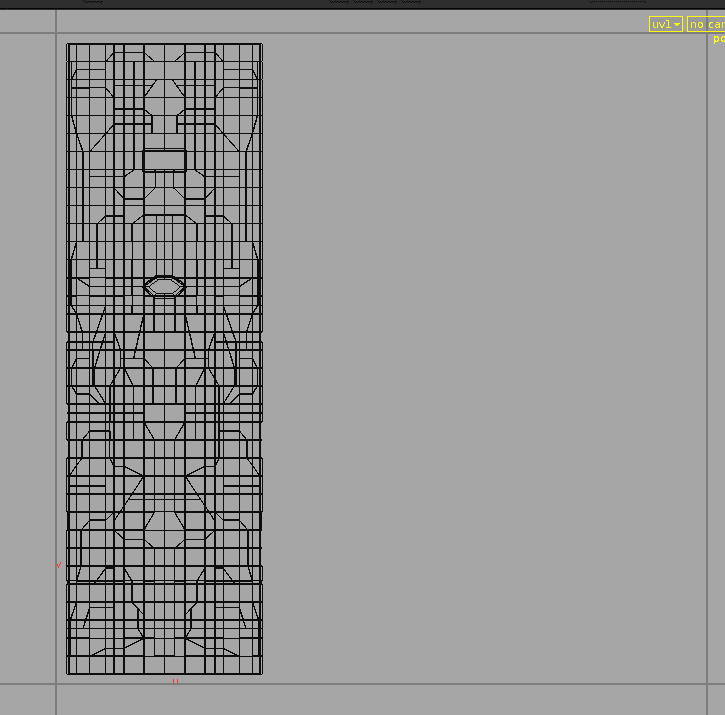
The first problem is that what shows up selected in the scene viewport, and what shows up in the UV view are NOT the same. There appear to be all sorts of missing faces. Here's what the scene view shows:

The effect this has is that when I hook a texture map, it doesn't look right, it looks like it's flipped on the x axis, and its got random parts where it's showing the whole texture image across a small set of faces.
I don't know how to resolve this. Assuming this is just some idiotic error on my part, the next problem is this how to keep the texture images crisp? When I rendered something the edges of the colored panels look fuzzy. I'm using a the default “Reflective Displacement” material from the Material Palette. I can see that there's a number of different options for the Color Map Filter, but I have no idea what they do, they don't appear to be documented (at least I couldn't find anything) and playing around, they didn't seem to have much effect.
If my idea in approaching this is completely off base, is there another approach to take? I was really hoping to get somewhere tonight and I'm completely stumped as to what's going on.
I've uploaded the HIP file, modified so that it's just the hull.


 Your file filled up my 4gb and then some.