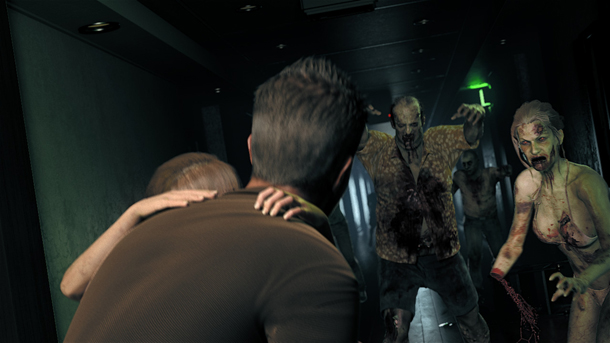
Scotland’s Axis Animation specializes in creating high impact video game cinematics. In the trailer for Dead Island, zombies attack a family during a dream vacation that goes horribly wrong. In this trailer, Axis Animation created a story-driven short that quickly went viral. Find out how Houdini was used to create all the mayhem and gore.
Nicholas Pliatsikas, Sergio Caires and Stu Aitken from Axis Animation have been kind enough to share their story with us. They have broken down their work in great detail with a focus on how they used Houdini to render the trailer using Mantra while creating effects such as shattered glass, splattered blood, and stylized hair. They also talk about an innovative facial rigging system created in Houdini to help add emotion to the traumatized characters.
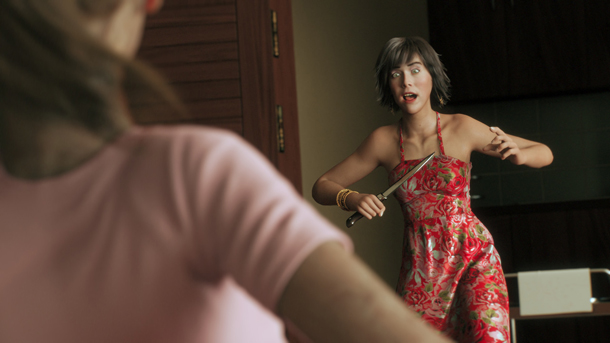
Dead Island Dead Island from Axis Animation on Vimeo
THE INTERVIEW
Q. How did you create the shattered glass effect?
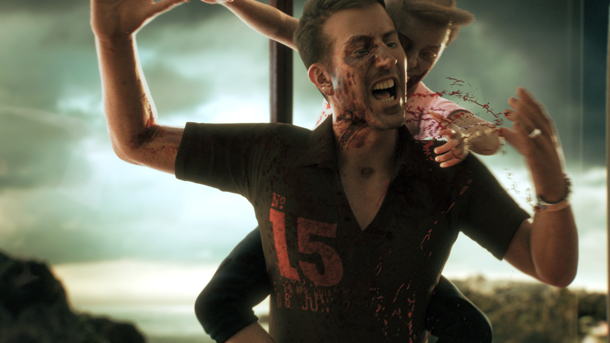
A. The shot starts with a little girl floating backwards in time up to a shattered window. Her father has just thrown his daughter out the window when she attacks him after being transformed into a zombie child. In this sequence, the shattering glass offered quite a challenge because it had to be presented in slow motion over a very long time period while revealing a great deal of detail.
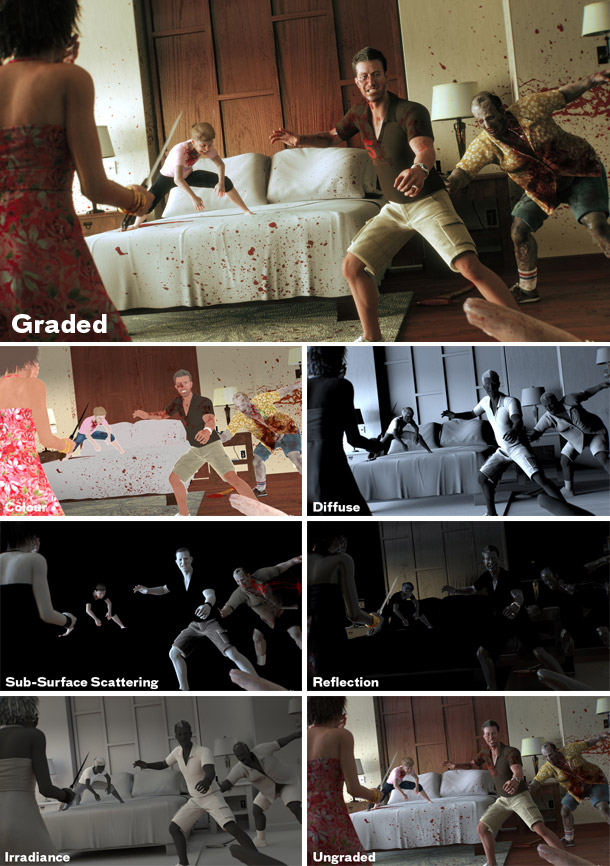
The glass was therefore pre-fractured using a mix of voronoi fracturing tools and a custom “for each” network to create more shard like segments of glass once the main fracture was generated. The simulation was then produced using Rigid Body Dynamics with radial activation set up to work over time. For the smaller touches, Surface Operators were used to add more subtle control over the shape of shatter on the initial impact. Using Houdini, this was possible without distorting the shard’s individual shapes. This technique was brought together by effects artist Kalman Ruszkai.
Q. How about the splattering blood?
A. The Blood was created using particle simulations run through the Flip Fluid solver. A large volume of particles was needed to generate enough detail in the simulations. The output of this was used to procedurally generate very dense particle-based wet maps, which is how the blood appears to stick on collision. Good thing for us that the Flip solver is robust because nobody likes to wait hours and hours for simulation artifacts! And Houdini’s particle mesher really is excellent, the best we have seen!
You don't notice that something is up, because they are just blurry things looking at other blurry things. We love it that Houdini lets you achieve this level of optimization!
For reflections, we used a combination of Houdini’s new Physical Based Rendering Vex Operators for its gorgeous importance sampled light reflections and custom gather-based loops for object-to-object reflections. This allows for the flexibility we need to do the optimizations outlined above.
We also developed a custom Irradiance Caching strategy using Houdini’s point cloud writing capability. We used it to mimic how Houdini uses Photon maps for fast and noise reduced indirect ray lookups. By blending the point cloud with brute force ray tracing based on distance we found we only had to write the cache once per shot or environment and completely ignore the characters. The end result gave us the equivalent of roughly four lighting bounces.
It works well for us because our AOV strategy separates the diffuse color into its own pass. For instance, we can go to the irradiance pass on its own and turn noise reduction up to 11 with no degrading effects on any other component. By the time the other layers get comped you’d never know it happened.
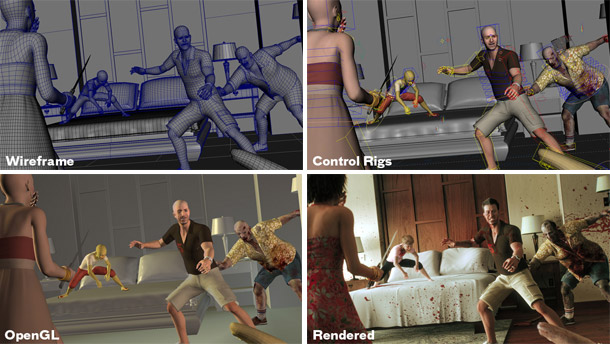
Q. Did you use Houdini for any animation?
A. Our pipeline at Axis Animation consists of Maya for animation and Houdini for rendering and effects work. With this particular project, we made our first real foray into Houdini's rigging toolkit. We chose Houdini for this task early on in our research and development phase because of its facial system. In this case Houdini’s ‘true procedural workflow’ and its enhanced capability at solving certain problems without resorting to custom plug-ins made it the go-to application.
Another first for us is the use of 4D capture data which became the basis of the facial system used on Dead Island. With the help of the awesome Glasgow based team at Dimensional Images, we were able to track well over two hundred and fifty individual surface points from the faces of our actors. These points were then projected onto a stereoscopically generated 3D version of our actors faces and stabilised for use within Houdini.
Because the Dimensional Images software could track all of the actors faces using the same relative reference points and numbering, we where able to reuse 95% of the rig setup meaning minimal changes where needed in order to drive our mesh data especially as we also kept our topology the same.
This mesh data was used as a point cloud that procedurally drives a joint based rig, which included setups to approximate the jaw position and rotation. This aspect was rather challenging due to the sliding nature of skin and muscles over bone. As accurate as the tracked data was, there was still an inherit issue with occlusion affecting how much data we had for the inner lips, teeth and jaw, so we developed various surface node networks to resolve each one. We found channel nodes to be extremely useful at smoothing small scale jitters and de-spiking any large scale jumps created by occlusion.
For solving the inner lips problems, Houdini allowed us to build a soft ray setup so the lips could collide and slide over the teeth. This means you get a natural thinning of the lips when people smile or compress their lips onto teeth. The lips themselves collide with each other, stopping intersections as well as creating bulging automatically using our custom edge crawling stress detection and deformation relaxer VEX-based surface node. To finish up on the lips deformation, we also created a sticky lips surface node, helping to further remove the rubber lip effect that you often see in CG.
Under and around the jaw area also benefited from jaw bone collision and sliding setup alongside our custom deformation relaxer tool to create a natural bulging soft skin effect when the mouth is opened to its limits.
While developing the 4D rig system we looked into re-targeting our 4D data to different characters. Houdini allowed us to make this process completely procedural. We were able to successfully re-target and even paint adjustment modulation for the X,Y and Z co-ordinates onto a meshed version of the 4D point cloud. This technique also allows us to animate on-top of the tracked data. Which means we could change the intensity of an emotion or even change the shape of the lips.
Q. Were there any other ways Houdini helped add detail to your shots?
A. To help with some of the more extreme expressions on the father character we used our stress detection node to drive our displacement maps, meaning we get those extra wrinkles when you expect them automatically. In future projects we plan to use this technique as much as we can to drive small scale and larger scale displacements/colour maps - say on clothing, any type of skin deformation or even environmental/mechanical damage. We see it as a very flexible tool.
We created several tools to assist in styling long hair as well as a customized fur procedural shader with extra features like curling about guides and more noise options etc. We discovered that to be able to style long hair, it is imperative that we are able to use the hair guides as the clumps which we feel was by far the most important addition to Houdini’s fur tools. This is where Houdini excels, I cant imagine extending a core feature in another software so easily.
Rendering wise, this is the first time we lit and rendered hair in situ, with the characters in the same pass with exactly the same lighting rig, and the hair able to receive indirect lighting!
To achieve this we created a volume VEX surface node to generate a volume based representation of the hair density and shape, which used a point cloud shader to count the number of points from the hair preview geometry inside each voxel. The result was used as a phantom shadow casting object which is vastly quicker than tracing rays against the real hair because a 150x150 volume has simpler geometric complexity than actual render time hair geometry. Basically, hair was made invisible to any ray-tracing, but was still able to receive, shadow and volumetrically attenuate incoming light. Rays fired from the hair surface could pickup light from the environment but we stopped any rays from the environment hitting the actual hair, as it would simply never render in a reasonable time frame. The computations required for that are just mind boggling without using some approximation - and luckily Houdini is flexible enough to let you come up with your own approximation without having to type a single line of code.
We are just glad the days of special spotlight shadow map light rigs and struggling to make it look like the hair is in the same universe as the rest of the character are over.
Q. Did you make use of Houdini Digital Assets in your work?
A. Our Houdini pipeline is very much based around a Houdini Digital Asset (HDA) workflow. We have built a solid foundation for migrating data from Maya into Houdini. It is now an automatic Houdini Digital Asset system (autoHDA), where we use YAML file descriptions and open ports to let Python scripts in Maya “tell” Houdini how to build a project asset into our custom autoHDA solution.
We can take any asset rigged within Maya and with a few simple steps create an associated autoHDA in Houdini, complete with paths to geometry and per shot deformation cache files built in. These autoHDAs are also built to automatically pick up transformation data, visibility data, any arbitrary channel data from animation controls, joints, locators, shaders etc as required.
The autoHDA system is pretty complete feature wise, and it supports completely automated delayed loads, and other useful features such as switching all internal geometry to a default material, shader switching driven by shot data from Maya, geometric subdivision, primitive based render parameter optimisations, and a spreadsheet-like overview of all sub object render settings.
To change the shot data within a render scene we simply specify the scene and or shot number on our Connected “Shot Output HDA” making it very quick to reuse our existing render files to create new ones. This setup means our Takes, shaders and lighting tweaks are maintained from shot to shot. The Shot Output HDA provides numerous functions to other assets, such as supplying root path data for generating folder paths for things like geo caches, IFDS, render data as well as a global timing remapping feature that allow us to easily time ramp entire shots for slow motion effects.
Q. Did you get any help from Side Effects support team?
A. We’d like to mention that the support team and developers at Side Effects are brilliant. They really do their best to help out with any problems whether the cause is a user error, actual bugs or simply requests for enhancements. With access to daily builds we can have bugs fixed or new features within a few days and even overnight. If the requests for enhancements are too big for a daily build, they are usually kept in mind for the next major point release. This has not only saved us from missing project deadlines but in turn has given us a much more solid and robust pipeline.
Side Effects Software would like to say a special thanks to Nicholas Pliatsikas, Sergio Caires, Stu Aitken and Axis Animation for taking the time to share their Houdini production experiences in this project with the rest of the community.
Visit the offical site for Dead Island.
UPDATE:
コメント
Please log in to leave a comment.