OPTIMIZING DESTRUCTION SIMULATIONS FOR REAL-TIME SOLUTIONS
The Destruction Cleanup HDA is part of the realtime-development tools made by Paul Ambrosiussen, targeted at optimizing a destruction simulation before exporting it to third party applications like Unreal Engine, Unity, Maya or 3DsMax.
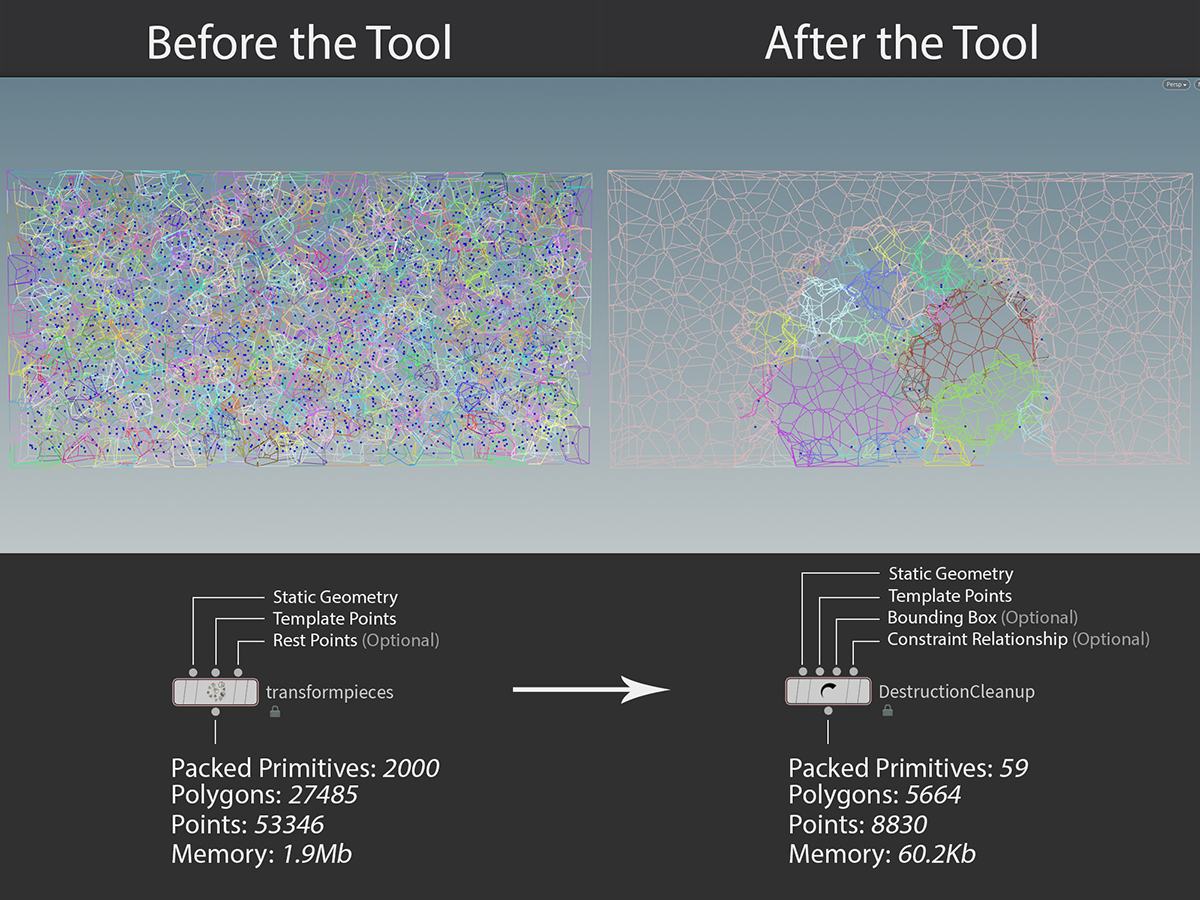
Some Examples
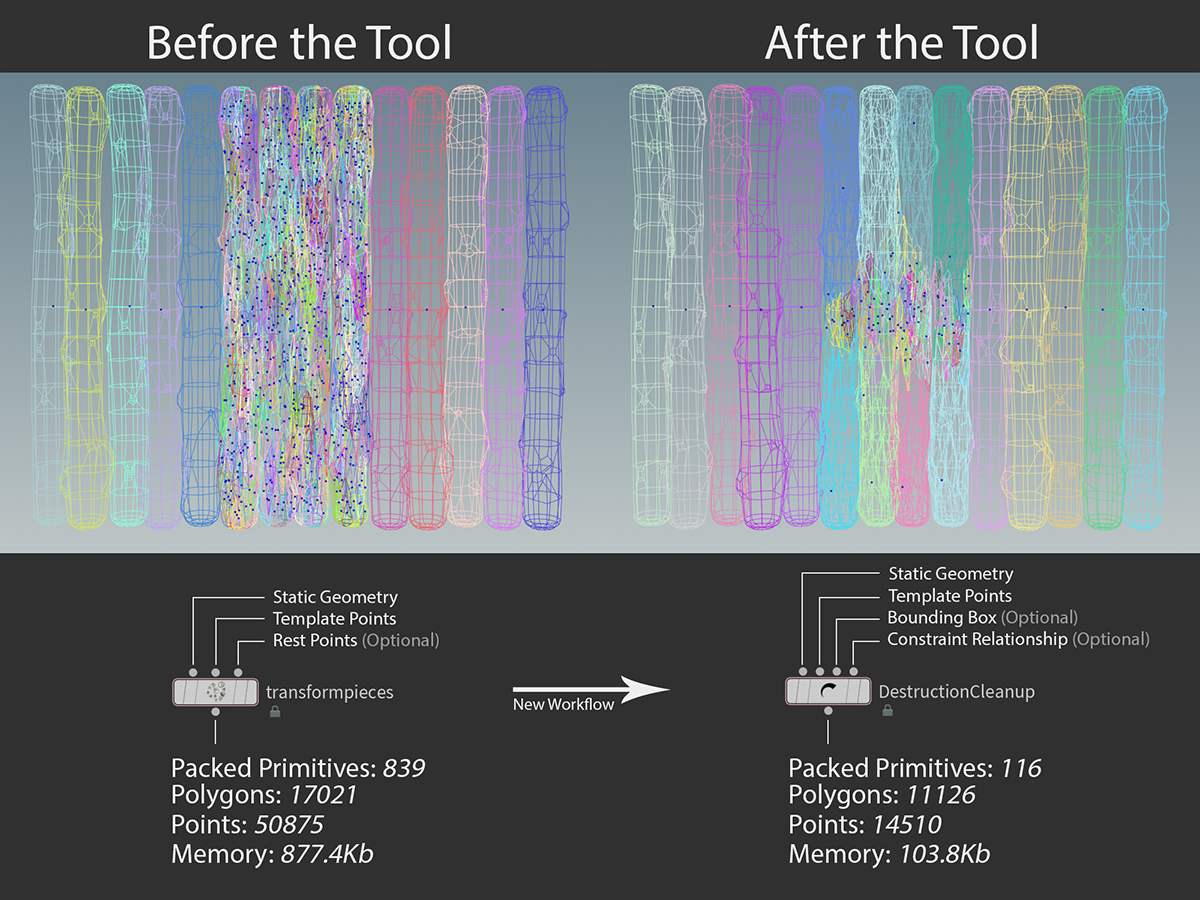
Scene Provided by Mike Lyndon

Scene Provided by Aram van Bergen en Henegouwen
Tool Functionality
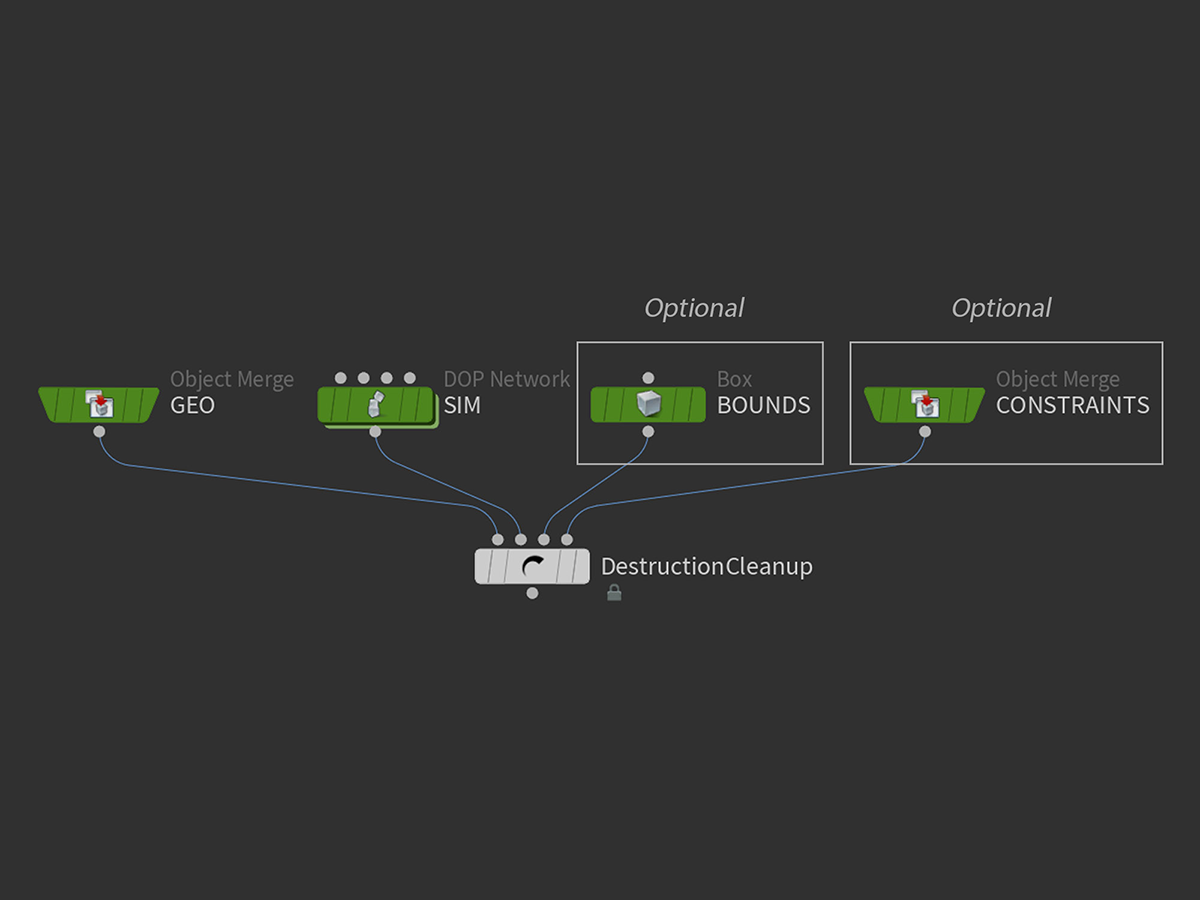
METHOD 1: DIRECT DOP ACCESS
Method 1 often provides the best cleanup result, since the tool then has access to any simulation data it needs. DOPs outputs packed primitives with all simulation data still stored on the surface, rather than it accidentally being packed inside a primitive. The first input needs static geometry to be plugged in. It is important that the static geometry AND the DOPs data share a common name attribute! The tool will otherwise not know what geometry belongs to which template point.The optional bounding input can receive any watertight mesh or volume, which gets used in an internal group SOP. The optional constraint relationship geometry needs to be the geometry imported from DOPs. (Instructions further down the page)
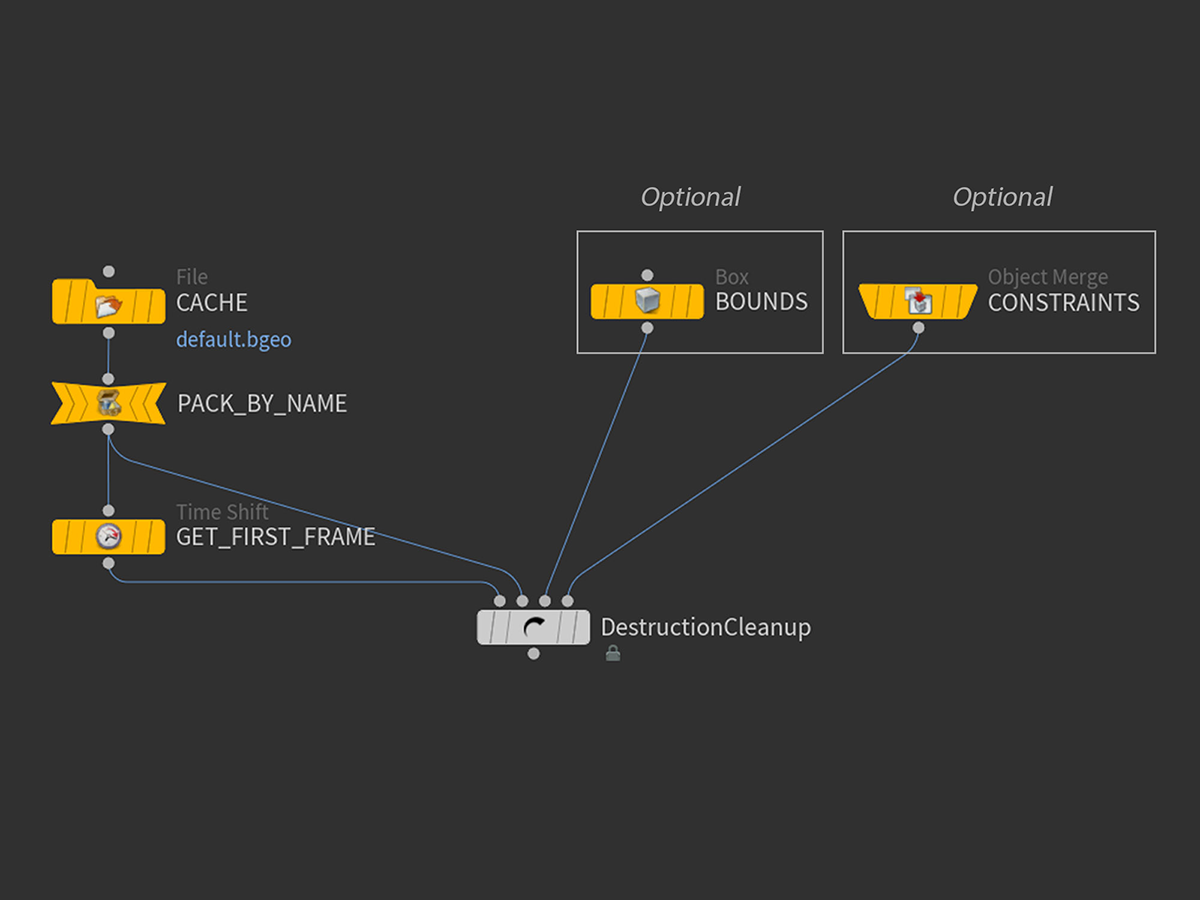
METHOD 2: CACHED BGEO SEQUENCE
When using method 2, you are importing a BGEO sequence cached out in a different scene. After the file node used to import your sequence, you should run it through a "pack" node, which should pack your geometry based on a name attribute. To be safe, put an "* / asterisk" in the "Transfer Attributes" parameter field. This will hopefully provide the tool with the data it needs. The tool will remove unrequired data by itself! After the pack node, you should put down a "Timeshift" node, with its frame parameter set to "1". This will make sure the tool gets static geometry on its first input connection.As for the bounding and constraint input, the same rules as method 1 apply.
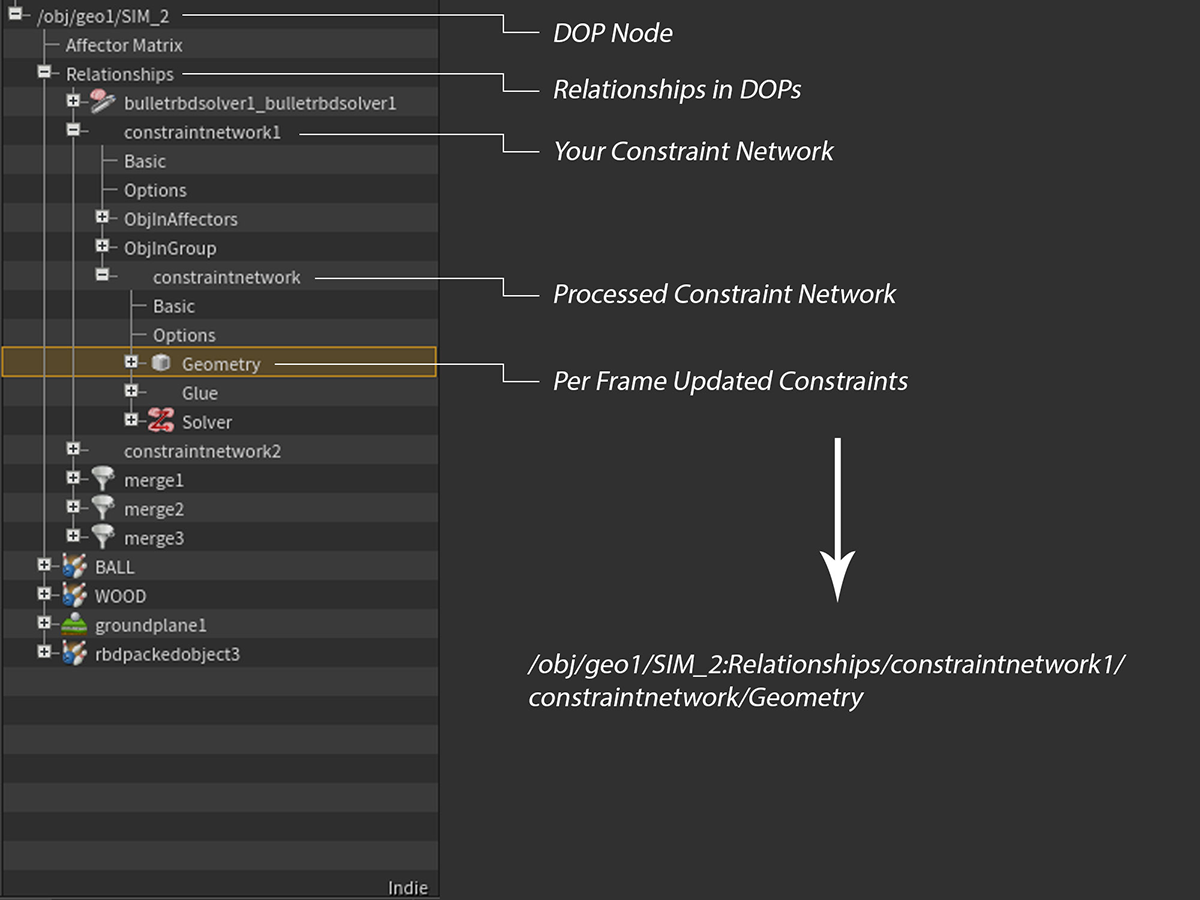
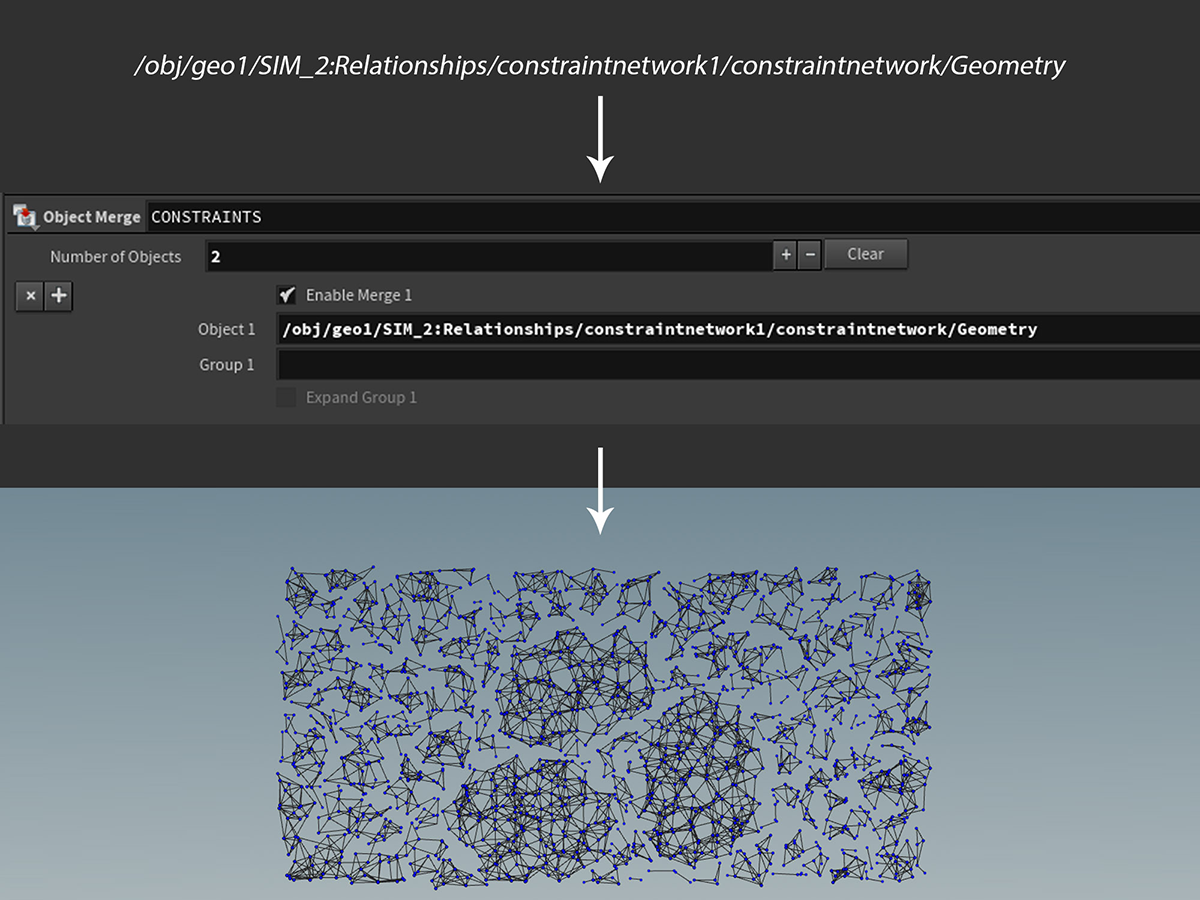
CONSTRAINT RELATIONSHIP GEOMETRY
The constraint geometry is optional for the tool, but it is highly recommended! The reason for this is that the tool can then exactly figure out what will ever get disconnected during the simulation. The images explain how to obtain the constraint relationship geometry, which can also be read more about in depth HERE. After this has been obtained, the data should look similar to what you see on the last image. You can now either cache this out, or directly plug it into the fourth input of the tool.
Note
When using the constraint method, make sure you have Visual Studio 2017 installed. Once that is done, edit your houdini.env file and set the MSVCDir variable to the installed MSVC directory.
Test Case
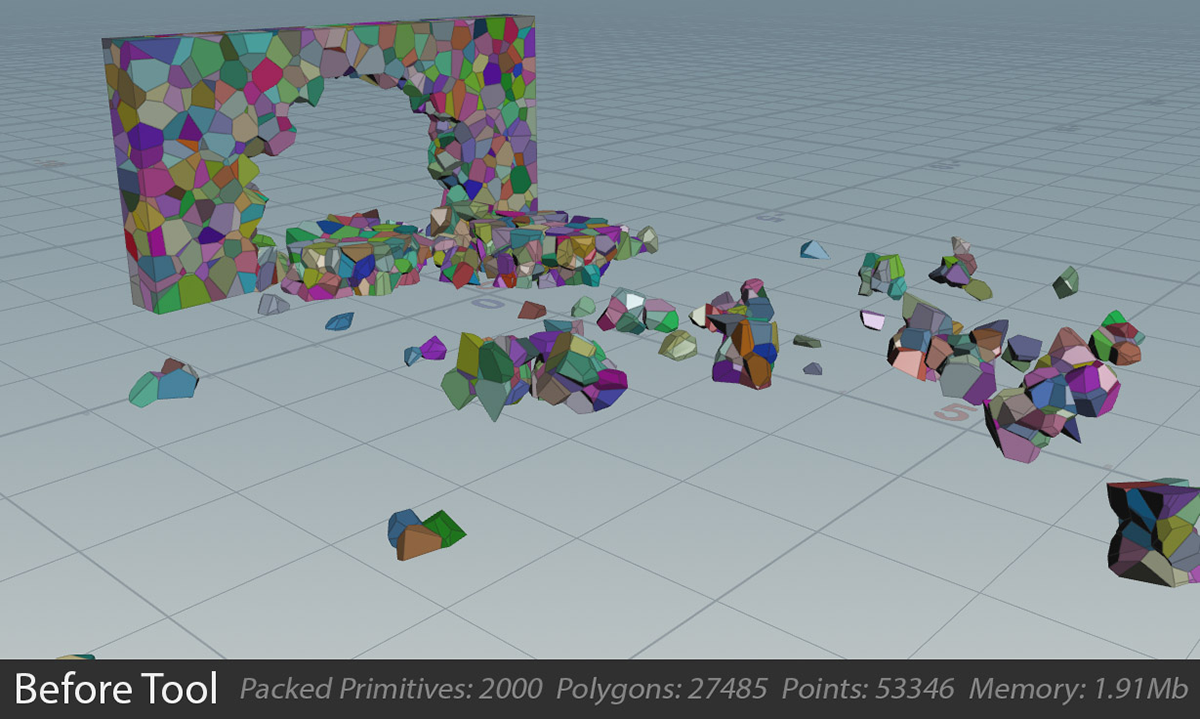
STARTING POINT
In this test case provided by Mike Lyndon, I had access to these input data: Static Geometry, Template Points (Directly from DOPs), and the Constraint Relationship Geometry.
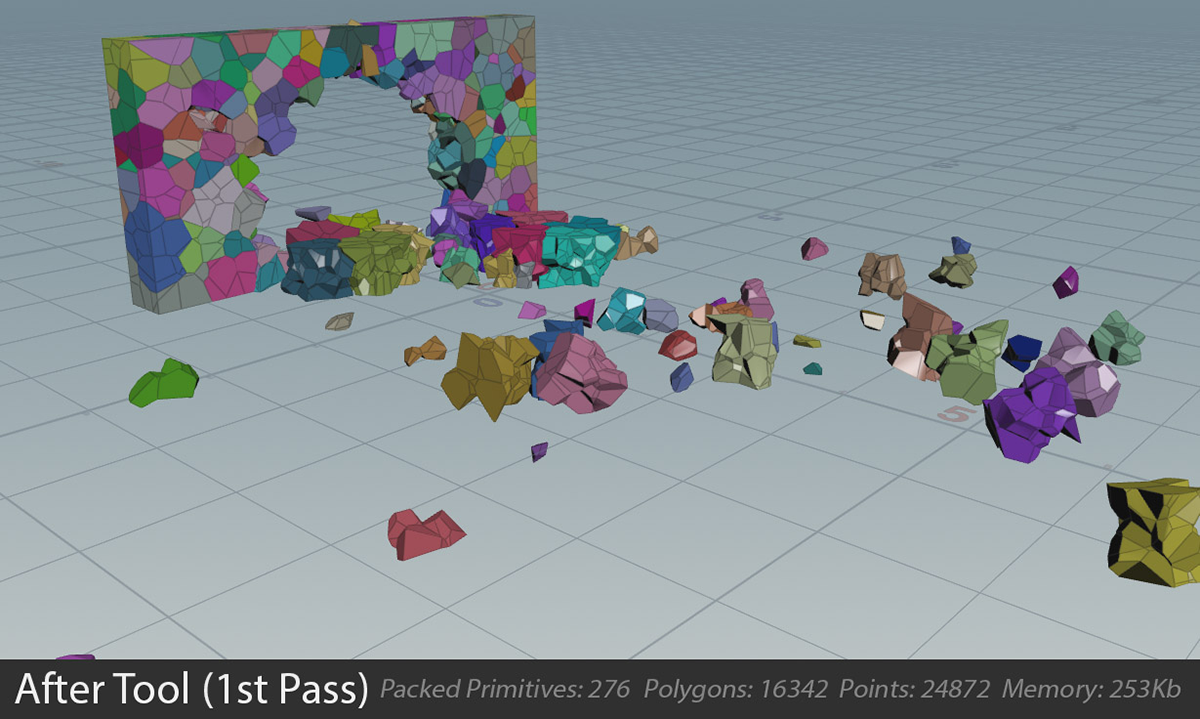
INITIAL TOOL CLEANUP
After connecting the tool with the input data, I set the cleanup method to "Constraint Based", which means the tool tries to figure out what is ever going to be connected throughout the simulation. The tool already did a pretty good job without any manual tweaking. We already reduced the packed primitives count by over 86%!
However, the simulation still doesn't look like the result we're after. A lot of clusters still have similar transformation data.
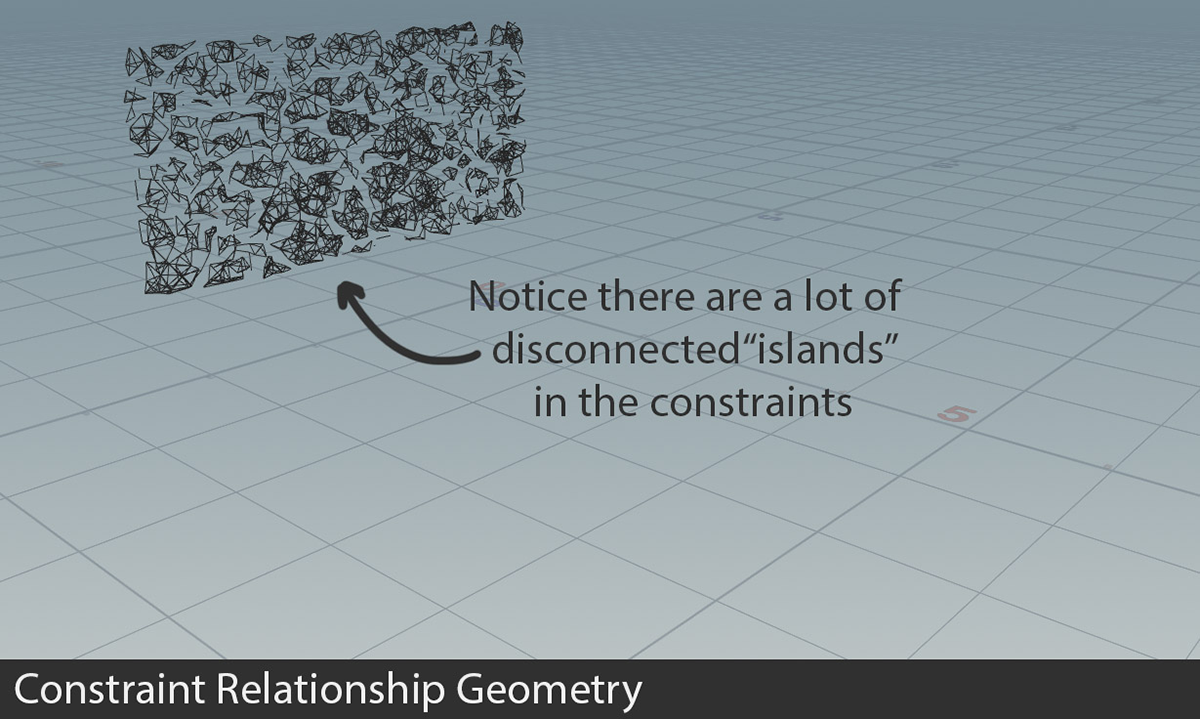
ANALYSING CONSTRAINTS
After visualising the constraint relationship geometry, it became quite obvious why the tool hadn't optimized all chunks with similar transformation data. As seen on the image, there are a lot of constraint "islands", which do not share atleast 1 connecting element. This means that the tool identifies these clusters as unique groups. Therefore not batching them together.
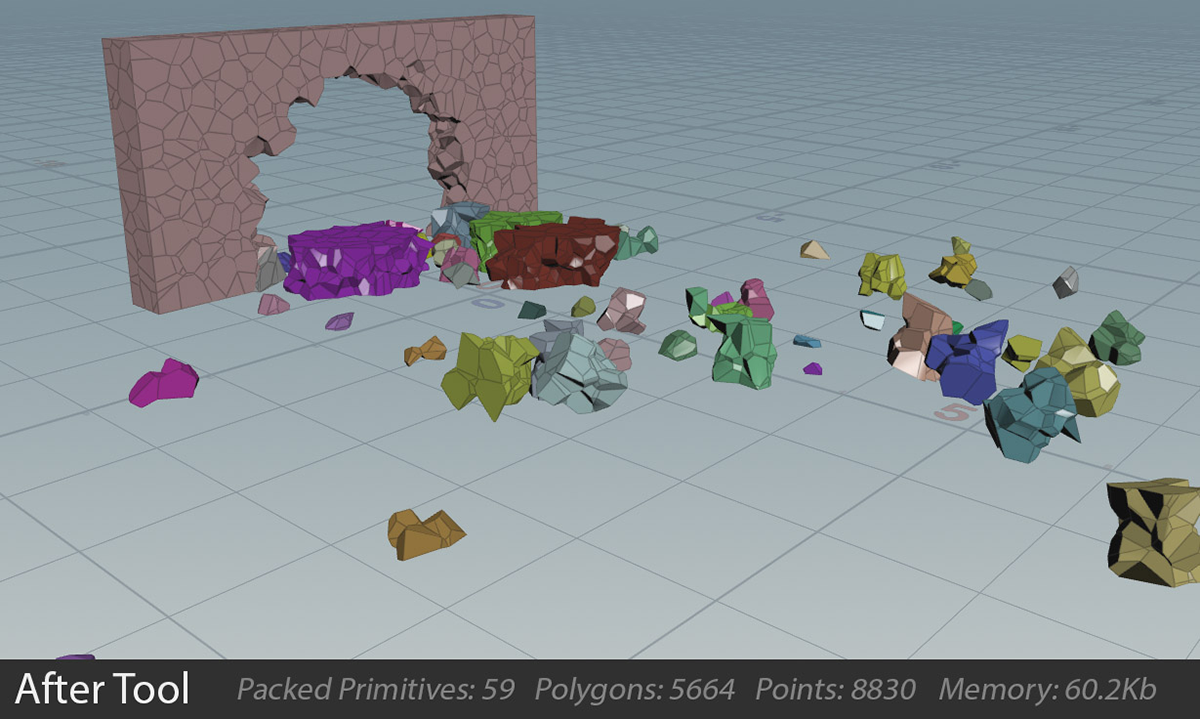
APPLYING FREEZE THRESHOLD
After concluding that solely using the constraint network to clean this simulation does not deliver perfect results yet, I decided to utilize the Freeze Threshold parameter. After enabling the checkbox, the default value already provided me with the desired result. (The chunks don't move throughout the simulation, therefore 0 is fine)
Now compared to the original 2000 packed primitives, we reduced it to only 59! Thats a reduction of over 97%!!!
CREATED BY

コメント
Sean-Soh 4 年, 2 ヶ月 前 |
Hi Paul! I downloaded the latest gamedev toolset and the node looks totally different. May i know how to get the new node working again?
I can sees that now it only takes in the SIM and bounding box option.
How do I get the static geo in?
Please log in to leave a comment.