Introduction

Skin Setup
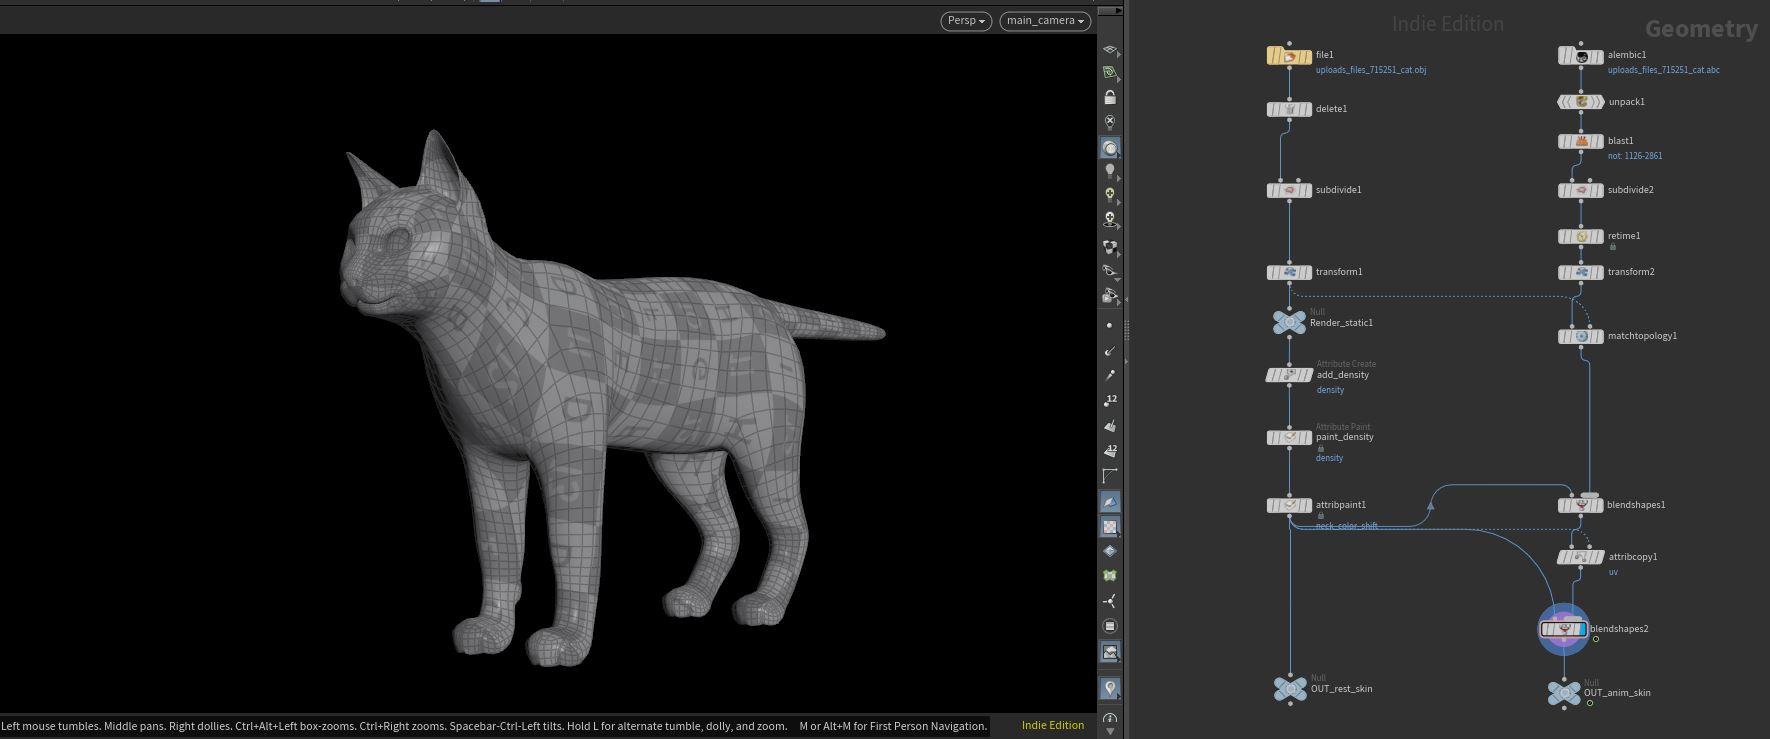
In the skin setup, we go over the basic methods for preparing geometry for grooming: firstly, checking and correcting the scale and orientation of the mesh to match the native Houdini environment and isolating the required parts of the given mesh, as well as the subdivision of the mesh to ensure that enough resolution is provided for the various processes involved in the grooming workflow.
Then, building in geometry correctives such as matching the topology to ensure that the point order is the same across the animated and non-animated meshes and operations to transfer attributes such as normals across the two active meshes.
We will also cover in depth some of the issues that one could face when grooming in a pipeline setting, such as changing point counts and geometry that is updated over time.
We will also show a process to pull out various animation cycles from an Alembic file.
Attribute Painting
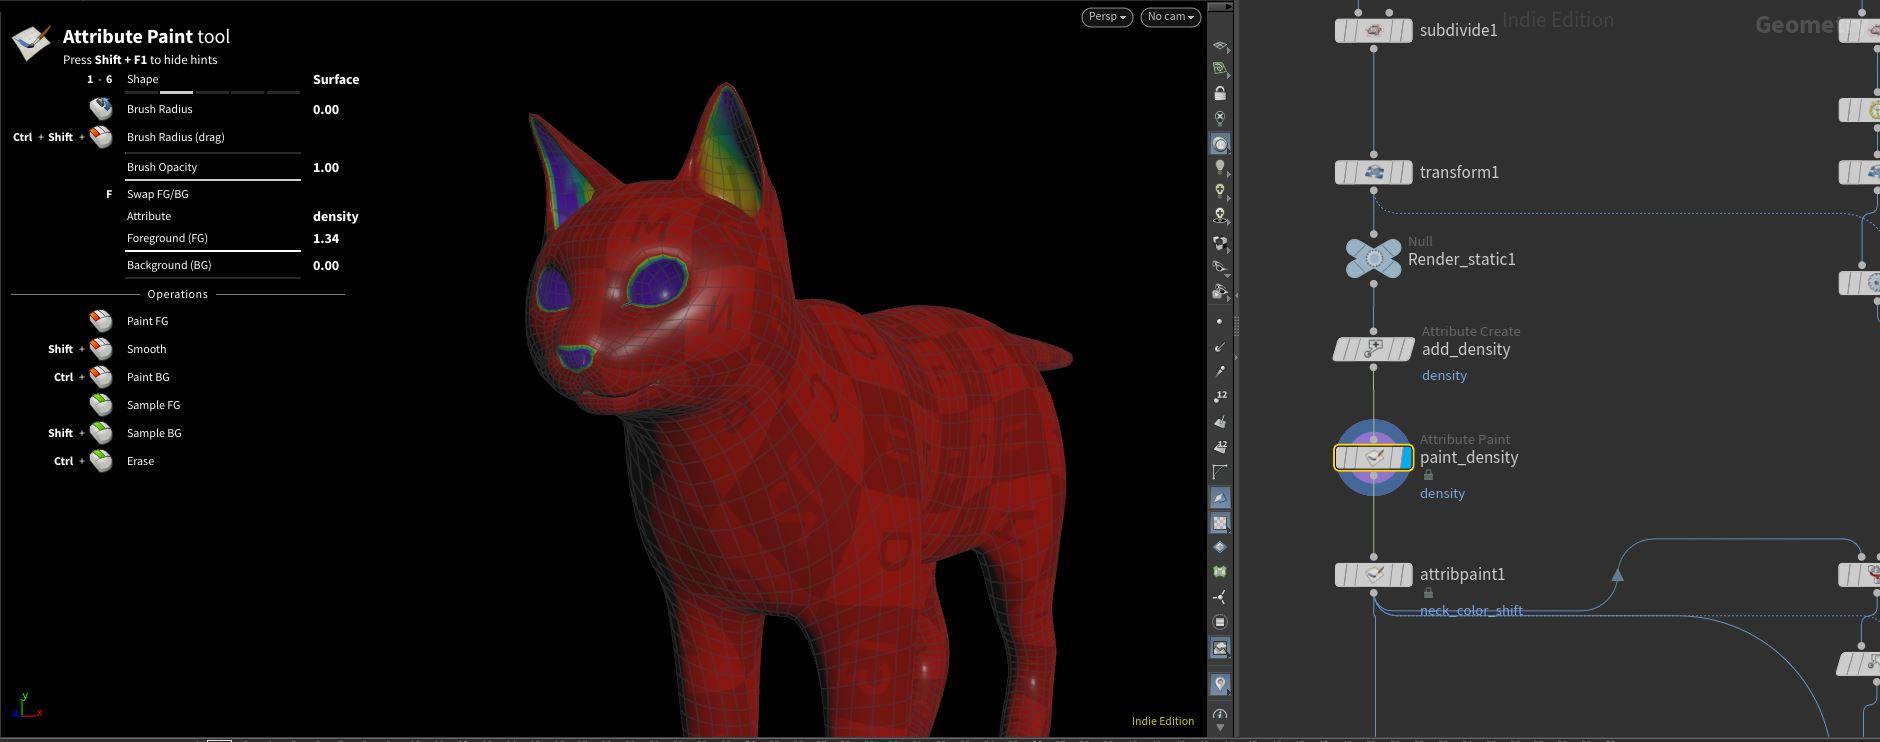
After the skin setup, we go over how to use, create, and paint attributes that can be used to affect various aspects of the groom. We will do an in-depth breakdown of the Attribute Paint tool and some tips and tricks on its various applications.
These attribute masks are an essential part of the grooming process to keep the system as procedural as possible. This also allows for future-proof systems that in any number of methods can withstand changing and updating geometry easily and with very little re-working necessary should those changes occur.
Reference Analysis

There will be a detailed guide on how to break down and analyze various references for grooming. The topics include how to analyze flow, clumping structure, and grouping.
This will allow for an informed approach to the grooming process and help by identifying some of the more common aspects of a creature groom and the effective methodologies to use when attempting to groom them.
Guide Grooming Process
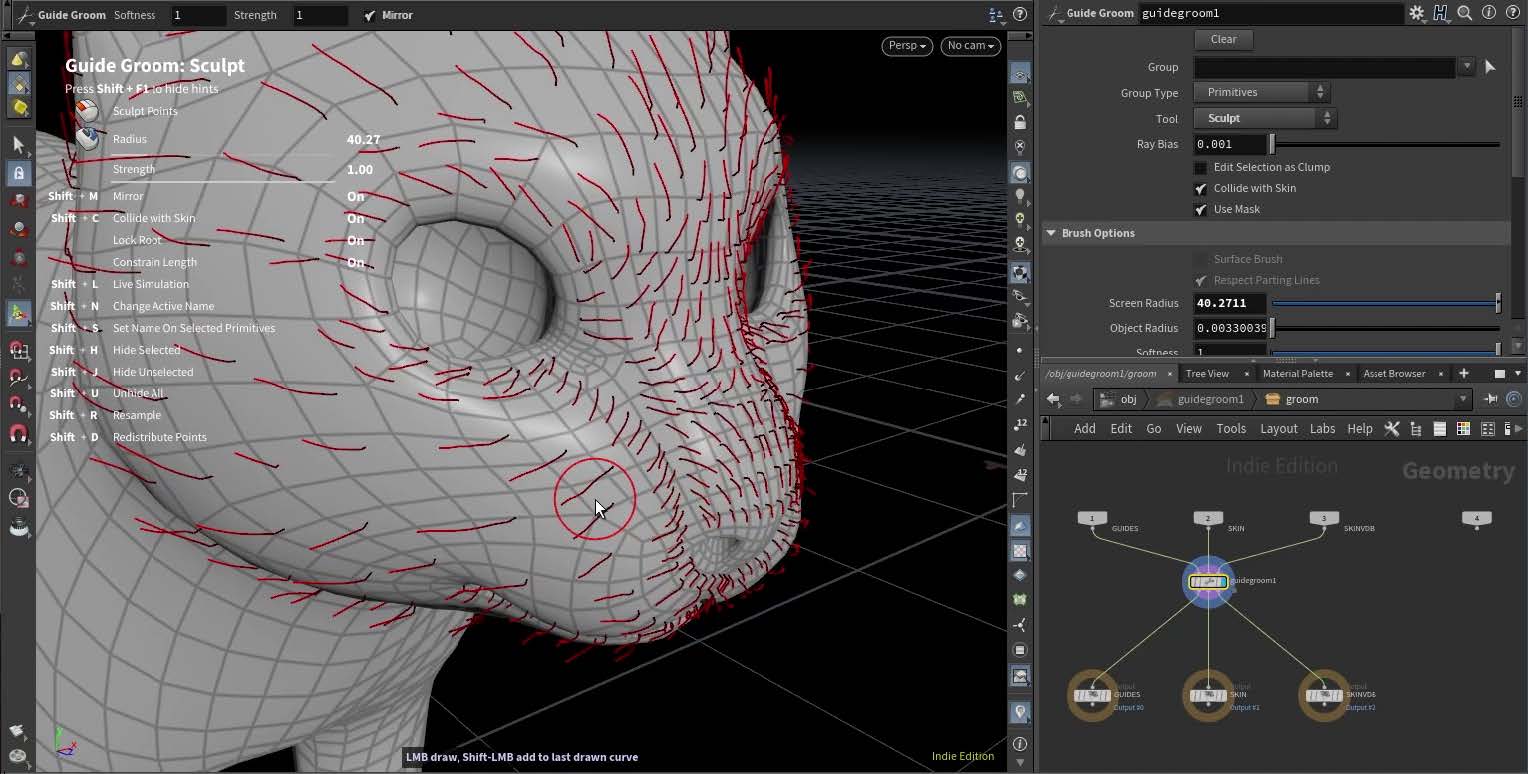
In the guide grooming phase, we go over a simple method of how to approach the grooming process. I find that it is easier to break down the guides into 3 levels: the first level is seen as the anchors or tentpole guides that will support the rest of the groom going forward. They dictate the primary flow and direction as well as the starting length for the rest of the groom going forward.
After the level 1 guides are placed, select the Plant tool and change the mode to Single, then start filling in areas of the current groom element that would require more resolution, sculpt and shape this level to get the final profile of the desired groom.
Level 3 is the density level of the guides. Using the plant tool on either scatter or single, place down an equal density of guides inside the boundaries created in level 2.
By using this method, one can quickly and effectively layout and groom any creature of character that fall within the traditional grooming requirements.
I will also go over the tools and processes that one can use in the guide groom node in-depth, breaking down each tool's function and some use cases for each.
Hair Generation
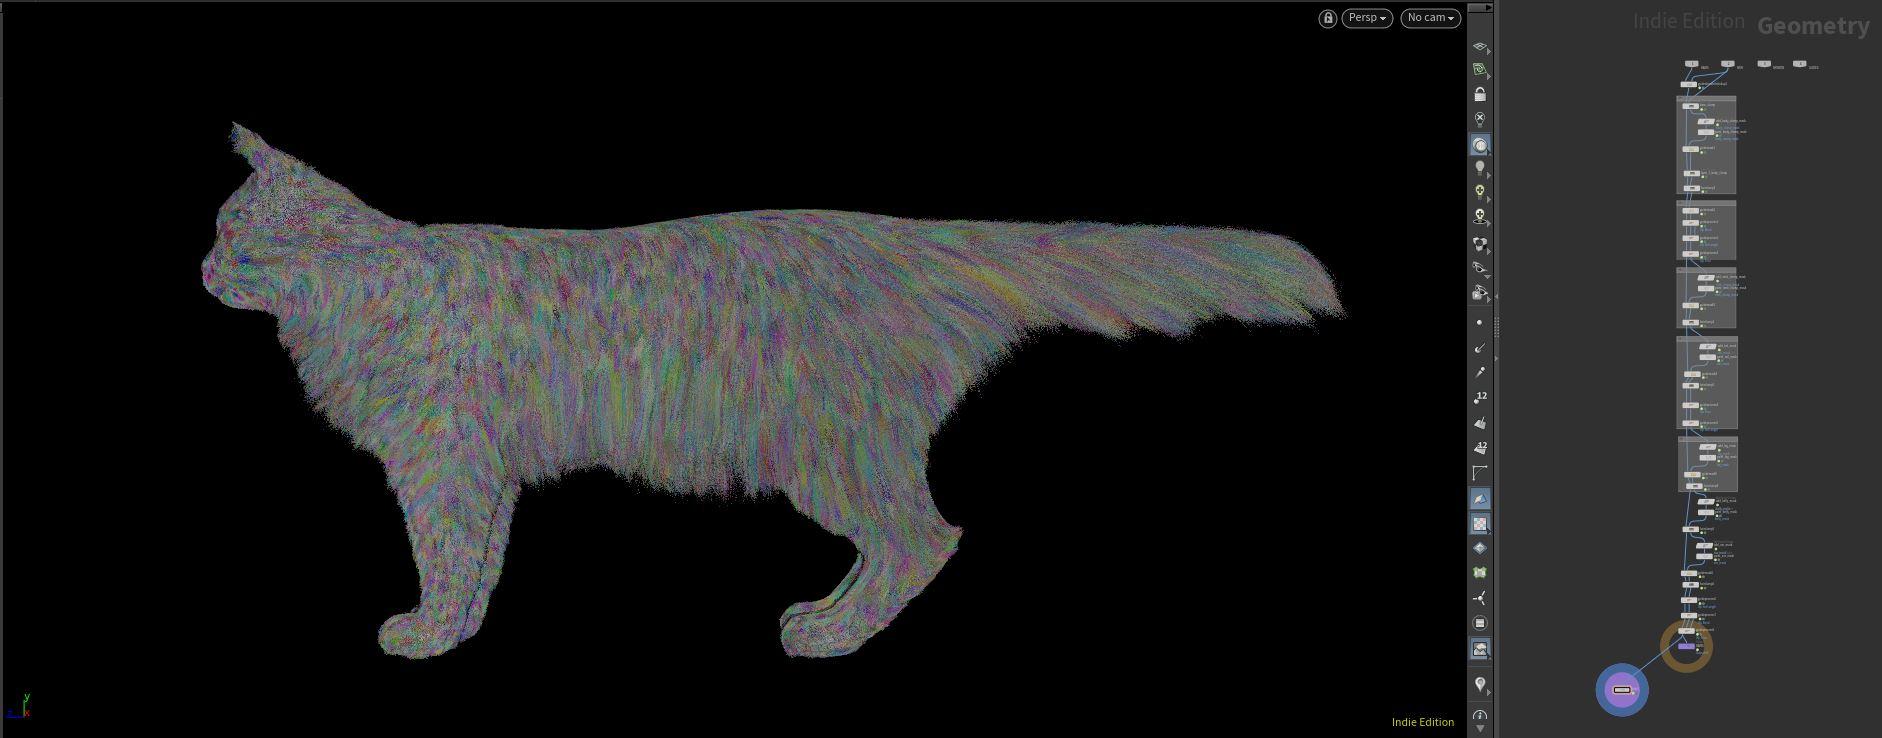
After the guide grooming process is complete, we will go over the hair generation aspect of the grooming workflow. Breaking down the HairGen node, we will go over the various parameters of the node in detail and the methods of using attributes to affect the different aspects of hair generation.
We will then use clumping and various guide processes to build a realistic hair groom where I will demonstrate the use of skins attribute overrides as well as how to create curve attribute masks to assist in the grooming process.
In this example, the entire groom will be contained in one master hair generate choosing, in this case, not to break apart the system into groups for the sake of simplicity. I do, however, explain the methods you could do it should you desire to approach the grooming process in that manner.
Shading and Rendering
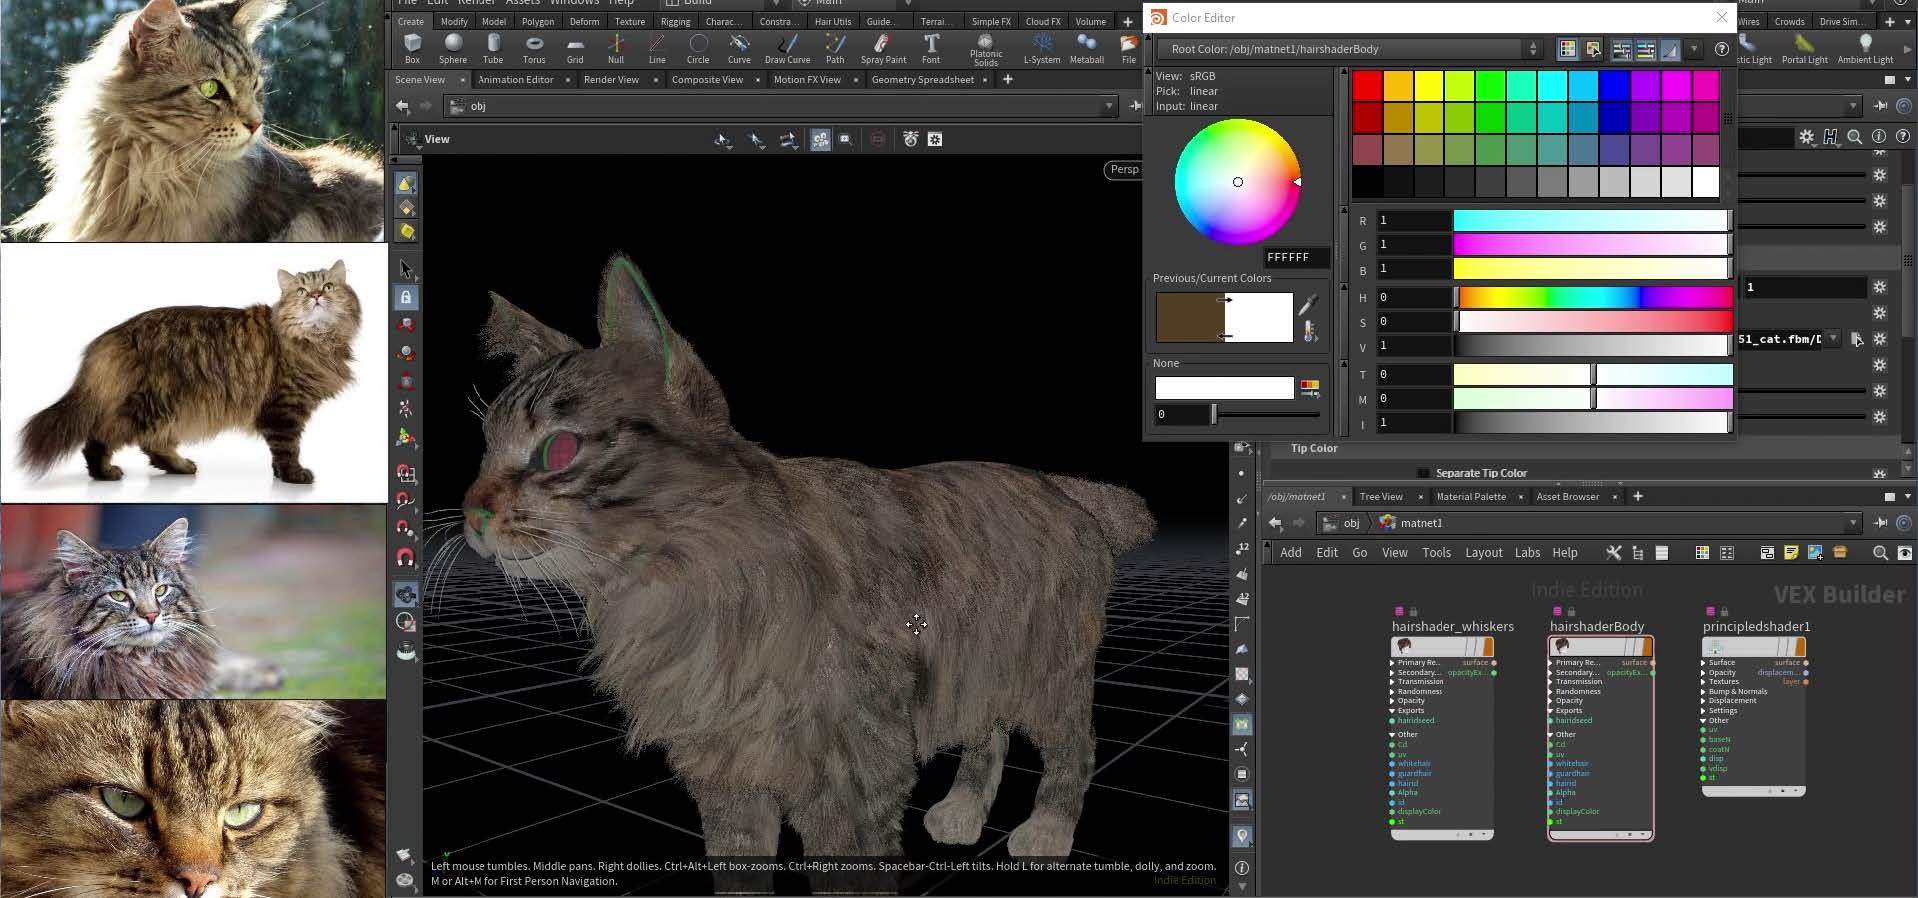
When approaching the shading aspect of the character's fur, we will go over a detailed breakdown of the standard hair shader for Houdini 19’s native render engine mantra.
I will demonstrate various methods of shading the character, such as how to use a texture map to drive the color of the fur as well as how to affect said shading with attribute to the point where if no texture map were provided, you would be able to shade the character entirely with attribute if so required.
I will also go over the various render settings to achieve clean and soft-looking fur in mantra while maintaining economical render times.
Deformation and Simulation
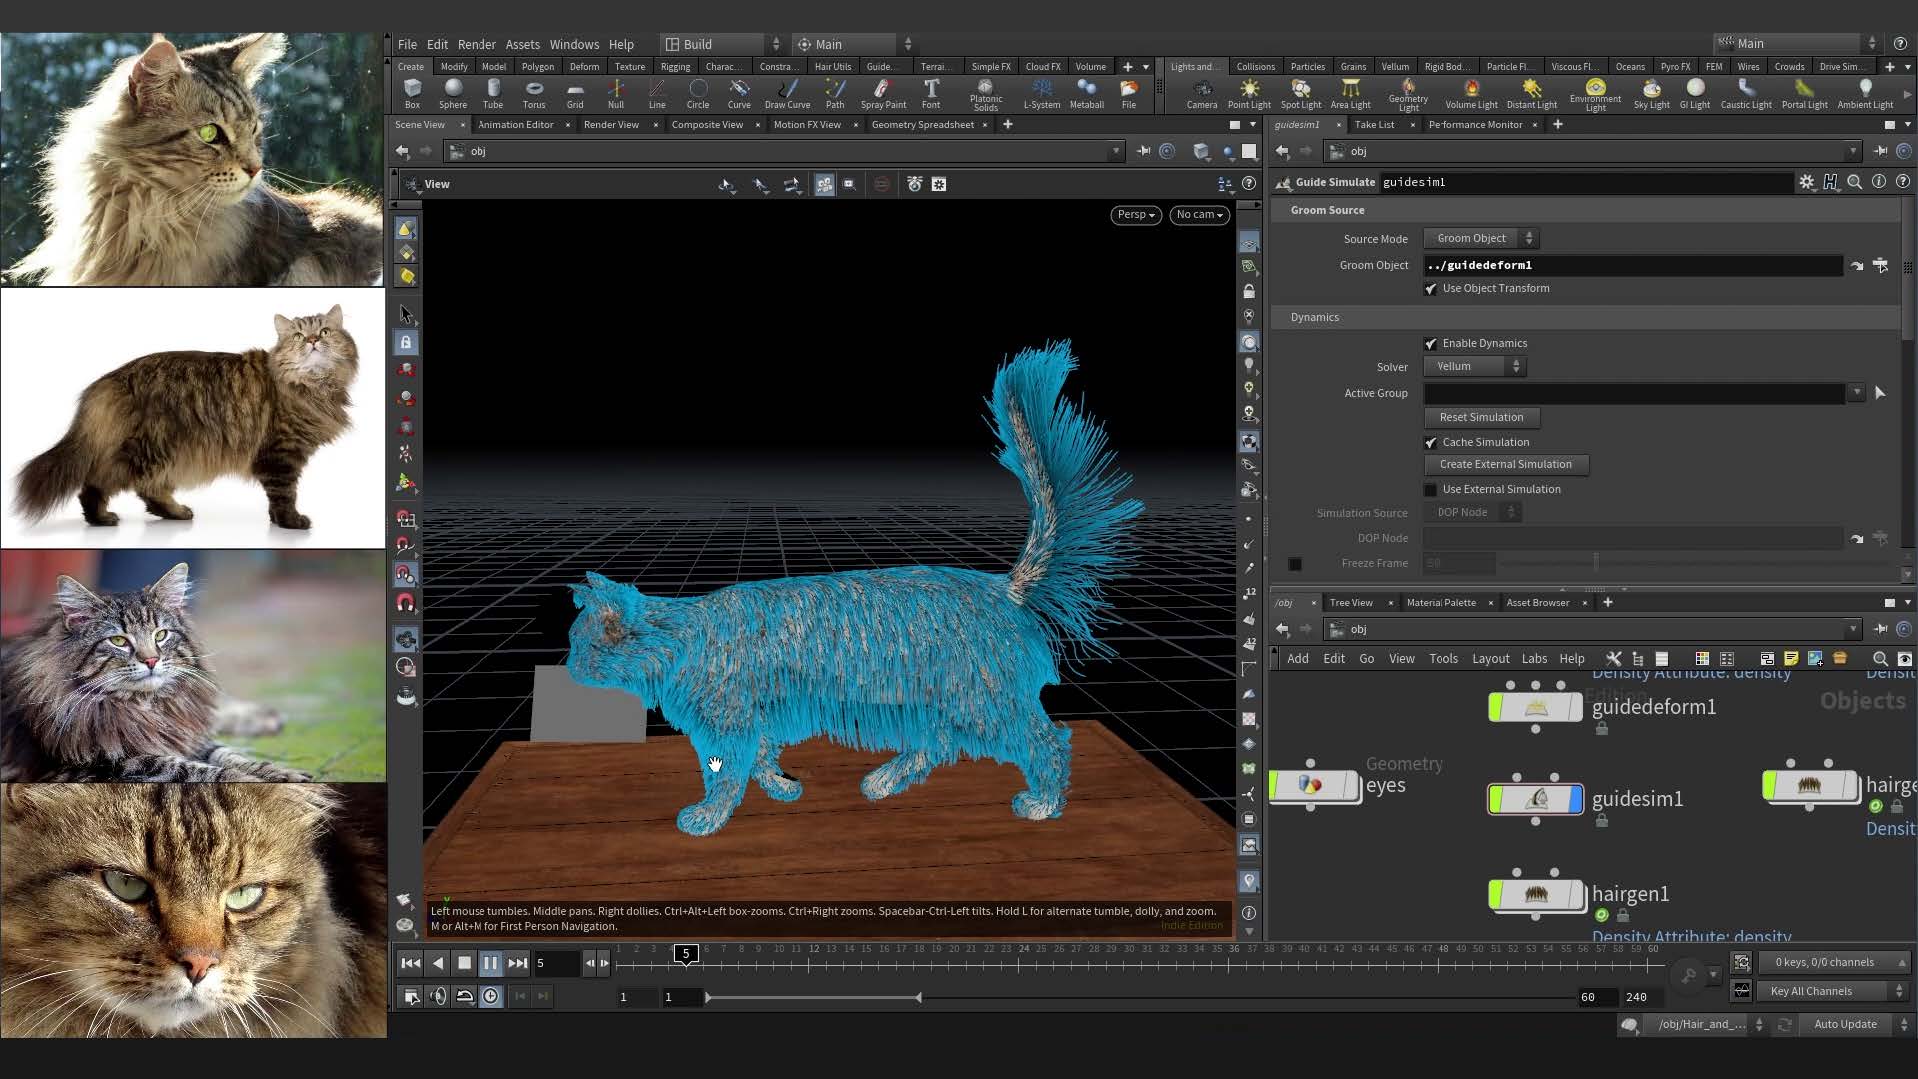
For deformation and simulation, I will show how to use the Guide Deform and the Guide Simulate nodes.
For the guide deform, we go over some common problems that could occur with incorrect mesh preparation and how to troubleshoot and diagnose those issues.
For the guide simulation, I will explain the internal working of the node and how to utilize its built-in vellum simulation network to achieve a simple and realistic guide simulation. We will go over the basic parameters of the simulation and how to analyze and iterate upon the results of a standard vellum simulation.
After simulation, I will briefly explain a few methods of caching out the final results of the grooming process.
Conclusion
CREATED BY

COMMENTS
Arvan 2 years, 6 months ago |
So happy to have stumbled across these current/H19 grooming videos - thank you very much for doing these!
MirHadi 2 years, 4 months ago |
Thank you very much, I learned a lot about grooming.
forton 1 year, 9 months ago |
Thanks to you I did a haircut and a beard the houdini 19 way. Everything moves and simulates nice with the character (didn't know how to). Good stuff.
kathrine12 1 year, 3 months ago |
INTRODUCTION TO GROOMING HAIR AND FUR is an exceptional guide for pet owners. The comprehensive tips provided make pet care a breeze, and the step-by-step approach ensures even beginners can confidently groom their furry friends. The course not only covers essential grooming techniques but also emphasizes the significance of <a href="https://klimdi.com/collections/progress-lighting">progress lighting</a> in creating a comfortable and stress-free environment. A truly valuable resource that promotes the well-being of our beloved pets while fostering a sense of accomplishment!
jamuk 1 year ago |
awesome!, are there any files to go with the tutorial, a cat mesh?
Please log in to leave a comment.