BLACKHAWK:
Destruction Series
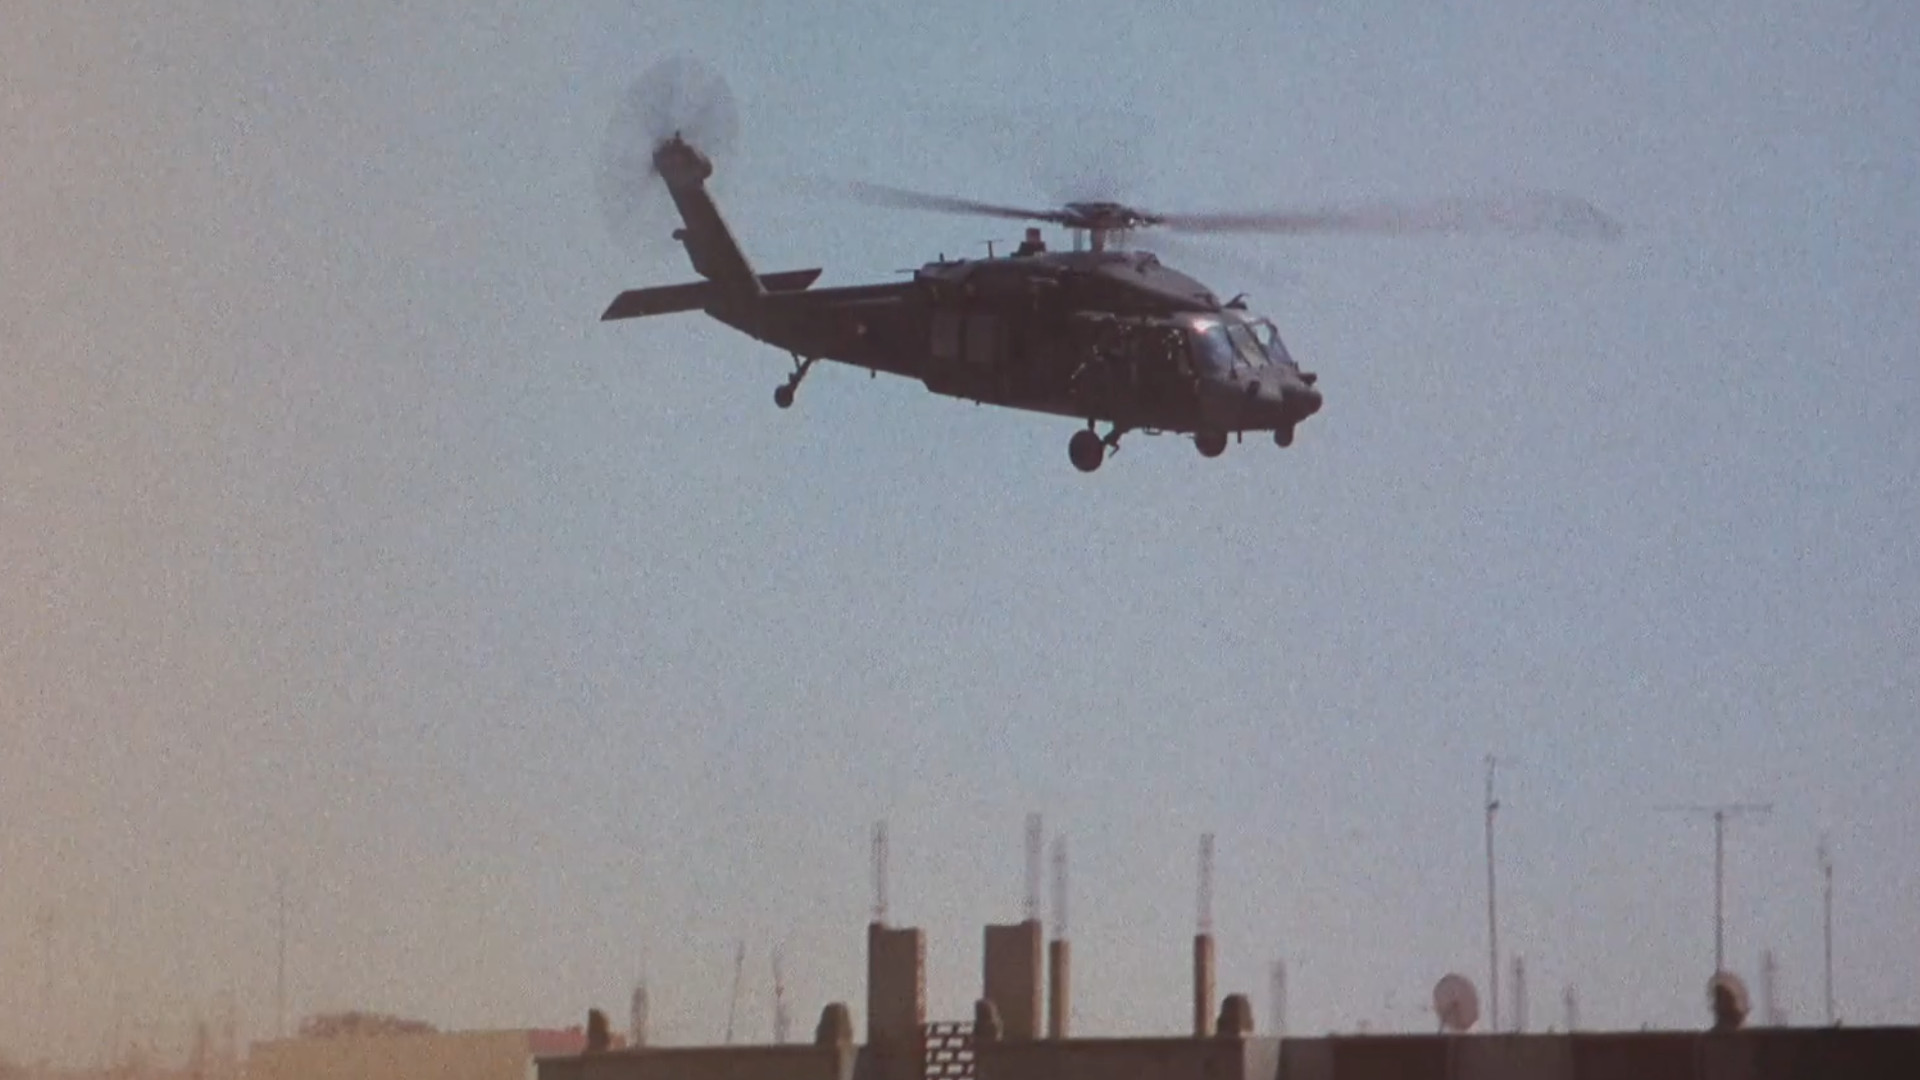
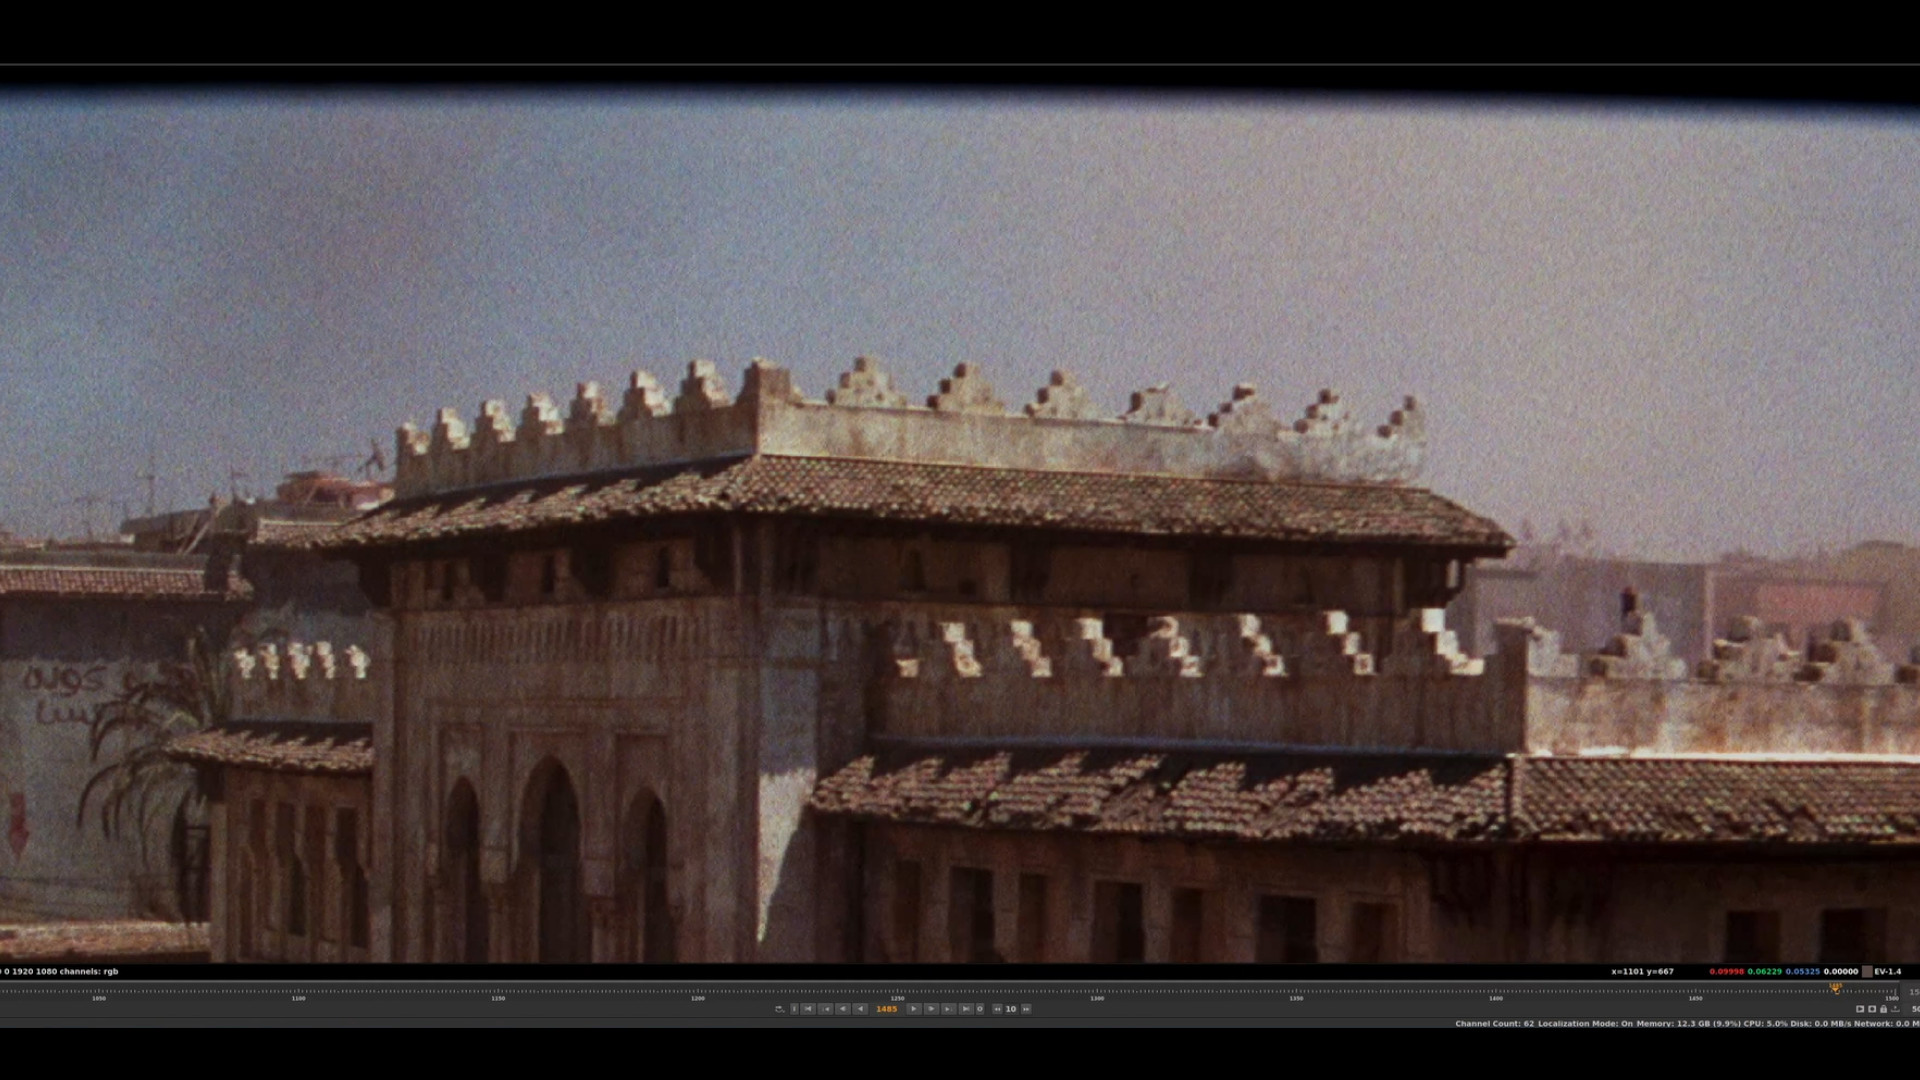
This course guides you through creating a VFX shot from start to finish, including integrating CG elements into live-action footage. Picture yourself as an FX artist in a studio, and join us as we navigate every step – from interpreting the brief and strategizing your FX scene to crafting each element and seamlessly blending them into real footage from Ridley Scott's movie "Black Hawk Down.
While this course is most advantageous for those with experience in RBD and Pyro simulations in Houdini, beginners will also find great value in it, gaining insights and learning the best practices of the VFX industry. We will focus on destruction, Pyro, Karma and a touch of compositing. Just download Houdini, grab the free project files and follow along!
1. Shot Brief
Begin your journey by understanding the scope of our project. We'll review the shot brief and all the FX elements that you will be working on.
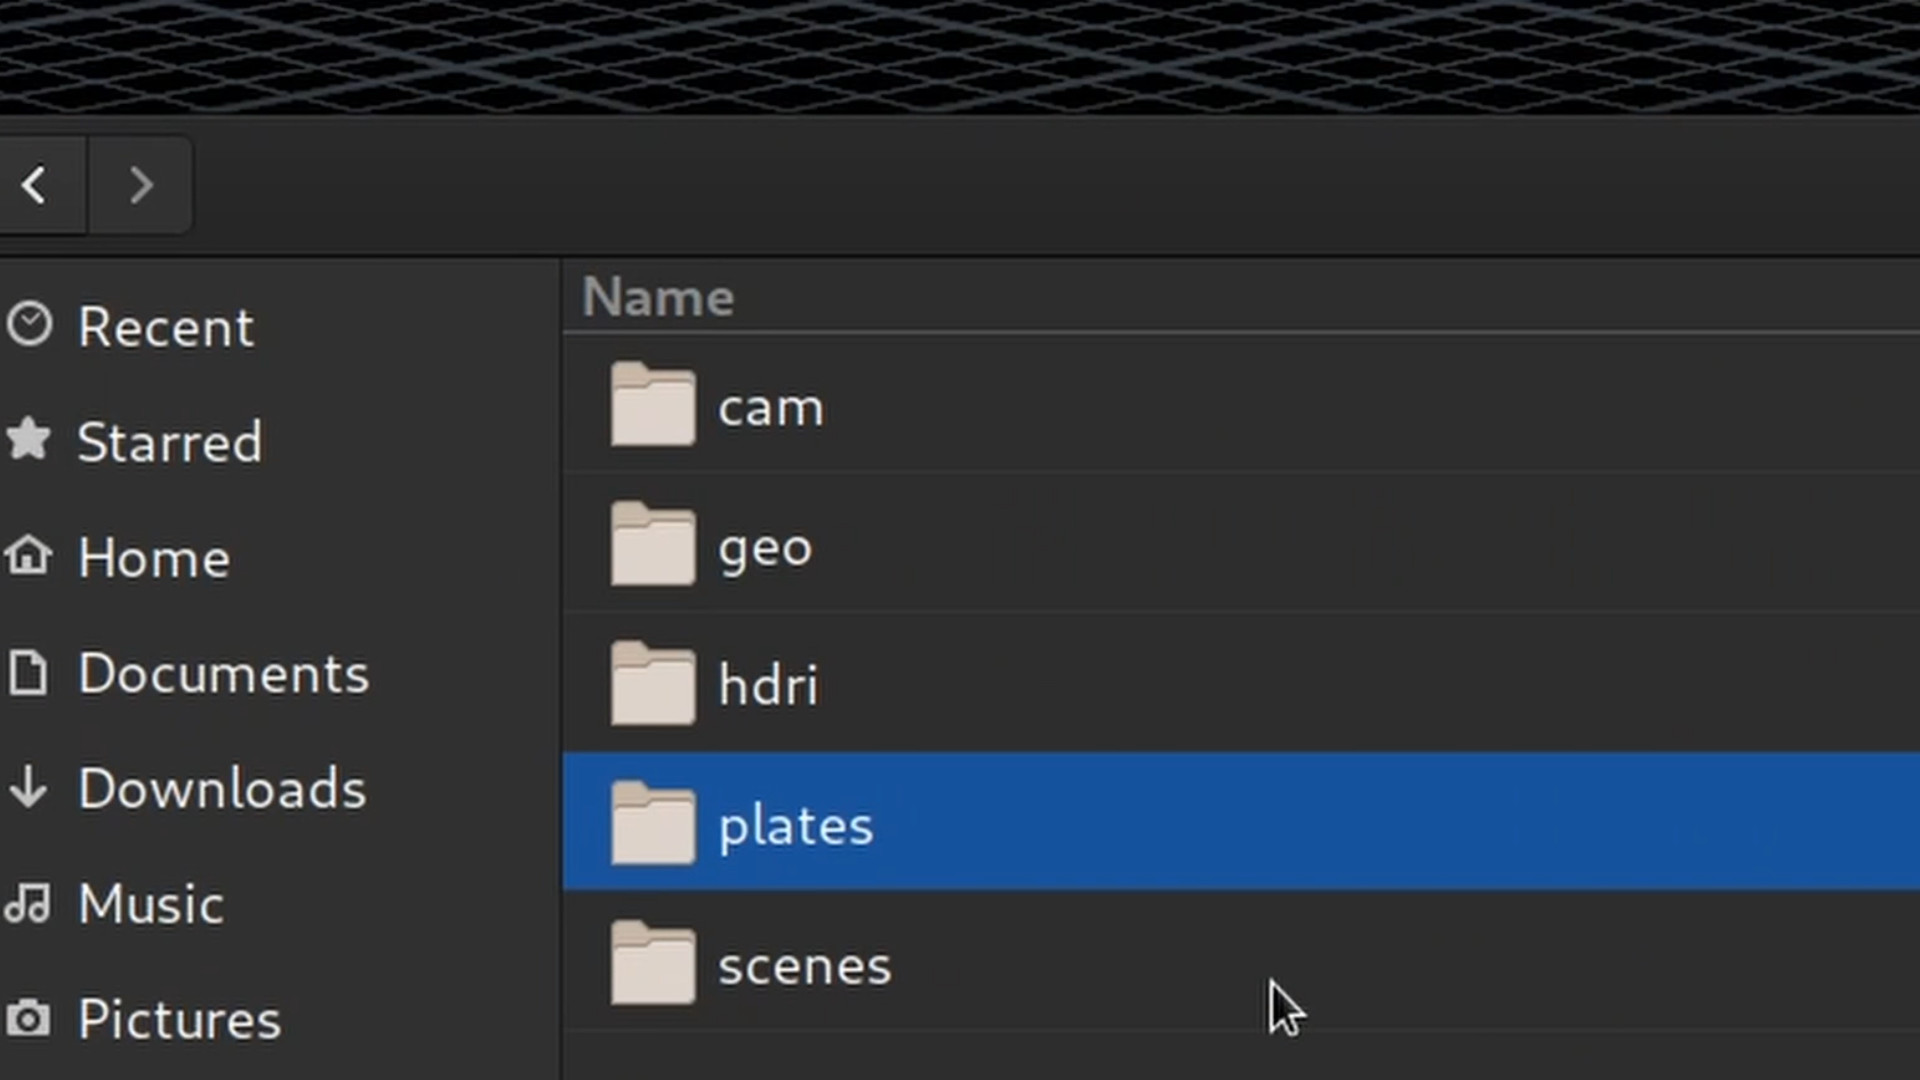
2. Project Folders & Files
Acquaint yourself with the organization of our project assets. This understanding is crucial for navigating the course materials.
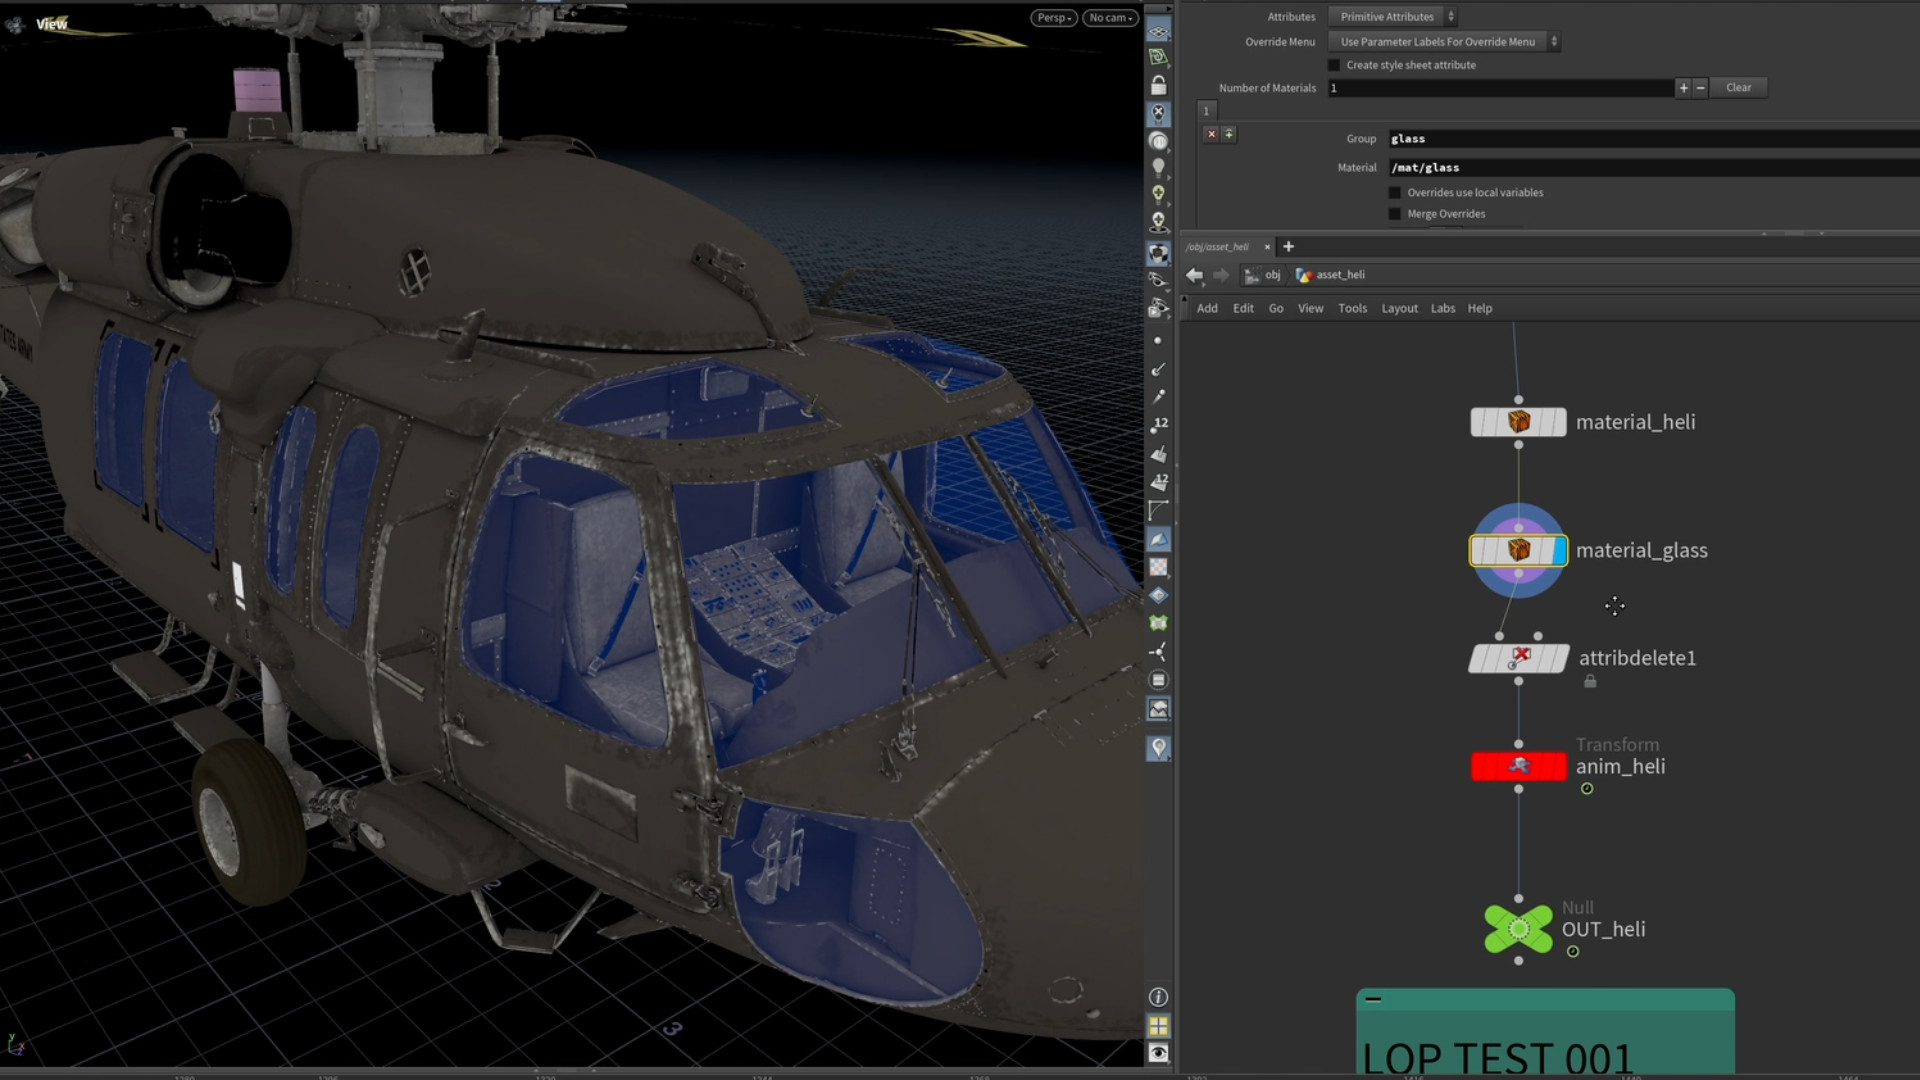
3. Project & Asset Walkthrough
Overview of the Houdini scene and the assets loaded in it. Create your first LOP test of the helicopter geometry to make sure all the materials are linked correctly. Don’t forget to set the $JOB (File/Set Project) so that all the assets load correctly on your system.

4. RPG & Building Preparation
Explore the RPG asset and test it in LOPs. Then move onto preparing the environment colliders that you will be using for all your future simulations.
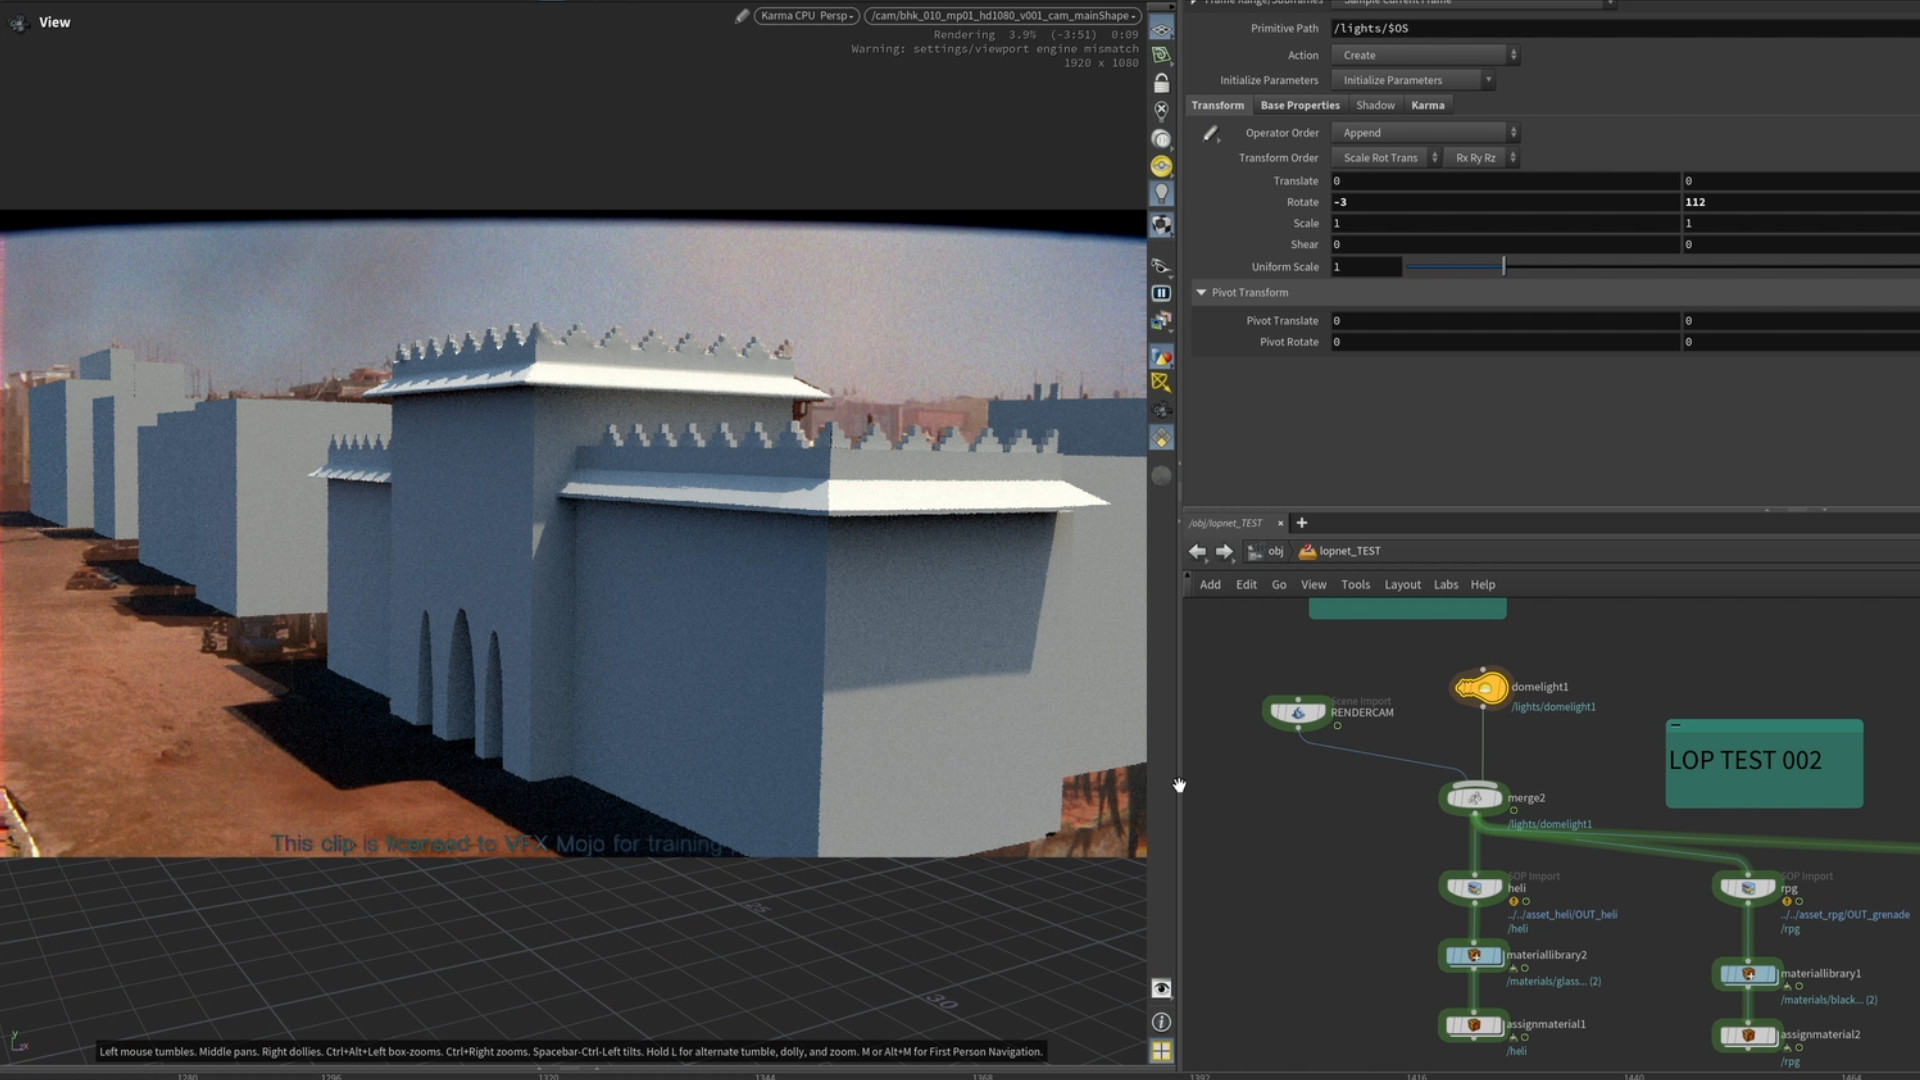
5. Lighting & LOPs Test
Practice how to match the lighting of your 3D scene with the lighting in the plate using Background Plate LOP in Solaris.
F R A C T U R I N G
6. Glass
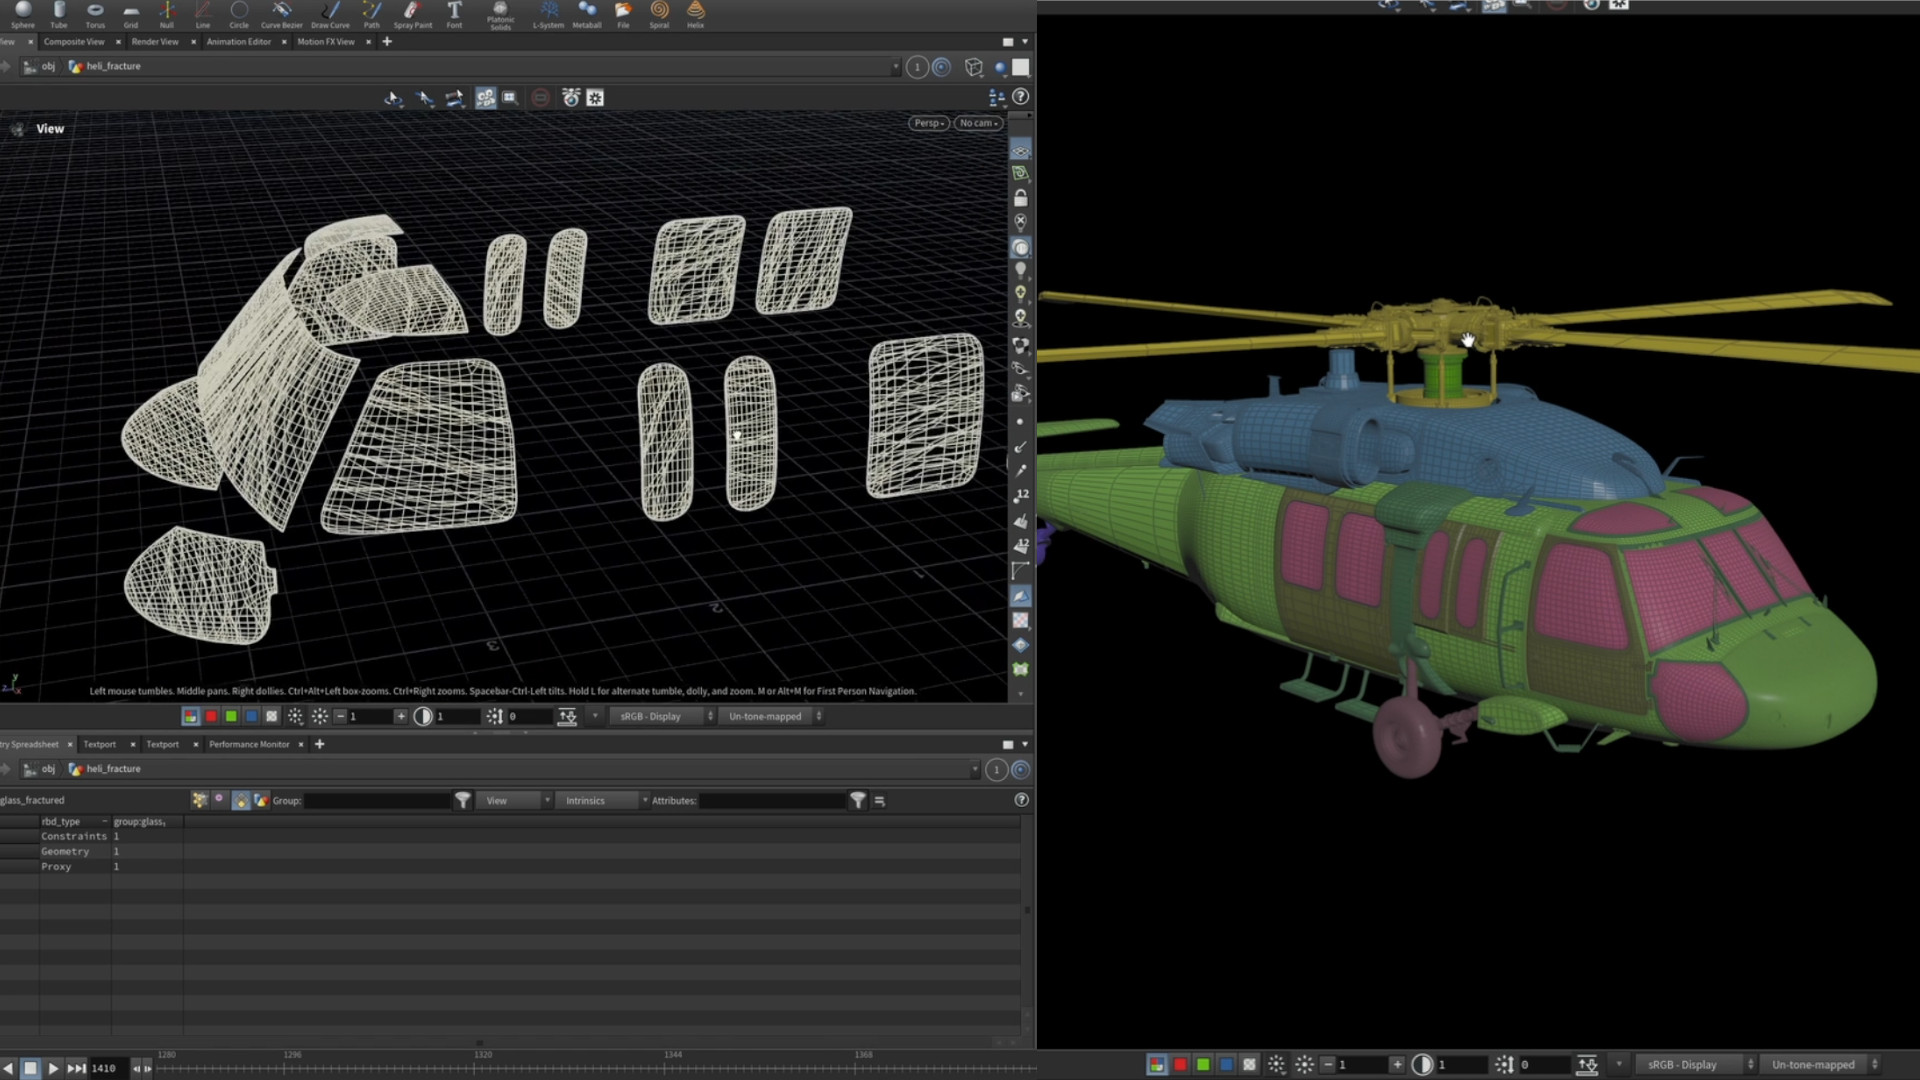
After analyzing various references we will do an overview of all the steps you will take to fracture the helicopter. You will start with a custom glass fracture for the helicopter windows.

7. Top Rotor
Prepare the top rotor of the helicopter for simulations. Practice geometry preparation, custom fracturing, glue and hard constraints. Adjust RBD Configure properties and test everything in an RBD Solver.

8. Rear Rotor
Prepare the rear rotor of the helicopter for simulations. Similar to the top rotor, practice geometry preparation, glue and hard constraints, adjust RBD Configure properties and test it in an RBD Solver.

9. Metal
Finish preparing the rest of the helicopter: wheels, small nuts and bolts, objects inside the cabin, and metal fuselage. Test metal tearing and bending using custom plasticity.
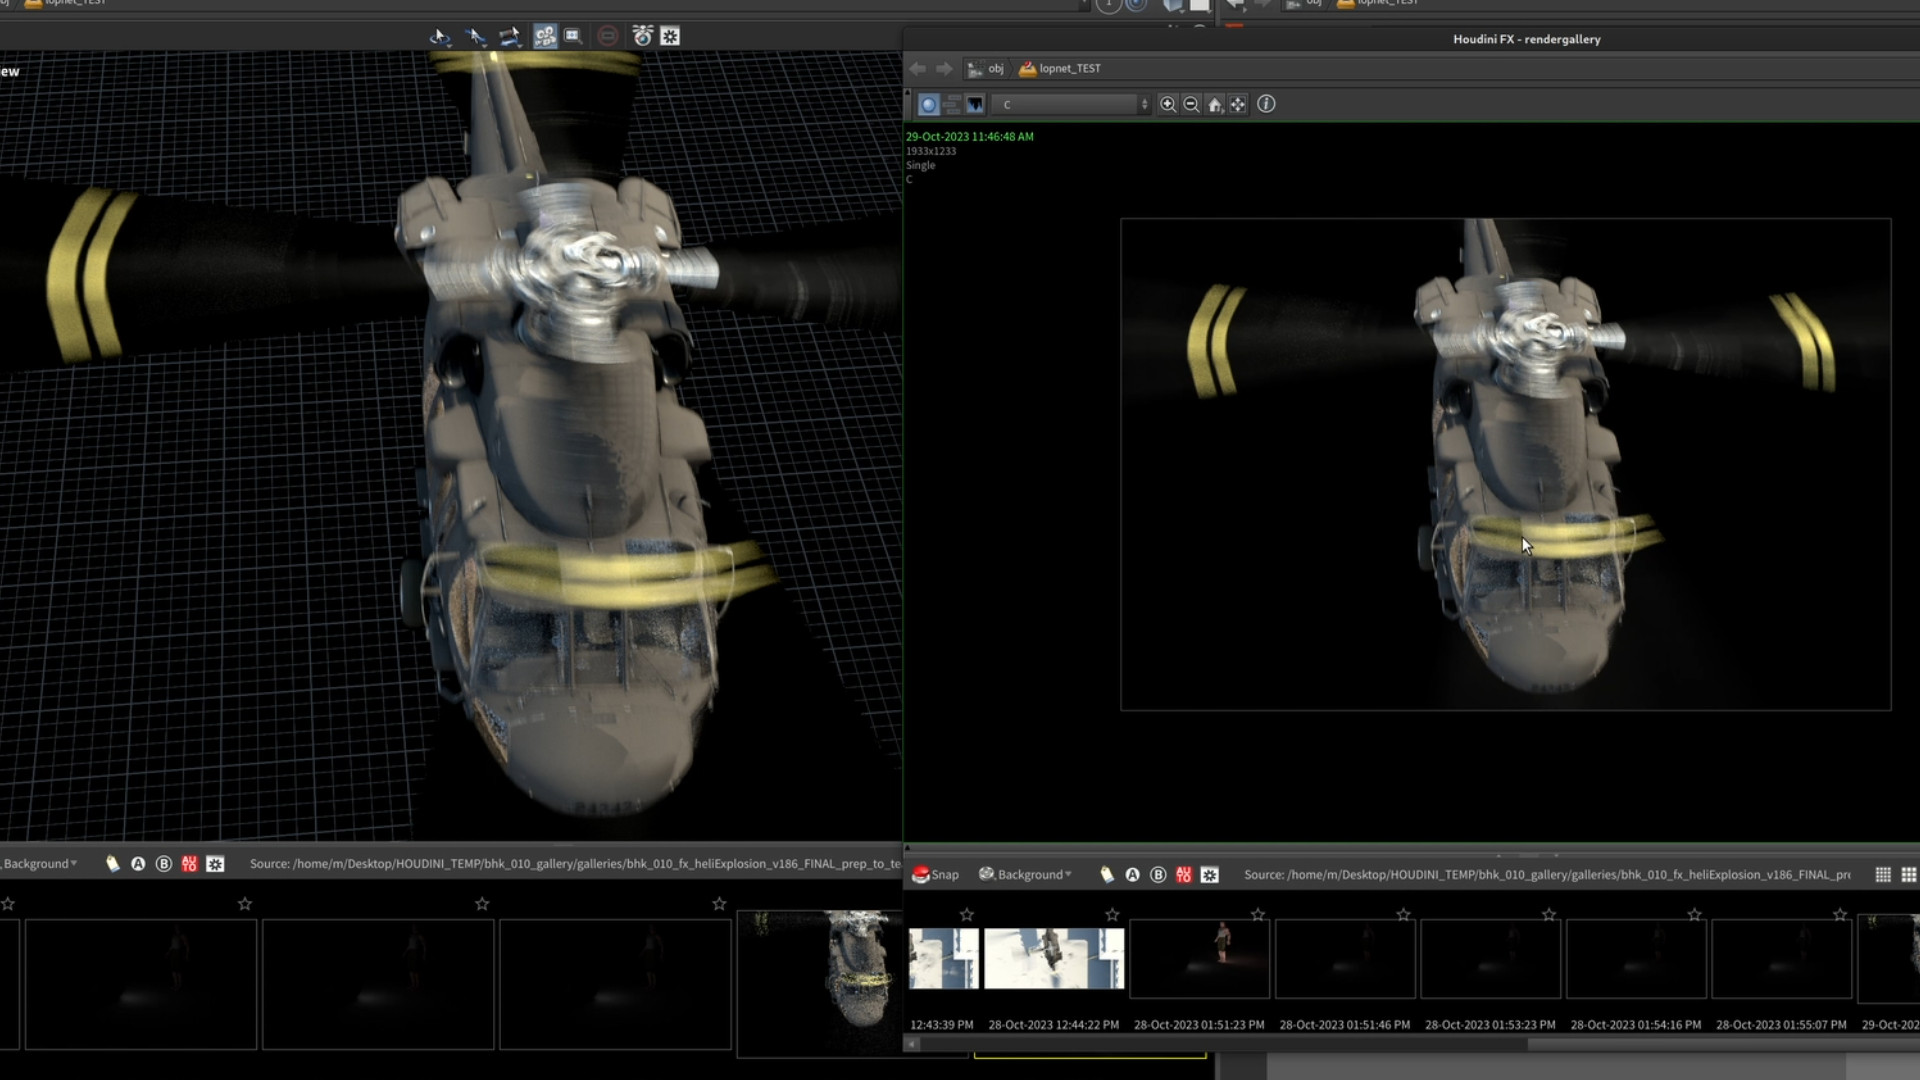
10. Assembly & Motion Blur test
Assemble all the fractured pieces, apply the initial animation to the fractured helicopter. Test in LOPs that we didn’t break our UVs and that deformation motion blur is working as expected.
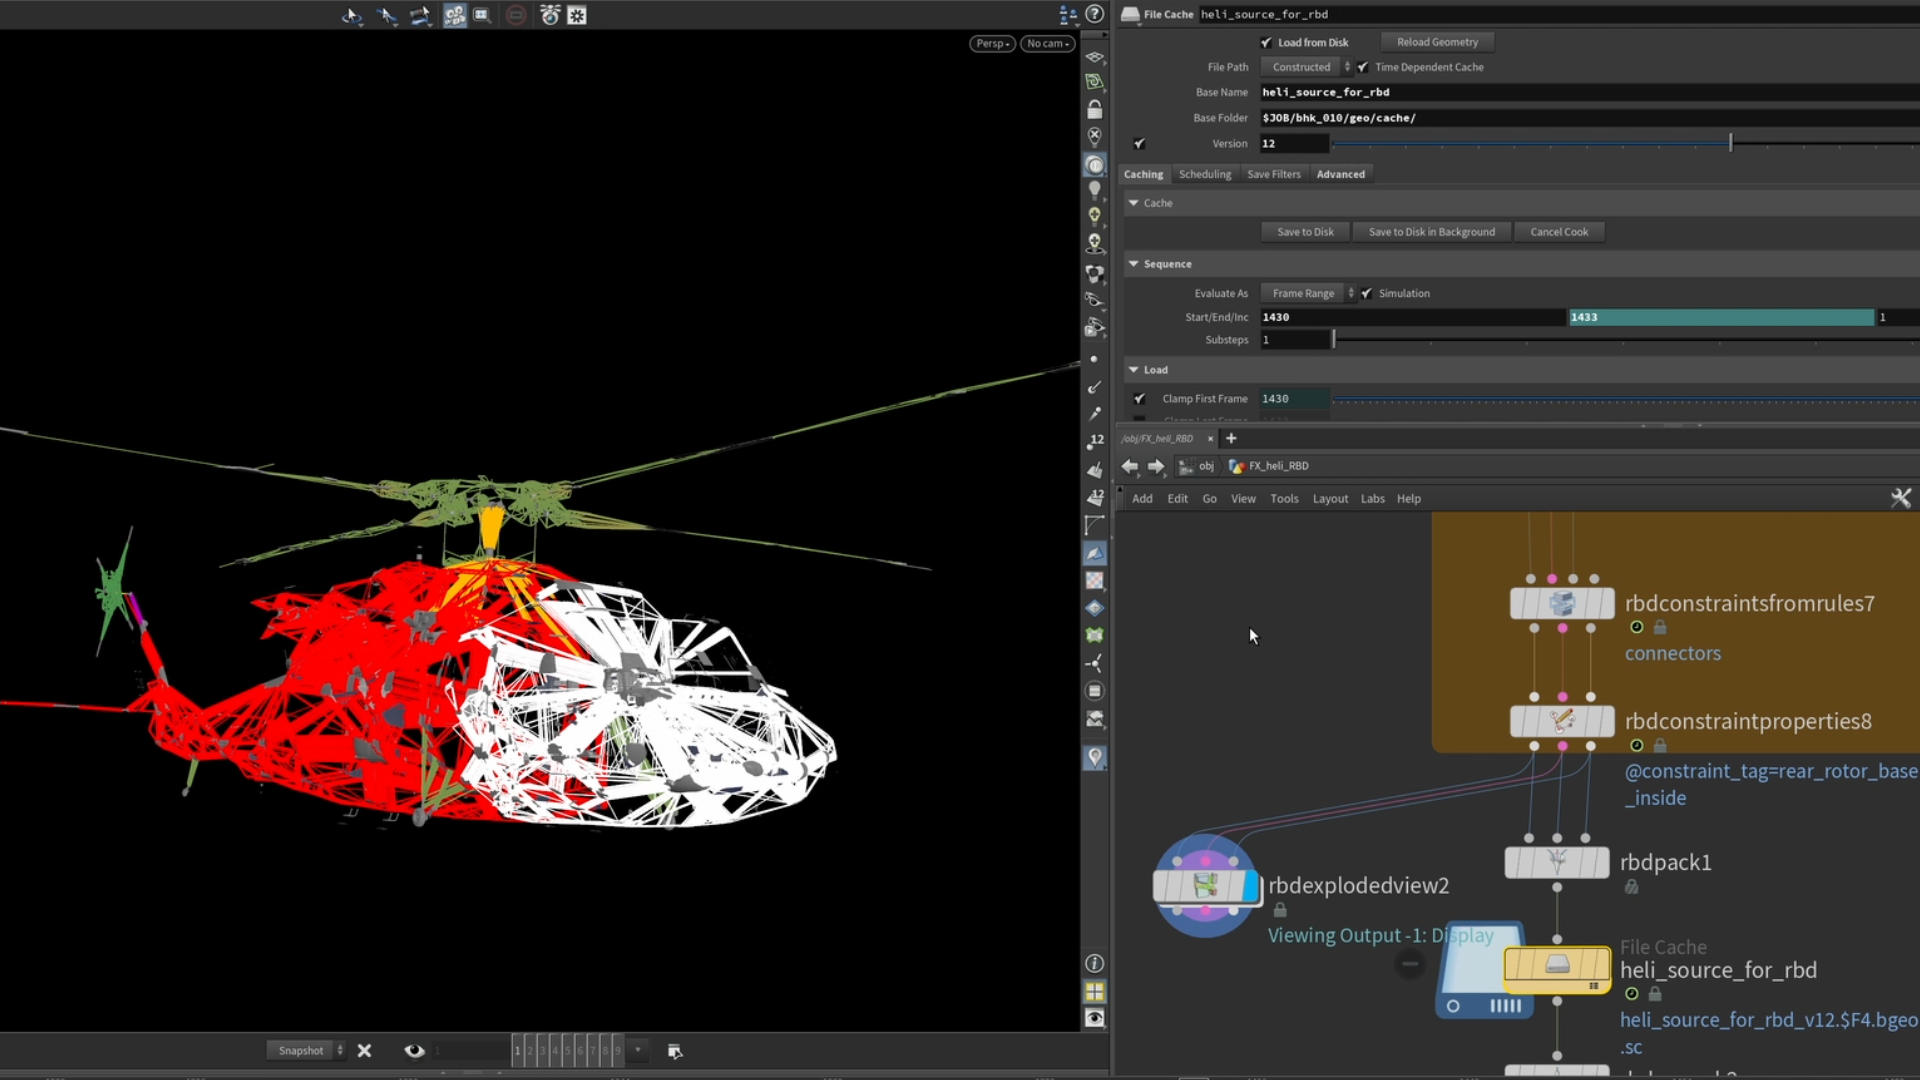
11. RPG Motion Blur, RBD Constraints & Configure
Set up all the constraints for the RBD sim. Use RBD configure to create the correct attributes that RBD Solver expects. Lastly, control when the helicopter is animated and when it is active in the simulation.

12. Custom Velocity, RBD Solver & Caching
Create custom velocity forces and dive into the RBD Solver settings. After you are happy with your simulation, learn about caching optimization techniques. Prepare the cached helicopter to act as colliders for future particle and pyro simulations.

13. PDG Wedging & LOPs Test
In case you are not happy with the previous results, learn how to use PDG to create dozens of variations of the helicopter RBD sim. Test the sim in LOPs for proper UVs and motion blur.
EXPLOsion, dust + debris

14. Set Up
Set up the sourcing for the pyro explosion and create a custom velocity field to simulate extra wind from the helicopter rotors.
15. Pyro Solver & LOPs Test
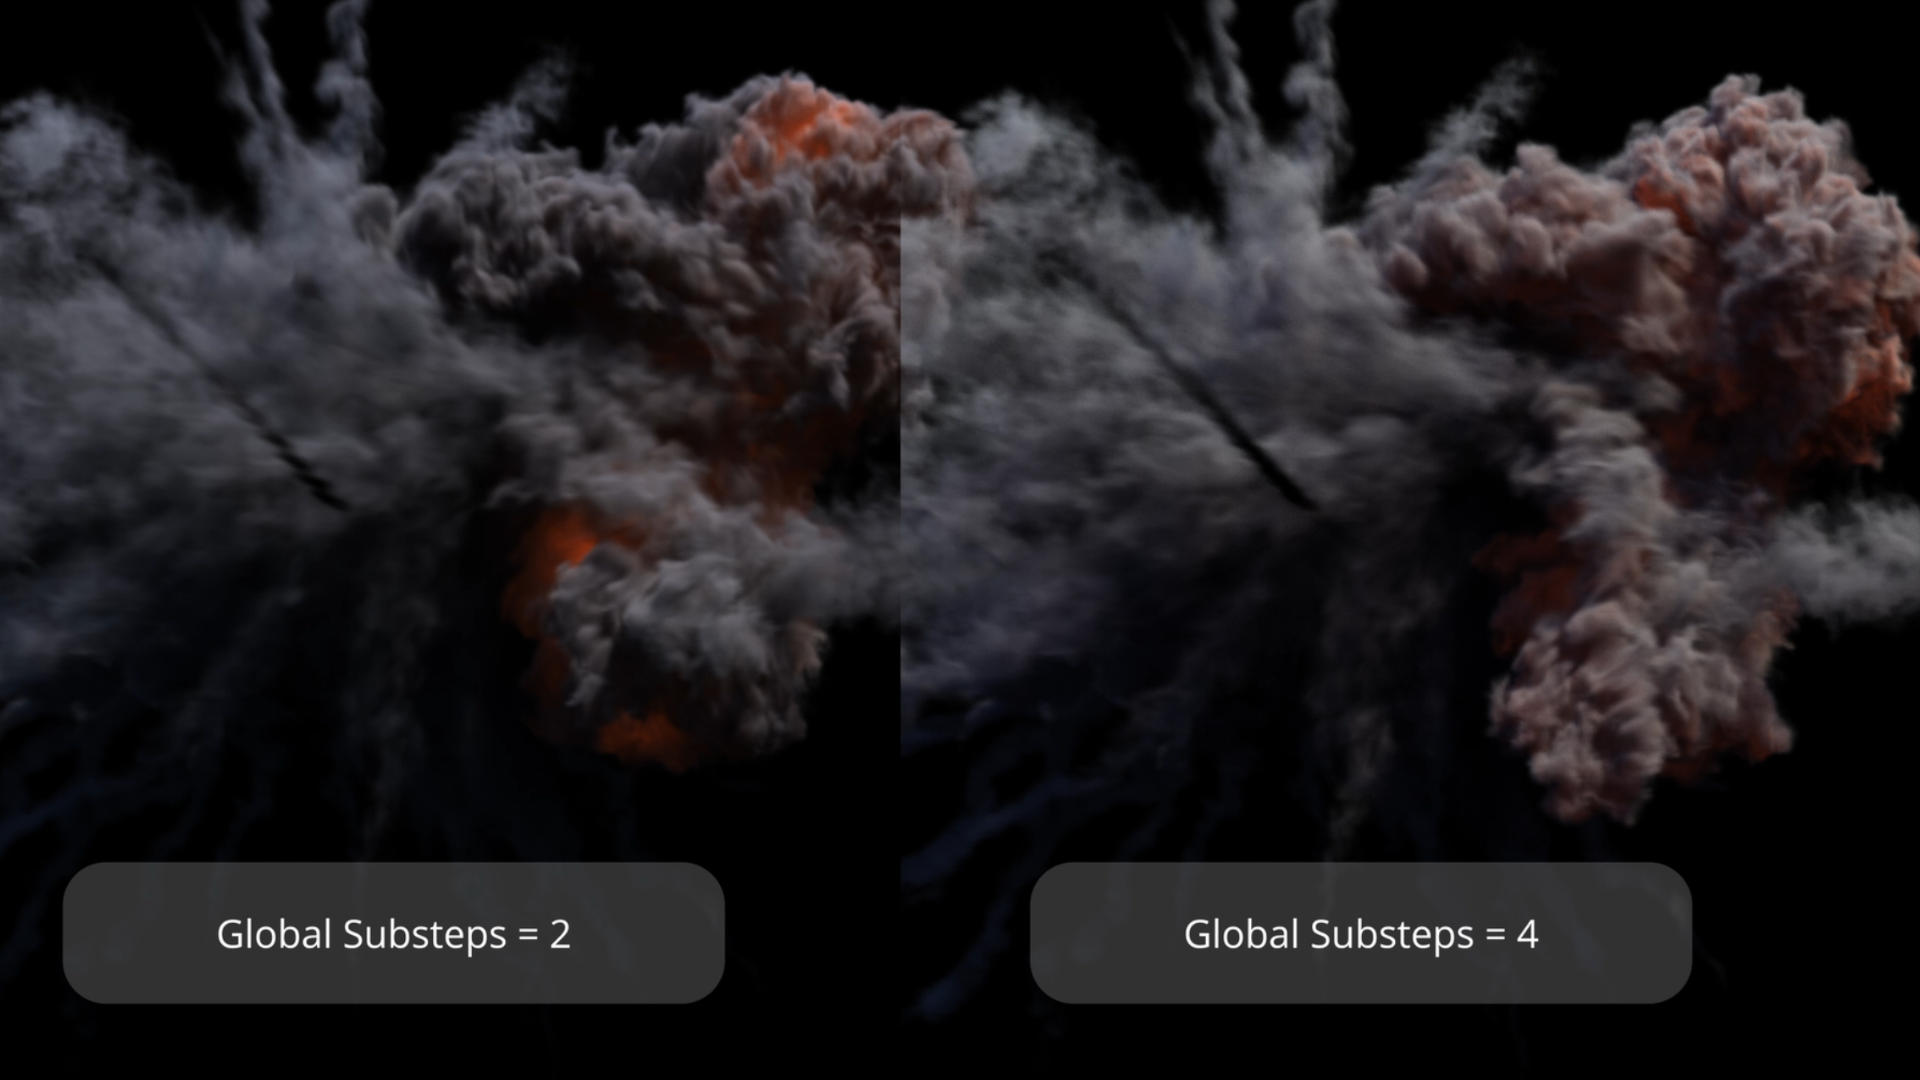
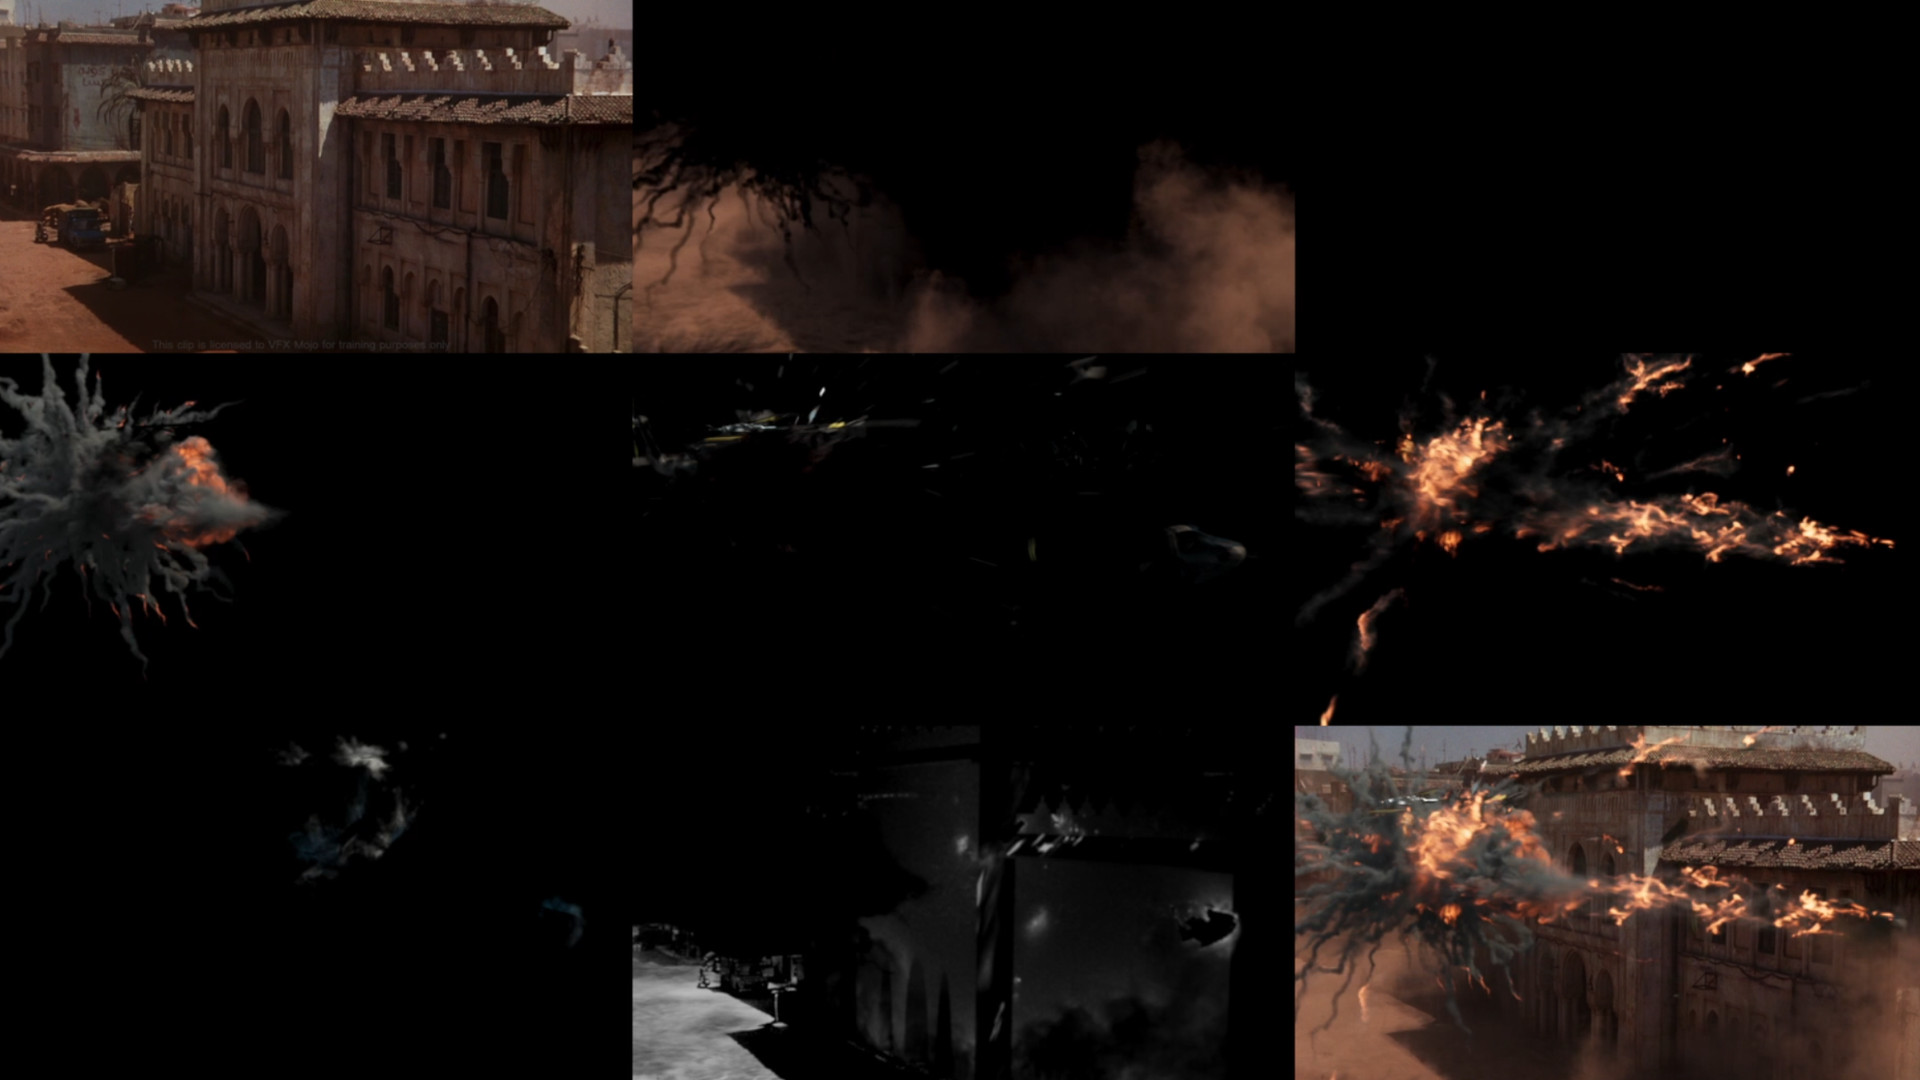
After you prepare all the static and dynamic colliders for the explosion, dive into the Pyro SOP solver. We will go through the most essential settings including pyro sourcing, disturbance, turbulence and the difference between Global and Local Substeps in the solver. Finish with Karma explosion shading and testing in LOPs.

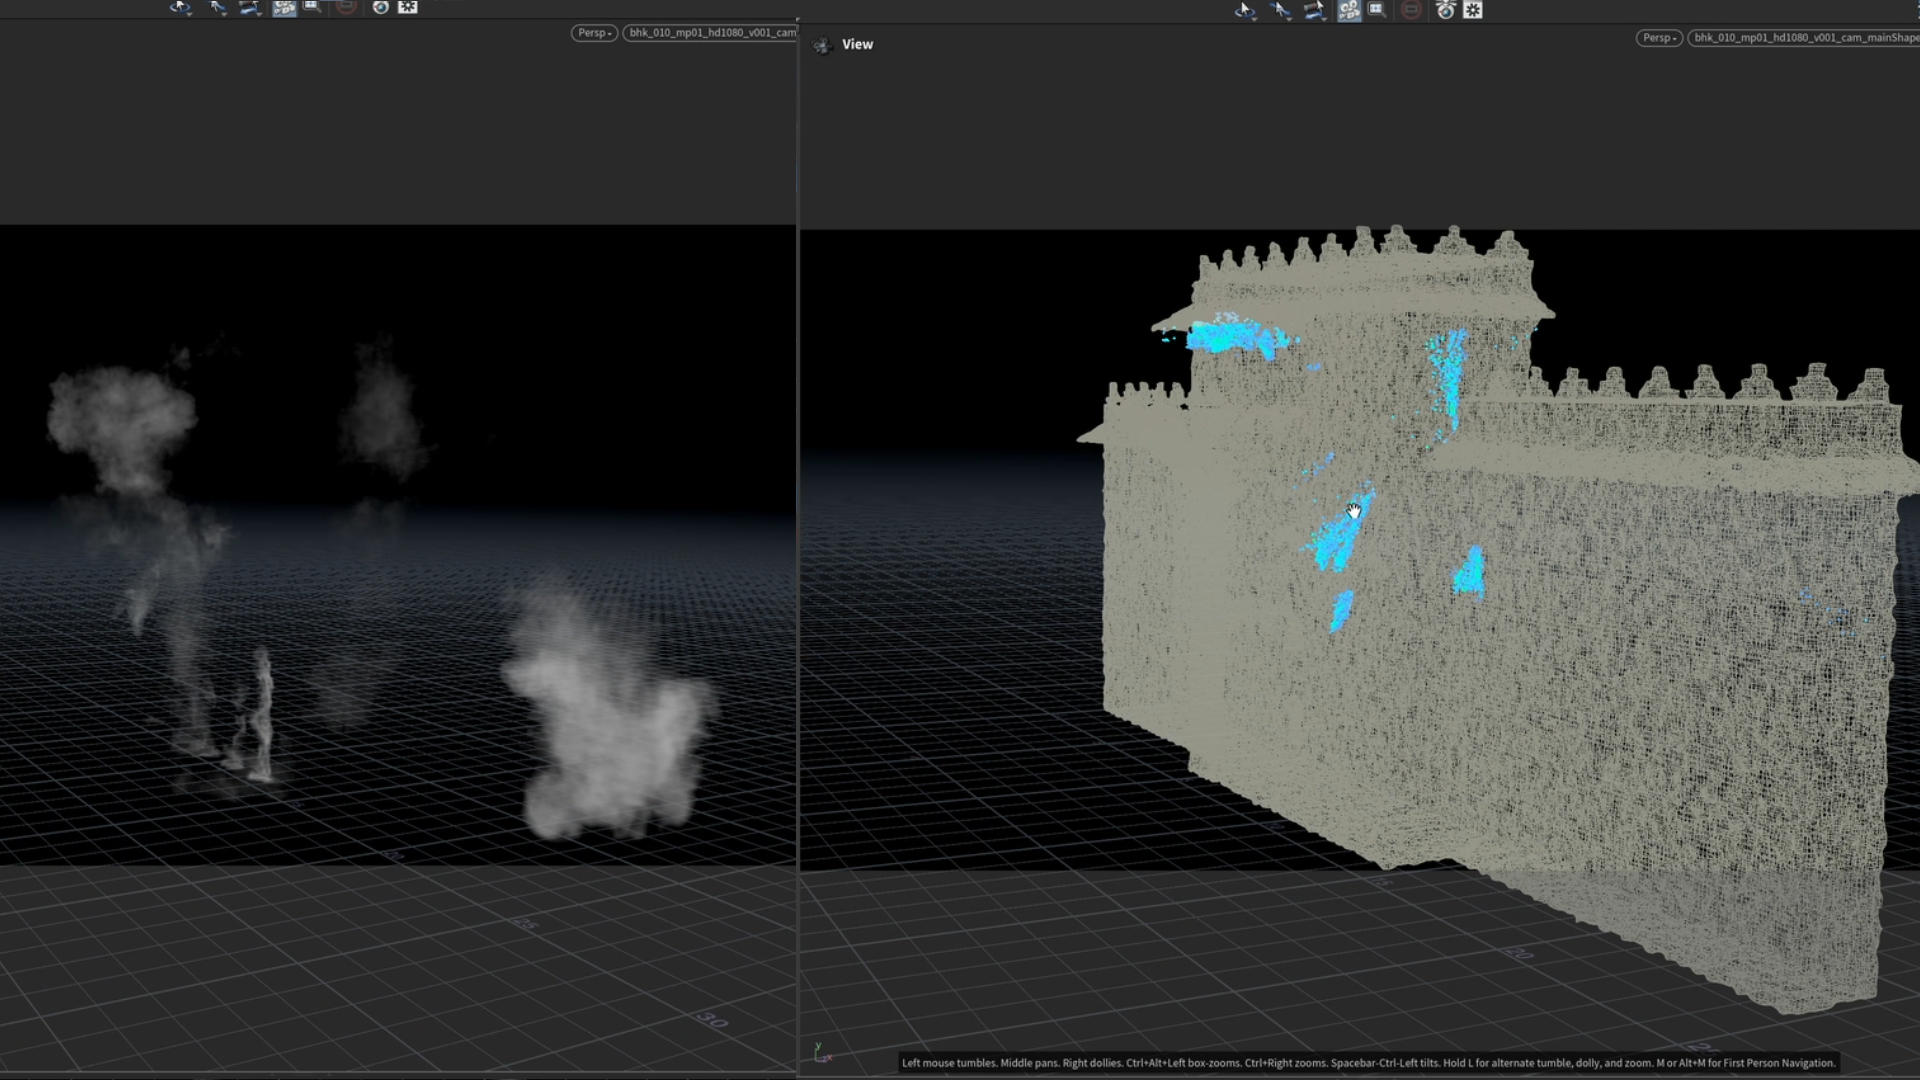
16. Debris Fire & Smoke
Create sourcing for fire and smoke from helicopter debris using custom attributes, useful VEX tricks and a POP sim. Go through the process of setting up and running the pyro sim for the fire and smoke. Create custom shaders in Karma and LOPs.

17. Helicopter Downwash & Dust
All you need to know to create a helicopter downwash dust effect: from reference analysis and procedural sourcing to Pyro Solver settings and in-solver high res sim optimisations. Explore the new Houdini 20 Pyro Solver feature of volume density influencing gravity.
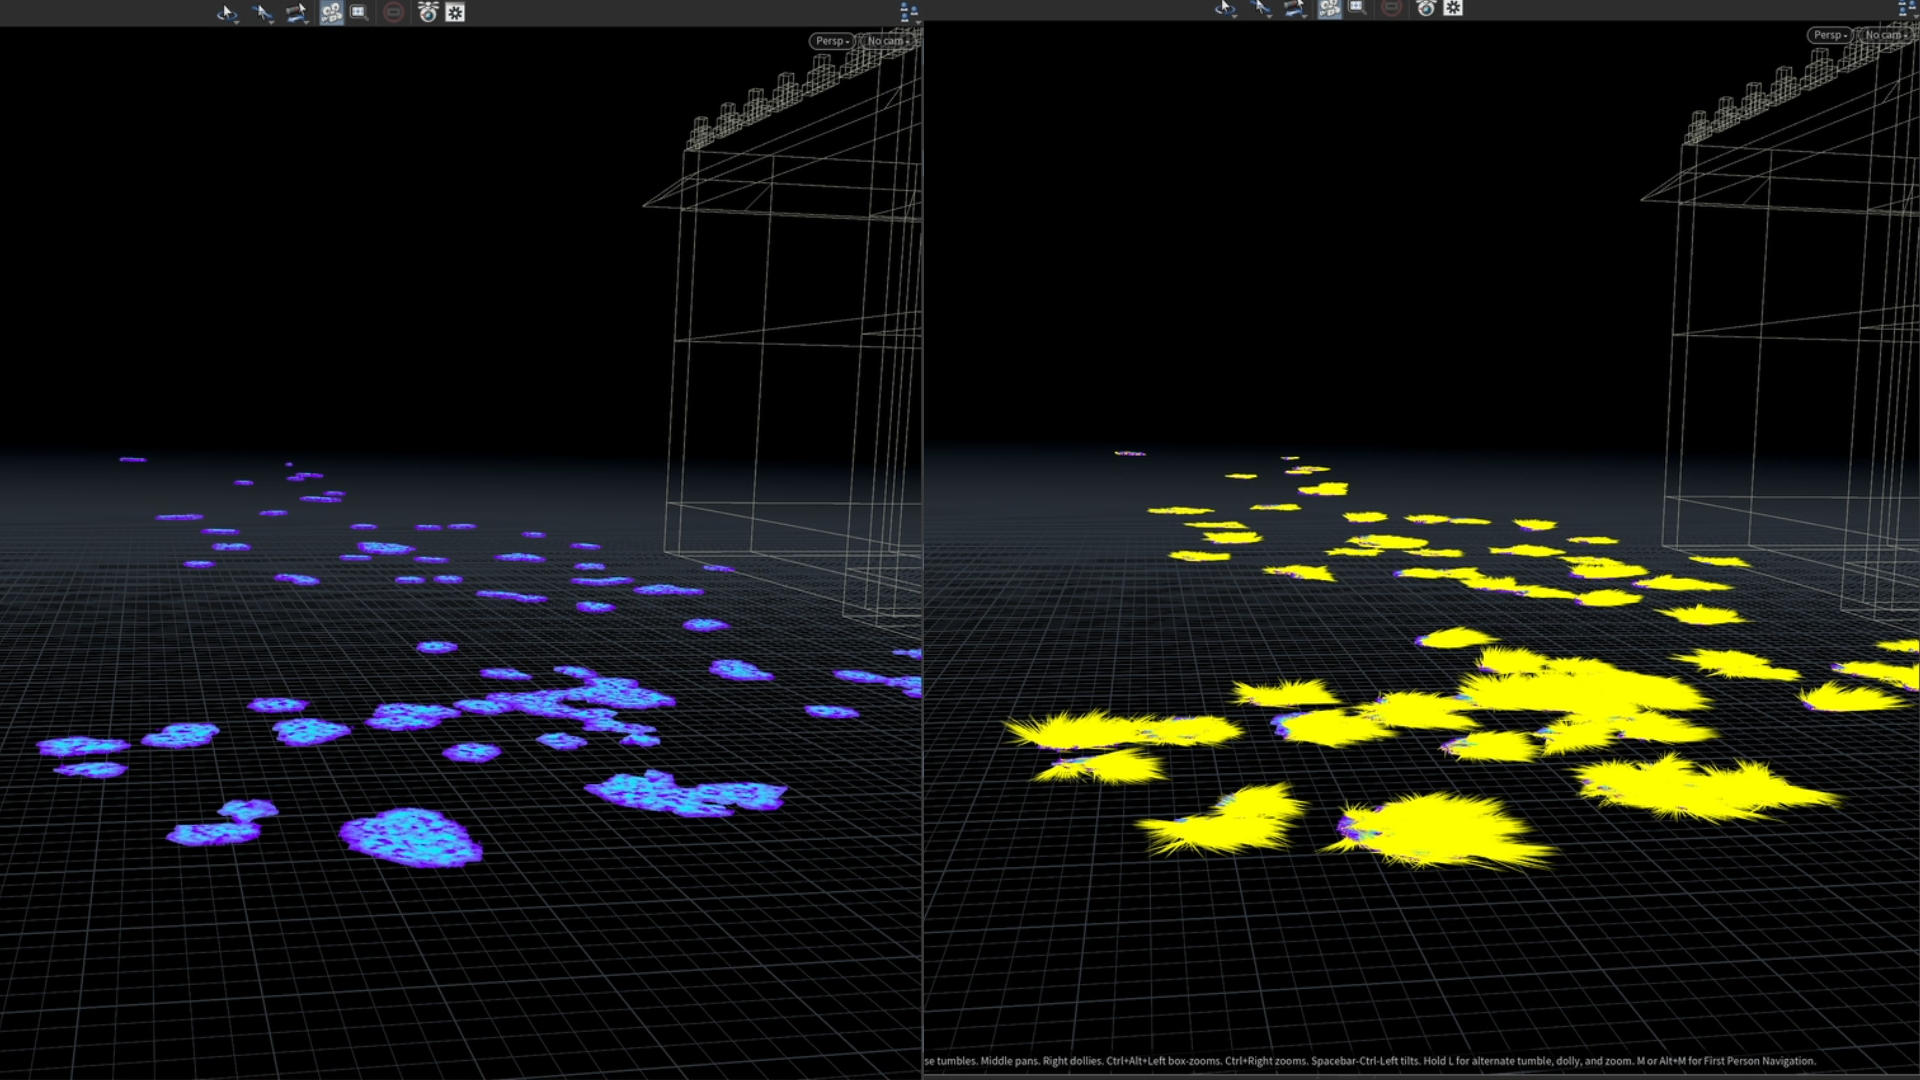
18. Dust From Falling Pieces
Create sourcing for dust from the helicopter debris pieces that fell on the ground using custom attributes, useful VEX tricks and a POP sim. Go through the process of setting up and running the pyro sim. Create custom shaders in Karma and LOPs. Explore the new Houdini 20 Pyro Solver feature of volume density influencing gravity.
19. DUST FROM BUILDING IMPACTS
Similar to the dust from the helicopter debris on the ground, create sourcing for the dust from the helicopter debris that hit the buildings. Use custom attributes, useful VEX tricks and a POP sim. Go through the process of setting up and running the pyro sim. Create custom shaders in Karma and LOPs. Explore the new Houdini 20 Pyro Solver feature of volume density influencing gravity.
RENDERING
20. Setup
Time to render everything using Karma XPU! Go through LOPs setups for several passes: helicopter RBD sim, explosion, cryptomattes, shadows.
COMPOSITING

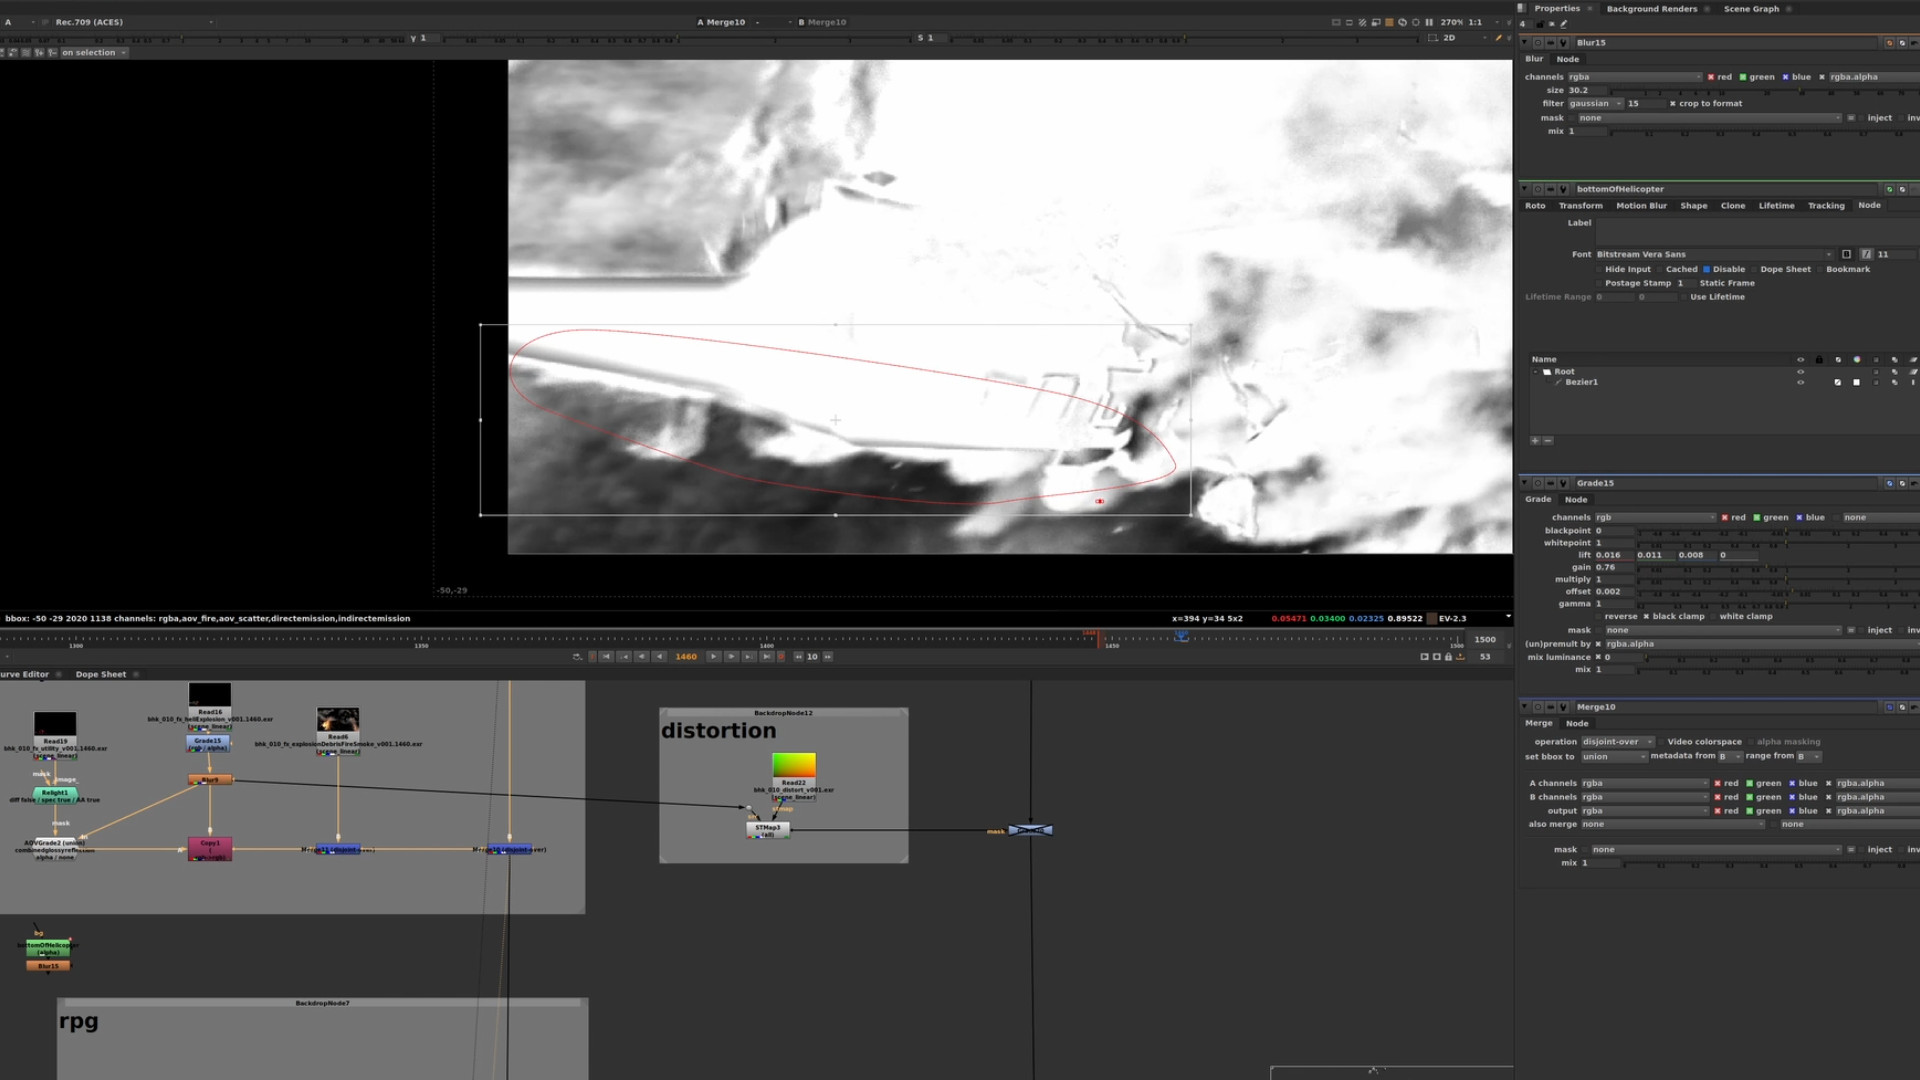
21. Setting Up
Set up Nuke, inspect the Houdini render and arrange your Read nodes
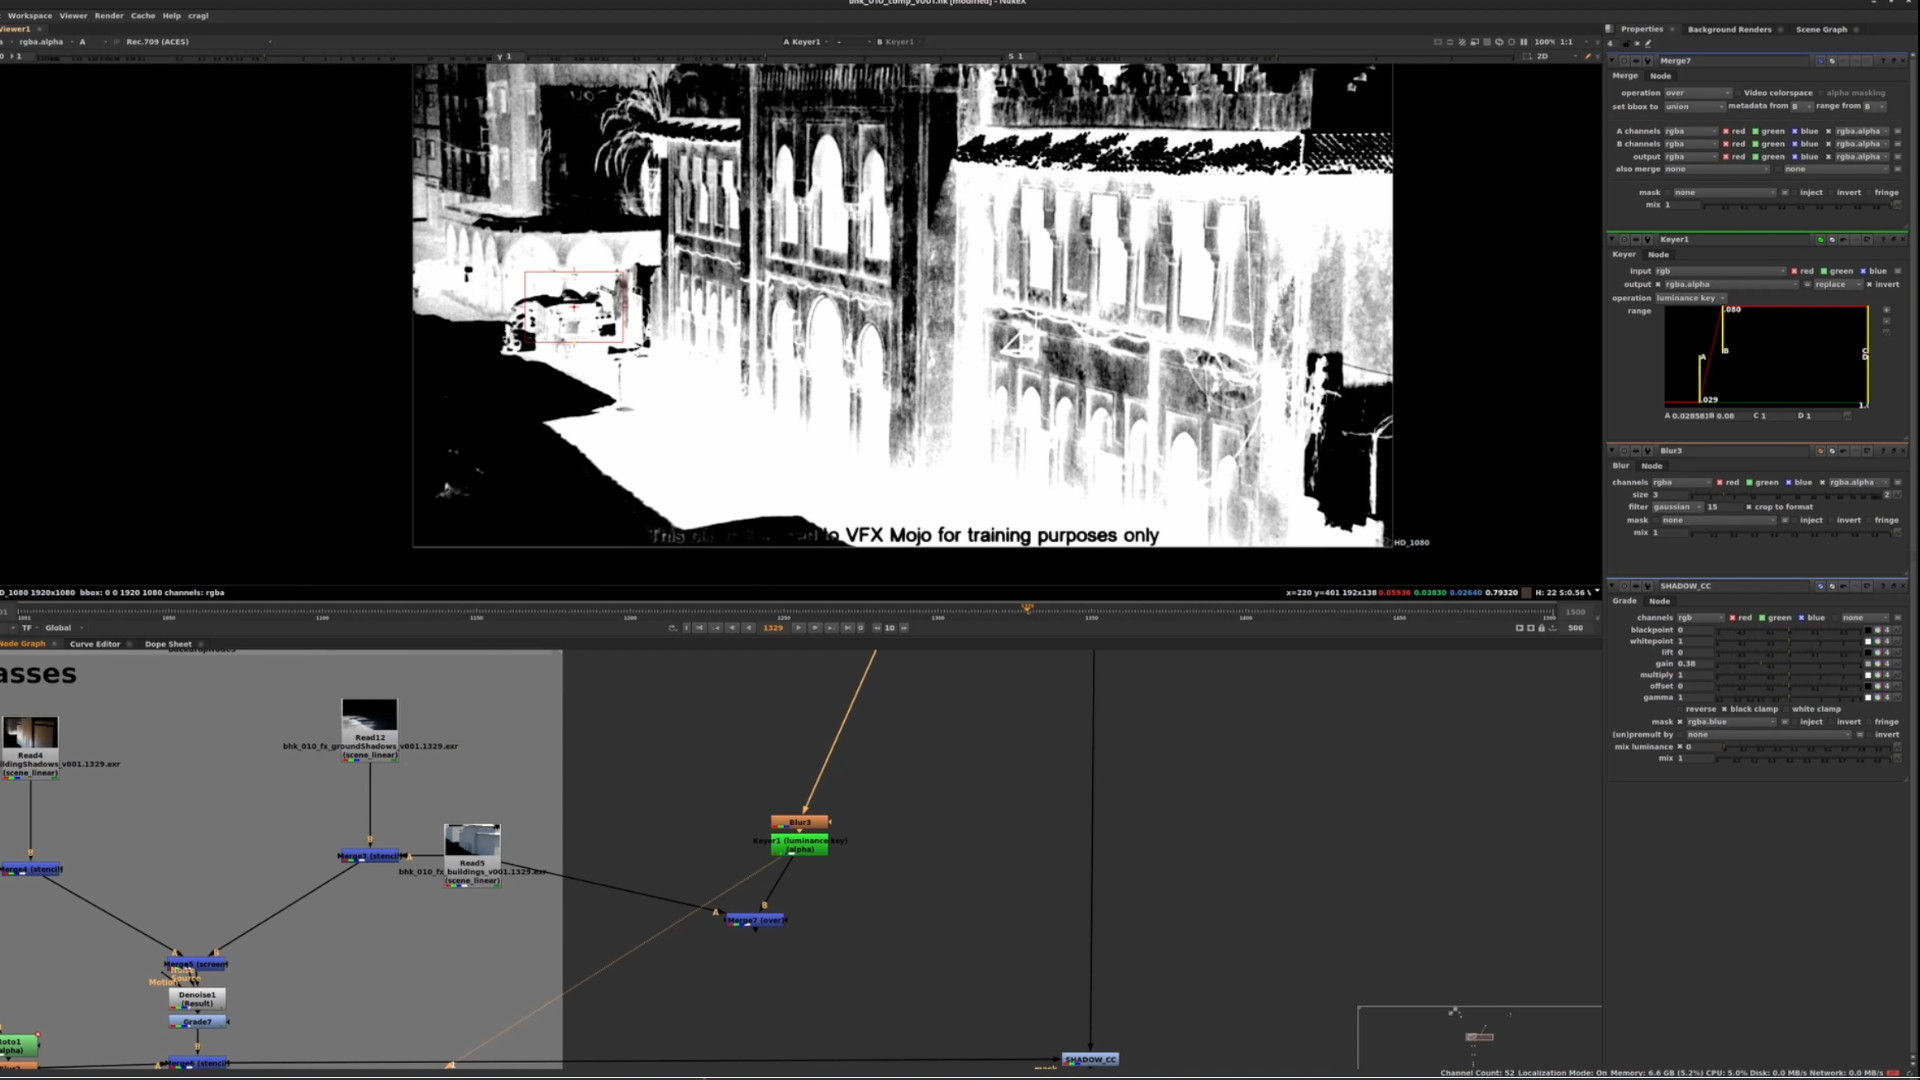
22. Shadows
Assemble the shadow passes, process them to be used as masks, and ccolor grade the plate.

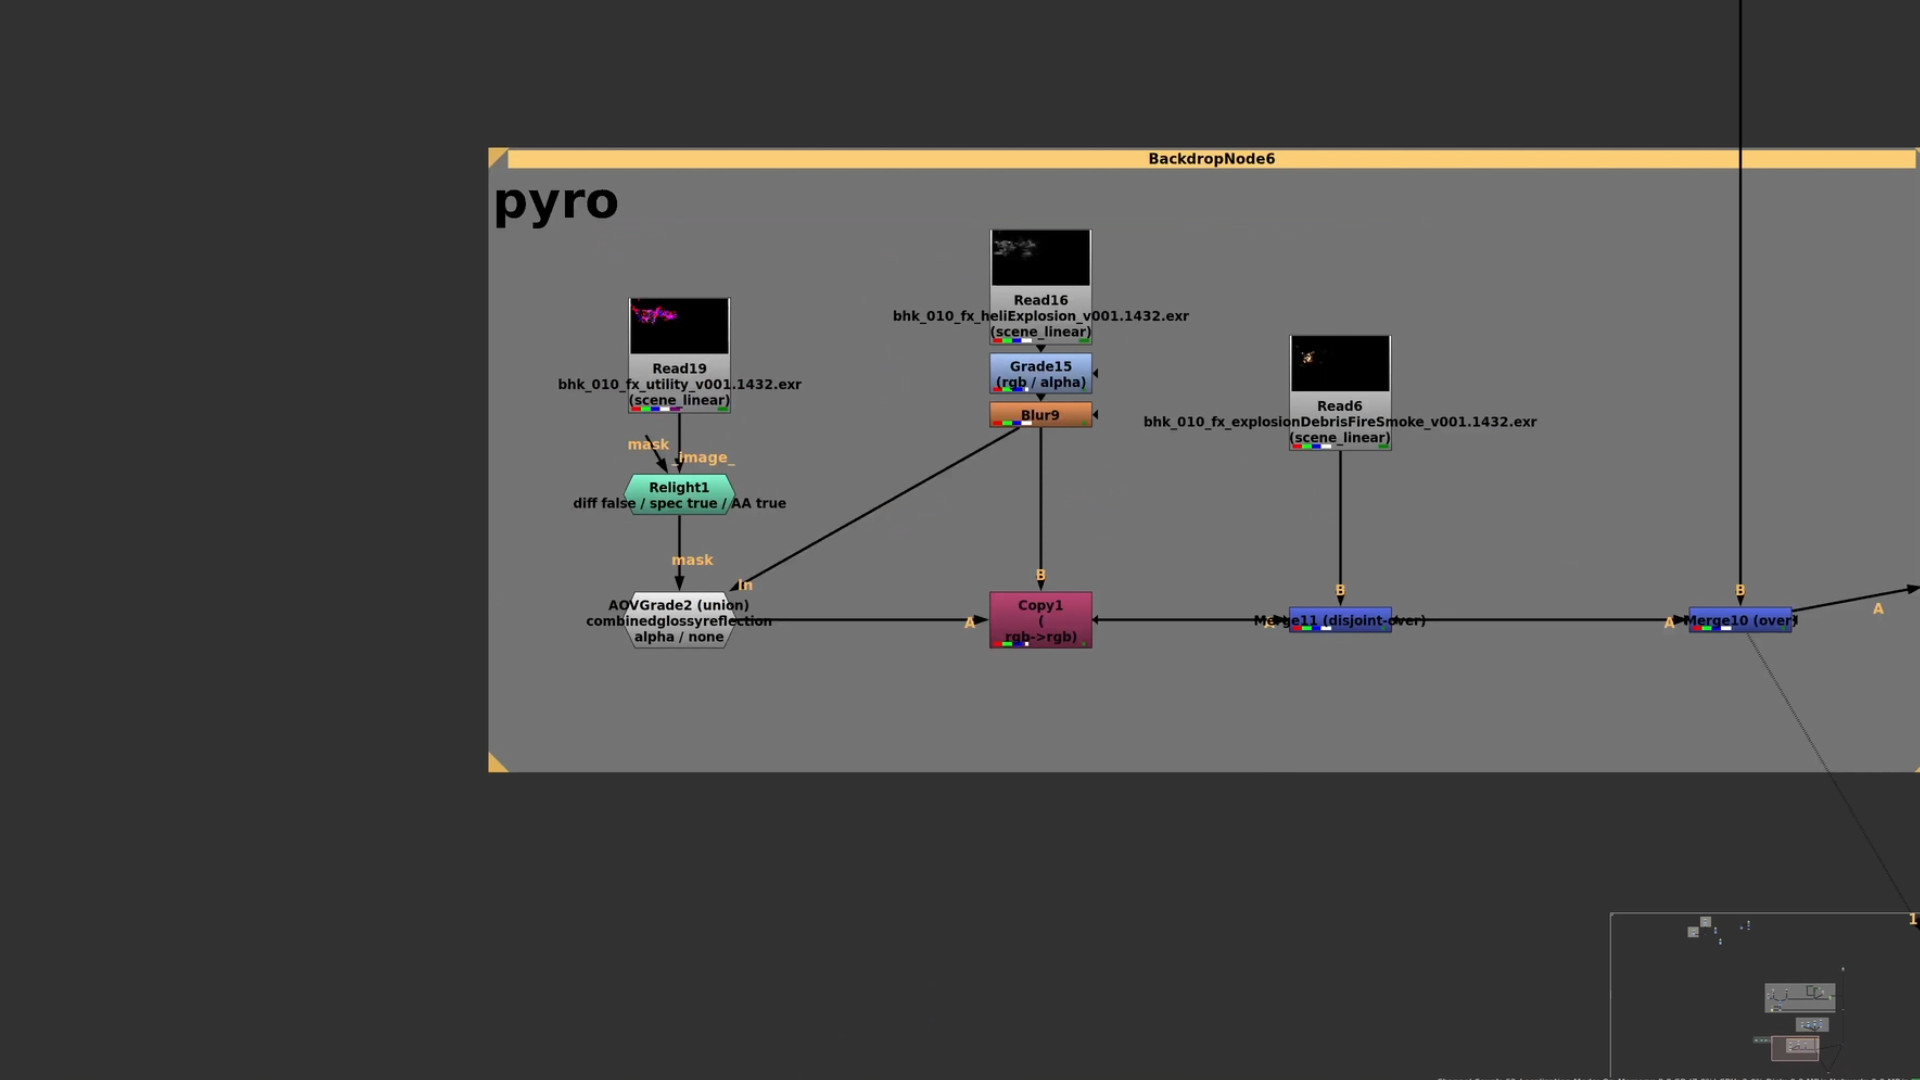
23. Pyro Renders
Color correct each Pyro render and composite them all into the plate.
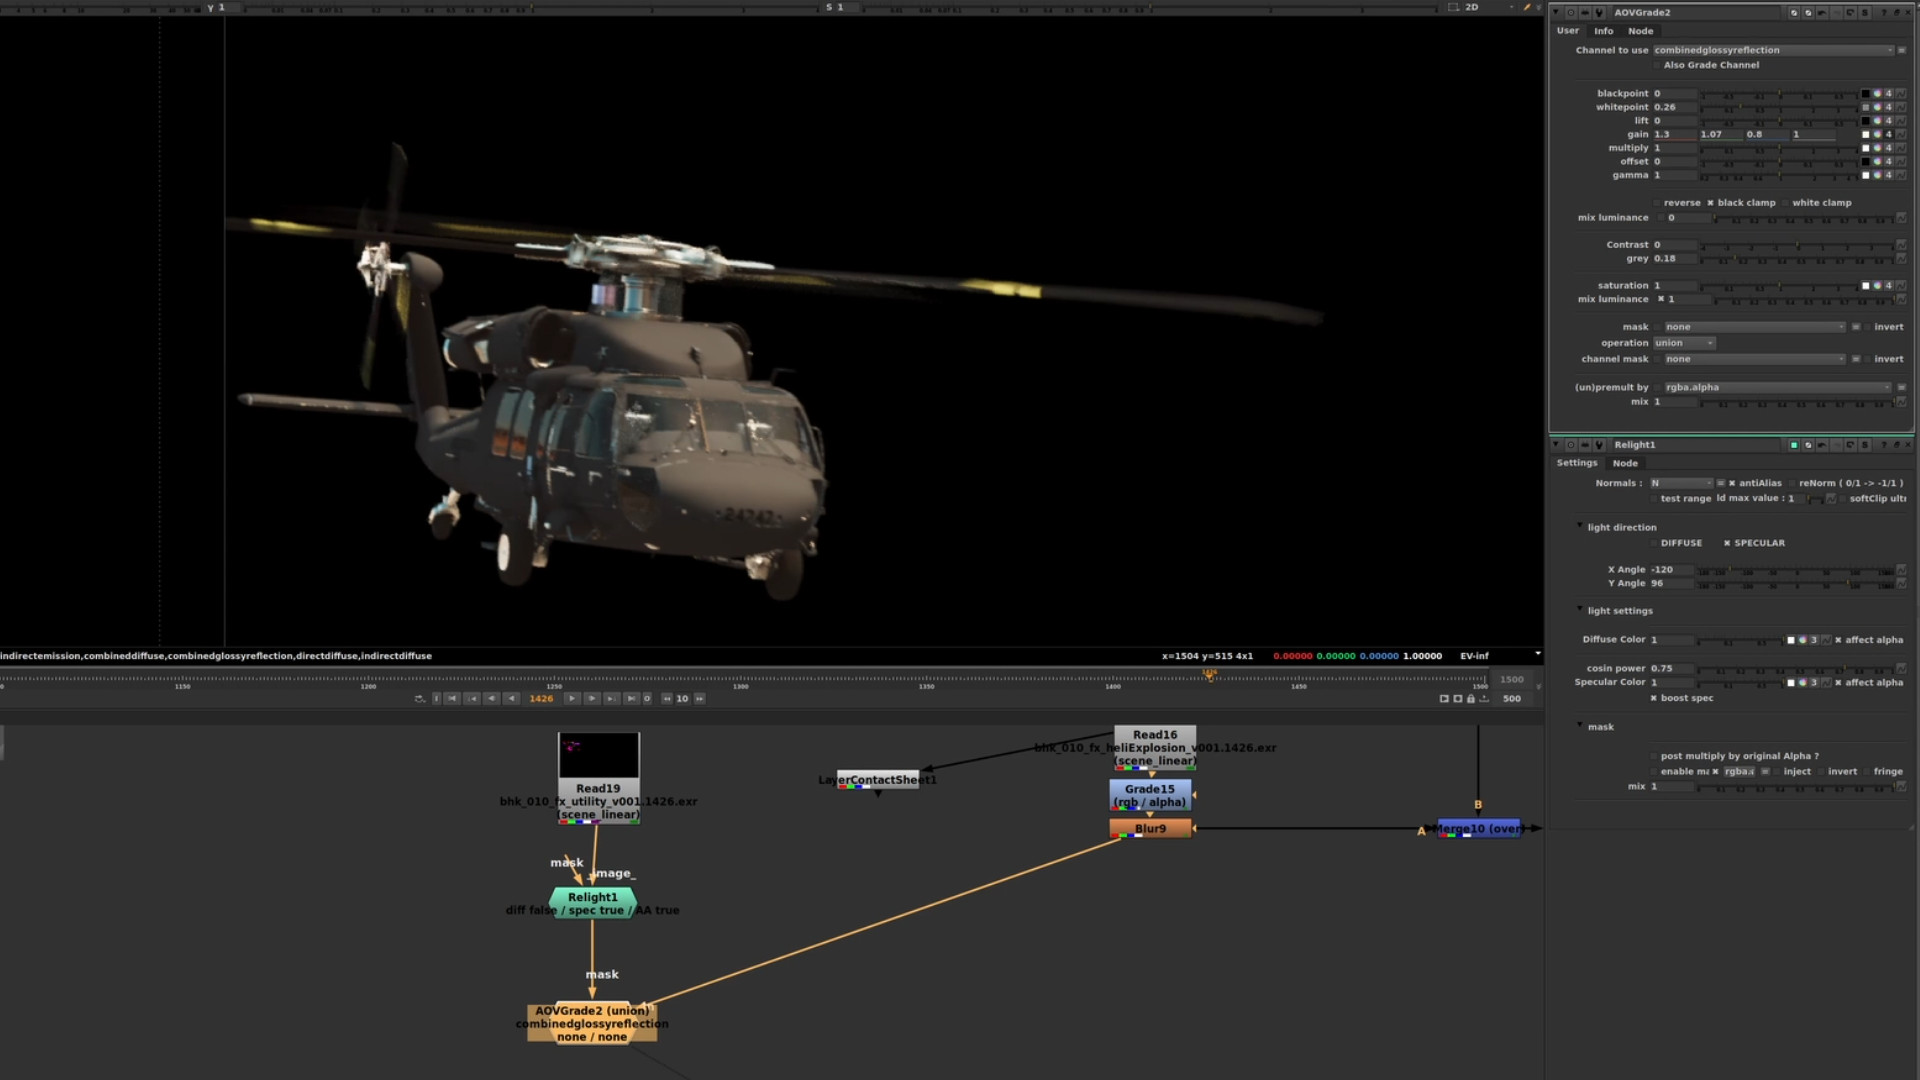
24. Helicopter
Color correct the helicopter and use the utility pass for selective grading.
25. Explosions
Set up Nuke, inspect the Houdini render and arrange your Read nodes.
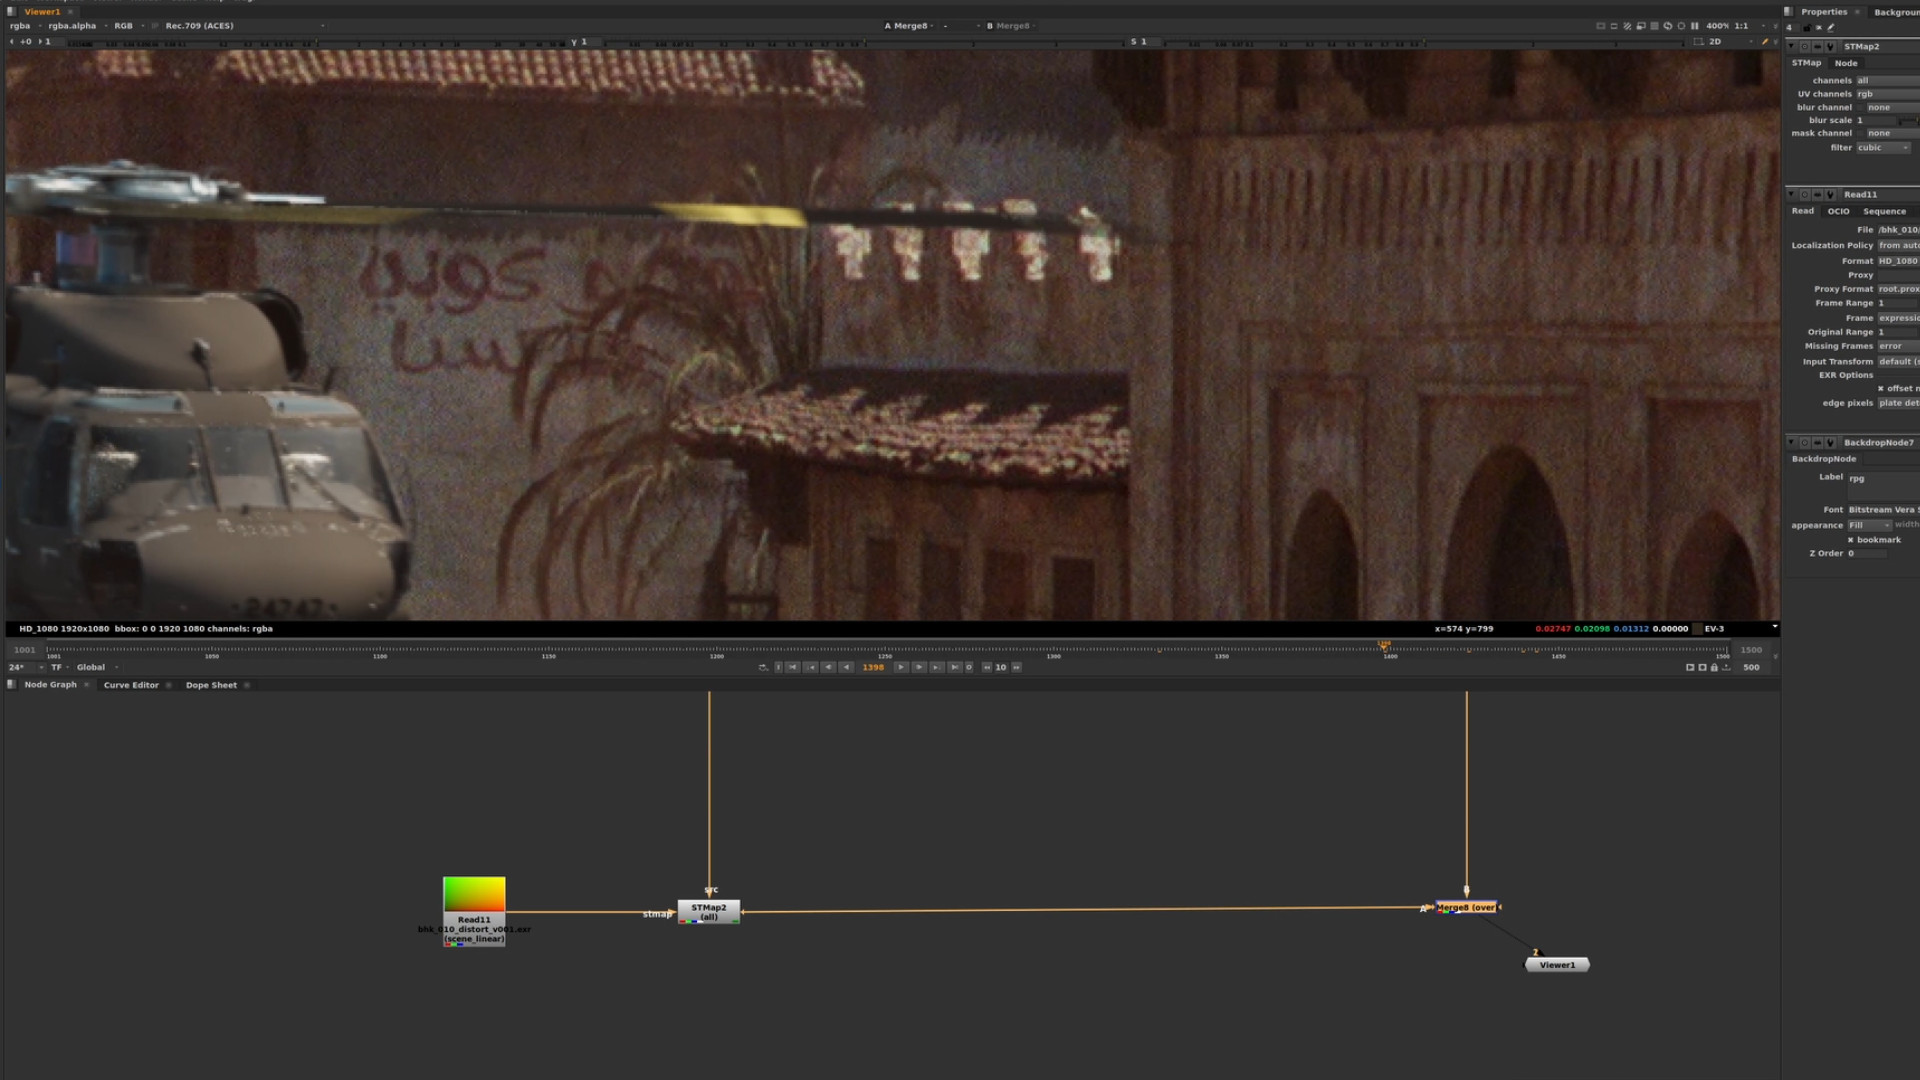
26. Lens Distortion
Use the supplied STMap to apply lens distortion to the CG renders.
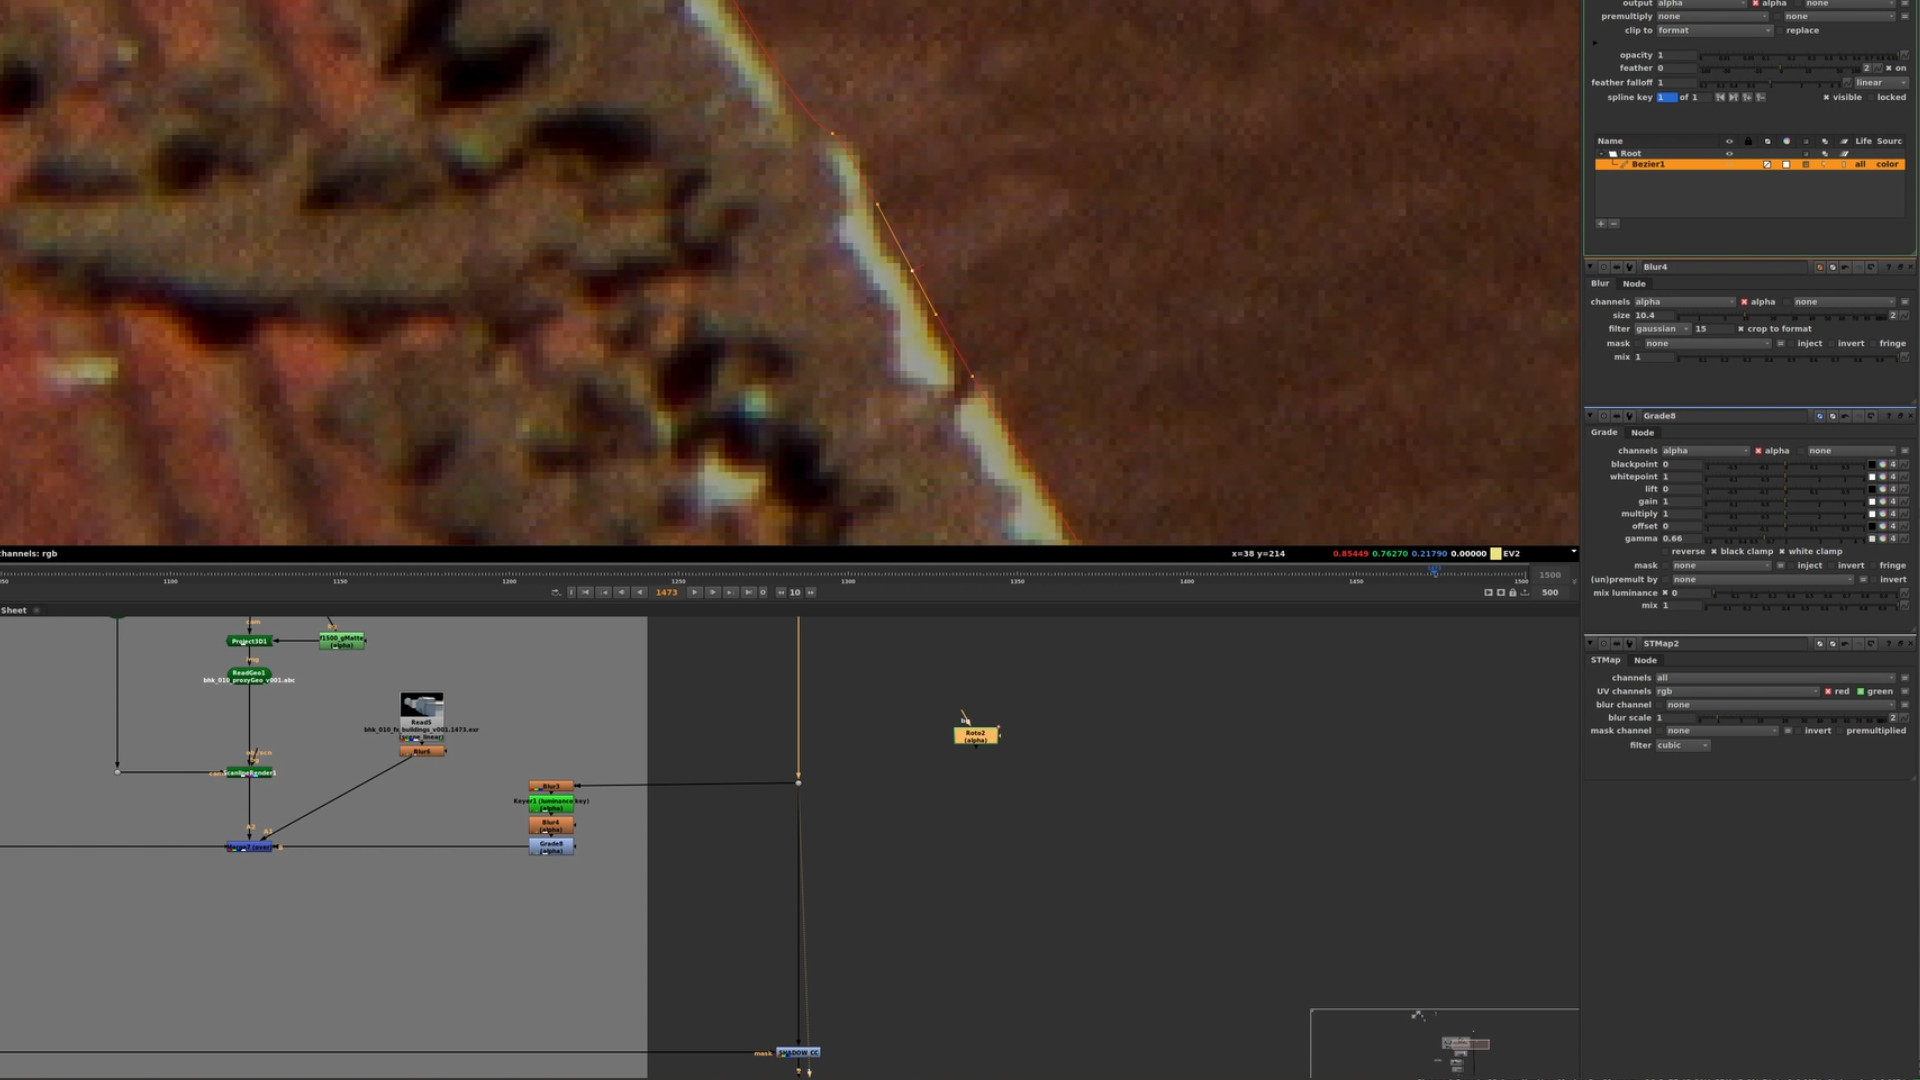
27.Wall Roto
Create and track a roto to improve the layering.
28. Film Grain
Replicate the plate’s film grade and aplly it to all the CG elements.
29. TECH FIXES
Fix issues using tracking, warping and grading techniques.

30. Rendered Comp
Review of the final composite.
VFX MOJO
VFX Mojo develops training programs tailored for visual effects artists, video game artists, and content creators seeking to enhance their skills in SideFX Houdini. Our experience in conducting various workshops, seminars, talks, and courses, both in-person and online, encompasses a wide range of topics, from fundamental concepts to advanced techniques like RBD, Pyro, Terrains, Vellum, and other production-proven methodologies. Furthermore, we specialize in creating custom training curricula for universities and studios globally.
www.vfxmojo.com