|
Houdini Engine for Unreal
|
|
Houdini Engine for Unreal
|
Curves are a very usefull way to control the way your asset behaves in Houdini, as they can be displayed and manipulated easily in the Unreal Engine viewport.
Houdini Engine for Unreal currently allows you to either use Houdini Curves or Unreal Spline Components as a method to control a Curve SOP in your Houdini Asset. Houdini Curves can be created either by using Input Curves or Editable Curve Nodes.
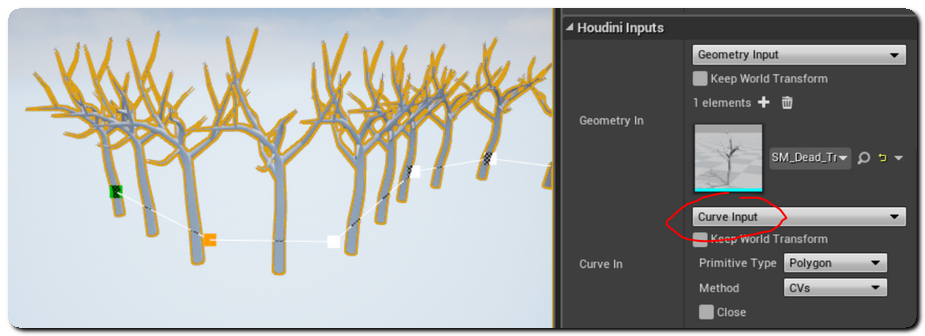
One of the way you can use a Houdini Curve to control your asset is by using Curve Inputs. This can be done either by creating a Node Input or an Object Path Input and changing its type to Curve.
The curve will then be displayed in the editor viewport, and can be edited directly there. You can also change curve parameters like its primitive type or method in the details panel.
For more information, please consult Curve Inputs.
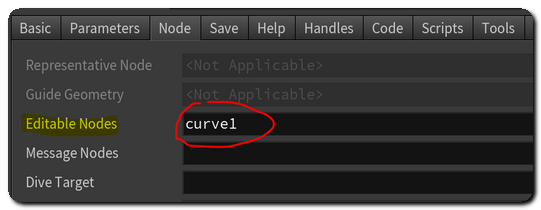
Another way to make Houdini Curves editable in Unreal, is by making the Curve SOPs editable. To do so, you just need to add the Curve SOPs to the Editable Nodes list of your asset.
The Editable Nodes list can be found in the Node tab of the Type Properties dialog of your asset in Houdini. Multiple curve nodes can be made editable that way, and will appear in Unreal.
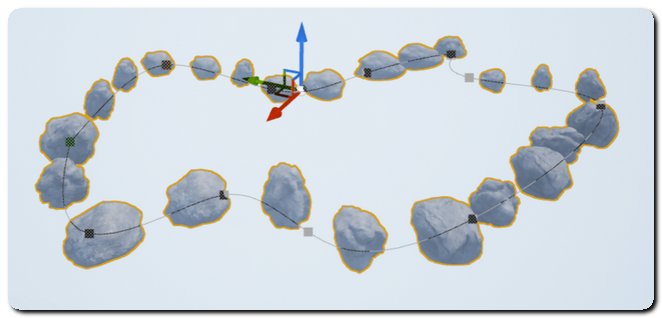
In Unreal, editable curves will appear in the editor viewport, and can be edited directly there.
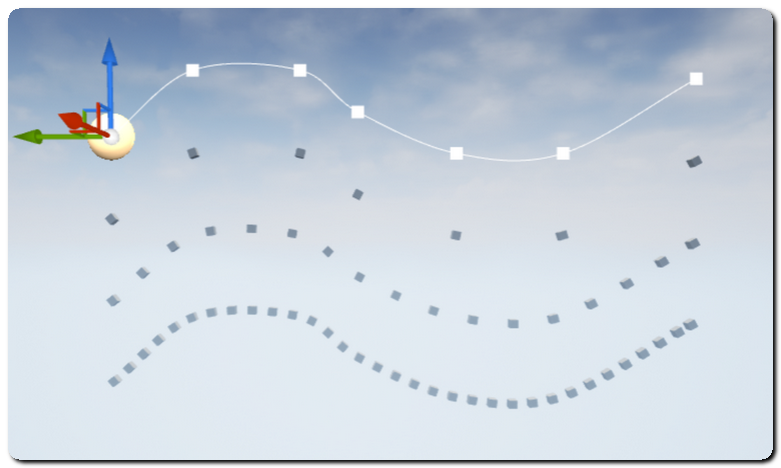
When an Houdini Asset exposing a curve is selected, its curves and their control points will displayed in the editor viewport. The curve and its points will be grayed out when the whole asset is selected.
You can edit the curve by clicking on the curve points, and by using the standard Transform Gizmos to either scale, rotate or move them around.
To create a new point after the current selection, press Alt when translating. Pressing the Del key will remove the currently selected points from the curve. These actions can also be done directly from the context menu displayed when right-clicking on a curve point.
The first two points of the curves will be respectively colored in green and orange to better show the direction of the curve. This is especially usefull when using a closed curve.
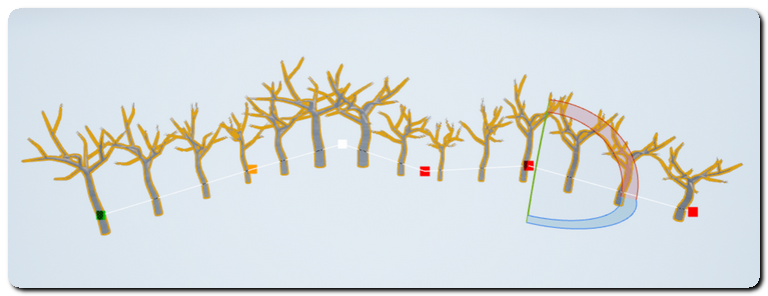
Rotation and scale of each control point of the curve can be modified in Unreal using the scale and rotation gizmos. The rotation and scale values will appear as the standard rot and scale points attributes in Houdini.
If you want, you can also use Unreal Spline Components to control a Curve SOP in Houdini.
This can be done by using an Actor with a Spline Component attached to it with a World Outliner Input. Using Unreal Spline Components is a great way to reuse your existing splines directly with Houdini Assets, and can also be used to share curves between multiple assets.
As Unreal's spline interpolation cannot be reproduced perfectly in Houdini, the Spline is resampled to its refined position when marshalled to Houdini and converted to a linear Curve SOP. The Unreal Spline Resolution parameter on the World Outliner Input allows you to choose the sample length used to resample and send the refined positions to Houdini.
The default value of 50 will extract a spline point every 50cm in Unreal and marshall it to Houdini. If the spline resolution is set to 0, only the spline's control points will be marshalled. The first and last point of the spline are always marshalled to Houdini.
Rotations and scale of each spline points will be available in Houdini as the standard rot and scale point attributes.
With Houdini Engine for Unreal, both Houdini curves and Unreal splines will generate curve SOPs, whose points will contain additional rot and scale point attributes.
These attributes give you additionnal control over your assets, by allowing you to manipulate them with the standard gizmos in Unreal.
However, as Curve SOPs traditionnaly do not have these attributes, their presence may sometimes cause side effects if your curve nodes are processed by nodes that will use them.
A simple example of this is a Sweep node, that uses a curve as its backbone. Even without modifying the curve's point rotation in Unreal, the added rot attribute might change the orientation of the geometry being swept on the curve.
To solve this issue, you might need to rotate the input geometry to account for the added rot parameter, or you can simply remove it from the curve with an Attribute Delete node. (in the case of the Sweep node example, using the "Transform using attributes" parameter will also fix the issue.)
 1.8.6
1.8.6 
