You can create a basic heightfield and use other nodes to refine its look. Then you can also import displacement map and elevate the base grid. Another method is to draw and paint heightfields directly inside Houdini. Heightfield painting is perfectly suited for creating trenches, riverbeds, and elevations in particular areas. Instead of height information you can also paint masks to spare out certain areas from being modified. This way you can, for example, draw streets.
When you paint a heightfield, you normally don’t draw each and every tiny detail. Instead you paint a basic shape and then you start working on the heightfield through noise, erosion, etc. to make your landscape look natural.

Example: Riverbed 
The following basic example illustrates how to paint a dry riverbed and blend it with various nodes to add surface detail. In this scene you’ll make use of Houdini’s drawing features to paint the terrain and a mask that defines where terraces will appear. You’ll also reuse the mask to drive erosion.
Let’s start with the terrain.
-
On the obj level, press ⇥ Tab to open the tab menu. From there, create a
 Geometry OBJ. Double-click the node to dive inside it.
 -
Lay down a
 HeightField SOP and change its Grid Spacing to
 1to get enough detail. -
Add a
 HeightField Paint SOP and connect its input with the output of the heightfield node.
 -
Go to Layer. By default, the node lets you paint a mask, but here we want to create a riverbed. From the parameter’s associated dropdown, choose
heightto replace the default entry. -
For FG Value, enter
-60to create an impression. Positive values, however, let you paint hills and elevations. -
Hover the mouse cursor over the viewport. Press Enter to turn on the paint mode and to see a spherical brush. You can change the size of the brush interactively by scrolling the
 up (bigger) or down (smaller).
 -
Press ⎋ Esc to leave the drawing mode.
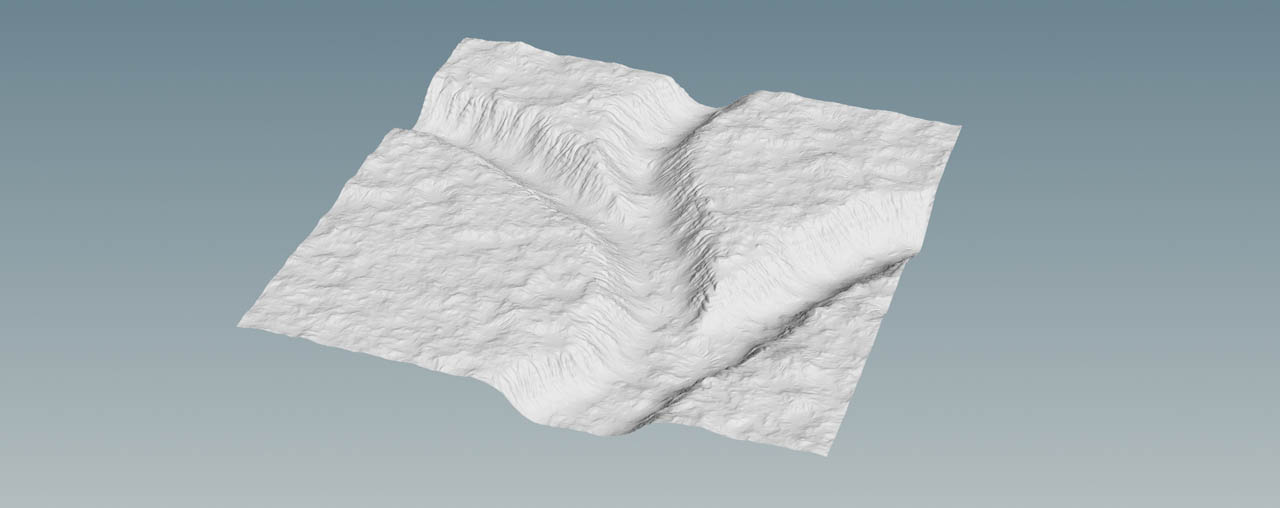
You’ll immediately see the result of your action and a canyon-like structure. You can add as many strokes as you want, change the brush size with each new stroke or alter parameters like Opacity.

Blurring 
A closer look at the riverbed reveals a flat area at the bottom, although Soft Edge is already set to 1.
-
To fix the edges, add a
 HeightField Blur SOP. Connect its first input with the output of the paint node.
 -
Change Method to Box Blur. This mode creates slightly better results, esp. along the hard edges at the bottom.
-
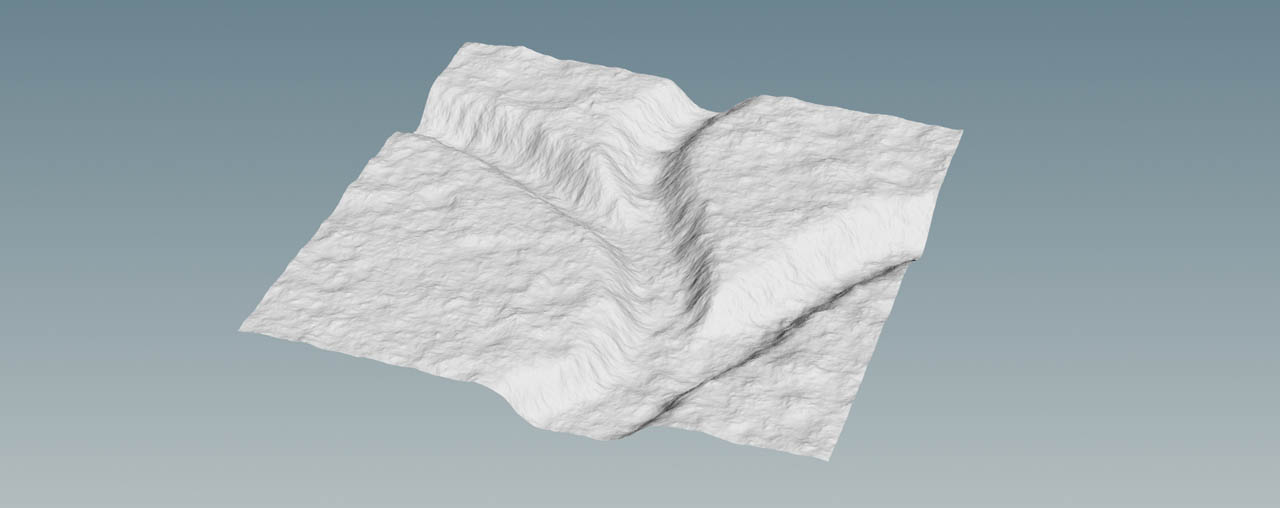
Drag the Radius slider to the right to increase the value until the edges are completely smooth.
Adding structures 
Right now, the terrain completely lacks surface structures. The advantage with procedural node-based systems is that you can add nodes anywhere in the network. Heightfields are no exception and you can chain as many nodes as required to create complex landscapes. The layer system in heightfields also allows for the manipulation of selected parts through masks.
In this example, you’ll add distortion, terraces, noise and erosion. A mask will help you to apply the erosion effect only to the hillsides of the trenches.
Noise and distortion 
Noise is the most fundamental method to create a terrain. In this example, noise should be moderate to keep the look of the trenches. With high settings you will distort the trenches and destroy the impression of a riverbed that dug its way through a large mesa.
-
Add a
 HeightField Noise SOP and connect its first input with the output of the terrace node.
 -
To roughen the terrain, set Amplitude to
40and Element Size to75. -
Then, lay down a
 HeightField Distort SOP and connect its first input with the noise node’s output.
 -
The goal is to add more structure to the terrain, but keep its character. A moderate Amplitude of
4and an Element Size of50create nice results.
Masking 
In this step you’ll paint one common mask to drive terracing and erosion. The process of painting a mask is almost identical with terrain painting.
-
Lay down another HeightField Paint SOP and connect its input with the output of the HeightField Distort SOP. The difference to the first draw node is that you’ll be drawing on the
masklayer instead of theheightlayer. -
Hover the mouse over the viewport, press Enter and start drawing as before. Press ⎋ Esc to confirm your work.
-
Add a
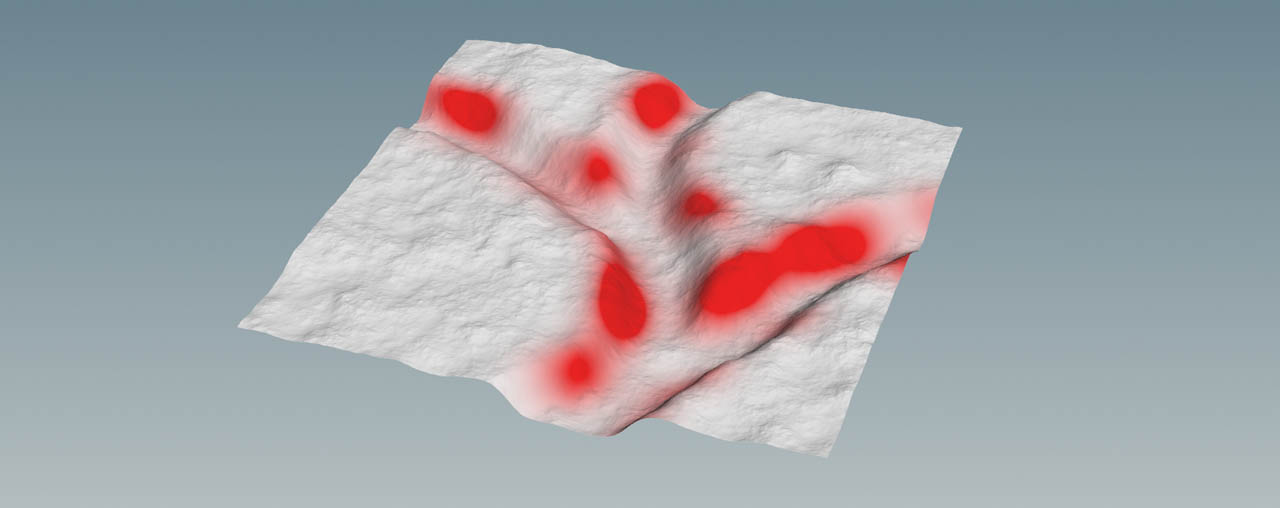
HeightField Mask Blur SOP and connect its first input to the new paint node. Change Radius if necessary to get a smoother mask.
Below you can see a possible result. You might have noticed that the mesa parts are completely spared out to prevent them from becoming eroded.
Terracing 
The next structures you're adding, are terraces. In nature, rocks from lower layers are compressed through overlaying layers and therefore harder. The softer upper layers are eroded faster and create terraces. You can mimic this effect in Houdini.
-
Add a
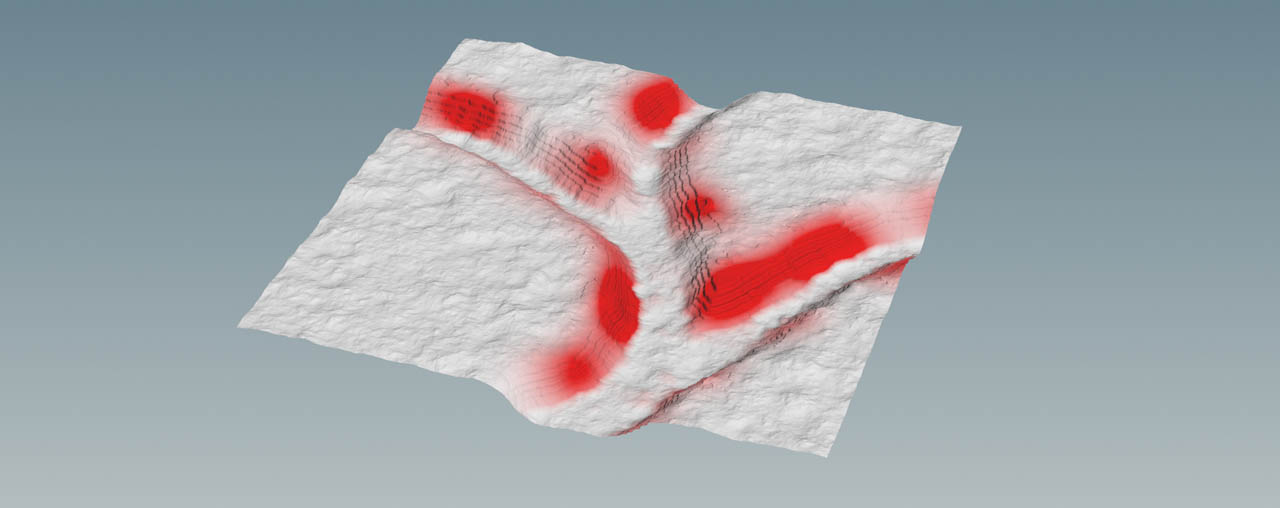
 HeightField Terrace SOP and connect its first input with the output of the upstream HeightField Noise SOP node. Link the second input to the output of the mask blur node. Now, the terraces will only appear inside the red areas.
 -
Click Compute Range. This button calculates the height range where the terraces will occur to give you an idea about the terrain’s vertical dimensions. Use Min Height and Max Height to determine, where you want to create terraces.
-
Max Step Size changes the number of terraces. With smaller values you create more steps.
-
To get rid of the hard edges, increase Smooth Edges, but don’t overdo the effect: later, when you apply erosion, the terraces will become smoother as well.
-
There’s also a hard transition from the terraces to the terrain. To get a smooth transition, open the Terracing tab and go to Fade Ramp. Click the
 Presets button to see a list of predefined curves. For this terrain the Valley preset is perfectly suited. The curve smooths the bottom and top terraces, but maintains the look of the inner layers.
Erosion masking 
Erosion is the result of external influences like water, wind and temperature. Wind and water carry away the debris. The movement makes the stones smaller and smaller and finally they become sand. In riverbeds you can often observe accumulations of sand near boulders or ditches, because the sand is heavier than water. This difference lets the sand sink and settle. On the land, however, sand is transported by wind and comes to rest when there’s an obstacle. This can results in dunes.
In this scene, erosion will be limited to the slopes of the trenches through the already existing mask.
-
Add a Heightfield Mask Expand tool from the tab menu. This tool is a preconfigured HeightField Blur SOP, where Method is set to Expand. Connect its first input with the output of the terrace node.
When you go to Blur Layer, you will see that the default entry is
mask. Leave the default, because it already specifies the mask from the terrace node. -
Increase Radius to control the mask’s expansion. The mask can also cover small parts of the mesa. This scene uses a value of
15. -
Lay down a
 HeightField Erode SOP and connect both inputs with the output of the blur node. Adjustments will be made directly below.
Controlling erosion 
The new HeightField Erode SOP in Houdini 21 provides a wide range of parameters that let you precisely control this process. Here, we're going to make only a few changes, because we don’t want to erode all the nice terraces.
-
Select the HeightField Erode SOP and make sure that the Solver tab is open.
-
Decrease Erosion Feature Size to
3. This value is measured in meters and creates rather narrow drains. Higher settings would wash away all fine structures. -
For Flow Force, enter a value of
0.5. This is the force of erosion that’s induced by water. With values, smaller than1, the drains won’t be so deep.
As you can see, the terraces “survived” the erosion process, but not completely, and you can still guess their shape.

Adding details 
-
Put down a
 HeightField Mask Clear SOP and connect its input with the output of the erode node to set all
 maskvalues to zero. -
Add another HeightField Distort SOP and connect its first input with the output of the mask clear node.
-
Set Amplitude to a moderate value of around
6. -
Increase Element Size to create slightly bigger noise patterns. Values around
120should give good results.
You can also add another erode node to make it slightly smoother, and give your terrain an even more natural look as in the image below.