| On this page |
Overview 
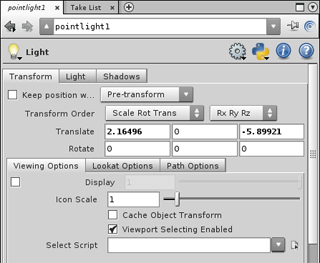
Parameters are the options on an individual node. For example, each light has a Translate parameter that controls the light’s position, a Color parameter that controls the color of the light cast, and numerous other parameters.
Editing 
| To... | Do this |
|---|---|
|
Edit a parameter value |
|
|
Undo to the previous value of a field |
Click |
|
Reset a value to the default |
⌃ Ctrl + |
|
Find a particular parameter on a node |
Click the |
|
Delete animation channels on a parameter |
⌃ Ctrl + |
|
Change a value by dragging in the viewer |
|
|
Change a value using the value ladder |
|
|
Create a new parameter editor pane that always edits at a certain node |
|
|
Create a relationship between two parameter values |
|
|
Protect a parameter from being changed |
Locked parameters have a gray background in the edit field(s). |
Entering expressions 
| To... | Do this |
|---|---|
|
Enter a short expression directly |
Type the formula directly into the parameter’s text box. |
|
Enter an expression using an editor window |
Right-click the parameter and choose Expression ▸ Edit Expression. |
|
Switch between viewing the computed value for the current frame and the expression itself |
Right-click the parameter and choose Expression ▸ Toggle Expression. |
|
View the animation curve generated by an expression |
Right-click the parameter and choose Channels ▸ Add to Channel List. |
Text box color coding 
Houdini color codes the parameter text boxes according to the current channel and keyframe status.
Background color 
Parameter background |
State |
|---|---|
Black
|
No channel This parameter is not animated. It has no channels associated with it. |
Green
|
Keyed This parameter is animated (controlled by an expression) and you are on a keyframe. |
Yellow
|
Pending changes This keyed parameter has been changed, but hasn’t been explicitly keyed. You need to explicitly key a changed parameter if auto-commit is turned off. You can set Houdini to automatically commit changes on keyframes. |
Blue
|
'Tween This parameter is animated (either with keyframes or an expression), but you are not on a keyframe. (Click the name of a parameter to switch between showing the current value and the expression.) |
Orange
|
Overridden by CHOPs This parameter is currently controlled by a channel operator (CHOP). |
Light blue
|
Muted channel This parameter is animated (either with keyframes or an expression), but the channel is muted in the |
Light yellow
|
Empty channel This parameter has an empty channel (a channel that doesn’t hold any keyframes). If you delete all the keyframes on the You can delete the channel on the parameter ( |
Purple
|
Non-default expression language This parameter uses a different expression language from the current default. Note that this does not indicate which expression language the parameter is set to, only that it is not the current default. Since the default is usually HScript, this often indicates that the parameter has a Python expression. See python parameter expressions for more information. |


Parameter underline 
The parameter editor also gives a visual hint of whether a parameter is selected in the channel list by displaying a colored underline for the selected parameters. Turn the parameter underline on or off in the Houdini animation preferences Edit ▸ Preferences ▸ Animation, option Underline in the Parameter Editor. If you turn on Use Channel Color in the animation preferences, the underline will have the same color as the channel in the ![]() graph view.
graph view.
If you turn off Use Channel Color, an orange underline will be displayed for all the selected channels in the channel list.
Parameters that reference other nodes 
In Houdini, various parameters contain references to other nodes instead of numeric or string values.
| To... | Do this |
|---|---|
|
Insert the name of a node in a node parameter |
|
|
Edit the parameters of a referenced node |
|
Copy, paste, and link parameter values 
See pasting references.
Presets 
A Preset file contains preset values for the parameters of an operator. You can use them to fill in common values, or to save important variations of a node. Saved presets are node specific.
Use the menu items in the ![]() gear pop-up menu
on the toolbar to load, save, and select presets.
gear pop-up menu
on the toolbar to load, save, and select presets.
| To... | Do this |
|---|---|
|
Save the parameter values of a node to a preset |
For more information see the save preset dialog help. |
|
Set the parameter values of a node from a preset |
In the parameter editor, click the |
|
Delete a node preset |
In the parameter editor, click the Use the delete preset dialog to choose the preset you want to remove. |
Note
Load from .preset File and Save to .preset File are older ways
of saving and applying presets. Using the above methods to save and
apply presets is the preferred method. However, .preset files are
ASCII files, which are easier to edit than the .idx files that the
new method uses, so they still have some usefulness.
Defaults 
-
The parameter editor shows values different from the default as bold.
-
You can temporarily change the original “factory” defaults for a type of node. For example, you can change the default Depth for the
 Subdivide node to
 2, so new Subdivide nodes will start with Depth at 2, and reverting to defaults will reset the value to2, not the original “factory” default of1.This does not affect the “bold” display style in the parameter editor. The parameter editor always bolds values that are different from the original defaults, regardless of how you've changed the defaults.
Changes to the defaults only last for the current “session”. If you quit and restart Houdini, it will start with the original defaults.
-
If you want to permanently change the default values for newly created instances of a node, you can use a creation script (
HOUDINIPATH/scripts/‹category›/‹nodename›.pyor‹nodename›.cmd) to modify new nodes of a type as they are created.
| To... | Do this |
|---|---|
|
Reset a single parameter to the default value |
In the parameter editor, right-click the parameter label and choose Revert to default. or ⌃ Ctrl + |
|
Reset all parameters on a node to their default values |
In the parameter editor, click the |
|
Make a node’s current values the new default |
In the parameter editor, click the |
|
Revert the defaults for a node to their original values |
In the parameter editor, click the This will also revert all the parameters on the node to their original default values. |
Toolbar 
Node type
For example, a Geometry object will show Geometry.
Name text box
The node’s name. When you create a node it has a default name of the operator type name plus a number. You can edit the text box to change the node’s name (this is the same as clicking the node’s name in the network editor).
Node names can only contain letters and numbers. Spaces are not allowed in the name.
![]() Gear menu
Gear menu
Use the items in this menu to edit various node and parameter settings. See gear menu for more information.
-
Edit the node’s parameter interface. See the Edit Parameter Interface window.
-
Save presets and reload presets.
-
Edit the node’s delete script (this lets you define a script that Houdini will run if/when the node is deleted).
![]() Info
Info
Click to show a small window of information about the node. For example, a geometry node will show the bounding box, number of points, attributes, and other information. This is the same information represented in the node info window in the network editor.
![]() Expression language
Expression language
This menu controls which expression language you will use to write new expressions (HScript expressions or Python). You can choose the expression language of each individual parameter using the parameter’s context menu.
![]() Search
Search
Click to show or hide a toolbar with controls for searching and filtering the parameters.
![]() Help
Help
Click to view documentation for the current node.
Searching and filtering parameters 
Often you want to quickly jump to one specific parameter in a complex interface, or show only the parameters that are not at their default values, or find parameters with expressions. The filter and search toolbar makes this easy.
| To... | Do this |
|---|---|
|
Show the filter and search toolbar |
In the top-right corner of the parameter editor, click the |
-
The pop-up menu on the left filters which parameters are shown in the parameter editor:
-
All parameters (in this mode, the text box only searches parameters, not tabs or other groups).
-
All parameters and headings (in this mode, the text box searches parameters as well as tab names and group headings).
-
Only parameters that are time-dependent (that change based on the current frame number). For example, parameters with expressions that use
$F. -
Only parameters that are shown in the animation editor (see Channel List for more information).
-
Only parameters that have the auto-add to channel list flag turned on.
-
Only parameters that are selected in the scene graph.
-
Only parameters that are not at their default values. This makes it easy to see what parameters have been edited.
-
Parameters with expressions.
-
Parameters with overrides. Usually this means the parameter’s value is computed by a CHOP network. For example, motion effects set up a CHOP network to control parameters.
-
Only parameters that are marked as invisible or are hidden because of hide when conditionals (see conditional rules)
-
-
The pop-up menu on the left also defines the search criteria that is used on parameters:
-
Parameter Names or Labels.
-
Parameter Names.
-
Parameter Labels.
-
Parameter Raw Value (in this mode, the current expression string is searched. If there is no expression, the parameter value is searched instead. If you have animation, the expression can change we time changes).
-
Parameter Evaluated Value (in this mode, all parameters are evaluated and the evaluated value string is searched.)
-
-
The pop-up menu on the left has extra options to customize the search:
-
Exact Match ( use exact pattern matching instead of simply finding the pattern within the string )
-
-
The text box on the right filters parameters by the current search criteria.
When the filter is set to “Raw value or expression”, the search box searches the parameter value rather than name/label.
Tip
The menu button text gives a summary of the current search mode and criteria. If “Exact Match” is turned on, the label will start with “Match” instead of “Search”.
Tip
Houdini preserves the tab structures around the matching parameters, so you still might need to click through tabs to find the parameter you're looking for.
Gear menu 
Edit Parameter Interface
Opens a window allowing you to add, edit, or remove spare parameters on the current node instance.
This is different from right-clicking the node and choosing Type Properties. That edits the parameter interface of all nodes of that type, while this edits the extra parameters that might exist on this particular node.
Edit Rendering Parameters
Opens a window allowing you to add, edit, or remove render properties on the current node instance.
The only difference between this and Edit Parameter Interface is this automatically shows the tab of available render properties instead of the tab of available spare parameter types.
Edit Deletion Script
Opens a window allowing you to edit a script that will run when/if the current node is deleted.
(You can set the deletion script programmatically using hou.Node.setDeleteScript.)
Edit Comments
Opens a window allowing you to edit the comment string associated with the current node.
This is the same as editing the comment in the node info window in the network editor.
Revert Parameter Interface
Reverts the parameter interface of the current to the standard initial interface for its node type.
Delete All Spare Parameters
Deletes any spare parameters on the current node.
Add Spare Input
Adds a spare reference to another node. These are used in compiled node blocks to avoid external references in expressions.
Add Visualizer
The items on this submenu let you attach a visualizer to the this node.
Show Visualizers
Opens a window that lets you edit the settings of any visualizers attached to the current node.
Save Preset
Saves the current parameter values as a preset you can recall or copy onto other nodes of the same type.
Save as Permanent Defaults
Saves the current parameter values as the defaults for new nodes of the same type.
Delete Preset
Opens a window allowing you to delete a saved preset for the current node type.
Revert to Factory Defaults
Resets all parameter values to the defaults for this node.
Revert to and Restore Factory Defaults
Resets all parameter values and their defaults to the “factory” default shipped with Houdini, reverting any changes and/or custom defaults.
Override Factory Defaults for This Session
Saves the current parameter values as the defaults for new nodes of the same type, but only until you restart Houdini.
Type Properties
Opens the Type Properties window for the current node type. For assets this lets you edit the type’s parameter interface and other options.
The rest of the menu lists any saved presets for this node type.
Parameter context menu 
You can edit the contents of this menu in PARMmenu.xml.
Revert to Previous Value
Returns to the previous parameter value.
Channels
This submenu provides options for working with animation channels.
Isolate in Channel List
Replaces the parameters in the channel list with this parameter.
Add to Channel List
Adds this parameter to the channel list.
Remove from Channel List
Removes this parameter from the channel list.
Auto-Add
Toggles the auto-add option for this parameter. When turned on, this parameter is automatically added to the channel list when the object is selected.
Select/Replace in Channel List
Selects this parameter and clears the previous selection in the channel list.
Select in Channel List
Selects this parameter in the channel list.
Deselect in Channel List
Deselects this parameter in the channel list.
Auto-Select
Toggles the auto-select option for this parameter. When turned on, this parameter is automatically selected in the channel list when the object is selected.
Pin/Replace in Channel List
Pins this parameter and clears the previous pins in the channel list.
Pin in Channel List
Pins this parameter in the channel list.
Unpin in Channel List
Unpin this parameter in the channel list.
Unmute Channel
Turns on the channel so that it affects the animation.
Mute Channel
Turns off the channel so that it does not affect the animation.
Create Channel Group
Creates a channel group from the selected channels. ![]() click on a parameter tab or from a selection in the channel list to bring up this option.
click on a parameter tab or from a selection in the channel list to bring up this option.
Select Nodes from Channel References
Selects the nodes in the viewport from the selected channels. This is useful on character rigs where all the handles are promoted on the top level digital asset. Hold S and click on a parameter label or tab to select the controllers. This can also be done from the channel list by pressing S without clicking.
Select/Append Nodes from Channel References
Same as Select Nodes from Channel References, but appends to the current viewport selection. Hold Shift+S and click on a parameter label or tab to append controllers to the selection.
Extrapolation
Sets the channel extrapolation of the selected channels. Choose from the following extrapolation modes: Default, Hold, Cycle, Extend, Slope, Cycle Offset, and Oscillate. The extrapolation can be applied before and/or after the channels end. See Edit Channel Properties for descriptions of the different extrapolation modes.
Channel Properties
Opens an Edit Channel Properties window that allows you to edit channel metadata such as how to extend the channel before and after the keyframed animation.
Keyframes
This submenu provides options for working with keyframes.
Set Keyframe
Sets a keyframe on the parameter at the current frame.
Remove Keyframe
Removes any keyframe on the parameter at the current frame.
Step to Previous Key
Go to the previous keyframe on this parameter.
Step to Next Key
Go to the next keyframe on this parameter.
Bake Keyframes
Writes the computed animated values of this parameter directly into the parameter at each frame, and then removes the keyframe animation.
Expression
This submenu provides options related to expressions.
Toggle Expression
Switches the text box between showing the computed value for the current frame, and the expression itself. This is the same as clicking the parameter label.
Edit Expression
Opens the parameter value in an editor window. This is useful for long, multi-line expressions.
Expand String Value
Turns string expansion on or off in the parameter value.
Change Language to Python
Interprets expressions in this parameter as Python expressions.
Change Language to HScript Expressions
Interprets expressions in this parameter as HScript expressions.
Motion Effects
This submenu contains canned effects you can apply to transform parameters. The effects are implemented using CHOP networks you can then modify and elaborate if needed.
Jump to Motion FX Network
Jumps to the CHOP network implementing any effect(s) on the parameter.
Edit Parameters
Choose an applied effect from this menu to edit the effect’s parameters.
Enable Effect
Toggles any motion effect(s) on the parameter on or off.
The rest of the menu lists the available effects which include Cycle, Cycle with Offset, Despike, Lag, Limit, Noise, Shift, Smooth, Spring, Stretch, and Wave.
You can edit this part of the menu using EffectsMotionMenu.xml.
Reference
The items in this submenu let you create references in this parameter to other data in the scene.
Scene Data
Creates a reference in this parameter to a transform or parameter value elsewhere in the scene.
Local Variable
Creates a reference in this parameter to one of the node’s local variables. This is useful if you don’t know the local variables that are available.
Local Attribute
Creates a reference in this parameter to one of the attributes in the node’s geometry.
Copy Parameter
Copies a reference to this parameter to the clipboard. You can then choose to paste the data into another parameter in a different way.
Paste Values
Pastes the value(s) from the copied original. If you copied parameters with expressions, this will paste the computed values of the expressions instead of the expressions.
Paste Expressions / Channels
Pastes animation (keyframes and expressions) from the copied original.
Paste Relative References
Pastes references (using the ch expression function with relative paths) to the copied original. This links the two parameters so that changes to the first parameter are pulled into the second parameter.
See linking parameters with references for more information.
Paste Other
This submenu contains lesser-used paste methods.
Paste Copied Expressions
Pastes the expression(s) (if any) from the copied original at the current time.
Paste Absolute References
Similar to Paste Relative References, but pastes ch expressions using absolute paths instead of relative paths.
Delete Channels
Removes any keyframe animation from this parameter.
Include in Take
Adds this parameter to the current take, allowing you to modify it in the take.
Lock Parameter
Prevents this parameter from being edited or animated. For example, Houdini will not allow you to type in the parameter’s text box or use a handle associated with the parameter.
Unlock Parameter
Unlocks this parameter if it was locked. This allows you to edit the parameter.
Revert to Defaults
Resets this parameter to the default value. You can change the default with Make Current Value Default.
Revert to and Restore Factory Defaults
Resets this parameter and its default to the “factory” default value shipped with Houdini, reverting any changes and/or custom defaults set.
Make Current Value Default
Makes this parameter’s current value the default. New instances of the node type will use this value, and the Revert to Defaults menu item will revert to this value.
Export Parameter to Type Properties
Adds this parameter to the Existing Parameters list in the Operator Type Properties dialog.
More
This submenu contains lesser-used items for modifying the parameter.
View Dependencies
Opens a window that lists dependencies (references on other nodes to this parameter) and references (references in this parameter to other nodes).
Bypass Spare Parameter
Disables this parameter so that the node acts like the parameter does not exist (if it is a spare parameter).
Delete Spare Parameter
Deletes the parameter from the node interface (if it is a spare parameter).
Bind to Viewport Ladder Handle
Sets this parameter as the parameter controlled by the ![]() ladder interactions in the viewport.
ladder interactions in the viewport.
Unbind All Viewport Handles
Removes any custom handles bound to this parameter.
| See also |