| On this page |
Overview 
This tool creates a FLIP tank simulation of a flat tank of particles similar to the ![]() FLIP Tank tool, but with the addition of a boundary layer of particles that helps suppress reflections at the edge of the tank and maintain the water level over time. The boundary layer also allows the tank to track a moving object, simulating only the area around the object.
FLIP Tank tool, but with the addition of a boundary layer of particles that helps suppress reflections at the edge of the tank and maintain the water level over time. The boundary layer also allows the tank to track a moving object, simulating only the area around the object.
Tip
For more information, see the differences between ocean tank types help page.
Note
Several of the ocean tanks use the Narrow Band feature in the ![]() FLIP Solver by default. If the traditional full tank is desired, it can be changed back by selecting Particle Field in the
FLIP Solver by default. If the traditional full tank is desired, it can be changed back by selecting Particle Field in the ![]() FLIP Object.
FLIP Object.

Using Flat Tank 
-
Click the
 Flat Tank tool on the Oceans tab to create a tank.
 -
Select an animated object to follow and press Enter to confirm your selection. If no object is selected, you will be prompted to place a static tank.
For specific parameter information, see the ![]() Ocean Source help page.
Ocean Source help page.
Understanding the network of nodes 
There are three important layers to focus on when creating your ocean. First create the ocean, next add whitewater, and finally add specularity for the whitewater.
Tip
Disable all whitewater nodes at the OBJ level while you work on your ocean, then disable the ocean nodes while you work on your whitewater.
The first set of nodes control the ocean itself.
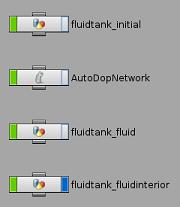
-
fluidtank_initialcontrols the first frame of your simulation. This is where you can shape the initial frame of your tank with Ocean Spectrum and control the outputs with
  Ocean Source. This includes the size of your tank, the depth of the water etc.
 -
AutoDopNetworkcontrols the simulation of your tank. This is where you will find the FLIP Object and
  FLIP Solver. The FLIP simulation will contain
  Volume Source DOPs to sink and source the boundary layer particles, and a
  Gas Guiding Volume DOP to add ocean velocities to the simulation. Note, the
  Beach Tank shelf tool uses
  POP Advect By Volumes to inject ocean velocities.
 -
fluidtank_fluidis the result of #1 and #2 combined, and is where the results are rendered. After the simulation is done, this node collects the fluid particles, sets up a material, creates some nodes for surfacing to finish the effect. -
fluidtank_interioris also used for rendering, and for creating the volumetric effect that one of the shaders applies to the interior of the fluid. It controls the volume beneath the surface, such as how cloudy or murky the water will appear.
The next set of nodes are to control the whitewater.
Note
To add whitewater to your simulation, use the ![]()
![]() Whitewater tool on the Oceans shelf.
Whitewater tool on the Oceans shelf.
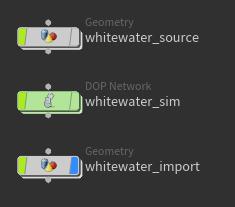
-
whitewater_sourceis where the spray and foam is coming from. -
whitewater_simis where the whitewater simulated. This is where you can modify the animation. -
import_whitewateris the result of #1 and #2 combined.
For more information see How to animate a wave tank with whitewater.
Note
If you build a completely procedural ocean (using the ![]() Large Ocean or
Large Ocean or ![]() Small Ocean shelf tools, for example), the
Small Ocean shelf tools, for example), the ![]() Ocean Foam SOP is used.
Ocean Foam SOP is used.
Tips for improving the look of your water 
-
The defaults for the tank will create a low res simulation, which makes it easy to animate. However, to create a nice looking render, you will need to change some of the defaults. For example, you will need to increase the number of particles in your scene. Decreasing the Particle Separation parameter to about
0.03will create a simulation with approximately 30 million particles. -
Add an environment light to your scene. Water reflects and refracts a lot of the environment around it, so having an environment map in your scene will significantly improve the look.
Tip
In your Environment Map parameter, navigate to the
HFS/houdini/pic/folder and choose the sky fileDOSCH_SKIESV2_${F2}SN_lowres.rat.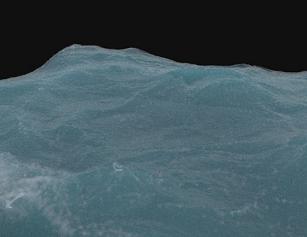
Tips 
-
It is useful to parent your trackable object with a
 Null Object so that you can create a more complex animation on the object and it will still follow your simple animation of the null.
You can also parent cameras and lights to the moving null by connecting them to the output of the
Null Object and enabling the Keep position when parenting checkbox on the light or camera object. -
The Particle Separation on the
Ocean Source controls the resolution of you ocean. The lower the number, the closer together the particles will be. -
The Size parameter controls the size, shape, and depth of the tank. When you change the size, you will see a handle in the viewport which you can drag to manually set the size and depth of your tank.
| See also |