| On this page |
|
Overview 
Houdini allows you to set up the networks of a simulated object so that it can be solved in parallel on multiple machines using HQueue. HQueue is a render and simulation job management system, consisting of a HQueue Server, HQueue Clients, workstations, and a Shared Folder.
-
The server is responsible for distributing your task to different client machines. The server also provides a web interface, where you can monitor and manage your jobs. The server is normally installed on a single computer.
-
A client receives jobs from the servers and performs the incoming simulation and render tasks. Sometimes, clients are also called nodes. The machine with the server running can also be configured as client. The client must be installed on every computer you want to use for a job.
-
Users, working in Houdini, submit jobs from a workstation to the HQueue Server which are then distributed to the HQueue Clients.
-
The Shared Folder is mounted as a shared drive on the network. Workstations transfer input files to the folder to make them accessible for the HQueue Clients. The HQueue Clients, on the other hand, write output files to the Shared Folder. The workstations are then able to read the output files.
Before you begin 
Before you can start distributing simulation jobs, you have to install the HQueue Server and Clients. To do this, download the Houdini installer from the SideFX website and execute it. Note that you normally need administrator privileges to install the software. Specify, which computer you want to use as
-
HQueue Server. The HQueue Server must be installed on one machine only.
-
HQueue Client. The HQueue Client must be installed on all machines that should contribute to the job.
-
Shared Folder. The Shared Folder is defined in the HQueue Server’s web interface. Make sure that all machines have appropriate privileges to access this folder.
Note
Please read through the HQueue documentation for detailed information on topics like installation, OS-specific settings or IP addresses. This guide helps you through the entire process of setting up your own farm.
Read me 
Most of Houdini’s simulation networks can also be created inside SOPs, e.g. Vellum, fluids or Rigid Body Dynamics. However, distributed simulations are currently only possible with DOP-based workflows. To be more precise: it’s possible to send a SOP-based simulation job to a single HQueue Client, but you can’t distribute the job over several machines.
For DOP-based networks, there’s also one important limitation
-
Houdini’s Pyro FX shelf tools are based on the
 Pyro Solver (Sparse) and don’t support distributed simulations by default. If you want to distribute a simulation, you must manually replace the sparse solver through the standard dense
  Pyro Solver DOP.
You can distribute POP particles, non-adaptive particle fluids and dense pyro simulations using slicing. There, the space in which the effect happens is partitioned and each slice is solved on a separate machine. You can slice grid-based fluid containers using a certain number of divisions per side, but for particle fluids simulations that do not have boundaries, you have to slice them manually. For sliced simulations, the nodes on the network talk to each other to communicate information across the boundaries between slices.
Dense pyro simulations, on the other hand, can also be clustered through a ![]() Cluster SOP to subdivide the pyro source particles into segments. Each cluster container solves independently, even if they overlap with other cluster containers. For smoke and pyro simulations this works well since their output volumes blend together visually.
Cluster SOP to subdivide the pyro source particles into segments. Each cluster container solves independently, even if they overlap with other cluster containers. For smoke and pyro simulations this works well since their output volumes blend together visually.
Distribution setup 
Particle fluids are certainly the most interesting solver type for distributed simulations, because they often require long simulation times. To ease the task of preparing a project for distributed simulations, you can use various shelf tools. They're all located under the Particle Fluids shelf tool.
-
Open the Particle Fluids shelf tab.
-
⌃ Ctrl click the
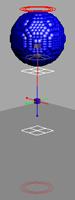
 FLIP Tank shelf tool to add the tank at the scene’s origin.
 -
From the same shelf, click the
 Distribute Particle Fluid shelf tool.
 -
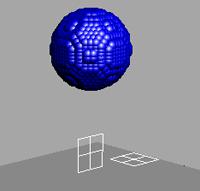
You must select a particle fluid to run the tool. From the viewport’s left icon bar, choose the
 Select tool and draw a rectangle around the fluid in the viewport. Then, press Enter to confirm your selection.
 -
Houdini jumps into the out network you can see a
distributedsim_fliptanknode. This node submits the job to the HQueue for distribution on the farm. -
In the Output Driver you can see a path. If you have followed the steps above, the path is
/obj/distribute_fliptank, whilesaveis the node you're referencing to. -
Open the path in the Network Editor. The
saveobject is a Geometry Output ROP and performs the simulation by clicking Save to Disk.
Methods of distributing simulations 
You can select the distribution method you want to use from the Partitioning Type drop-down menu located in the distributedsim_fliptank ![]() HQueue Simulation render node parameters.
HQueue Simulation render node parameters.
No partitioning
Sends the entire simulation to another machine to be simulated as a whole.
Clustering
Allows you to partition the source into chunks along the X, Y, or Z axis. These pieces are simulated simultaneously, but they do not talk to each other or transfer particles between frames. Since clustering doesn’t need to wait for each partition to finish simulating a frame before moving onto the next, this method is much faster than slicing.
Slicing
Allows you to slice the space containing a particle fluid so that different machines on an HQueue farm can simulate different parts of the fluid. Since this method transfers particles between slices at the end of each frame, it is more precise (but also more expensive) than clustering.
Tip
For more control over the direction and hierarchy of your pieces, use the ![]()
![]() Slice or
Slice or ![]()
![]() Slice Along Line shelf tool.
Slice Along Line shelf tool.
For more information, see Set up a sliced distributed simulation down below.
Volume slicing
Automatically slices a space containing a particle fluid into equal NxMxP pieces. You can also specify a specific overlap to provide a buffer around each piece. The separate machines will then work on each slice, and periodically synchronize their buffers. This works well for dense sims in fixed rectangular spaces like pyro solves.
Particle slicing
For non-dense simulations, splitting the domain into equal parts doesn’t make sense. It is important that the partition be balanced so that one machine isn’t waiting for the other machines to finish. So instead you will want to divide your sim space using the Slice or Slice Plane DOP nodes. These divide the world into different regions that each simulation machine then owns. Each machine has all the data for its own slice and some boundary information for the surrounding slices to avoid having to constantly update.
Wedging
Allows you to try different variations of a simulation. For more information, see the ![]()
![]() HQueue Simulation render node and
HQueue Simulation render node and ![]()
![]() Wedge render node.
Wedge render node.
Set up a sliced distributed simulation 
Slicing the space containing a particle fluid allows different machines on the HQueue farm to simulate different regions of the fluid. You can send a particle fluid simulation to the farm without slicing, but it will just simulate on one machine instead of multiple machines in parallel.
There are two shelf tools on the Particle Fluids tab for slicing a particle fluid simulation into separate regions for distribution:
-
 Slice along line tool
Creates a specified number of equally spaced slices along a certain direction. This is the simplest way to slice up space.
-
 Slice tool
Slices the space using a hierarchy of intersecting planes which arbitrarily divides the space in complex ways.
Each fluid region requires an individual machine on the HQueue client network, so you can only set up as many regions as you have machines. For example, using the Slice along line tool with Number of regions set to 8 would require 8 machines on the HQueue network.
How to slice a fluid space 
-
On the Particle Fluids, Cloth, or Wire shelf tab, click the
 Distribute tool.
 -
Select the particle fluid, cloth, or wire object and press Enter.
This creates a few nodes in various networks for distributing the simulation:
-
A
distributedsimHQueue Simulation render node in/outto render the simulation out to HQueue.This render node sends the distribution job to the HQueue server.
-
A
distribute_‹objectname›object in/objto load the simulation files created by the HQueue clients back into Houdini. -
A
DISTRIBUTE_‹objectname›_CONTROLSNull node in the DOP network.This node is mostly a placeholder for values. The render node explicitly sets values on the control Null DOP such as the tracker address/port and slice divisions, and then multiple distribution-aware DOPs in the network reference the value on the control Null.
-
-
If you want to change the default path pattern for saved geometry files (
$HIP/geo/dist_${SLICE}_$F.bgeo.gz), go to the Scene level (/obj) and double-click thedistribute_‹objectname›object to go inside. Select theloadslicesFile node and change the File parameter. See using expressions in filenames for more information.The path should be relative to
$HIP.
How to view a simulation slice without running it on the farm 
The ![]() Distribute tool modifies the network to ready it for distribution. If you try to play back the simulation after these modifications, the network will only calculate a slice of the whole simulation, and several nodes will generate network traffic trying to talk to HQueue peers.
Distribute tool modifies the network to ready it for distribution. If you try to play back the simulation after these modifications, the network will only calculate a slice of the whole simulation, and several nodes will generate network traffic trying to talk to HQueue peers.
If you want to check the simulation on a single machine, you can use parameters on the control Null DOP created by the Distribute tool to temporarily switch the network back to non-distributed operation.
| To... | Do this |
|---|---|
|
View a slice without distributing the simulation |
|
How to use particle fluid distribution with FLIP 
Using particle distribution with tanks can sometimes lead to a loss of fluid. Turn on the Distributed Pressure Solve check-box on the ![]() FLIP Solver to avoid this issue. This will account for pressure in the tank and result in smoother seams between slices.
FLIP Solver to avoid this issue. This will account for pressure in the tank and result in smoother seams between slices.
How to set up a distributed narrow band FLIP tank 
-
Create a
 FLIP tank using one of the tools on the Oceans shelf. Narrow Band Particles should be enabled by default.
 -
Use the
Slice tool on the Particle Fluids shelf to slice the particle fluid. -
Use the
Distribute tool, and choose Slicing. This will set up the network so that it can be solved in parallel on multiple machines using HQueue.
How to set up a distributed whitewater simulation 
-
Create a whitewater simulation using the tools on the Oceans shelf.
-
Set the whitewater to distribute and click the
Distribute Particle Fluid tool on the Particle Fluids shelf. -
Choose between No Partitioning and Clustering as the distribution method from the pop-up dialog box.
Note
If the whitewater is pre-sliced using the
Slice or Slice Along Line tools, there will also be an option to choose Slicing.Selecting No Partitioning allows you to send your entire simulation to another machine. Selecting Clustering allows you to divide up your simulation into chunks that will be simulated simultaneously on another machine. Both options will create an
 HQueue Simulation for your distributed simulation.
 -
Choosing Clustering will set your Partition Type to Clusters on the
HQueue Simulation render node. Click the  Jump to operator button on Cluster Node parameter to jump to the
 partition_emissionSubnetwork. -
Set your clusters using the Divisions parameter.
Note
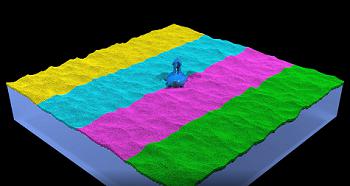
You should make your particle fluid divisions parallel with the flow direction because these clusters will be simulated independently and don’t transfer particles between frames that are born in separate clusters.
In the following example, a
 Beach Tank is divided along the Z-axis, which coincides with the flow of the waves up the beach.
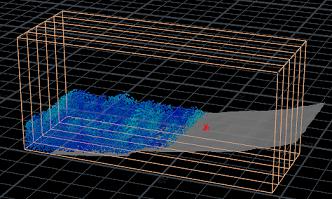
Set up distributed clustered smoke and pyro simulations 
-
Create a clustered smoke or pyro simulation from point sources using the Smoke Cluster or Pyro Cluster tools on the Pyro FX shelf tab (see clustering).
-
On the Container Tools shelf tab, click the
Distribute tool. -
Select the container you want to distribute and press Enter.
If you are distributing a clustered simulation with multiple containers created by the smoke/pyro cluster tool, you can just select one of them.
(Alternatively you can select the DOP object in the network editor and then press Enter in the viewport.)
-
If the object has multiple containers (for example, it was created using clustering), a dialog box appears asking if you want to distribute the simulation using slices or clustering.
(If your simulation is so massive even a single clustered container at a time is too much to run on one machine, you can click Slicing to distribute separate slices of each clustered container.)
-
If for some reason you have more than one object importing the results of the simulation, a dialog box will ask you which object should be set up for distribution (see how the tool modifies the geometry network below).
-
The tool will create and select a
HQueue simulation render node. Set the node’s HQueue server parameter to the name of the HQueue server machine and port name (for example hq.company.com:5000).If you are slicing, you can set the Slice Divisions parameter. The default
1, 1, 1slices does not actually divide the container into multiple subdomains. Increasing these values to2, 2, 2, for example, will slice the container into 8 smaller boxes for distribution.
Distributed clustering behind-the-scenes 
In the Geometry object that imports the simulated fields you distributed (for example, import_pyro_build), the Distribute tool adds a DOP I/O node to write the generated cluster fields to disk using a ![]() ROP Output Driver on the farm.
ROP Output Driver on the farm.
When the HIP file is run on the farm (below), the HQueue render node does the following:
-
Sets the global
$CLUSTERvariable to the cluster number being generated on this machine. -
On the Cluster Points node (pointed to in the HQueue render node’s Cluster Node parameter), it sets the Cluster Filter parameter to the
$CLUSTERvariable, so the source network will only generate source points for that cluster number. -
It cooks the ROP Output Driver (pointed to in the HQueue render node’s Output Driver parameter) which causes the simulation to cook and writes out the geometry for the current cluster and frame.
The Distribute tool also creates a File Merge node in the network to import the cluster fields generated on the farm and reintegrate them on your machine. It sets the display and render flags on this node so when you view the HIP file on your machine it uses the cached geometry files.
Note
The filename pattern for the output geometry files is set on the File Merge node and referenced from the ROP Output Driver, so if you want to change it, change it on the File Merge node. The pattern must incorporate the $CLUSTER (cluster number being simulated) and $F (current frame) variables.
Turn off the live simulation 
Once the HQueue network has generated the geometry, you should stop the original simulation network from cooking since you now have the end-result cached.
Do one of the following:
-
Turn off the visibility of any scene-level objects that require the simulation to cook.
-
Turn off simulation in Houdini: right click (or pressing and holding on) the
 simulation menu in the bottom right corner of the main window and turn off Enable simulation.
 -
Start a fresh new
.hipfile that simply loads the generated particle fluid geometry files using a File surface node.
Run the distributed simulation on the farm 
-
In the main menu, choose Render ▸ Edit render node ▸ distributedsim. In the parameter editor:
-
Set the frame range you want to simulate.
-
Check the Slice divisions parameter. The product of the three components should equal the number of regions in your particle fluid simulation (for example,
3, 1, 1for a simulation with 3 regions).This number is set automatically when the Distribute tool creates the render node. However, if you then go back and change the number of slices (for example, by changing the Number of regions parameter on a Slice Along Line node), you need to update this parameter on the render node.
-
Set the HQ Server to the hostname and port of the HQueue server, for example
render.example.com:5000.
-
-
In the parameter editor, click Render to send the job to HQueue.
The render node sends its information to the HQueue server. The HQueue server sends commands to its client machines to load the
.hipfile and simulate and save a slice of the particle fluid simulation per-frame. The individual client machines save their generated geometry cache files to the shared network directory.