| On this page |
Overview 
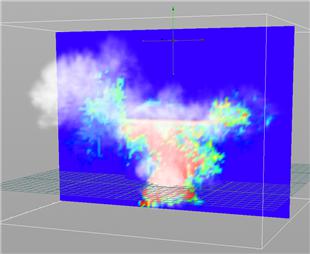
The Pyro solver handles effects related to hot expanding gases such as fire, smoke, and explosions. The Pyro FX shelf tab contains tools for creating different effects.
Effects are generated from source geometry. For example, the skin of a character on fire. This can be as simple as a sphere if you just want to generate smoke and the source shape doesn’t matter.
How to 
| To... | Do this |
|---|---|
|
Create a smoke or pyro effect |
|
|
Increase the maximum size of the smoke/fire container |
By default, the maximum size the automatically resizing box mirrors the size of the Pyro/Smoke object. Select the object in the dynamics network, click the Properties tab and set the Size parameter. |
|
Adjust resizing for fast-growing simulations |
Increase the Padding parameter on Bounds tab of the |
Tip
See how to navigate between networks for tips on navigating between the three networks quickly. You may want to pin parameter editor pane tabs for the pyro object and solver so you can access them quickly.
See Pyro look development for information on how to use the various parameters of the source, object, and solver to achieve different smoke and fire looks.
Point based sourcing 
In Houdini 17, pyro sourcing changed from being based on volumes representing different properties (temperature, fuel) to being based on points with attributes representing the physical properties.
-
This conforms better to how most users source pyro sims, for example running a particle sim and then using the result as the source for smoke.
-
This makes it easier to manipulate the properties using the large number of SOPs dedicated to editing points and point attributes.
The points are still converted into a volume before export to the simulation, however the new workflow is to edit the points and point attributes rather than the volume itself.
The attributes have the same names as the volume fields: density, temperature, fuel, divergence, burn, heat, velocity, collision, source, and sink.
Pyro node networks 
When you use the Pyro shelf tools, they add geometry (SOP) nodes inside source object, set up a DOP network for the simulation, and create an Output object to import the result of the simulation back into a renderable Object.

|
Converts the source geometry into points with attributes ( This node has controls for how to scatter the points on/inside the source geometry, what attributes to create, and what to do with existing attributes. |
|
|
Adds some default randomness to the |
|
|
Generates a volume from the points and point attributes, for import into DOPs. |
|
Controls the 3D resolution of the smoke/fire object, the maximum size of the resizeable container (by default), and whether the container is open on each side, among others. It also has extensive controls for visualizing the contents of the object. (In the DOP network, this “object” is the volume in which the effect is simulated, not the source geometry. The source geometry is imported in a different branch of the network by the Volume Source node.) |
|
|
This node imports the SOP Volume generated by the source network as a series of volume fields. This takes care of renaming attributes and fields that for historical reasons have different names (for example, the Generally you will import SOP attributes into their corresponding DOP fields, but if you need to you can edit the relationships, for example copying the same attribute into two different fields. |
|
|
Houdini includes two solvers for grid-based smoke/fire simulations. The The high-level effects created by the tools on the Pyro FX shelf tab generally use the Pyro solver. The solvers have extensive controls for visualizing forces created by the solver, such as shredding. |
|
|
Solver for effects involving smoke, but not flames. |
|
One DOP Import node imports all fields for rendering, and another imports only fast display-related fields for display in the viewport. |
Inside the Pyro solver 
-
The source adds
temperatureandfuelto the simulation. -
Where
fuelexists and thetemperatureis above a certain point,burnis created. -
burncreatesheat(visible flames). -
burninefficiency leaves a certain percentage offuelbehind after burning. -
divergencerepresents the expansion caused by heating gas. -
Dissipation and cooling reduce the smoke density and temperature over time, respectively.
-
velocity= Startingvelocityplustemperaturetimes Buoyancy -
Advection affects
temperature,heat,density, andfuel(if Advect fuel is on in the solver). -
In Houdini,
temperaturerepresent buoyancy,velocityrepresents momentum.
Notes:
-
The “Multifield” visualizer shows both
heat(flame) anddensity(smoke). -
Temperature is one of the most important fields for running a simulation (together with Velocity) and controls to great extend how the sim behaves and looks. Although it isn’t often used for rendering and visualization, internally it drives many forces and shape operators (such as Buoyancy, Shredding and Dissipation).
-
When creating a fire sim, that control is extended to the combustion model. Temperature Diffusion and Cooling Rate act directly on the temperature field and offer great control over the simulation’s decay in speed and simulated detail.
Collision and expansion fields 
The Smoke/Pyro solvers allow you to add collision fields (areas the smoke/fire will avoid) and expansion fields (areas that add outward velocity to the simulation).
Tools in the Populate Containers shelf tab let you create collision and expansion fields. These create the same sourcing setup as the one Pyro tools use for fuel sources, but instead of creating a fuel attribute, they create a collision or divergence attribute.
Note
Since Houdini 14, the recommended way of setting up collision objects for pyro simulations is by using ![]()
![]() Static Object or
Static Object or ![]()
![]() Deforming Object shelf tools under the Collisions tab.
However, the
Deforming Object shelf tools under the Collisions tab.
However, the ![]()
![]() Collide with Objects shelf tool can still be used if you want fine control over collision velocities.
Collide with Objects shelf tool can still be used if you want fine control over collision velocities.
| To... | Do this |
|---|---|
|
Turn an object into a collision field |
|
An expansion field adds outward velocity to the simulation within the field. That velocity is then advected, creating continuous outward force. This can quickly blow up your simulation.
If you're making an explosion, that can be desirable, but if want something more subtle, you can try the following:
-
Add a
 Drag Force node after the solver to keep the velocity from continuing forever.
 -
Scale down the expansion source (
 Volume Source DOP > Scale parameter in the
 divergencesource), or animate it on and off.
You can also use DOP forces to push smoke/fire around. However, the effect of the force will be dampened by the solver’s project non-divergence step. Because you set up the expansion field as a direct input to the solver, the solver knows to exclude the expansion field from the project non-divergence calculations.
How to use pyro to advect points of DOP geometry 
You can use the fields of a pyro simulation to advect the points of DOP geometry.
-
Attach editable Geometry data to the smoke container.
To create editable geometry, import geometry using a
 SOP Geometry DOP and copy it using a
  Copy Geometry DOP. Then use an
  Apply Data DOP to attach the geometry to the smoke object DOP. Set the data name of the copied geometry to
 Geometry. -
Connect a
 Gas Advect to the Advection input of the pyro solver (the third green input). Set the Gas Advect’s Geometry parameter to the data name of the editable geometry (
Geometry) Set the Velocity field toveland the Collision field tocollision.
Temperature diffusion and viscosity are blurs 
Temperature diffusion is a blur on the temperature field. Increasing it will blur the boundaries between high and low temperature areas, and increase the diffusion of temperature from a source out into the system.
Viscosity is a blur on the velocity field. Increasing it will blur velocity variations, such as shredding and vorticles (small pinwheel-type eddies). If you have a look you like but it has a little too much velocity noise, you can try adding a bit of viscosity to blur it out.
Because these controls blur the fields, high diffusion/viscosity values will decrease the temperature/velocity in the system, because you are averaging together the areas of high temperature/velocity (for example, near the source) with the surrounding (usually much larger) areas of inactive space.
Rendering Pyro effects 
-
You may want to decrease the division size (that is, increase the resolution) of your containers before rendering.
-
Render Pyro effects using the micropolygon engine (
 Mantra render node > Properties tab > Render tab > Rendering Engine).
 -
Set up your lights' shadow parameters (
 Light object > Shadow tab), set Shadow type to Depth Map Shadows, Pixel samples to 2×2, and Shadow Quality to 2.
 -
To get more detail in the render, you can try decreasing the renderer’s Volume step size (
Mantra render node > Properties tab > Sampling tab). This will not make a difference if the reason the render lacks detail is the pyro volume’s container is low resolution.