Houdini 20.0

Color visualizer

Visualizes attributes by displaying them as color.

See visualizers for more information.

Parameters

Color Type

Determines the main method for coloring the displayed geometry.

Attribute as is

Displays attribute values as RGB color values.

This only works properly with floating point attribute types. If the attribute has only one component, it is used as the red channel. If it has two components, they are used as red and green.

Ramped attribute

Looks up attribute values on a color ramp and colors the geometry with the corresponding color.

Constant

Colors the geometry with a single color. This may be useful for tracking a certain piece of geometry by giving it a bright color when the visualizer is on.

Random

Colors each element of the geometry with a random color.

Random from attribute

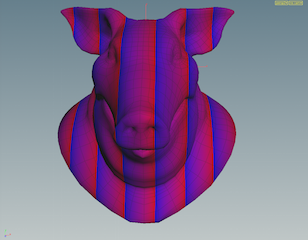
Colors attribute values randomly. Attributes with the similar values will have the same color. You can set how different values must be to be colored differently with the Value separation parameter.

Polygon vertex count

Colors triangles, quads, and n-gons differently. This makes it easy to find stray n-gons, or find non-tris when you need only tris.

Texture distortion

Tint faces based on how much the texture is being stretched or squashed in that area.

Class

Whether to visualize a point, primitive, vertex, or detail attribute. This also controls whether the color will be applied to points, vertices, or primitives.

Attribute as is

Attribute

Name of the attribute to visualize.

Ramped attribute

Attribute

Name of the attribute to visualize.

Range

To map attribute values onto the ramp, Houdini needs to know the full range of possible values so it can scale that range onto the range of the ramp.

Auto

Looks at the actual values of the attribute in the visualized geometry and picks the minimum and maximum.

Min and Max

Allows you to manually specify min and max values. This can be useful when there’s a “natural” range of values larger than what’s currently in the geometry. You can also use a narrower range than what’s currently in the geometry as a way of highlighting values outside the range (see the Out of range values paramter).

Center and Width

Like Min and Max, except you specify a center value and the width of the range around that value.

Min

The (per component) lower end of the value range, when Range is “Min and Max”.

Max

The (per component) upper end of the value range, when Range is “Min and Max”.

Center

The (per component) center of the range, when Range is “Center and Width”.

Width

The width of the range centered around Center, when Range is “Center and Width”.

Out of Range Values

How to color values outside the given range, when Range is “Min and Max” or “Center and Width”.

Roll Cyclically

Color the value as if the ramp repeated endlessly forward and backward.

Black Out

Color out of range values black.

Clamp to Edge Values

Use the first color in the ramp for values less than the range, and the last color in the ramp for values greater than the range.

Treat As Scalar

Convert vector attribute types (with more than one component) to a single value. This enables a menu for choosing how to convert the values.

Using

How to convert multi-component values to a single number, when Treat as scalar is on.

Component

Pick one of the components.

Component Abs.

Pick one of the components, and use its absolute value.

Component Sum

Sum up the component values.

Component Abs. Sum

Sum up the absolute values of the components.

Length

Use the length of the vector.

Length Squared

Use the square of the length of the vector.

Dot Product

Use the dot product of the vector with a given vector. This may be useful for measuring deviance from a certain direction.

Color Ramp Preset

A list of presets for the Color Ramp.

Color Ramp

The colors to map to attribute values.

Constant

Color

The color to use for all geometry this visualizer applies to.

Random

Random Seed

The seed for the random number generator. Change this value to get different random colors.

Random from attribute

Attribute

Name of the attribute to visualize.

Random Seed

The seed for the random number generator. Change this value to get different random colors.

Value Separation

How far apart two values must be to be colored differently. This is useful for floating point values (for example, you might not care about the difference between 0.0001 and 0.0002). It is also useful for “banding” ranges of attribute values.

Polygon vertex count

Color Triangles

Visualize three-sided polygons using this color.

Color quads

Visualize four-sided polygons using this color.

Color n-gons

Visualize polygons with more than four sides using this color.

Texture distortion

Texture attribute

The attribute containing the UV coordinates to visualize. The default is uv.

Houdini 20.0

Getting started

Using Houdini

  • Geometry

    How Houdini represents geometry and how to create and edit it.

  • Copying and instancing

    How to use copies (real geometry) and instances (loaded or created at render time).

  • Animation

    How to create and keyframe animation in Houdini.

  • Digital assets

    Digital assets let you create reusable nodes and tools from existing networks.

  • Import and export

    How to get scene, object, and other data in and out of Houdini.

  • Executing tasks with PDG/TOPs

    How to define dependencies and schedule tasks using TOP networks.

  • MPlay viewer

    Using Houdini’s stand-alone image viewer.

Character FX

  • Character

    How to rig and animate characters in Houdini.

  • Crowd simulations

    How to create and simulate crowds of characters in Houdini.

  • Muscles and tissue

    How to create and simulate muscles, tissue, and skin in Houdini.

  • Hair and fur

    How to create, style, and add dynamics to hair and fur.

  • Feathers

    How to create highly realistic and detailed feathers for your characters.

Dynamics

  • Dynamics

    How to use Houdini’s dynamics networks to create simulations.

  • Vellum

    Vellum uses a Position Based Dynamics approach to cloth, hair, grains, fluids, and softbody objects.

  • Pyro

    How to simulate smoke, fire, and explosions.

  • Fluids

    How to set up fluid and ocean simulations.

  • Oceans and water surfaces

    How to set up ocean and water surface simulations.

  • Destruction

    How to break different types of materials.

  • Grains

    How to simulate grainy materials (such as sand).

  • Particles

    How to create particle simulations.

  • Finite elements

    How to create and simulate deformable objects

Nodes

  • OBJ - Object nodes

    Object nodes represent objects in the scene, such as character parts, geometry objects, lights, cameras, and so on.

  • SOP - Geometry nodes

    Geometry nodes live inside Geo objects and generate geometry.

  • DOP - Dynamics nodes

    Dynamics nodes set up the conditions and rules for dynamics simulations.

  • VOP - Shader nodes

    VOP nodes let you define a program (such as a shader) by connecting nodes together. Houdini then compiles the node network into executable VEX code.

  • LOP - USD nodes

    LOP nodes generate USD describing characters, props, lighting, and rendering.

  • ROP - Render nodes

    Render nodes either render the scene or set up render dependency networks.

  • CHOP - Channel nodes

    Channel nodes create, filter, and manipulate channel data.

  • COP2 - Compositing nodes

    Composite nodes create, filter, and manipulate image data.

  • TOP - Task nodes

    TOP nodes define a workflow where data is fed into the network, turned into work items and manipulated by different nodes. Many nodes represent external processes that can be run on the local machine or a server farm.

  • APEX - APEX nodes

Lighting, rendering, and compositing

  • Solaris

    Solaris is the umbrella name for Houdini’s scene building, layout, lighting, and rendering tools based on the Universal Scene Description (USD) framework.

  • Rendering

    How to render images and animation from the 3D scene.

  • HQueue

    HQueue is Houdini’s free distributed job scheduling system.

  • Materials

    How to assign materials and create custom materials for shading.

  • Compositing

    Houdini’s compositing networks let you create and manipulate images such as renders.

Reference

  • Menus

    Explains each of the items in the main menus.

  • Viewers

    Viewer pane types.

  • Panes

    Documents the options in various panes.

  • Windows

    Documents the options in various user interface windows.

  • Stand-alone utilities

    Houdini includes a large number of useful command-line utility programs.

  • APIs

    Lists all the reference documentation for the ways you can program Houdini.

  • Python scripting

    How to script Houdini using Python and the Houdini Object Model.

  • Expression functions

    Expression functions let you compute the value of parameters.

  • HScript commands

    HScript is Houdini’s legacy scripting language.

  • VEX

    VEX is a high-performance expression language used in many places in Houdini, such as writing shaders.

  • Properties

    Properties let you set up flexible and powerful hierarchies of rendering, shading, lighting, and camera parameters.

  • Galleries

    Pre-made materials included with Houdini.

  • Houdini packages

    How to write and combine multiple environment variable definition files for different plug-ins, tools, and add-ons.

  • Houdini Engine

    Documents the Houdini Engine C, Python APIs, and Houdini Engine plugins

  • hwebserver

    Functions and classes for running a web server inside a graphical or non-graphical Houdini session.