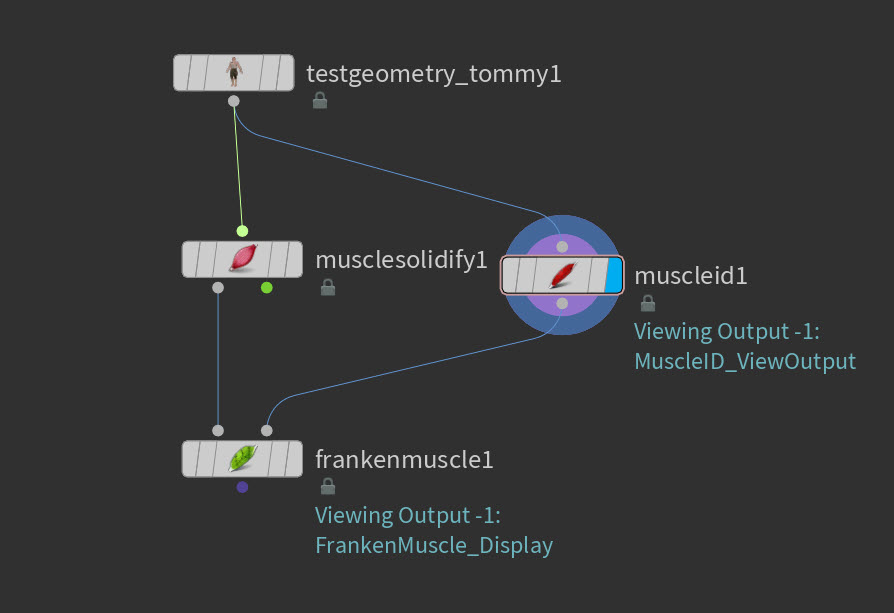
Franken Muscle allows you to assign multiple muscle_id within a single muscle geometry. You can define multiple sub-regions from a single solid tetrahedral mesh which will then behave as an independent muscle. This gives you the access to use the range of muscle nodes such as ![]()
![]() Muscle Properties SOP,
Muscle Properties SOP, ![]()
![]() Muscle Constraint Properties Vellum SOP and
Muscle Constraint Properties Vellum SOP and ![]()
![]() Muscle Flex SOP as though each region is a separate muscle.
Muscle Flex SOP as though each region is a separate muscle.
This method provides an alternative solution to create muscle sub-regions without having to model individual muscles. It also can provide a hybrid method to use existing geometry and muscle geometry to further refine the character to your needs.
To create and refine the Franken Muscle sub-regions, you can use attribute point based methods such as curves, geometry, or selections. You can also use ![]()
![]() Franken Muscle Paint SOP to paint the separate
Franken Muscle Paint SOP to paint the separate muscle_id's.
For the Franken Muscle workflow, use the following nodes:
-
The

 Franken Muscle SOP uses proximity search to find nearby points on the second input and query the
 muscle_idattribute. Themuscle_idattributes are then transferred to the muscles on the first input. -
The
 Franken Muscle Paint SOP lets you interactively paint masks for Muscle IDs
 -
The
 Muscle ID SOP lets you create Muscle IDs and assign them to each connnected cluster of primitives on the input geometry.
 -
The
 Muscle Properties SOP physical properties to your character’s muscles that will determine how they are simulated by the
  muscle solver.
 -
The
 Muscle Solidify SOP node automatically converts your surfaces to triangles using its
 Remesh Surfacessettings or its internal default remesh mechanism.
How to 
These Franken Muscles workflow are only a part of the larger Muscle & Tissues workflow. You can combine Franken Muscles with traditional Muscle workflows to suit your needs. See Muscles and tissue workflow for more information.
Create a Franken Muscle sub-region using selections 
-
Create a
 Test Geometry: Tommy SOP node.
 -
Select Test Geometry: Tommy and turn off the Clothing and Textures.
-
Connect the TestGeometry_Tommy output to the input1 of the
Muscle Solidify SOP node. -
Connect the TestGeometry_Tommy output to the input1 of the
Muscle ID SOP node. -
Select the Muscle ID SOP node, turn on its Display flag.
-
Select the viewport and press 9. This turns off the Select Goups or Connected Geometry and allows you select faces without the existing selection groups.
-
Select the faces of the left chest area. The selection doesn’t have to be exact as you can refine it later with a
Franken Muscle Paint SOP.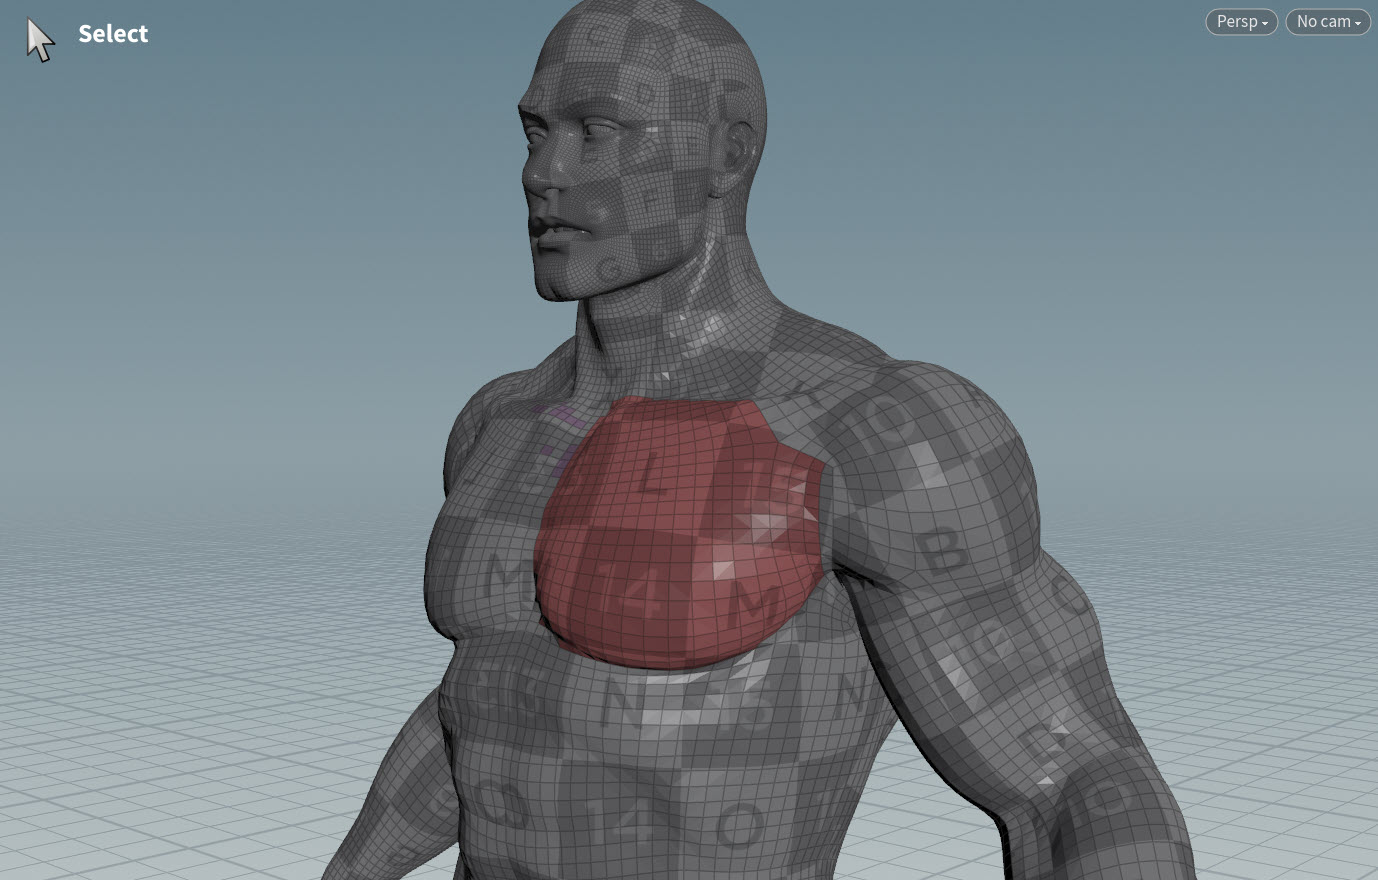
-
Press Enter and name it
L_Chest. -
Create a
Franken Muscle SOP. Connect the Muscle Solidify SOP node output1 to the input1. Then connect Muscle ID SOP node output1 to the input2. -
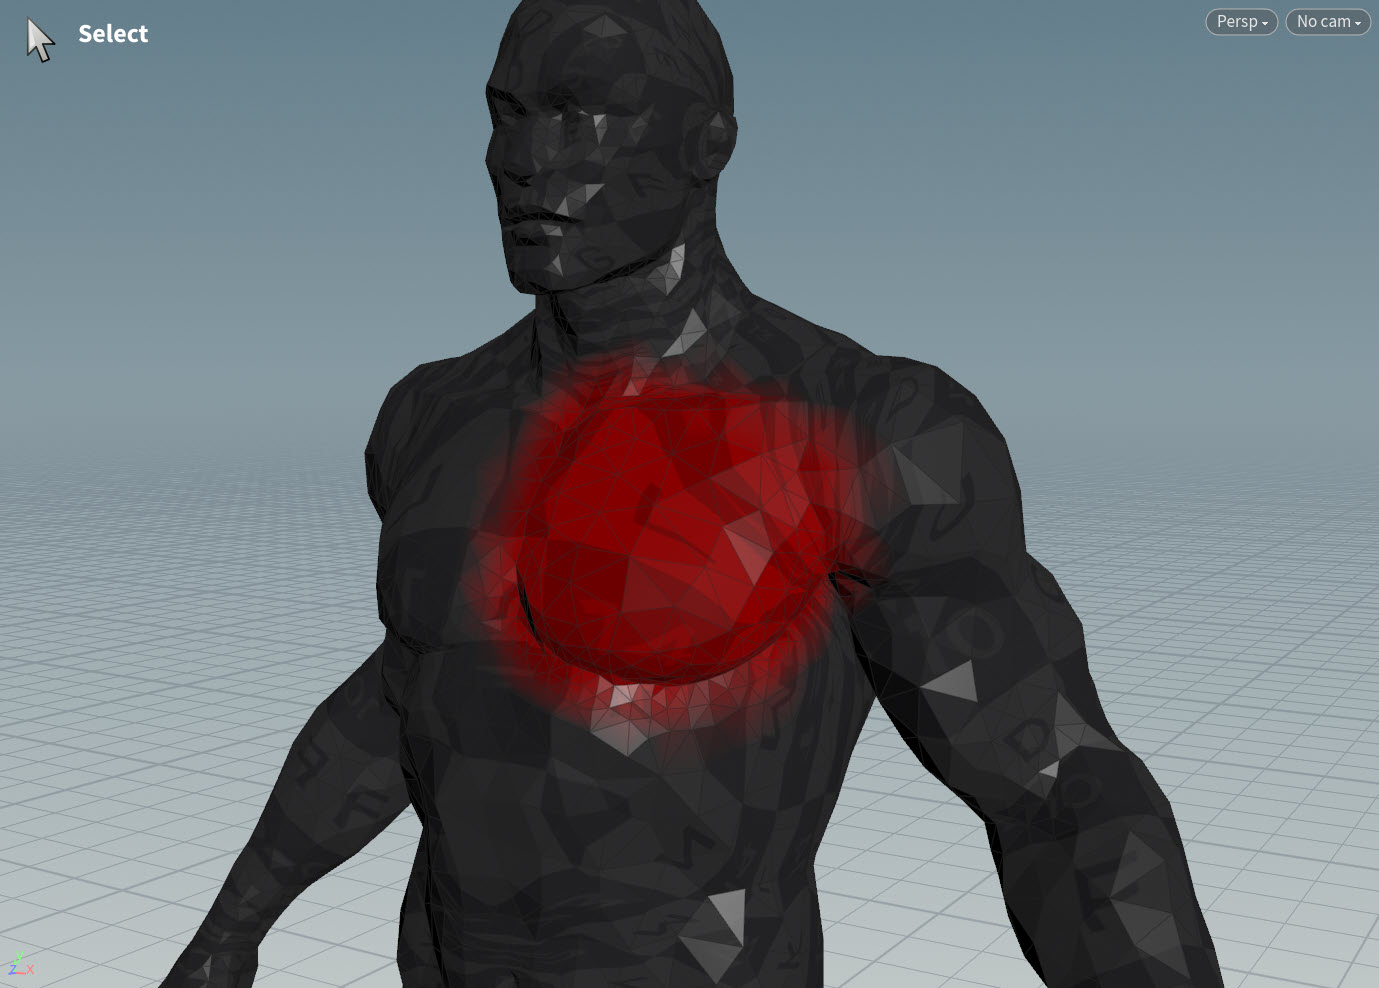
Select the Franken Muscle SOP node, turn on its Display flag.
-
In the Parameter Editor, do the following:
-
Turn on View Isolated Region.
-
In Muscle ID, select the drop-down menu and select
L_Chest. -
You can also change the parameters of
Transfer Distance,Falloff Distance, andInterior Spread Radiusto refine the Muscle sub-region. See Franken Muscle SOP for more information.
-
Create multiple muscle sub-regions using curves 
-
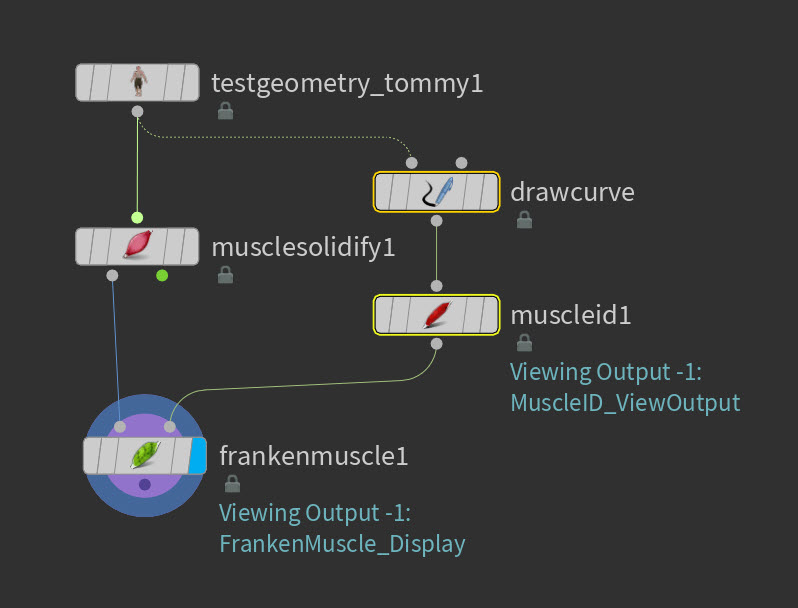
Create a
Test Geometry: Tommy SOP node. -
Select Test Geometry: Tommy SOP and turn off the Clothing and Textures.
-
Connect the TestGeometry_Tommy output to the input1 of the
Muscle Solidify SOP node. -
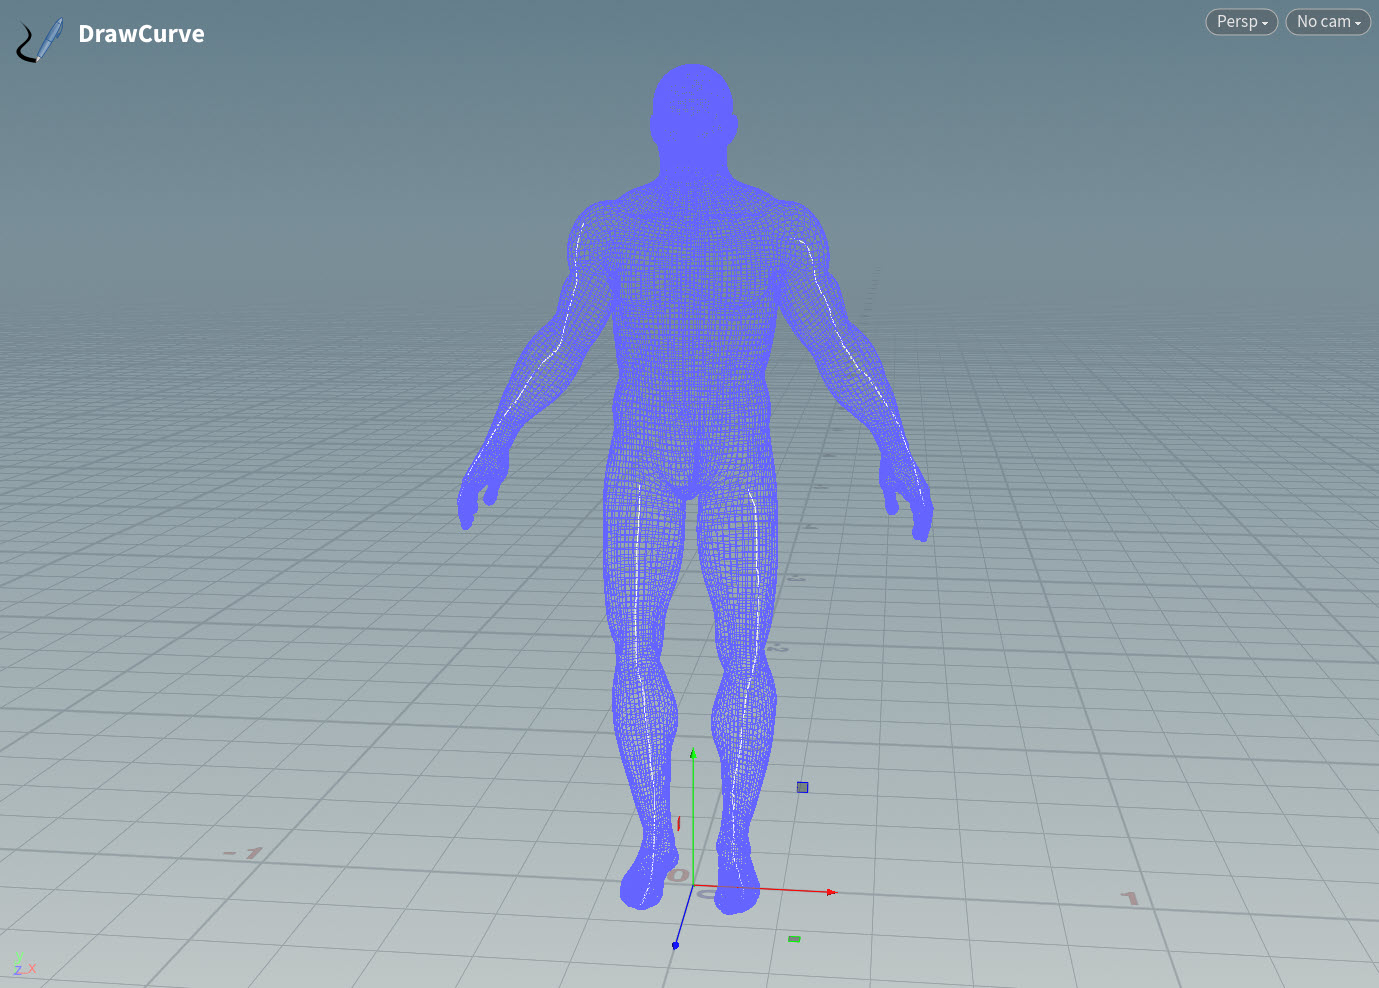
Select Tommy SOP in the viewport. In the Create Toolbar, select Draw Curve.
-
Draw four curves, one for each arm and legs of Tommy. This doesn’t have to exact as you can refine it later with a
Franken Muscle Paint SOP.-
You should see a new
 Draw Curve SOP connected to Tommy.
-
-
Connect the Draw Curve SOP output to the input1 of the
Muscle ID SOP node. -
Create a
Franken Muscle SOP. Connect the Muscle Solidify SOP node output1 to the input1. Then connect Muscle ID SOP node output1 to the input2. -
Select the Franken Muscle SOP node, turn on its Display flag.
-
You can also change the parameters of
Transfer Distance,Falloff Distance, andInterior Spread Radiusto refine the Muscle sub-region. See Franken Muscle SOP for more information.
-
You can now refine the muscle sub-regions using the ![]()
![]() Franken Muscle SOP or
Franken Muscle SOP or ![]()
![]() Franken Muscle Paint SOP.
Franken Muscle Paint SOP.
Create muscle sub-regions using Franken Muscle Paint 
-
Create a
Test Geometry: Tommy SOP node. -
Select Test Geometry: Tommy SOP and turn off the Clothing and Textures.
-
Connect the TestGeometry_Tommy output to the input1 of the
 Blast SOP node.
 -
In the Blast SOP parameter editor, do the following:
-
In Group, select
body. -
Select the checkmark for Delete Non Selected and Delete Unused Groups.
-
This deletes the eyes and teeth geometry which is not needed for this workflow.
-
-
Connect the Blast SOP output to the input1 of the
Muscle Solidify SOP node. -
Connect the Muscle Solidify SOP output to the input1 of the
Franken Muscle Paint SOP node.-
You can now start painting Muscle sub-regions on the Tommy geometry.
-
-
In the Franken Muscle Paint SOP parameter editor, select the Muscle IDs tab.
-
In the
Total New IDsparameter, click the + symbol to add the number of Muscle IDs you want to paint.-
For each
Muscle ID, you can rename your Muscle ID.
-
-
In the viewport, press Enter to use the Franken Muscle Paint Tool.
-
Paint the sub-regions you want on each Muscle ID. See
Franken Muscle Paint SOP for more information on how to change brushes and other hotkeys for painting.-
You can cycle through Muscle IDs quickly in the drop-down menu for
Active IDin the Viewport Toolbar or by pressing N.
-
-
You can then continue following the traditional Muscles and Tissues workflow. See Muscles and tissue workflow.
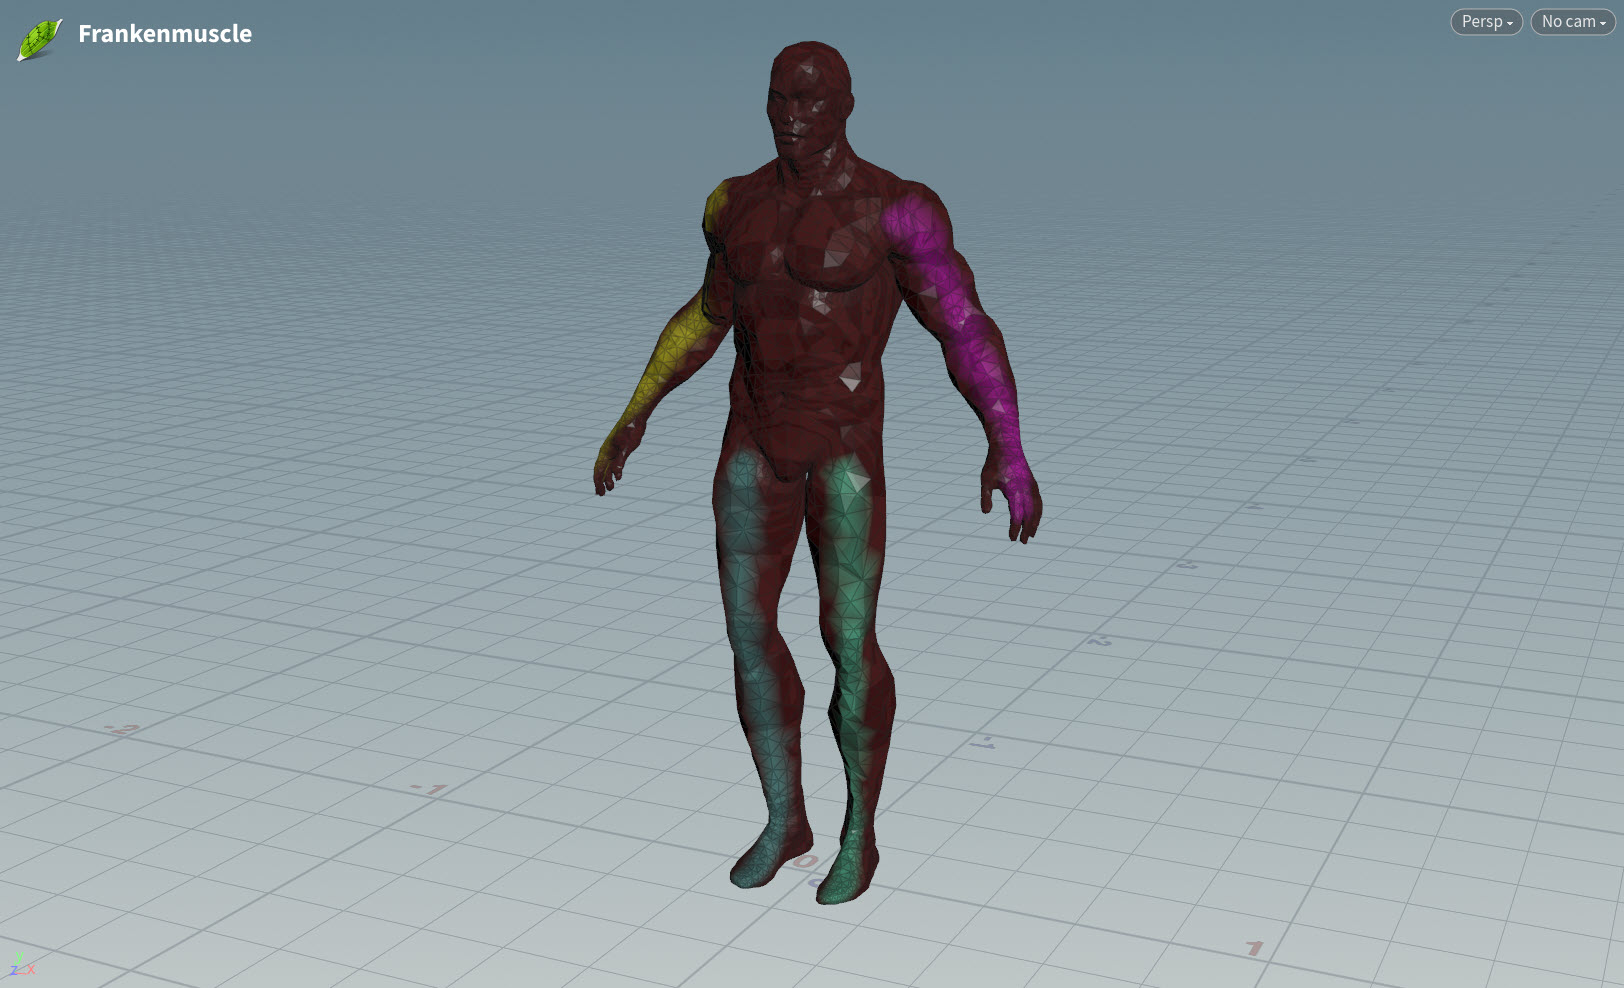
Example: Cycle through Muscle ID sub-regions created using Franken Muscle Paint SOP
| See also |