| On this page |
There are multiple ways to setup collision with Houdini Engine for Unreal.
You can generate complex, convex, simple, or create your own custom collision.
To create these collisions, you assign your geometry or parts of it to the ![]()
![]() Group SOP node. The colliders are generated based on your Group Name in the Group SOP node parameter.
Group SOP node. The colliders are generated based on your Group Name in the Group SOP node parameter.
Note
If you use your original static mesh to generate a collision, you must use the rendered prefix attributes for the collision and your static mesh to appear.
See Collision types for further explanations and its attributes for your Group Name.
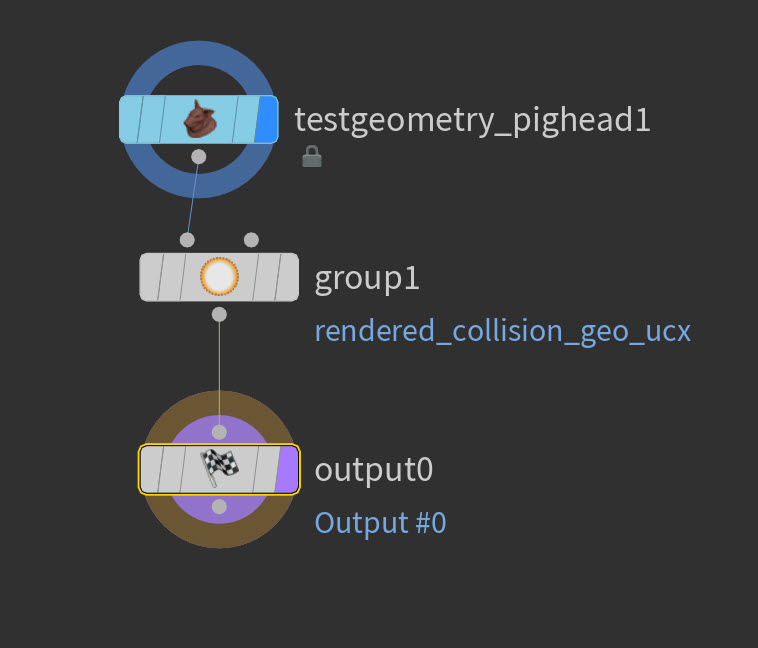
Generate collision from your asset 
This is the basic method to generate a collision using the collision attributes, a single group, and your existing asset.
-
In the node network, go into the geometry level for your asset.
-
Create a
 Group SOP node.
 -
Connect your object output to the input of
Group SOP node. -
Select the Group SOP node, and open the Parameter Editor.
-
In the Group Name, enter
rendered_collision_geo_ucx. -
In the Base Group category, turn on Enable.
-
Create an
 Ouput LOP node.
 -
Connect your Group SOP node output to the input of the Output LOP node.
-
Create an HDA and import it to your Unreal project.

Collision from multiple geometries 
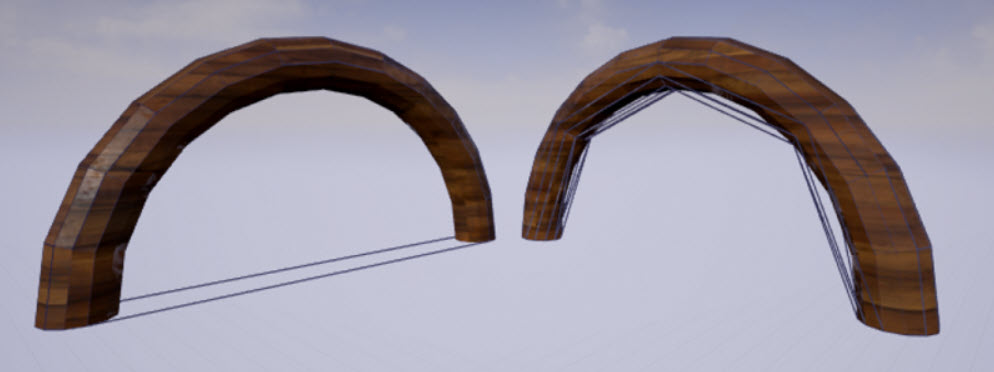
This method generates collision from multiple geometries on a single asset.
This can be useful if you have areas like a doorframe or fence that a player can walk through without colliding with a single collision.
For multiple geometries, make sure the name group has a sequential suffix after the collision attributes.
For example, the first collision is collision_geo_simple_1 and second is collision_geo_simple_2.
Warning
DO NOT use the collision_geo attribute for your custom collision. This results in Unreal generating a collision based on your original asset and not your custom collision.

-
In the node network, go into the geometry level for your asset.
-
Create a
Group SOP node. -
Connect your first collision geometry output to the input of
Group SOP node. -
Select the Group SOP node, and open the Parameter Editor.
-
In the Group Name, enter
collision_geo_simple_1. -
In the Base Group category, turn on Enable.
-
Repeat steps 2-6 for the rest of your collision geometry.
-
Make sure to change the end numerical value after the collision attribute prefix. For example, the first collision is
collision_geo_simple_1, second iscollision_geo_simple_2.
-
-
Create a
 Merge SOP node.
 -
Connect the output of your multiple collisions and original asset to the input of the Merge SOP node.
-
Create an
Ouput LOP node. -
Connect your Group SOP node output to the input of the Output LOP node.
-
Create an HDA and import it to your Unreal project.

Collision from LOD 
If your HDA has multiple LODs, you can use one of the LOD levels for your collision. LOD collisions uses complex collisions.
You need to use unreal_uproperty_LODForCollision as a detail attribute and set its value to the LOD level you want for your collision.
-
In the node network, go into the geometry level for your asset.
-
Create a
Group SOP node. -
Connect your LOD0 geometry output to the input of
Group SOP node. -
Select the Group SOP node, and open the Parameter Editor.
-
In the Group Name, enter
lod_0. -
In the Base Group category, turn on Enable.
-
Repeat steps 2-6 for the rest of your LODs.
-
Make sure to change the end numerical value after the collision attribute prefix. For example, LOD0 is
lod_0, LOD1 islod_1.
-
-
Create a
Merge SOP node. -
Connect the output of all of your LODs the input of the Merge SOP node.
-
Create an
 Attribute Wrangle SOP node.
 -
Select the Attribute Wrangle SOP node, and open the Parameter Editor.
-
In the VEXpression, enter
i@unreal_uproperty_LODForCollision = 1; -
Create an
Ouput LOP node. -
Connect your Group SOP node output to the input of the Output LOP node.
-
Create an HDA and import it to your Unreal project.