| On this page |
Importing SOP geometry 
There are two ways to get geometry into a COP network. You can either use a ![]() SOP Import COP which points to an existing SOP to grab the geometry, or you can use a
SOP Import COP which points to an existing SOP to grab the geometry, or you can use a ![]() SOP Geometry COP and dive inside to create the geometry directly inside. Although these are two separate options in the tab menu, they both put down the same node.
SOP Geometry COP and dive inside to create the geometry directly inside. Although these are two separate options in the tab menu, they both put down the same node.
For more information, see Bringing SOPs into COPs.
Creating VDBs from surface 
-
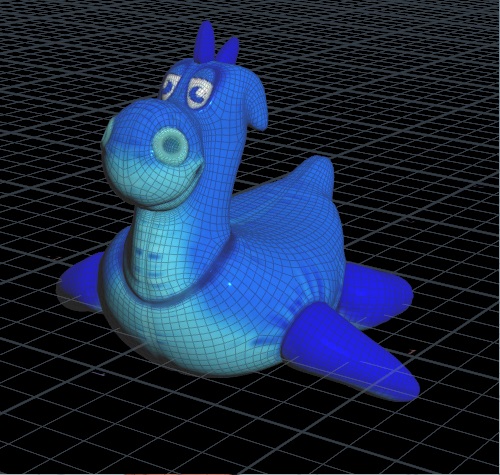
Put down a
 SOP Geometry COP and dive inside to create the geometry, for example a
  Rubber Toy Test Geometry.
 -
Connect a
 VDB from Polygons node to convert it into a VDB volume.
 -
Increase the Voxel Size to
0.05to give it a higher resolution. -
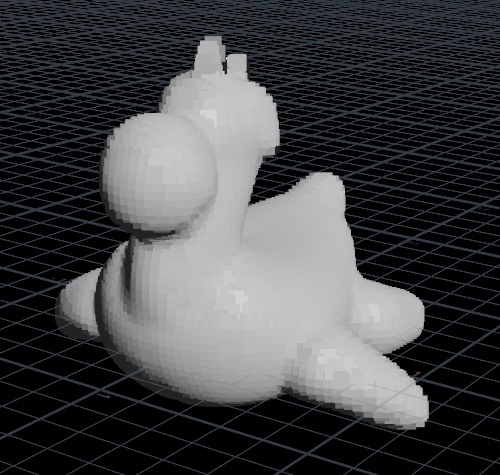
Navigate back to the COP network, and you will see the VDB representation in the viewport. You will also have a
geometryoutput on your SOP Geometry node, and you're able to click on the node to see the info window.
 -
To use it in Copernicus you will need to convert it into a VDB Layer. You can do this by putting down a
 Geometry to VDB node, and connecting it to your SOP Geometry COP. This node extracts a specifically named volume or VDB from the geometry and creates the the single wire out of it. If you click to see the info window on this node, you will get slightly less information, since it’s just one VDB and not the whole geometry.
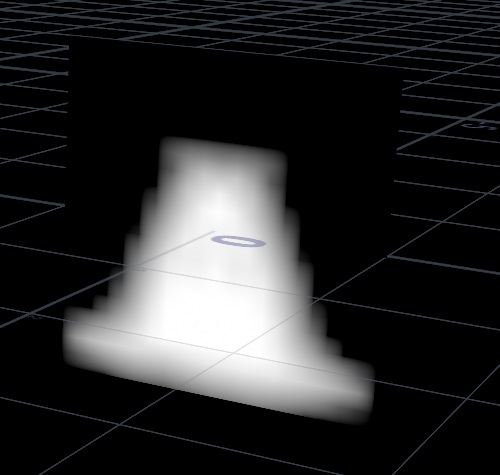
Creating VDBs from fog volume 
-
Put down a
SOP Geometry COP and dive inside to create the geometry, for example a  Pig Head Test Geometry.
 -
Connect a
VDB from Polygons node to convert it into a VDB volume. -
Turn off the Distance VDB checkbox and turn on the Fog VDB checkbox to create a fog volume.
-
Navigate back to the COP network, and you will see the VDB representation in the viewport. You will also have a
geometryoutput on your SOP Geometry node, and you're able to click on the node to see the info window. -
To use it in Copernicus you will need to convert it into a VDB Layer. You can do this by putting down a
Geometry to VDB node, and connecting it to your SOP Geometry COP. This node extracts a specifically named volume or VDB from the geometry and creates the the single wire out of it. If you click to see the info window on this node, you will get slightly less information, since it’s just one VDB and not the whole geometry.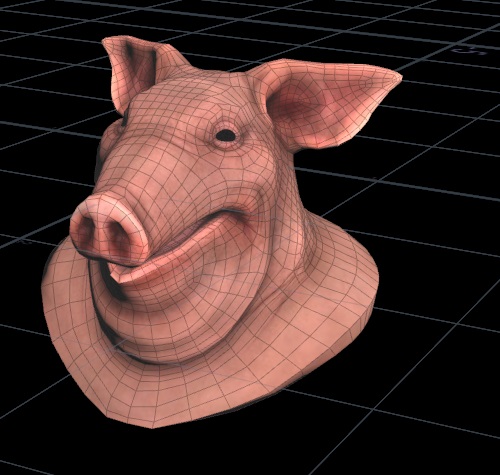
-
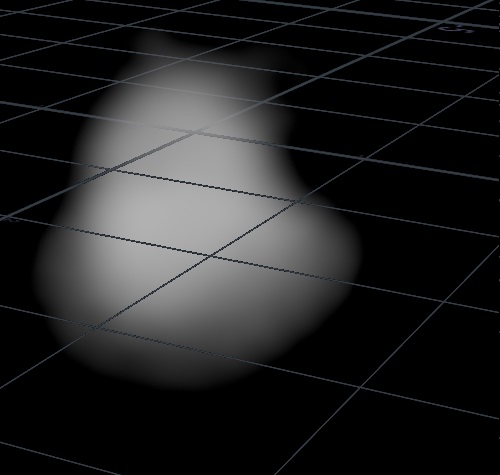
Next you can put down a
 Layer form VDB node and connect the
 outputof the Geometry to VDB node to thevdbinput. This dips one of our 2D volumes into the VDB, so you can see what it looks like. -
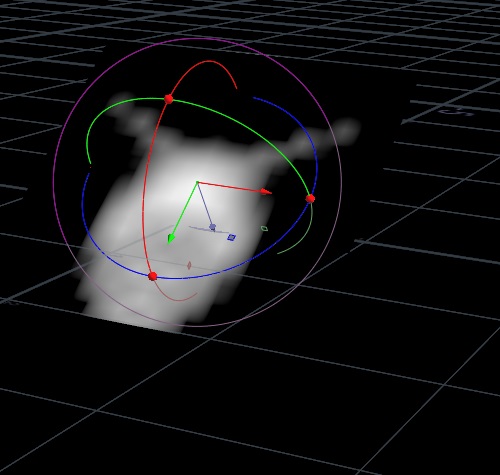
In order to get difference slices of the pig head, put down a
 Layer node and a
  Transform 3D node.
 -
Connect them together and then wire the
outputof the Transform 3D node to thesize_refinput of the Layer form VDB node. -
With the Transform 3D node selected, you can press Enter in the viewport to activate the state, and use the handles to rotate and transform the slice.
Tip
You can use the ![]() Rasterize Volume COP to simulate camera views by sending rays, like in Karma.
Rasterize Volume COP to simulate camera views by sending rays, like in Karma.
Note
Most of the COP nodes for working with monochrome images or vector RGB images can also be used in VBDs.