| On this page |
Overview 
Houdini has configuration options in many different places. Some of the most important:
-
Choose Edit ▸ Preferences ▸ ‹category›.
-
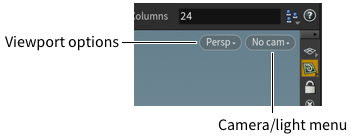
Click the
 Display Options button in the 3D view (and some other views) to get options related to the view.
 -
Option windows. Click the
 options button in a window or pane to edit its options.
See also how to change the hotkeys and how to customize the shelf.
Common UI customizations 
You can customize the UI for a particular workflow, project, or facility.
| To... | Do this |
|---|---|
|
Scale the Houdini UI |
Choose Edit ▸ Preferences ▸ General user interface and change the Global UI size option. You can also set the |
|
Adjust the UI colors |
Choose Edit ▸ Color settings. |
|
Use Houdini 8-style pane coloring to show network type |
Choose Edit ▸ Preferences ▸ General user interface and turn on Color pane headers with network contexts. |
|
Add preset colors to the palette in the color picker dialog |
|
|
Remove preset colors from the palette in the color picker dialog |
|
Common viewer customizations 
| To... | Do this |
|---|---|
|
Change the tumbling behavior |
|
|
Turn off multicolored handles |
With this option off, Houdini will draw handles all-red instead of coloring the axes red, green, and blue.
|
|
Use a black background in the 3D viewer |
|
|
Change the background color in a compositing viewer |
|
Common network editor customizations 
| To... | Do this |
|---|---|
|
Choose whether to zoom in and out from the center or based on the mouse position |
|
|
Change how wires are drawn |
|
|
Automatically place new nodes instead of requiring a click |
|
Paths and locations 
Houdini uses two types of environment variables for specifying directories: paths (lists of locations to check for files), and locations (paths of directories).
In a command line shell, run hconfig -ap to show the current path
and location assignments, and instructions and shortcuts for setting
the variables.
Locations 
Locations, like $HSITE (directory of site-specific files) and
$HIP (the directory containing the current .hip file), specify
the directory in which to find files for various purposes.
Unlike a path, a location variable can’t have multiple directories;
it’s simply used to avoid hard-coding locations, as in
$HFS/geo/model.bgeo instead of
/usr/joe/files/show/act1/scene1/geo/model.geo. This makes the .hip
file much more portable between machines and operating systems.
Tip
You can set the $HSITE variable to a directory containing
site-specific files. You can set the $JOB variable to a
directory containing project-specific files. The two locations
are included in the path, but not defined by default. So, if you
define one or both, they will already be included in the path.
Note
The $HSITE directory must contain a houdini‹X›.‹Y›
directory (such as houdini9.0). If no such directory exists,
Houdini will not search in $HSITE.
Paths 
Paths, like $HOUDINI_PATH, can have more than one location, and
Houdini searches the locations in the path in the order they appear
in the variable.
Houdini uses paths to search for various file types (for example,
$HOUDINI_GEOMETRY_PATH for .geo files) when the file’s location
is not absolute.
For example, the default $HOUDINI_GEOMETRY_PATH is:
./
$HOUDINI_PATH/geo/
If you add a location to the path:
./
$HIP/geo/
$HOUDINI_PATH/geo/
…then you can just use model.bgeo in a geometry file parameter and
Houdini will find it if it exists in $HIP/geo/.
Some important Houdini paths:
$HOUDINI_GEOMETRY_PATH
Geometry (.geo) files.
$HOUDINI_OTLSCAN_PATH
Houdini digital asset (.hda) files.
$HOUDINI_SCRIPT_PATH
HScript (.cmd) files.
$HOUDINI_TEXTURE_PATH
Image files.
$HOUDINI_CLIP_PATH
Channel and audio files.
$HOUDINI_VEX_PATH
Compiled VEX (.vex) files.
This not a full list of search paths. In a command shell, run
hconfig -ap to see all available path variables.
Configuration files 
Houdini will search certain paths to build up the configuration when it launches. The main path is in the environment variable HOUDINI_PATH. For different options, Houdini may find the first file it finds, or it may aggregate all files found in the path.
-
Execute the first startup scripts it finds (
123.cmdand456.cmd). See event scripts. -
hopmanager.preffile (for OTL configuration). See Operator type manager. -
OPmenufile (for customizing menu options of nodes).
 -
FBresfile (for customizing the list of preset resolutions in pop-up menus on render nodes, lights, and cameras). -
FBrenderfile (for customizing the list of preset sequence filename patterns in pop-up menus). -
Most files under
$HFS/houdini($HH). You can copy these files into$HOME/houdiniX.Y(which is earlier on theHOUDINI_PATH) and modify them to override the files in$HH.
Note
Preference files (.pref) that are outside of $HOME/houdiniX.Y must be suffixed
with .nosave in order for them to be recognized, even if they occur earlier
in the HOUDINI_PATH (ie, ui.pref.nosave).
Preventing user changes 
-
If you are creating/copying
.prefand/or.deskfiles manually instead of using the graphical interface (for example, to enforce uniform layouts/preferences across all machines), you can usually append.nosaveto the filename to prevent the files from being overwritten with user changes. The user can still change the settings in a session, but those changes will not be saved between sessions. -
For desktop (pane layout) files, this is the same as turning on the “no save” option in the desktop editing interface.
-
The downside is that a preference file often contains many different preferences and you may not want to lock them all down. The
.nosavefeature is most useful to overridehopmanager.prefsettings to provide a consistent set of OTLs. -
Make sure the
.nosaveversion of the file is higher in theHOUDINI_PATHthan a regular version.
| See also |