| On this page |
About this tutorial 
This tutorial will introduce you to the basics of Houdini’s Rigid Body Material Based Destruction workflow using the ![]() RBD Bullet Solver SOP. This tutorial assumes you have at least a beginner’s understanding of Houdini. The tutorial will cover the following topics:
RBD Bullet Solver SOP. This tutorial assumes you have at least a beginner’s understanding of Houdini. The tutorial will cover the following topics:
-
Preparing geometry for destruction.
-
Using the
 RBD Material Fracture SOPs.
 -
Adding a custom hitting object.
-
Organizing your network.
-
Tweaking constraint and material properties.
-
Creating constraints within a material.
-
Using multiple constraint types.
-
Rendering glass.
-
Debugging and tweaking simulations.
Before you begin 
This is a guided tutorial which follows actions which happen automatically in Houdini. This means we have automated a lot of tedious button pressing in Houdini, so you can concentrate on setting properties and values that make a difference.
Note
Because this tutorial communicates with Houdini, you should follow this tutorial inside Houdini, with this page in a an embedded browser pane or floating window, just as you would need to load example files from the help docs.
At the start of the tutorial below, you will load the example Houdini Digital Asset into your scene (there is a button to do this automatically if you are reading this in the embedded browser, otherwise we will explain how to load the asset manually). This adds a node to Houdini with several buttons in its parameter interface. You will click the buttons as you follow the tutorial, to create the simulation a few nodes at a time. At any point in the tutorial you can build the entire finished to see how it is supposed to work.
At the end of this tutorial, you should have a simulation that looks like the following animation:
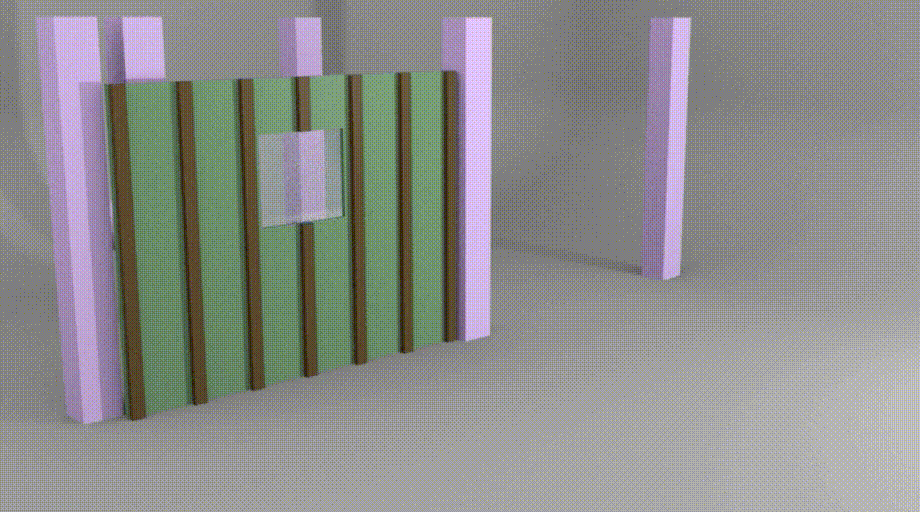
However, your simulation may not be identical, for various reasons:
-
Minor changes to parameter values can have large changes to a simulation.
-
Software updates between when we wrote this tutorial and when you read it might introduce changes to behaviors.
-
Rendering with motion blur can introduce changes to your simulation.
After you finish the tutorial, you can try starting again, recreating the simulation yourself from scratch using the tutorial text to guide you, rather than using the asset to automatically build the network. You could even run two Houdini sessions side-by-side, with the automated asset in one and your from-scratch network in the other, copying and pasting from one to the other, to help you through it.
Tips 
-
Save your scene file frequently as you work. For example, you might save
rbd_tutorial_step1.hip,rbd_tutorial_step2.hip, and so on. -
Often you will want (or be encouraged) to tweak a parameter to see how changing it changes the simulation. In the parameter editor, values that have been changed (that is, that are not the default values) are shown in bold. To revert a value to its default, right click the parameter or tab, and choose Revert to defaults.
Note
Any value in the Houdini parameter interface that’s in BOLD is not the default value. To return to default values, right-click the parameter or folder and choose Revert to Defaults.
Load Digital Asset and Explore 
To begin, click the Load button above to load the example asset.
Note
If the Load button above doesn’t work, do the following:
-
In Houdini’s main menus, choose Install Asset Library.
-
In the Install Digital Asset Library dialog, in the text box labelled Digital Asset Library, type
$HFS/houdini/help/examples/nodes/sop/rbdbulletsolver/MaterialFractureTutorial.hdaand press Enteror
Click the
 file chooser button and navigate to
 $HFS/houdini/help/examples/nodes/sop/rbdbulletsolver/in the file browser, selectMaterialFractureTutorial.hda, and click Accept. -
Make sure Install Library to is set to Current HIP file only.
-
The list of Digital assets to be installed should show
Object/rbd_mf_tutorial. -
Click Install and Create.
This will create a new node in Houdini at the Object level (/obj) called RBD Material Fracture Tutorial (the node itself will be named rbd_mf_tutorial1. The parameter interface for the node will show buttons that are grayed out.
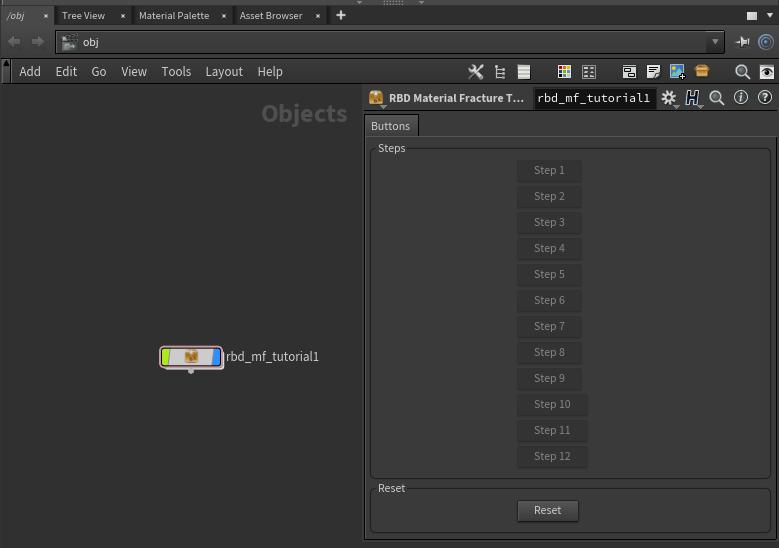
Tip
If you ever accidentally delete the rbd_mf_tutorial1 node, the asset type is still loaded in Houdini, so you can easily recreate the node. In the network editor, at the Object level, press ⇥ Tab and start typing RBD Material Fracture Tutorial, and press Enter once it is selected. Then click to place the new node in the network.
Double-click the rbd_mf_tutorial1 node to dive inside. You will see a node network that looks like the following:
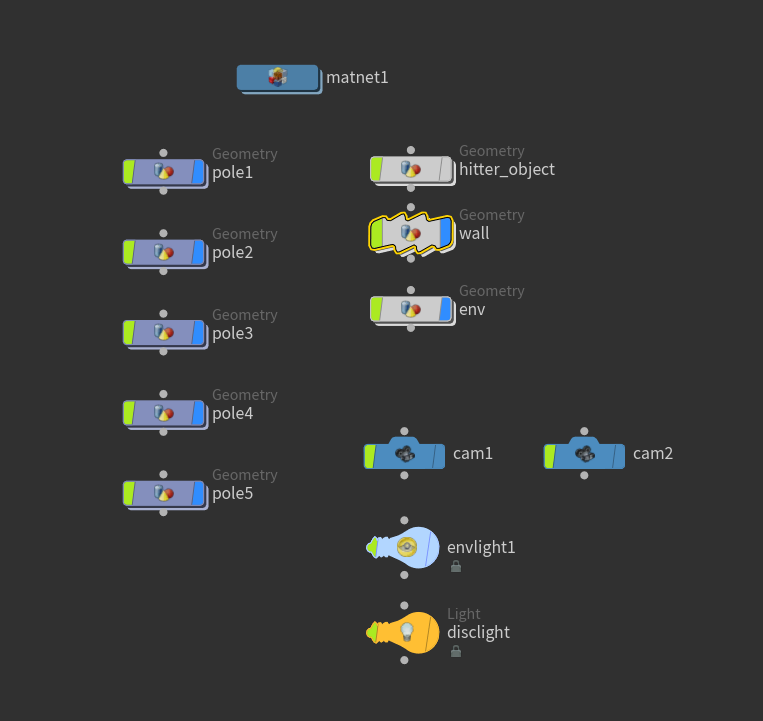
Double-click the wall object, or select it and press Enter, to dive inside it to the SOP level. Here you will see the finished node network. If you set the display flag on the last SOP in the chain (rbdbulletsolver1) and click ![]() Play Forward in the playbar, you will see the wall get destroyed by the hitter object.
Play Forward in the playbar, you will see the wall get destroyed by the hitter object.
Note
It may take a few minutes for Houdini to build the various RBD “materials” (glass, wood, and drywall) and constraints before the scene will begin playback.
The Wall asset 
Inside the wall object you will see a ![]() Subnetwork SOP called
Subnetwork SOP called wall1. Double-click this SOP to dive inside.

This wall is built simply so that we have some light-weight objects to work with. Here are a few things to keep in mind when building geometry for destruction:
-
Do not allow the geometry to intersect.
-
All geo should be “manifold” (meaning “water tight” or without holes). This is why there are numerous
 Polyfill SOPs in this network. If there are openings in the geometry, this node will fill them, (this often happens after boolean operations). If there are no openings, it will simply do nothing.
 -
Each type of material is grouped. You will see how useful this is later.
To go back up one level, out of this SOP node, in the network editor press U, or click the ![]() up arrow button in the toolbar, or click the previous level in the network path at the top of the pane.
up arrow button in the toolbar, or click the previous level in the network path at the top of the pane.
Next Steps 
Now you can start the step-by-step Material Based Destruction tutorial.