| On this page |
Overview 
-
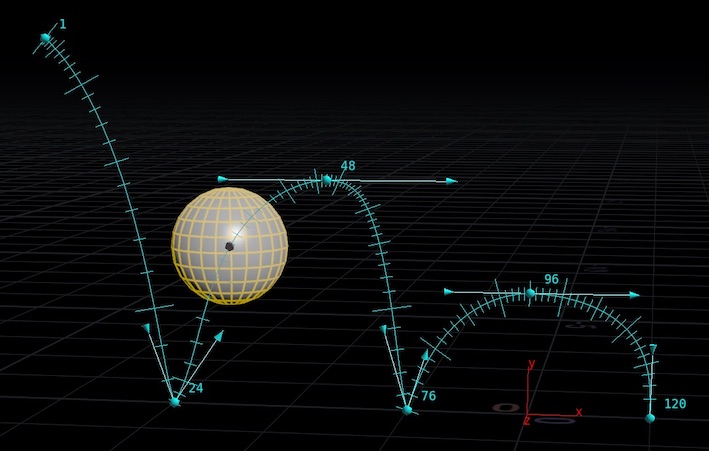
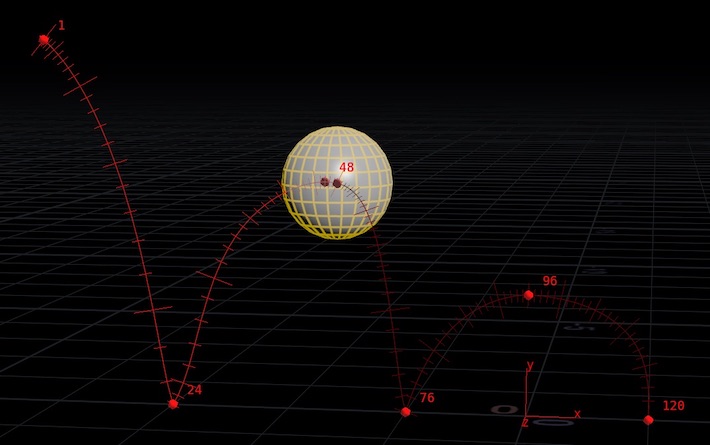
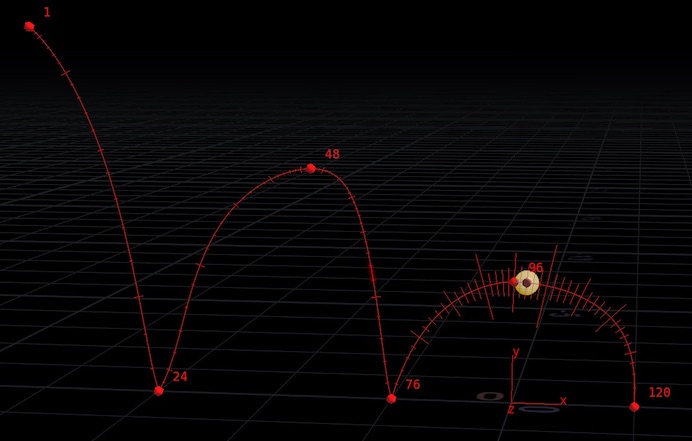
The path shows the interpolated position of the object through world space during the scene animation.
By default, the path is sampled at integer frames. You can increase the path sampling in the handle settings to get a smoother path at the cost of performance.
-
Ticks (small lines perpendicular to the path) show where the motion path is at each frame. (You can turn the frame ticks off in the settings.) Every fifth tick is slightly longer to make it easier to visually count frames.
-
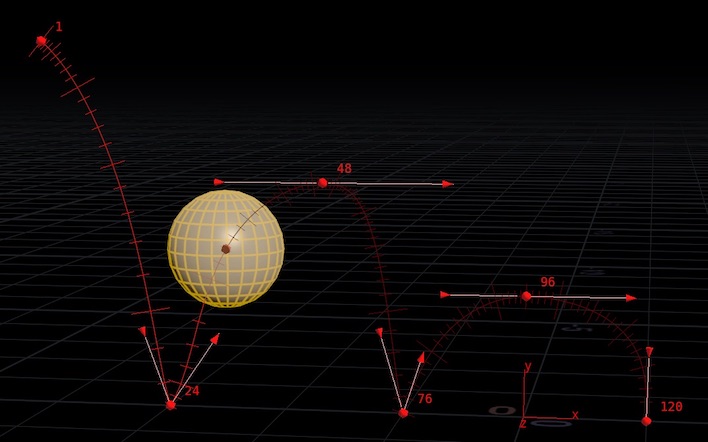
Spheres on the path show keyframes. You can click or drag a sphere to move it in world space.
-
You can display tangent handles on keyframes to let you edit the in and out tangents for keys and see the changes in the path.
How to 
| To... | Do this |
|---|---|
|
Show the motion path handle for an object |
|
|
Make the handle persistent (show the handle even when the object is not selected) |
Right-click the motion path and turn on Persistent. |
|
Edit animation using the motion path handle |
|
|
Change the handle color |
Right-click the motion path and turn on Handle parameters. Then click the Handle color swatch. Changing the color makes it easier to tell different motion paths apart when you have multiple persistent handles.
|
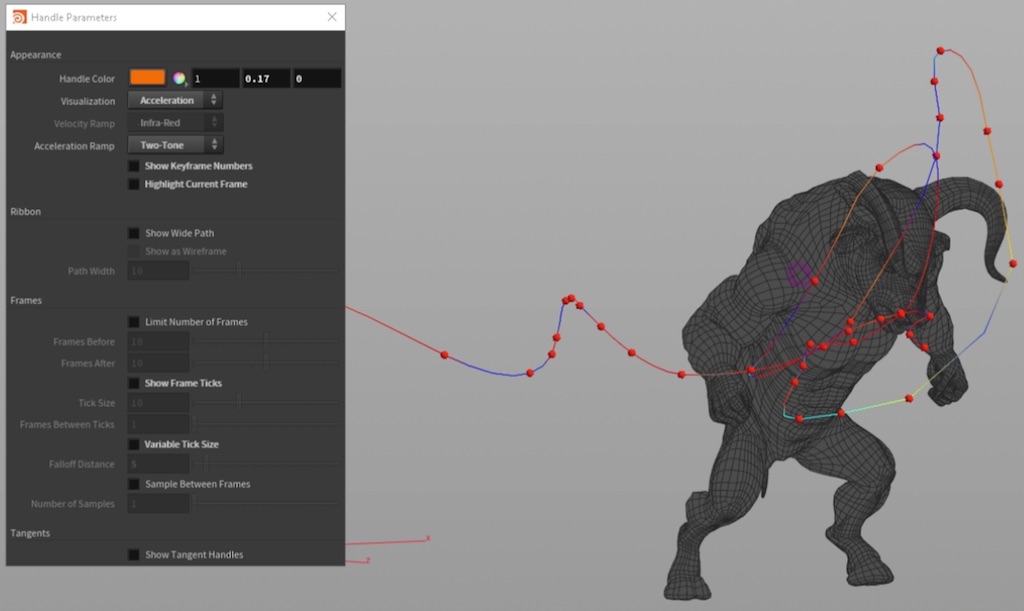
Handle settings 
| To... | Do this |
|---|---|
|
Show the handle settings window |
Right-click the motion path and turn on Handle parameters. |
Handle color
The color Houdini uses to draw the motion path handle. Click the color swatch to open a color picker.
Visualization
Controls how Houdini draws the motion path.
Timeline
Draw the path in a solid color.
Pre/Post
Draw the path before the current frame bright and the path after the current frame using different shades.
Velocity
Color the path using a ramp to visualize the object’s velocity at each point.
Acceleration
Color the path using a ramp to visualize the object’s acceleration at each point.
Tip
You can change the visualization quickly by right-clicking the path handle and choosing an option from the menu.
Velocity ramp
When Visualization is Velocity, this lets you choose a preset color ramp to use to visualize velocity as color.
Acceleration ramp
When Visualization is Acceleration, this lets you choose a preset color ramp to use to visualize acceleration as color.
Show wide path
Draw the path as a wide strip/ribbon instead of a line. This may be helpful for visualizing object roll/banking. Keyframes appear as bars across the ribbon.
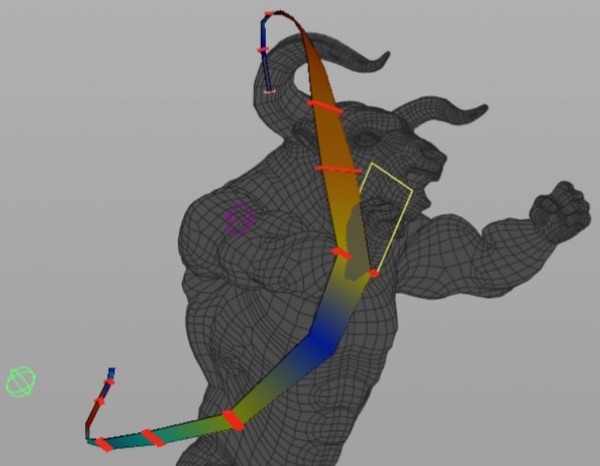
Show as wireframe
When Show wide path is on, this draws the path as a wireframe (that is, as two lines along the edges of the path) instead of as solid, allowing you to see through it.
Path width
When When Show wide path is on, this controls the width of the path.
Limit number of frames
Normally Houdini draws the entire path corresponding to the scene’s current frame range. You can turn this on to only draw the path for a certain number of frames before and a certain number of frames after the current frame.
Frames before
When Limit number of frames is on, only draw the path for this many frames before the current frame.
Frames after
When Limit number of frames is on, only draw the path for this many frames after the current frame.
Show frame ticks
Show ticks on the path representing frames. If you have a very large number of ticks crowding together on the path, you can choose to only show a tick for only every second frame, or third frame, or ‹n›th frame, using the Frames between ticks setting below.
Tick size
Controls how long the ticks marks are. Increase this to make the tick marks more visible.
You can also use the Variable tick size setting to dynamically emphasize the ticks near the current frame and de-emphasize ticks away from the current frame.
Frames between ticks
The default value of 1 shows a tick for every frame. If you have a very large number of ticks crowding together on the path, you can use 2 to only show a tick for every second frame, or 3 to only show a tick for every third frame, and so on.
Variable tick size
Turn this on to dynamically increase the size of ticks near the current frame, and decrease the size of ticks away from the current frame. In certain circumstances this might make the handle less likely to obscure other geometry.
Falloff distance
When Variable tick size is on, this controls how quickly the ticks decrease in size the further they are from the current frame on the motion path. Decreasing this setting causes the tick length to decrease over a shorter distance, so long ticks near the current frame quickly fall off. Increasing this setting stretches the falloff over a greater distance, so long ticks near the current frame slowly decrease along the path.
Sample between frames
Normally, Houdini draws the path using straight line segments between the object’s position at each integer keyframe. Sometimes you might want to sample a smoother line, to capture very quick motion or visualize the effect of tangent changes better. You can turn this setting on and increase the Number of samples parameter to sample at times between frames. However, turning this on can make displaying and manipulating the motion path handle slower.
Number of samples
When Sample between frames is on, this is the number of samples to take for each frame of animation. The default value of 1 samples at each frame, the same as when Sample between frames is off. A value of 2 would sample at the frame and halfway to the next frame. A value of 3 would sample at each frame and 1/3 and 2/3 of the way to the next frame, and so on.
Show tangent handles
At each keyframe, show tangent handles to let you adjust the in and out tangent directions and speed visually in world space.
Tip
You can show or hide the tangent handles quickly by right-clicking the path handle and choosing Show tangents from the menu.