
| On this page |
Old network
As of Houdini 20.5, use Copernicus nodes instead of Compositing nodes. Though both networks still exist, the Compositing network is now designated as COP Network - Old. The Compositing network and its nodes will be deprecated and then removed in a future Houdini release.
Compositing node (COP2) networks 
A Compositing network contains compositing nodes (COP2s) for manipulating 2D pixel data. This is useful for compositing images such as render passes, but you can also use COP2s to manipulate other pixel-based data, such as depth maps.
Houdini creates a default compositing network at /img. You can also create your own Compositing network at any level of the scene (for example, next to a render node that uses the Compositing network to process its output).
Wiring COP2s together controls the flow of image data, from nodes that load or generate image data through nodes that modify the image.
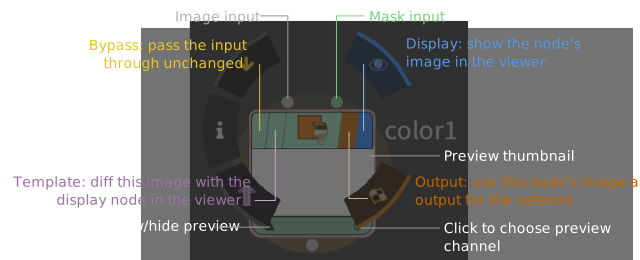
Compositing nodes have a different node body from other network nodes.
-
Compositing nodes include a preview thumbnail in the node body. To hide or show the preview thumbnail, click the arrow in the bottom left corner of the node.
-
To control which image plane the node displays, click the plane menu in the bottom right corner of the node.
-
Because of the special features built into compositing node, you cannot assign custom shapes to them.
You can view the image generated by a compositing network in the Composite View tab.
See compositing for more information on using compositing nodes.
COP2 flags 
Icon |
Key |
Description |
|---|---|---|
|
Q or B |
Bypass disables the node, making it pass its input image through to the output unchanged. This is useful for testing and visualizing the effect the node is having in the viewer. When a node is bypassed, the flag on the left of the node is lit yellow. |
|
T |
Template makes the node’s image diff-able in the viewer. You can use controls in the viewer UI to compare between the display output and the template output. When the template flag is on, the flag second from the left of the node is lit purple, and a maroon ring appears around the node. |
|
E |
Output marks the node whose output is used as the output for the entire network. When the output flag is on, the flag second from the right of the node is lit dark orange, and an orange circle appears behind the node. |
|
R |
Display marks the node whose output appears in the COP2 viewer. Often this is at the end of the network, showing the cumulative output of the network, but you can (and will often) move the display flag around the network to check the output of different nodes. When the display flag is on, the flag on the right of the node is lit blue. |


Nodes 
-
Imports geometry attributes as image planes using a UV attribute.
-

Generates a blackbody ramp, or colorizes a black and white image with a blackbody ramp.
-
Converts a single mosaic (flipbook/subuv) image into a sequence of sub images based on the frame.
-
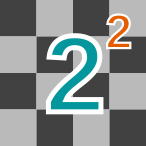
Generates a texture that can be used as a simple resolution checkerboard.
-
Simple helper node to generate the default normal color.
-
Overlays 2 normal maps together.
-
Convert a grayscale image into a normal map.
-
Invert individual channels on an image.
-
Adjusts black point, white point, and midrange to increase, balance, or decrease contrast on a normal map.
-
Rotates a normal map while correcting recalculating it’s internal vectors.
-
Ensures the normal map is balanced in a unit vector.
-

Load Substance Archive (SBSAR) Files into COPs


