| On this page |
Input 
You can import instancers to Houdini when you select the Actor with the Instanced Static Mesh ComponentThe instanced mesh is imported as a packed primitive, copied on each of the instanced points.
Each material used for the instances will have a corresponding attribute named unreal_materialINDEX where INDEX is the index of the corresponding material’s slot. The value will be the Unreal path to that material.
Foliage instances can be imported in a similar way, and will have the unreal_foliage attribute set.
Alternatively, you can import a Static Mesh as a single attribute instance when checking the Import as reference checkbox.
Output 
The plug-in supports outputting instances from an asset using packed primitives, object instancers, or attribute instancers.
Instanced geometries in Unreal are InstancedStaticMeshComponents by default or HierarchicalInstancedStaticMeshComponents if the geometry instanced has multiple LODs. If you want to force the creation of HierarchicalInstancedStaticMeshComponents, even without LODs, you can add the unreal_hierarchical_instancer attribute and set its value to 1.
Note
For Nanite meshes, forcing the use of HierarchicalInstancedStaticMeshComponents is not recommended - as it will have a performance cost.
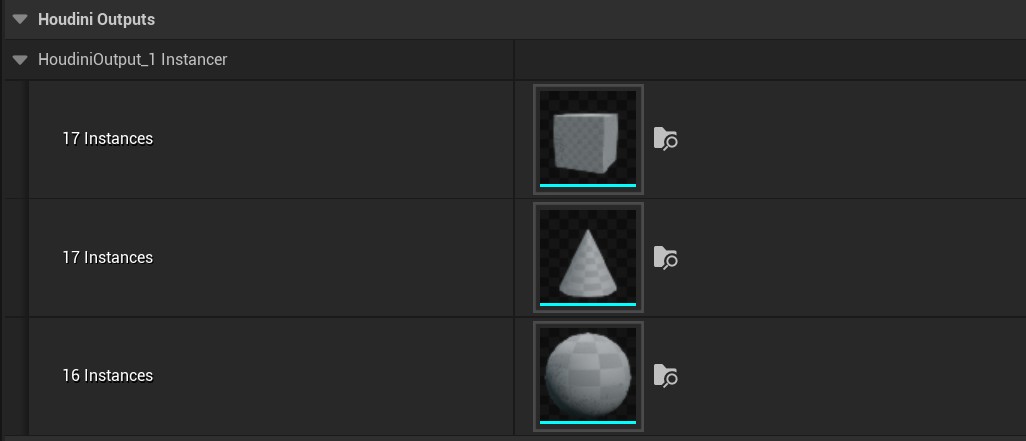
Instanced geometry or uassets appear as instancers in the Houdini Outputs section of the Detail Panel, as shown below:
Point attributes can be added to specify material overrides for the instanced meshes. Create an attribute named unreal_materialINDEX where INDEX represents the material slot index to override. The value should be the Unreal path to the material to be used.
Note
Replacing the geometry of instanced outputs in Unreal has been deprecated in Houdini 20.5 and removed in Houdini 21.0. Use the attribute instancer instead.
Packed Primitives 
The recommended way to create instances is using Packed primitives. The packed geometry is used as the instanced geometry and any copy of this packed primitive is converted to instances in Unreal.
Note
An instancer is created for packed primitives only if that packed primitive is copied more than once. Single instance instancers only create regular Static Mesh Components. This can be changed by using the “unreal_force_instancer” attribute.
A simple way is to use a Copy To Points SOP and turn on the Pack and Instance option. You can also use Pack Geometry Before Merging or Inputs.
It’s important to look at the location of the attributes when you control properties of either the instancer of the instanced mesh in packed primitives. If you apply an attribute before packing it’s applied to the generated mesh. For example, you apply attributes before using the PACK SOP. If you apply attributes after packing, it’s only applied to the instancer.
Attribute Instancers 
Besides instancing geometry generated by the HDA, instances can also be created from pre-existing Unreal assets.
This can be done using the unreal_instance attribute and setting the attribute value to the asset’s reference.
You aren’t limited to static meshes, but the instanced asset must be convertible to a native Actor type. In that case, multiple instances of that Actor type is created and the generated instancer component will be a HoudiniInstancedActorComponent. This can be used to spawn pre-existing assets in the level using the generated instancer’s point cloud.
You can also instantiate classes directly by using attribute instancers. This is useful to create instances of a class which you can’t save as a Uasset in the Content Browser, but can be instantiated as an Actor(for example, Lights, Volumes etc.. ).
To do so, set the unreal_instance value to the clsas name you want to instantiate as Actor (unreal_instance = PointLight).
Note
To detect it properly, attribute instancers need to be in a separate part of the Geometry. Attribute instancer won’t be detected if the points that they are assigned to is part of the main geometry.
When an asset referenced by an attribute instancer could not be found, the plugin creates a default “asset not found” box mesh (hidden in-game by default) instead of ignoring the instancer. This can be enabled or disabled in the plugin settings in the Show default Mesh checkbox.
You can apply the Houdini rot/orient and scale attributes to specify the transform of the instance.
Splitting Instancers 
There are some cases where you may want to split instancer outputs to multiple components. This could be to assign different materials to each instancer or to get a finer grain control on the actors generated when baking.
This can be done using the unreal_split_attr string attribute. This attribute’s value should be set to the name of another attribute, whose values will be used to control the splitting.
(a separate instancer component will be created for each value of that attribute).
For example, you can use the unreal_material attribute as the unreal_split_attr attribute (unreal_split_attr = unreal_material) creates an instancer component for each material on the second attribute.
If three different materials are used, the instancer splits to three different instancer components.
In Houdini 20.5, using the unreal_split_instances attribute to create individual StaticMeshComponentshas been deprecated and will be removed in a future version.
It’s recommended to use the unreal_split_attr attribute instead.
The following code provides a behaviour similar to the unreal_split_instances attribute:
i@id = @ptnum;
s@unreal_split_attr = "id";
Per Instance Custom Data 
Per instance Custom Data lets you add custom data to the instance buffer, that can then be read by the instancer’s material’s vertex shader.
In your HDA, you can specify per instance custom data on your instances, via attributes:
The number of custom floats per instance can be set via the unreal_num_custom_floats attribute.
The custom data itself can be set on the instances via unreal_per_instance_custom_dataX attributes, where X is the zero-based index of the custom float data.
An example is to specify custom RGB float values on instances.
You need to add:
i@unreal_num_custom_floats = 3;   (to indicate that each instance will have 3 custom floats)
f@unreal_per_instance_custom_data0 = XXX; (red value)
f@unreal_per_instance_custom_data1 = YYY; (green value)
f@unreal_per_instance_custom_data2 = ZZZ; (blue value)
Foliage Types 
To output foliage instances with an HDA, add the unreal_foliage attribute with its value set to 1 to the instances. UE5 requires a Foliage Type Asset stored in the Content folder to create foliage instances inside an Unreal level.
If the instance type in the HDA is set to reference an Unreal Static Mesh then the plugin will automatically create the needed Foliage Type assets when cooking and baking.
If the instance type is set to an existing Unreal Foliage Type, then foliage instances can be baked to that foliage type. During cooking, a temporary Foliage Type is created which is a copy of the user-defined Foliage Type specified in the HDA. This allows you to select existing or HDA generated foliage in the Foliage Editor after cooking. The instances are baked into the level using the target Foliage Type only during baking.
Note
If you modify the temporary Foliage Type, when you bake the HDA it creates a new Foliage Type. This prevents changes to the original Foliage Type.
The unreal_foliage_attachment_type attribute attaches foliage instances to other objects in the Unreal level. It can take the following values:
-
0 - The instance is not attached (default)
-
1 - The instance can be attached to any collision component.
-
2 - The instance can only be attached to landscape collision components.
The exact component to attach is determined by tracing a vertical ray up and down from above the instance’s position for a distance of unreal_foliage_attachment_distance.
Level Instancing 
Level Instancing is supported in Unreal 5.1 and later; set unreal_instance to reference the source level or packed level blueprint.
In Unreal, Level Instancing is at the Actor level, rather than the component level. Both cooking and baking generate Actors rather than Components.
Note
Unreal expects both the source and target levels to have certain settings such as Extenal Actors. It’s suggested to run a Map Check in Unreal when developing your HDA and instancing pipeline to make sure your data is compatible with the latest version of Unreal.
Attributes 
Houdini to Unreal 
This table lists special attributes to set in an HDA and the plugin recognizes when you translate the Houdini data to Unreal outputs. You can setup these attributes on your assets to control and override some properties and behaviours of the generated Unreal outputs. See Attributes and Groups for more information.
Instancers 
Attribute Name |
Owner |
Type |
Description |
|---|---|---|---|
|
point, detail |
string |
Unreal path to an Asset that shall be instanced at the given transform. In version2, this attribute can also be a Class Name ( |
|
detail, prim, point |
int, float |
When used on instances (and set to 1), the plugin will add the instances to the current level’s foliage system instead of creating new actors/components |
|
point |
int |
Determines whether foliage should to attach to other objects in the level - 1 for yes, 0 for no, a value of 2 attaches to landscapes only. |
|
point |
float |
Distance to search vertically when using |
|
any |
string |
Indicates the name of another attribute to be used to split the instancers into multiple components depending on that second attributes values |
|
any |
int |
When set to 1, forces the creation of HierarchicalInstancedStaticMeshComponent instead of |
|
any |
int |
When set to 1, forces the creation of an instancer component ( |
|
any |
int |
Indicates the number of custom floats to be used for an instancer’s Per Instance Custom Data |
|
any |
float |
Per-Instance Custom float data, where X is the zero-based index of the custom data |
|
point, detail |
float(3) |
For mesh instances, the position of the instancer component relative to the origin. This is specified in Houdini coordinates. This will be converted to Unreal coordinates and will be relative the Houdini Asset Component. |
Custom primitive data can also be set on instancers. Please bear in mind that they apply to the instance component itself, not individual instances. Therefore, if using packed primitive instancers, the custom primitive data attributes should be set AFTER the pack node, and not before.
Custom Primitive Data 
Attribute Name |
Owner |
Type |
Description |
|---|---|---|---|
|
any |
int |
Indicates the number of custom primitve data floats to be used for an output’s component Custom Primitive Data. |
|
any |
float |
Custom Primitive Data float data, where X is the zero-based index of the custom primitivedata. |