The most basic way to start is to create a simple tube with bones inside. Once you learn the basic concepts, you will be able to apply them to any model.
-
Use the
 Tube shelf tool to create some tubular shaped geometry.
 -
Change the Primitive Type to Polygon, increase the Height to
8and the Rows to10. You need to have points on your geometry for it to be able to bend. Capture data is stored on points, so you need to have points on your geometry to hold the data.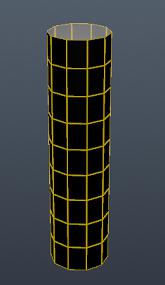
The
 Bones shelf tool allows you to interactively draw and manipulate bone chains before animating. The top of the chain of bones has the root, and each bone will be parented to the previous bone.
 It is important to note that the bones will align to the view you are in. For this example, we will change to the Front Viewport (in the Set View menu) so that everything will line up parallel to the tube walls.
-
Use the
Bones shelf tool to draw your bone chain, starting at the root. If this is going to be an arm, you would start from the shoulder point and draw down to the hand. Press Enter when you are finished drawing your chain.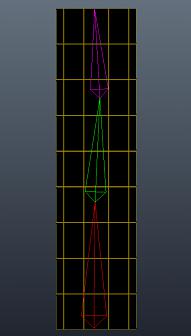
In order to link the bones and tube, you must use the
 Capture Geometry tool on the shelf.
 -
Click the
Capture Geometry tool on the Characters shelf, select the geometry objects to capture and press Enter, then select the root object of the capturing hierarchy and press Enter.If you switch to Wireframe shading mode you will see that pills are created around the bones, but the are not wide enough to include the geometry. You can edit the diameter of the pills using the
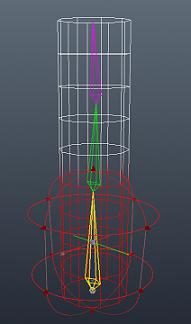
 Edit Capture Regions tool on the shelf.
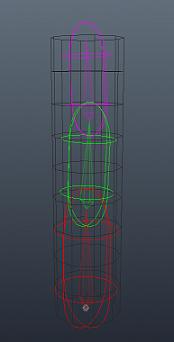
-
Click the
Edit Capture Regions tool on the Characters shelf, select the bone to edit, and drag the arrows to edit the bone capture regions.Make sure that the diameter of the pill is wide enough to surround the tube geometry. The geometry will turn the color of the bone once it is captured.
Now when you translate and rotate the bones in the viewport, you will see the geometry move with it. To see the geometry deform in the viewport, you must have the display flag of the Bone Deform SOP turned on in the tube object.

Tips 
-
If you turn off the green display flag on your tube object, you can easily select bones in the viewport without accidentally selecting the tube.
-
You can manually set the pill size on the Capture tab of each bone, instead of using the
Edit Capture Regions tool. -
To get bones back to their original pose, you can click
 the Translate or Rotate parameters on each bone and select Revert to Defaults.