| On this page |
You pose characters with the ![]() Pose tool. Using this
tool at the object level, you can manipulate control objects and bones
using the handles set up by the technical director.
Pose tool. Using this
tool at the object level, you can manipulate control objects and bones
using the handles set up by the technical director.
With digital asset characters, not all controls appear when you first select the asset. Digital asset characters can use nested digital assets with simpler interfaces that let you focus on different body parts such as arms or legs. In some cases, bones might be left without controls to allow for the animation of joint rotations.
How to pose a character 
| To... | Do this |
|---|---|
|
Select the entire character |
|
|
Pose parts of the character |
|
|
Switch between having one manipulator or separate manipulators for multiple selected items |
|
|
Use a digital asset’s controls |
|
|
Access nested digital assets |
When you set up a nested character asset, you can create null objects that represent nested assets inside the main asset. Select the null object with the Pose tool to select the nested asset. |
Using invisible rigs 
Inserting a Pose Scope node in your skin geometry network will allow you to set up the pose_scope attribute so that you can pose geometry in the viewport without using handles. You can create groups of geometry, which you can assign channels to using Pose Scope, then click directly in the viewport and drag to pose.
This improves workflow and makes character animation easier by removing clutter from the viewport. Complicated rigs can have hundred of controllers, which can make animating quite difficult. Hiding these controls and using invisible rigs allows you to click and drag parts of the character in the viewport, which makes animating feel more like working with a stop motion puppet.
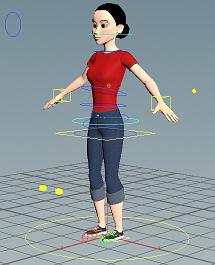
The following example uses the ![]() Simple Female shelf tool.
Simple Female shelf tool.
-
Click the
 Simple Female tool on the Characters shelf.
 -
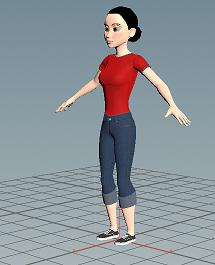
Navigate to the Display tab and turn off Show Controls.
-
 the
the simplefemale1node in the network editor, and select Allow Editing of Contents. -
Double-click to dive inside the
simplefemale1node and then double-click thegeo_skinnode to dive inside that network.Note
If you click
 the
the  File node, you will see that this character already has the
 pose_scopeattribute. However, for the sake of this example we will pretend that she doesn’t. -
Insert a Group SOP above the last Deform SOP.
-
Give the group a name, for example
l_hand, click the selection button in the Base Group parameter, select the left hand geometry in the viewport, and press Enter.
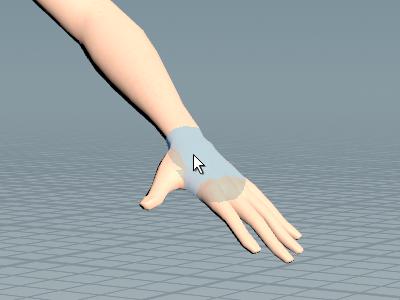
-
Insert a
 Pose Scope SOP between the Group SOP you just created and the last Deform SOP.
 -
Select the Group you just created (
l_hand) from the drop down menu. You can create groups for all body parts.Note
You can create groups directly in the pose scope tool, but the recommended workflow is to create separate group nodes. This will make the parameters easier to read, since you will see the names of groups as opposed to a long string of numbers. You can also list multiple groups in this parameter.
-
Use the
 node chooser menu to select channels to apply to the group. For this example, we chose the translate and rotate channels.
 -
Navigate back to the object level, and click the
 Pose tool in the Toolbox menu to pose your character interactively in the viewport. Selecting the geometry will pop-up a wheel which will allow you to easily switch between the channels you assigned.
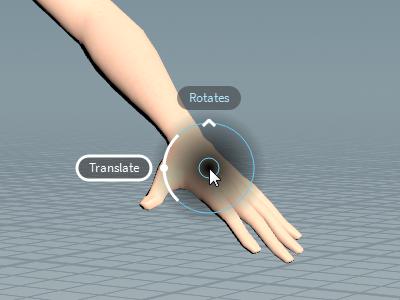
If the group has more than one channel, a pop-up wheel will allow you to easily toggle between the channels. For example, the simple female character has both translate and rotate abilities on her hand.
Note
The selection flag of the skin geometry must be turned off for invisible rigs to work.
How to keyframe a character pose 
See the animation section for more information on keyframing.
| To... | Do this |
|---|---|
|
Keyframe an IK goal |
|
|
Keyframe a blended IK/rotation set-up |
|
How to pose bones using temporary IK 
Whenever you select two bones with ![]() Pose tool, if
the bones do not already have IK, Houdini will create a temporary IK
solver and end goal to help you pose the bones. Once you deselect the
bones, the temporary goal disappears.
Pose tool, if
the bones do not already have IK, Houdini will create a temporary IK
solver and end goal to help you pose the bones. Once you deselect the
bones, the temporary goal disappears.
One style of rigging and animating characters is to not assign any “real” IK solvers to the character at all, and do all posing with rotates and temporary IK through the Pose tool.
How to squash and stretch bones 
To squash and stretch the character for cartoon-style animation anticipation and follow-through, you can do any of the following:
-
Change the Length of the bones you want to stretch.
-
Parent the bone chain to a control Null and then scale the Null to scale the descendant bones.