You can direct particle motion with forces. Forces can emanate from geometry in the scene (for example, you can create a  sphere and have it attract or repel particles), or you can create a general directional force (such as gravity).
How to direct particle motion with forces
| To... | Do this |
|
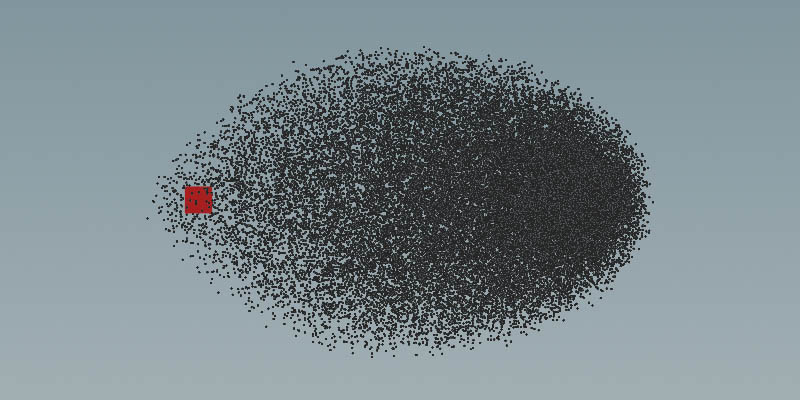
Make geometry attract or repel particles
|
-
Click the   Point Attract or Point Attract or  Curve Attract button from the Particles tab of the shelf. Curve Attract button from the Particles tab of the shelf.
-
Select the particle system you want to be attracted or repelled and press Enter to confirm your selection.
-
Select the object or curve you want the particles to be attracted to or repelled from and press Enter to confirm your selection.
The degree of attraction/repulsion can be modified with the Force Scale parameter on the Force tab of the POP Attractor DOP node. A positive value will attract the particles and a negative value will repel the particles.
|
|
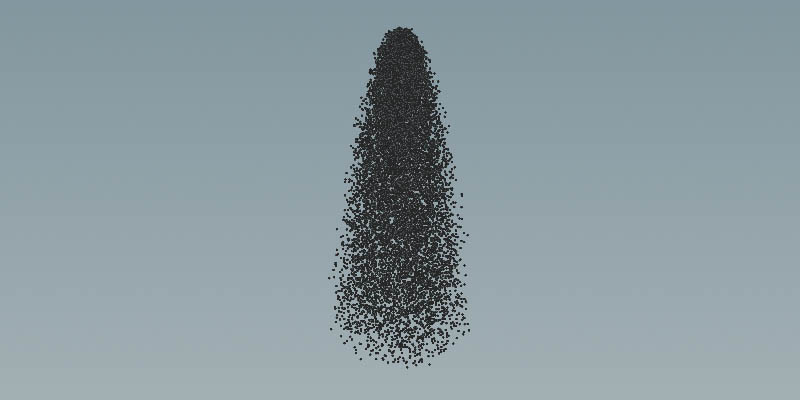
Create a general directional force
|
-
Click the  Force Particles tool on the Particles tab of the shelf. Force Particles tool on the Particles tab of the shelf.
-
Select the particle system you want to be affected and press Enter to confirm your selection.
-
Set the Force parameter on the POP Force DOP node to affect the particles. By default this is set to -9.81 in the Y direction, to apply a gravity force.
|
|
Add random force to particles
|
-
Click the Force Particles tool on the Particles tab of the shelf.
-
Select the particle system you want to be affected and press Enter to confirm your selection.
-
Modify the parameters on the Noise tab of the POP Force DOP node. You can change the Swirl Size, Pulse Length, Roughness, Turbulence, etc,
|
|
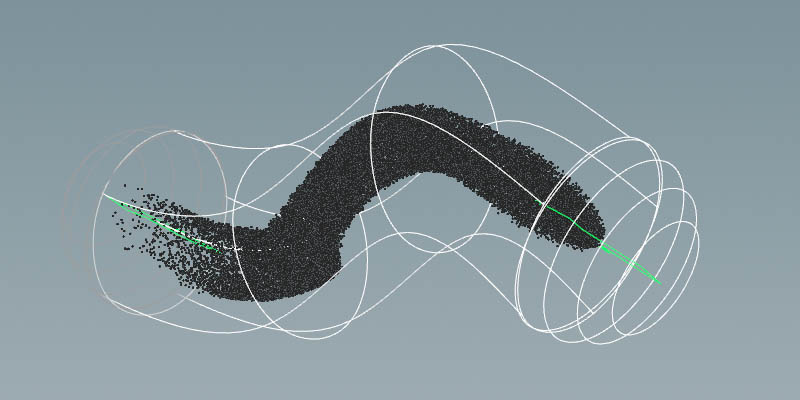
Move particles along, toward, or around a curve
|
-
Create a curve using the  Draw Curve shelf tool. To get a smooth curve, use the tool’s Bezier mode. Draw Curve shelf tool. To get a smooth curve, use the tool’s Bezier mode.
-
Create a particle system along the curve using the  Location shelf tool. In the viewport, place the cursor over one end of the curve and press Enter to define the system’s origin. Location shelf tool. In the viewport, place the cursor over one end of the curve and press Enter to define the system’s origin.
-
Click the  Curve Force tool on the Particles tab. Curve Force tool on the Particles tab.
-
Select the curve you want to affect your particles and press Enter.
-
On obj level, double click the AutoDopNetwork node to dive into it.
-
Adjust the POP Curve Force DOP’s parameters and forces to tame the particles.
-
Turn off the  Gravity Force DOP node with the Bypass switch or delete it. Gravity Force DOP node with the Bypass switch or delete it.
|
|
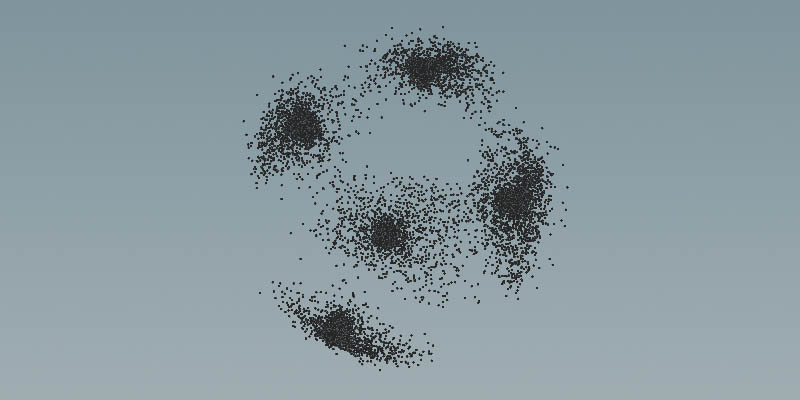
Make particles flock together
|
-
Create a particle system using the Location or  Source shelf tools. Source shelf tools.
-
Click the  Flock Particles tool on the Particles tab. Flock Particles tool on the Particles tab.
-
On obj level, double click the AutoDopNetwork to dive into it.
-
Open the POP Location or POP Source DOP’s Birth tab. For Const. Activation, enter $F<=5 to limit the creation of new particles to five frames.
-
Increase Const. Birth Rate to get a dense particle cloud.
Flocking particles often have very large dimensions. In the viewport, use the  to zoom out. to zoom out.
-
Select the POP Flock DOP. You can choose the Number of Centers to determine how many different clusters of particles are formed.
-
Set Avoid Force to 3 to give the particles more space.
-
Set Avoid Max Dist to 0.5. This is the distance where particles start to avoid each other.
Note
To move the flocks, you can use a POP Attract DOP node to have them follow an object (such as a character), or use other POP Forces DOP to direct them.
Tip
To make the particles stay together and create a denser particle cloud, add a  POP Drag DOP after the POP Location DOP. Change the Air Resistance parameter to control the particles' speed. POP Drag DOP after the POP Location DOP. Change the Air Resistance parameter to control the particles' speed.
|