Houdini 20.0 Hair and fur

Creating and styling guide hair with Guide Groom

On this page

Overview

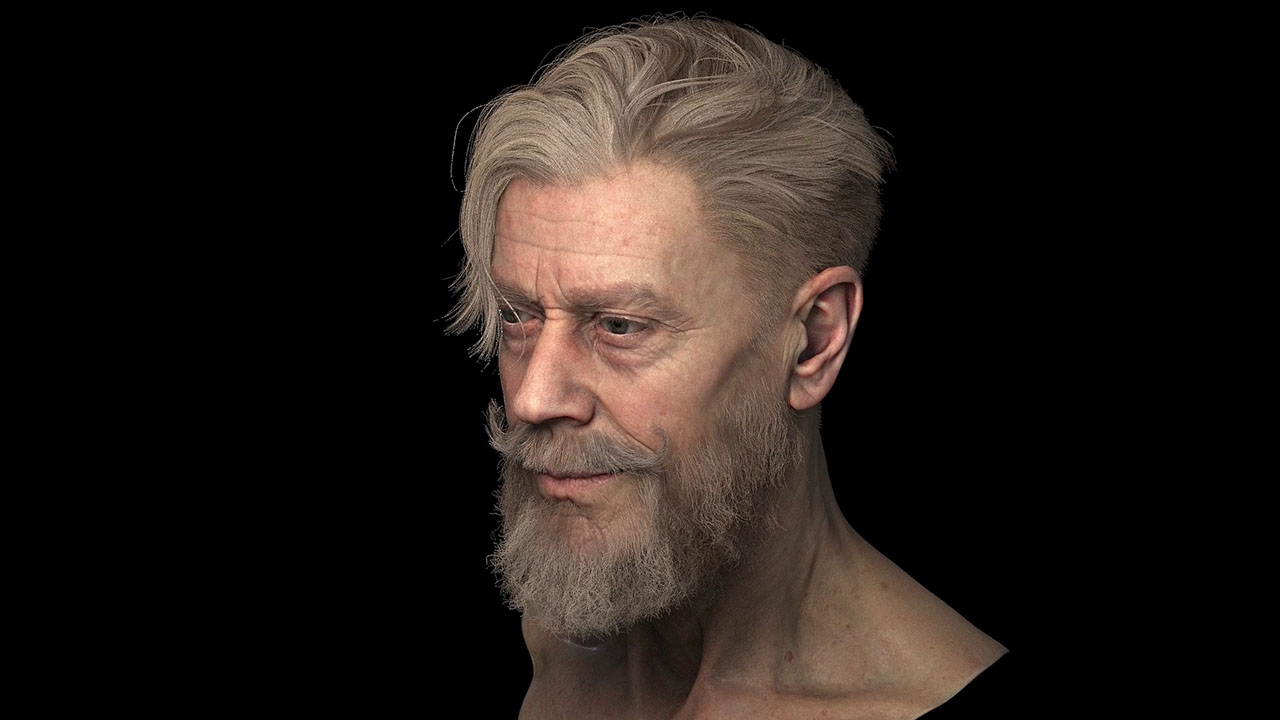
Image by Andriy Bilichenko
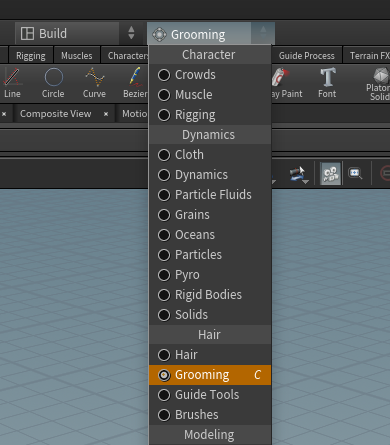
The Groom shelf tool on the Guide Process tab creates a Guide Groom SOP and switches the viewport to the grooming state. This tool, combined with the new grooming radial menus, allow you to quickly and interactively draw and style fur.

Note

Files from earlier Houdini versions with the Hair Generate SOP node can still be used. Plug the first output of the Hair Generate SOP node to the first input of the Guide Groom SOP node to make it work.

Grooming radial menu

When using the Guide Groom SOP, make sure to switch to the Grooming radial menu from the top menu bar. This menu lets you quickly switch tools options in the viewport, and is the recommended workflow when using this node.

After switching to the Grooming radial, you can open it by pressing C. This brings up a menu that contains all the Tool options for the Guide Groom SOP, and reflects the options available in the Tool dropdown parameter on the node. It’s a quick way to switch between the options on this node.

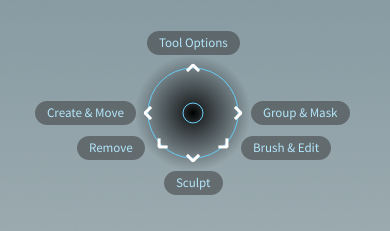
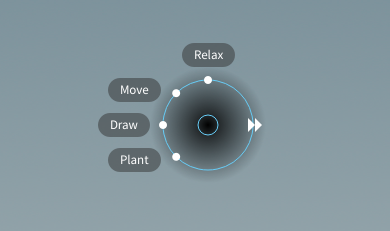
For example, if you hover your mouse over Create & Move, you will see the 4 options available for creating and moving hair. You can either choose one, or navigate back to the previous level by hovering your mouse over the double arrows.

Each Tool has a Tool Options menu that is unique to that mode. For example, the tool options available in Draw mode are different than the ones available in Plant mode.

Working with brushes

Many tools of the Guide Groom SOP use brushes, for example Plant, Sculpt, Smooth, or Brush. When Surface Brush is turned off in the parameter section, you are in screen mode. Most tools are able to work in both screen and surface mode. In surface mode, the brush will follow the outlines of the object you're working on. In screen mode, the brush is a plain projection on the viewport.

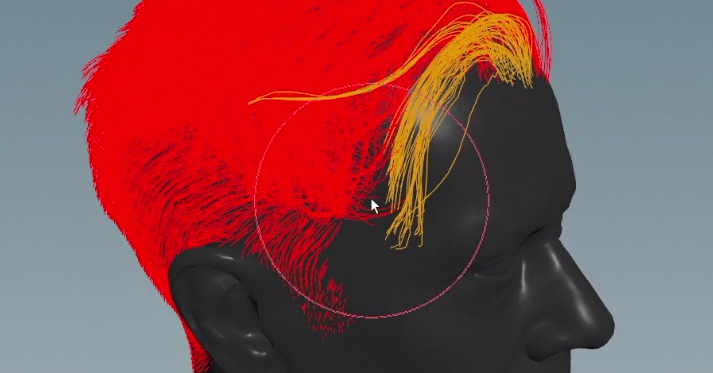
Brush size is indicated through a red circle in the viewport. You can change brush size interactively by using the mouse_wheel, or numerically by changing Screen Radius or Object Radius in the node’s parameter section. Some tools like, for example, Plant Work can only be used in Surface Brush mode. In this case, brush size can be controlled through Object Radius.

Softness adds a falloff to the brush. A value of 0 creates a hard brush with no falloff.

Creating and moving hair

The controls for creating and moving hair are located in the Create & Move section of the Grooming radial menu. If you hover over this option with your mouse, it will take you to a sub-menu where you can choose to Draw, Plant, Move, or Relax hair.

Tip

You can select the Guide Groom SOP and choose the appropriate entry from the Tool menu. Most of the SOP’s options are also available in the parameter editor. The radial menu just provides a quick way of switching between them.

Note

Modifications on hair will only be applied to selected strands. Hold the S key while selecting multiple hairs in the viewport. When you hover over the hairs they will turn blue, and orange once selected. Alternatively, enter a single number or a range in the Guide Groom node’s Group attribute.

Drawing hair

The Draw option lets you interactively draw guides from your perspective. By default, the guides are aligned to your view (projected into screen space) and will all be the same orientation. Each guide hair also has a default Segment Count of 8. This is typically sufficient for most short hair or fur, since having too many points per strand could affect performance.

To...Do this

Draw hair in screen space

  1. Press C in the viewport to open the radial menu.

  2. Hover your mouse over Create & Move and choose Draw.

  3. Click the surface of your character to create the root, and drag with your mouse to draw the curve in the viewport.

Draw hair on the skin of a character

  1. Make sure you're in Draw mode and press C in the viewport to open the radial menu.

  2. Hover your mouse over Tool Options to access the different draw options.

  3. Choose Draw on Skin.

  4. Click the surface of your character to create the root, and drag with your mouse to draw the curve along the the skin.

Change the default number of segments on a strand of hair

  1. Select the hair in the viewport.

  2. Right-click the hair and choose Resample.

  3. Change the Segment Count and click OK.

    You can increase the points per strand for long hair to smooth out any jagged looking pieces, or decrease the points for very short hair to speed up performance.

Change the default number of segments on all hairs

Update the Segment Count parameter in the Brush Options section of the Guide Groom SOP.

This will save your preference for all future hairs you draw.

Automatically create more segments as you draw longer curves

  1. Make sure you're in Draw mode and press C in the viewport to open the radial menu.

  2. Hover your mouse over Tool Options to access the different draw options.

  3. Choose Adaptive Segment Mode.

  4. Click the surface of your character to create the root, and drag to draw the hair. This option will automatically create points based on the length of your curve.

Spread out points evenly along a curve

  1. Select the curve(s) in the viewport.

  2. Right-click the curve and choose Redistribute Curve Points.

    This will keep the same number of points, but evenly spread them along the strand of hair.

Draw a parting line to separate groups of hairs

  1. Make sure you're in Draw mode and press C in the viewport to open the radial menu.

  2. Hover your mouse over Tool Options to access the different draw options and choose Parting Line Curve Type.

  3. Drag along the surface of your character to draw the parting line.

    This will create an invisible barrier so that when you interpolate hairs, they will only be influenced by the guides on one side of the parting line. This also applies to any sculpting, brushing, or editing operations you perform on the hairs. Please note that the Surface Brush has to be active. You can find this option in the node’s Brush Options section.

Planting hair

The Plant option lets you interactively place hairs based on the closest existing curves. It will create these new guide hairs in the same orientation and interpolate the length based on the surrounding hairs.

To...Do this

Plant single guide hairs

  1. Draw some guide hairs on your character. The tool will use the guides as reference point to interpolate length and orientation.

    It is also possible to restrict the tool to a selection of guides.

  2. Make sure you're in Plant mode and press C in the viewport to open the radial menu.

  3. Hover your mouse over Tool Options to access the different draw options.

  4. Choose Single Mode.

  5. Click to place single guide hairs that are interpolated based on the surrounding guides.

Plant multiple guide hairs

  1. Draw some guide hairs on your character. The tool will use the guides as reference point to interpolate length and orientation.

    It is also possible to restrict the tool to a selection of guides.

  2. Make sure you're in Plant mode and press C in the viewport to open the radial menu.

  3. Hover your mouse over Tool Options to access the different draw options.

  4. Choose Scatter Mode.

    This will give you a brush that lets you to paint clusters of guide hairs that are interpolated based on the surrounding guides.

Moving hair

The Move option allows you to slide the roots of selected hairs along the surface without changing the orientation. This is very useful when creating hairlines or facial hair on a character. Sometimes after sculpting hair, you may need to clean up areas like this to push hairs back into place.

To...Do this

Move hairs at the root

  1. Select the hair(s) you want to move.

  2. Press C in the viewport to open the radial menu.

  3. Hover your mouse over Create & Move and choose Move.

  4. Drag the hairs to slide them along the surface.

Relaxing hair

The Relax option lets you push the roots of hairs apart if they're drawn too close together. It will try to spread the roots out evenly along the surface, so they're not too clumped together.

To...Do this

Spread out hairs at the root

  1. Select the hairs you want to spread out.

  2. Press C in the viewport to open the radial menu.

  3. Hover your mouse over Create & Move and choose Relax.

  4. Drag the hairs you want to move in the viewport.

    This will smooth out the distribution of the hairs.

Removing hair

To...Do this

Delete guide hairs

  1. Make sure the hairs you want to delete are selected.

  2. Press C in the viewport to open the radial menu.

  3. Hover your mouse over Remove and choose Delete.

  4. Drag your brush over the hairs you want to remove.

    This will delete any hair that you touch with your brush while holding LMB in the viewport.

Thin out patches of hair

  1. Select the patch of hair you want to thin out.

  2. Press C in the viewport to open the radial menu.

  3. Hover your mouse over Remove and choose Cull.

  4. Drag your brush over a patch of hair to remove hairs.

    This will remove hairs and also redistribute them to reach a specific density. You can set the density using the Density parameter in the Brush Options section.

Sculpting hair

The options in the Sculpt menu allow you to Smooth, Clump, Blur, Sculpt, and Sculpt with Physics.

To...Do this

Brush hairs while maintaining the length

  1. Select the hairs you want to brush.

  2. Press C in the viewport to open the radial menu.

  3. Hover your mouse over Sculpt and choose Sculpt.

    This will let you brush selected hairs while maintaining their length.

Tip

You can also select a single hair if you only want to brush one hair into place.

Brush hairs while keeping their offset from each other

  1. Select the hairs you want to brush.

  2. Make sure you're in Sculpt mode and press C in the viewport to open the radial menu.

  3. Hover your mouse over Tool Options to access the different draw options.

  4. Choose Edit Selection as Clump.

    This will treat the group of selected hairs as if they are one hair, instead of individual hairs. When you drag your brush over the hairs, they will maintain their offset from each other and not become pushed together. This is useful to move shaped hairs around as one piece without disturbing the overall shape, such as a tail of an animal or a braid of hair.

Remove the kinks from jagged looking guide hairs

  1. Select the hairs you want to smooth.

  2. Press C in the viewport to open the radial menu.

  3. Hover your mouse over Sculpt and choose Smooth.

  4. Click the section of the hair you want to smooth in the viewport to smooth out any kinks.

    This option looks at the other points along the hair averages the point positions. You only need to click the sections with the kinks and then move the mouse to see them update. You don’t need to click and drag to brush the hairs.

Pull hairs together

  1. Select the hairs you want to clump.

  2. Press C in the viewport to open the radial menu.

  3. Hover your mouse over Sculpt and choose Clump.

  4. Drag your brush over hairs to pull them together.

    This lets you to pull any hairs under the brush together into a clump. Holding MMB and brushing will push the hairs apart.

Tip

This option is often used in combination with the the Smooth option, to create more natural looking clumps of hair. You can use the Smooth option to remove harsh bends in hairs as they're pulled into the clump.

Average the direction and length of hairs

  1. Select the hairs you want to blend the transition between.

  2. Press C in the viewport to open the radial menu.

  3. Hover your mouse over Sculpt and choose Blur.

  4. Click the group of hair you want to blur. This will only affect the hairs that are under your brush.

    This option is similar to Smooth, but instead of removing kinks, it allows you to align the orientation of hairs that are pointing in two different directions. It also changes the length of the hairs and tries to pull them all to be the same length. This is useful for blending the transition between sections of hair, so the separation isn’t so harsh.

Run a simulation on existing hairs

  1. Select the hairs you want to affect.

  2. Press C in the viewport to open the radial menu.

  3. Hover your mouse over Sculpt and choose Sculpt with Physics.

    The default Tool Option is Settle Simulation Mode, which will take the selected hairs and run a simulation with gravity on them. Changing this to Damped Simulation Mode will let you brush the hairs in the viewport without them becoming too close together since they are colliding against each other with physics. This is useful to get a preview of how hair will act once it’s simulated.

Brushing and editing hair

The options in the Brush & Edit menu are mostly designed to fine tune your sculpted hair or fix errors.

To...Do this

Stretch and rotate hair

  1. Select the hairs you want to stretch and rotate.

  2. Right-click the selected hair and choose Select Tip(s).

  3. Press C in the viewport to open the radial menu.

  4. Hover your mouse over Brush & Edit and choose Transform Handle.

  5. Use the transform handle to pull or rotate the selected hair.

    Note

    You can use this Transform Handle on any point in the curve (not just on the tips) to pull or rotate any portion of the hair.

Push hairs outside the collision object that have gotten stuck

  1. Select the hairs you want to free from the collision object.

  2. Press C in the viewport to open the radial menu.

  3. Hover your mouse over Brush & Edit and choose Deintersect.

  4. Drag your brush over the selected hairs that have gotten stuck inside the collision object.

    Tip

    Once the hair is free from inside the collision object, you can use the Transform Handle to move and reposition it.

Rotate hair from the root without changing the shape

  1. Select the hairs you want to rotate.

  2. Press C in the viewport to open the radial menu.

  3. Hover your mouse over Brush & Edit and choose Brush.

  4. Drag your brush over the selected hairs to rotate them at the root.

    This will push hairs over and treat them as if they are rigid objects.

Push hair away from the surface

  1. Select the hairs you want to lift.

  2. Press C in the viewport to open the radial menu.

  3. Hover your mouse over Brush & Edit and choose Lift.

  4. Drag your brush over the selected hairs to lift them away from the surface.

  5. You can set a target Angle for the lift in the Guide Groom SOP’s parameter section.

Straighten hairs

  1. Select the hairs you want to straighten.

  2. Press C in the viewport to open the radial menu.

  3. Hover your mouse over Brush & Edit and choose Straighten.

  4. Drag your brush over the selected hairs to straighten them.

    This option will keep the same orientation at the root.

Change the length of hairs

  1. Select the hairs you want to lengthen or shorten.

  2. Press C in the viewport to open the radial menu.

  3. Hover your mouse over Brush & Edit and choose Adjust Length.

  4. Hold LMB and drag the selected hairs to increase the length or hold MMB and drag to reduce the length of hairs.

  5. If you want to fine-tune the length of the hairs, go to the Guide Groom node’s parameter section and set Value to a small value, e.g. 0.02. Then, apply the again in the viewport.

Grouping and masking

Groups are used to separate different parts of hair, for example eyebrows and eyelashes. You can use the Geometry Spreadsheet pane’s Primitives switch to control if the hairs have been added to a group.

The Name Attribute doesn’t have to be changed in most cases. It can be used to further subdivide groups, e.g. if you want to split eyebrows into grey and dark hair.

Masks let you define areas where hairs will appear. NOTE

A single hair or a selection of hairs can belong to more than one group.

To...Do this

Adding hairs to a group through brushing

  1. Go to the Guide Groom SOP node’s Group parameter section.

  2. Under Active Group enter a name for the group, e.g. eyelashes

  3. The hairs, meant to be grouped, will get the entry from Active Name. Change this name if necessary.

  4. Press C in the viewport to open the radial menu, and go to Group & Mask.

  5. Drag the brush over the hairs you want to add the eyebrows group.

Adding hairs to an existing group through selection

  1. Press S in the viewport and drag the mouse over the hairs you want to select.

  2. Open the Guide Groom SOP node’s Group parameter section.

  3. Under Active Group enter a name, for example eyebrows.

  4. The hairs, meant to be grouped, will get the entry from Active Name. Change this name if necessary.

  5. Click Add Selection to Group.

Adding new hairs to an existing group

  1. Open the Guide Groom SOP node’s Group section.

  2. Turn on Add New Curves to Group

  3. Under Active Group enter the name of the group you want to add the new hairs, e.g. eyebrows

  4. The new hairs will get the entry from Active Name. Change this name if necessary.

  5. Press C in the viewport to open the radial menu.

  6. Hover your mouse over Create & Move and choose Draw.

Change the name of a hair selection

  1. Press S in the viewport and drag the mouse over the hairs you want to select.

  2. Open the Guide Groom SOP node’s Group parameter section.

  3. Enter a new group name under Active Name, e.g. eyelashes.

    The name can be different from the Active Group entry.

  4. Click Set Name on Selected Primitives.

Mirroring

Turning on the Mirroring checkbox in the parameter editor will mirror existing hairs as well as any operations as they're applied. This can also be turned on and off by pressing ⇧ Shift + M in the viewport.

You can create, move, remove, sculpt, brush, and edit hairs on either side of the character and the changes with be reflected on both sides. Once mirroring is turned off, your changes will all be preserved on one side of the character, so you won’t lose any drawn hairs or edits regardless of which side was changed.

Transform handle

This tool lets you stretch and rotate hair.

  1. Select the hairs you want to stretch and rotate.

  2. Right-click the selected hair and choose Select Tip(s).

  3. Press C in the viewport to open the radial menu.

  4. Hover your mouse over Brush & Edit and choose Transform Handle.

  5. Use the transform handle to pull or rotate the selected hair.

    Note

    You can use this Transform Handle on any point in the curve (not just on the tips) to pull or rotate any portion of the hair.

Utilities

Utilities are a convenient way to ease resampling, twisting, and mirroring. You will find specific parameters for each tool in the Guide Groom SOP node’s Utility options. Utilities can be applied to one or more groups of hair: If a group exists, add its name to the node’s Group field, and execute the utility.

Resample Utility

This tool lets you change the number of intermediate points interactively. Choose the utility from the Guide Groom node’s Tool menu, and go to Utility options. There, choose a Segment Mode and make sure that Preview is turned on to get a life preview in the viewport.

Drag the appropriate segment slider to increase or decrease the number of points. For short hair, a small segment number is often sufficient. Long hair strands normally require more segments to appear smooth. You can also consider using group names to differentiate between long ans short hair, for example.

Click Apply to confirm your changes.

Twist Utility

This tool lets you curl the entire set of hairs or a group. In the Guide Groom SOP node’s parameter section go to Utility Options. There, turn on Preview to monitor your actions in the viewport. Drag the Angle slider or enter a fixed value. Click Apply to confirm your changes.

Mirror Utility

This utility lets you preview the mirroring process. Go the parameter section of the Guide Groom SOP node, and open Utility options. There, turn Preview on and off. This is useful if you want to evaluate the result of the mirroring process. In the Mirroring section you can find all associated parameters to adjust the result, as well as the Mirror Group field for restricting the process to selected groups.

In Utility options, click Apply to confirm your changes.

Hair and fur

Working with fur

Shelf tools for creating fur

  • Add Fur

    Adds fur to a surface.

  • Create Guides

    Creates a guide curves from a skin geometry or manipulates the guides of another groom object.

  • Groom

    Creates a Guide Groom SOP ready to draw & brush curves.

Shelf tools for styling with guide processes

  • Initialize Guides

    Gives the guides an initial direction.

  • Curve Advect

    Advects curves using a vector field generated from curves drawn on the skin surface.

  • Groom

    Creates a Guide Groom SOP ready to draw & brush curves.

  • Reguide

    Interpolates guides between planted guides.

  • Set Guide Direction

    Points guides in the direction of a vector.

  • Set Guide Length

    Lengthens or shortens guide hairs.

  • Lift Guides

    Lifts curves off the skin or flattens them against it.

  • Straighten Guides

    Straightens the hair by bending each segment back so that it’s in the same direction as the previous segment.

  • Smooth Guides

    Blends the shapes of the neighboring guides to create a smoother look.

  • Frizz Guides

    Offsets the curve points along the guide hairs to create a frizzy look.

  • Bend Guides

    Bends curves in a certain direction and by a certain angle.

  • Clump Guides

    Creates bunches of guide hairs.

  • Part Guides

    Lets you draw a parting line on the skin geometry.

  • Add White Hairs

    Adds the required attribute to mark hairs as white hairs in the standard hair shader.

Shelf tools for animating and simulating fur

How to