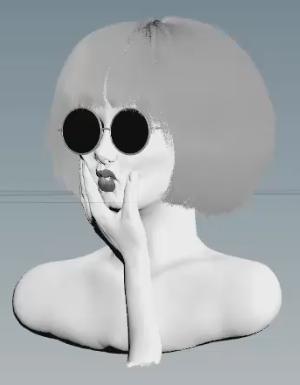
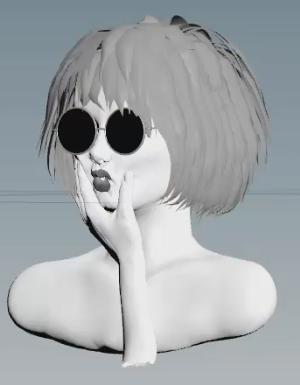
There are two tools on the Hair Utils shelf that you can use to generate hair cards and apply textures for realtime applications. The ![]() Generate Hair Cards tool converts hair or fur into polygon cards, while keeping the style and shape of the groom. These polygon cards require far less memory and less computational power to render and display than dense hair curve. It uses a
Generate Hair Cards tool converts hair or fur into polygon cards, while keeping the style and shape of the groom. These polygon cards require far less memory and less computational power to render and display than dense hair curve. It uses a ![]() Hair Card Generate node to assigns groups of nearby curves to clusters and then generates polygon cards for each cluster, with the width and orientation matching the original curves.
Hair Card Generate node to assigns groups of nearby curves to clusters and then generates polygon cards for each cluster, with the width and orientation matching the original curves.
Note
You can use this tool without having any initial hair generated. You can simply groom the guides and create hair cards directly from the guides.
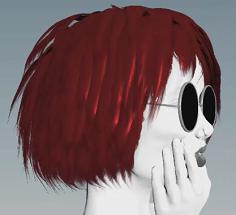
Once you generate the hair cards, you can use the ![]() Hair Card Texture tool to generate the textures. This tool is typically used after the
Hair Card Texture tool to generate the textures. This tool is typically used after the ![]() Generate Hair Cards tool to create textures for the generated hair cards. It creates the materials, a render node, and some default hair strips to use as a starting point.
Generate Hair Cards tool to create textures for the generated hair cards. It creates the materials, a render node, and some default hair strips to use as a starting point.
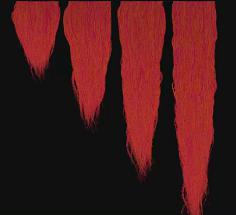
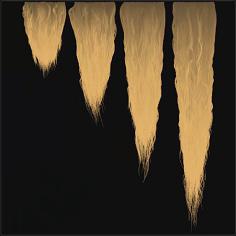
Each of the four strip regions contains a few hundred strips, and each one is matched to the region that most closely matches the length and width proportions of the hair card. For example, the shorter hairs on the top use the strip on the left, and the longer strips near the bottom use the strip on the right so that there is minimal stretching of the texture.


Tips 
| To... | Do this |
|---|---|
|
Change the look and shape of the hair strips |
Dive inside the |
|
See the rendered hair with textures |
|
|
Change the color of the hair |
Note To see changes in the viewport, you must click the Render button again on the
|