| On this page |
The  HeightField Project COP lets you add arbitrary geometry to your heightfield. You can define custom mountain shapes, add plateaus in specific locations, or create patterns.
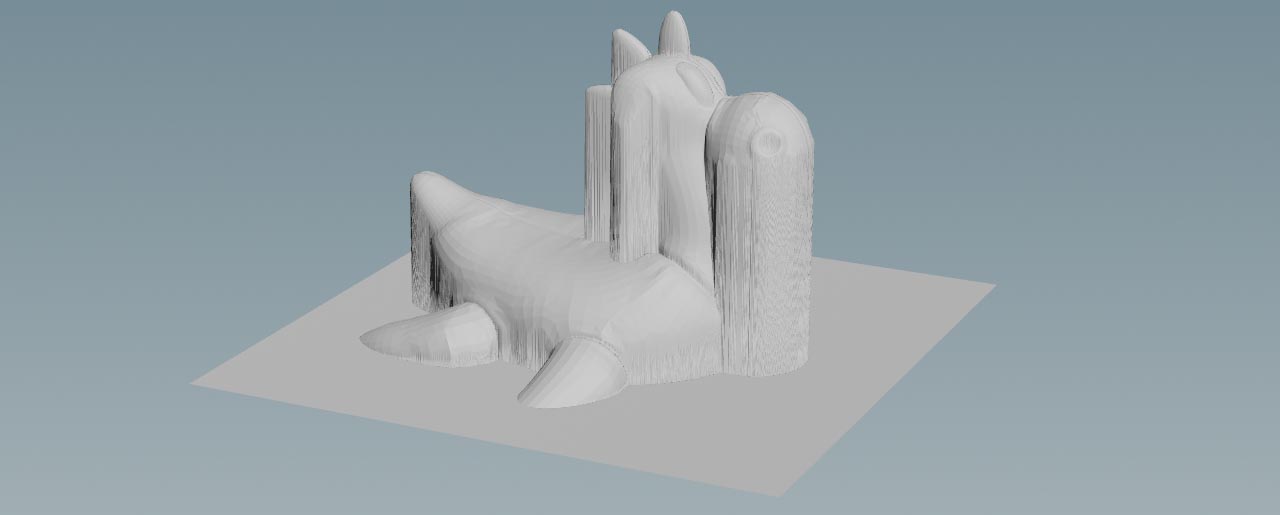
Projection uses rays to catch the original geometry’s shape. This also means that occluded areas that can’t be seen by rays, won’t be projected. You’ll get a solid “wall” in those areas instead. This is due to the fact that Copernicus heightfields are 2D images with height information and there’s no displacement in the XZ plane. When you project an object, you just add an offset to the already existing height information. The quality of the projection also depends on the resolution of the COP network’s Default Resolution parameter. Low resolutions may create alias effects and jagged edges.
However, the projected geometry is an integral part of the heightfield and you can apply noise, strata, erosion, and masks. Furthermore it’s not only possible to add geometry, but you can also subtract an object, and create impressions like footprints or the caldera of a volcano.
With the project node’s Max Ray Height parameter, all parts above the adjusted value will not be considered.
Adding the geometry 
To get a result, you need to import geometry from Houdini’s SOP level. This can be from any SOP geometry context like the  Geometry OBJ.
To fetch the object you want to project, lay down a  SOP Import COP and connect its
 geometry output with the geometry input of the HeightField Project COP. You can:
-
directly enter a location to the SOP Path parameter
-
click the
 Open floating operator chooser and choose an item from the appearing panel
 -
turn off Use External SOP, double-click the import node to dive inside, and create an object
In the last case, the object will be taken from the inside of the import node and you don’t have to specify a path.
Masking 
The HeightField Project SOP contains a mask input where you can connect any mono pattern and control the projection process. For example, add a  Cellular Noise COP. Connect the
 noise output with the mask input of the project node. Play with the noise parameters to get different results.
Tip
You can read more about masking on the Masking page. There are also some VEX scripts available that let you create custom masks like rings and ovals.

Blurring 
You can avoid harsh transitions by blurring the HeightField Project COP’s output. Add a  Blur COP and connect its
 source input with the project node’s height output. Use the blur operator’s Size slider to adjust the amount of blurring.