| On this page |
There are several Otis muscle and tissue recipes available through the tab menu. These are similar to shelf tools that put down networks of nodes for learning purposes and plug and play processes. The Test Geometry: Otto Muscle Transfer recipe provides a template to quickly transfer the fully modeled muscle and bone geometry from the Test Geometry: Otto SOP to a biped character with matching skin topology. This creates muscle and bone geometry for your target character without the need to manually model them. The muscles can then be plugged into the Test Geometry: Otto Muscle and Tissue Simulation recipe, a pre-existing muscle simulation setup, instead of needing to be configured from scratch.
This recipe uses a character called Broot as the example target character, sourced from SHFS. It is a good illustration of how the Muscle Transfer SOP is able to automatically handle source and target characters of different scales.
Important nodes 
This list of nodes are included in the example. Some other nodes are recommended for further configurations, see Muscle transfer nodes for more information.
MUSCLES,SKELETON_AND_ORGANS,PROXY_SKIN, RENDER_SKIN
These are source geometries unpacked from the Test Geometry: Otto SOP. See Learning and using this example to replace it with your own source geometry. See Required assets for muscle transfer to learn how to prepare your geometry.
broot_proxy_ottotopology
This is the Broot example target proxy skin geometry, with the same topology as Otto’s proxy skin. See Learning and using this example to replace it with your own target geometry.
bone_transfer, muscle_transfer
These Muscle Transfer SOPs transfer the muscle and bone geometry between the characters, using the source and target skin surfaces with matching topology. The bones are transferred first, so that they can be used as additional inputs for the muscle transfer, giving more control over the result.
adjust_transfer_target
This is a subnetwork that contains the nodes to adjust your target proxy skin for better transfer results. Instead of modifying the target mesh directly, this recipe stores all adjustments in a separate targetP attribute, using a Rest SOP. This allows the target character’s unmodified shape to be visualized, while the
Muscle Transfer SOP uses the modified target mesh for the transfer. See Learning and using this example for how to visualize the unmodified target mesh from the Muscle Transfer SOP.
edgerelax1
This Edge Relax SOP, moves points around so the edges between them match those specified by the second input. Without this, areas with bunched up edges in the target mesh compared to the source mesh will cause the transferred muscles or bones to be bunched together accordingly.
measurethickness1, peak1
These nodes push the target skin points in slightly, based on the thickness of the mesh. This ensures a bit more space between Broot’s muscles and skin compared to Otto’s.
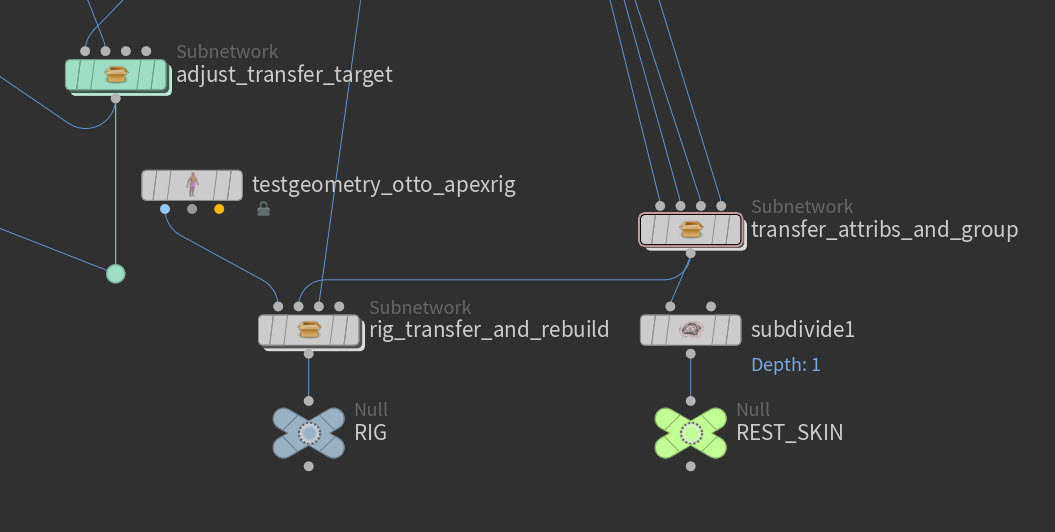
rig_transfer_and_build, transfer_attribs_and_group
These subnetworks are part of the capture weight workflow. This process is optional and should be used if you plan to rig and animate your character with KineFX or Apex. If you're using an external rigging and animation pipeline, you do not need to transfer capture weights.
Capture weights (optional) 
Capture weights are values assigned to geometry that determine how much each point is influenced by skeleton joints during deformation which allows for procedural, non-destructive skinning in Houdini. This process is optional and should be used if you plan to rig and animate your character with KineFX or Apex. If you're using an external rigging and animation pipeline, you do not need to transfer capture weights.

Learning and using this example 
| To... | Do this |
|---|---|
|
Insert your proxy target skin mesh |
|
|
Use your own source geometry |
|
|
Match your source mesh size to the target mesh |
|
|
Visualize unmodified target mesh while using Muscle Transfer |
Tip This allows you to get a more accurate sense of the final position of the transferred bones or muscles, relative to the original skin, instead of the edgerelaxed, deflated, peaked in, or otherwise modified skin. |
|
Connecting the transfered muscles to a muscle simulation recipe. |
