| On this page |
The Houdini Engine for Unreal plugin now supports Copernicus Houdini Digital Assets. COP HDAs allow you to generate, process, preview, and bake texture outputs from Houdini to Unreal. The workflow to export COPs HDAs is similar to the SOP based workflow to import assets. COPs workflows has benefits such as allowing you to generate, cook, and bake textures to save on VRAM in the Unreal Engine.
Asset Editor 
The asset Editor allows you to view your outputted Corpernicus assets as textures. When you open a COP HDA in the asset editor, it switches to a 2D viewport.
In the 2D mode, you can use the RGBA channel toggles to filter individual channels of the generated image. If multiple outputs are generated, a combobox is available to select which texture output is displayed in the viewport. If the generate material option is enabled - a checkbox will allow you to visualize the generated material directly in the viewport.
If you place the COP HDA into the level, a preview quad is generated, allowing you to visualize the texture outputs within the level.

Houdini Image details panel 
When you select a COP HDA in Unreal, the details panel displays a Houdini Image section. See Houdini Image settings for a detailed description of the settings.
This panel allows you to control parameters of the generated textures such as the resolution, pixel scale, and data format.
Note
Only int8, int16, float16, and float32 data formats are supported.

There are other options to automatically generate a material instance that uses the generated textures. By default, the Houdini Engine default material is used as a source for the material instance. You can use a different material by changing the Source Material property.
COP HDA inputs, outputs, and parameters 
The COP node’s inputs is available as inputs on the HDA in Unreal. The HDA’s exposed path parameters are available as parameter inputs. This is similar to other types of HDA inputs and parameters.
You can add and edit your inputs, parameters, and output in the type properties.
-
 of your COP HDA and select Type Properties to access the Operator Type Properties window.
Outputs 
In this section, you can see the COP HDA output’s number, name, and label.
When you generate a material, the plugin matches a generated texture to a Texture parameter in the material using its COP output name. For example, if you want to override a Texture parameter named plip in your source material, the output name of your COP HDA needs to also be set to plip.
The Output Name in the HDA also dictates the type of texture generated. This affects parameters of the generated textures such as its compression, gamma and SRGB. To add or edit your outputs, access the Type Properties window.
The plugin supports the following output names:
Output Name |
Type |
Description |
|---|---|---|
|
SRGB |
Color Texture (with Gamma set to 2.2) for the material’s Diffuse texture parameter. |
|
Linear Grayscale |
SRGB of texture for the material’s Metallic texture parameter. |
|
Linear Grayscale |
SRGB of texture for the material’s Specular texture parameter. |
|
Linear Grayscale |
SRGB of texture for the material’s Roughness texture parameter. |
|
SRGB |
Color Texture (with Gamma set to 2.2) for the material’s Emissive texture parameter. |
|
Linear Grayscale |
SRGB of texture for the material’s Opacity texture parameter. |
|
Normal |
SRGB of texture for the material’s Normal texture parameter. |
|
Linear Grayscale |
SRGB off texture that will be used for the Displacement texture parameter of the material. |
|
Linear Grayscale |
SRGB off texture that will be used for the Displacement texture parameter of the material. |
|
Color |
SRGB off texture used as a compact map, that will be used for the RMA texture parameter of the material. The red channel will be used for roughness, the blue channel will be used for metallic, and the green channel used for ambient occlusion. If a compact map is present, it will override any roughness/metal/ao texture also generated by the HDA. |
Main COPs workflows 
Copernicus with Unreal has two main workflows:
-
SOP HDA with material preview - allows you to export a geometry along with the textures. Houdini Engine automatically converts your COP textures into an Unreal material and assigns the textures appropriately.
-
COP HDA with texture outputs - allows you to export generated texture assets without geometry using output attributes. These textures can then be previewed in the Asset editor for further changes and to be recooked/rebaked.
SOP HDA with material preview 
-
In the Geometry network, create a COP Network SOP node.
-
Dive into the COP Network node and create a Preview Material COP node
-
Assign your generated textures to the Preview Material COP node.
-
Step out to the Geometry network, create an Output SOP node.
-
Connect the output of COP Network SOP node to the input of the Output SOP node.
-
Your geometry needs to be connected somewhere in the network to export along with the textures.
-
An alternative is to dive into your COP Network SOP node, then create a SOP Import COP node and connnect the geometry wire to the geo input of the Preview Material COP node.
-

-
-
Follow the Create a Houdini digital asset workflow to export your HDA.
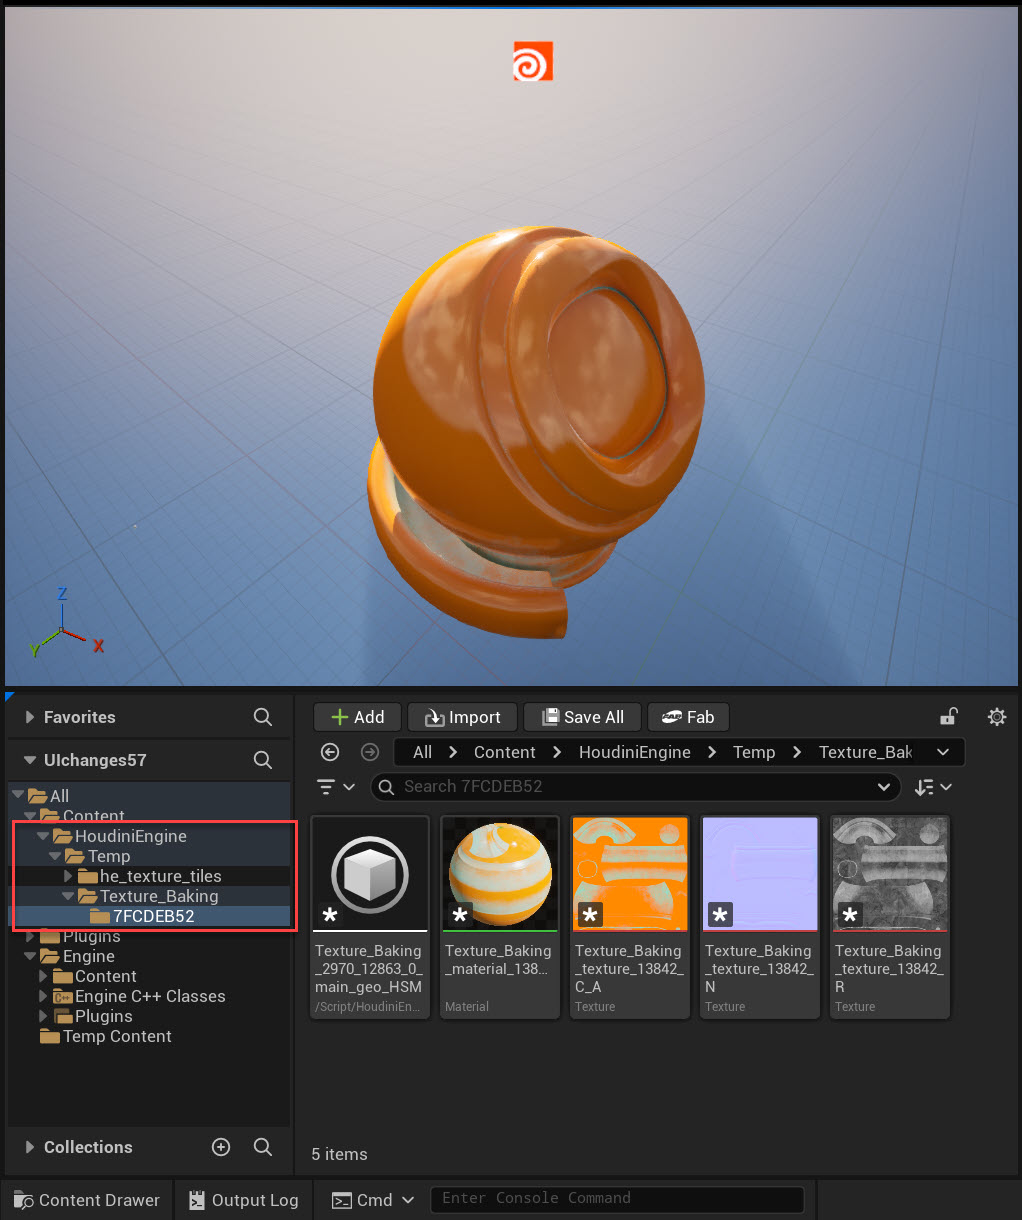
Once the SOP HDA is imported into Unreal, you will see a new folder in HoudiniEngine/Temp/YourAssetName. This folder contains the generated material and textures assigned automatically to the geometry. These textures and materials can be baked like any other HDA output type.
COP HDA with texture outputs 
-
Create a COP Network node.
-
Dive into the COP Network node and create a Subnetwork COP node.
-
In the Subnetwork COP node, create your texture network inside the subnet.
-
Wire your textures you want to expose to the Output COP node. See outputs to see what textures you can expose.
-
This example exposes the diffuse, height, roughness, normal, ao, and metallic textures.

-
-
Step out to the Subnetwork COP node network.
the node and select Create Digital Asset.-
The Edit Operator Type Properties window pops up.
-
-
In the new window, select the New Output dropdown and choose the correct output according to your textures. See the attributes table in the outputs section for the correct output names and type

-
Save the HDA.
-
Follow the Import HDA into Unreal workflow to import your COP HDA.
Once your COP HDA is in Unreal:
-
Open the HDA in the Asset editor.
-
In the asset editor window, locate the Texture Output section near the tab.
-
Change the dropdown to your desired texture.
-
After your changes, recook or rebuild to bake your changes.