| On this page |

Overview 
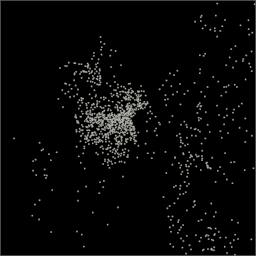
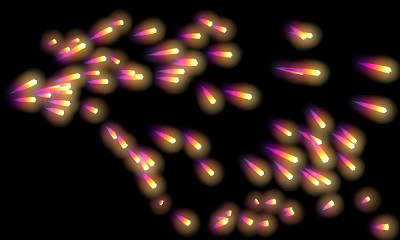
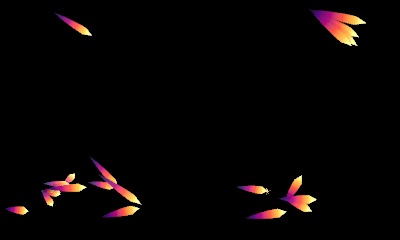
The ![]() Particle Trail SOP takes an animated particle system and generates motion trails from its particles. These trails can be used for various effects such as sparks, fireworks, and rain. This node also allows you to control the look of the trails. This enables you to fine-tune their look in the SOP context, without the need to render the points with large amount of motion blur.
Particle Trail SOP takes an animated particle system and generates motion trails from its particles. These trails can be used for various effects such as sparks, fireworks, and rain. This node also allows you to control the look of the trails. This enables you to fine-tune their look in the SOP context, without the need to render the points with large amount of motion blur.
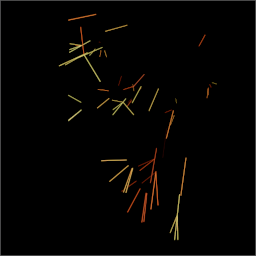
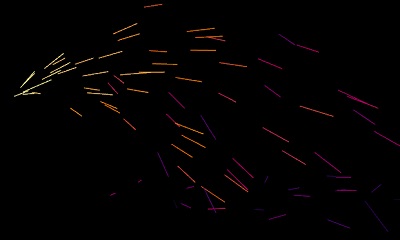
Particles from simulation and the generated particle trails.

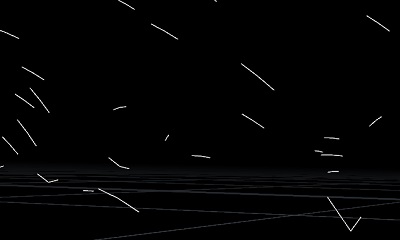
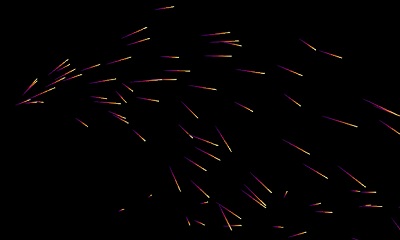
In addition, the Particle Trail node can generate split trails to mimic the look of bursting sparks or splashing rain. The generated splits are only approximations of the real physical behavior you could achieve with a particle simulation. Using this node has the benefit of providing faster iteration times without the need of complex particle simulation setups, while giving you more directable controls over the splits.
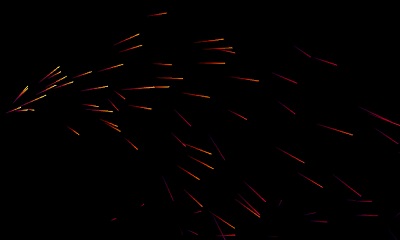
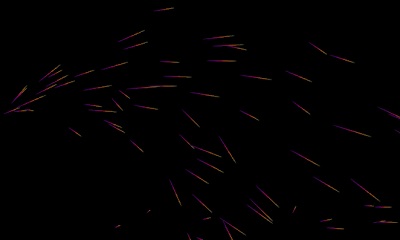
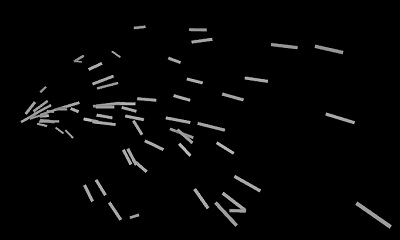
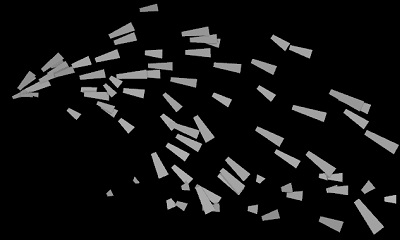
Particle trails with and without splitting enabled.

Note
This node uses in-between frames to sample the motion trails, but does not perform any interpolation between integer frames. Therefore, you have to make sure its inputs can evaluate on fractional frames. DOP networks do not use the id attribute to match particles from different frames, so it will produce incorrect interpolation when particles die out.
You can use the Quick Setups menu to append a ![]() Time Blend SOP before the Particle Trail SOP to properly interpolate based on the
Time Blend SOP before the Particle Trail SOP to properly interpolate based on the id attribute. This will wire in a Time Blend node before the Particle Trail node with all the required settings. Alternatively, both nodes are created for you automatically in the network editor if you press ⇥ Tab and type Sparks.
Tip
As the generated trails are built from the motion of the particles, you must disable motion blur in your render. To capture camera motion blur, enable Bake Camera Motion on the Motion tab of this node.
When the input comes from a particle simulation, it must contain the following attributes:
-
lifepoint attribute, storing the prescribed lifetime of the particle. -
agepoint attribute, storing the current age of the particle. -
The integer Seed Attribute (
idby default), storing the unique identifier for each particle.
When the input to this node comes from the ![]() Ballistic Path SOP, it must contain the following attributes:
Ballistic Path SOP, it must contain the following attributes:
-
timepoint attribute, storing the time when the particle is at a given position on the ballistic path. -
The integer Seed Attribute (
idby default) on the primitives, storing the unique identifier for each ballistic path.
Customizing trails 
By default, all trails will have the same properties, as set by the node’s parameters (such as Color, Alpha, etc.). To vary these properties for each trail, select the Set Varying option on the menu next to the corresponding parameter. This will use a different random value in the provided range for each input point. These generated random numbers are seeded with a custom integer attribute set by Seed Attribute (id by default). This will ensure that randomized properties will remain the same for an input point even if points are shuffled or removed from the input, provided the value of the Seed Attribute stays the same.
You can also manually override parameter values with attributes. For example, if the input geometry has a Cd point attribute, its values can be used instead of the global Color. This allows you to finely control the color of each spark. To this end, the menu next to the corresponding parameter must also be set to Use Attribute.
Parameters that can be controlled by point attributes are listed in the table below.
Parameter Name |
Range |
Attribute Name |
Attribute Type |
|---|---|---|---|
Intensity |
0 to ∞ |
|
float |
Color |
(0,0,0) to (∞,∞,∞) |
|
vector |
Alpha |
0 to 1 |
|
float |
Length Start |
0 to 1 |
|
float |
Length End |
0 to 1 |
|
float |
Tail Width |
0 to ∞ |
|
float |
Head Width |
0 to ∞ |
|
float |
Split |
0 to 1 |
|
integer |
Splits per Point |
0 to ∞ |
|
integer |
Split Start Angle |
0 to 180 |
|
float |
Split End Angle |
0 to 180 |
|
float |
Split Velocity Scale |
0 to ∞ |
|
float |
Split Duration |
0 to ∞ |
|
float |
For more detailed parameter information, see the ![]() Particle Trail SOP help page.
Particle Trail SOP help page.
Changing the look of sparks 
There are many controls on the ![]() Particle Trail SOP that allow you to change the look of sparks. In some of the following images, the width has been increased to better illustrate the effect.
Particle Trail SOP that allow you to change the look of sparks. In some of the following images, the width has been increased to better illustrate the effect.
Detail 
If you increase the Substeps parameter, it will increase the number of divisions in each line. This will give more detail to the sparks, such as a slight curved shape as they fall toward the ground, and V shapes as they hit the ground and bounce off.
Color 
You can change the color of your sparks using the controls in the Color section on the Look tab. The Color Along Length Ramp parameter is useful for creating a natural looking gradient in your sparks from head to tail. However, you can only have as many colors as there are numbers of Substeps.
Alternatively, you can choose Color Over Normalized Age if you want to color the sparks from when it was create to when it dies.
Color Along Length Ramp
Color Over Normalized Age
You can turn both of these checkboxes on to use both effects. This will give you individual sparks that are brighter at the tip and darker at the tail, as well as sparks that are brighter when they're born and fade over time.
Transparency 
You can change the opacity of your sparks using the controls in the Alpha section on the Look tab. Similar to color, the Scale Along Length parameter will fade the spark along the length of each individual spark from head to tail, and the Scale Over Normalized Age parameter will fade the sparks from when they were created to when they die.
Scale Along Length

Scale Over Normalized Age
Note
Similar to color, these can also be used together to create both effects.
Brightness 
To make sparks brighter, you can increase the Scale in the Intensity section of the Look tab. This will act as a multiplier on the color of the trail, since often you want sparks to emit light onto a scene if they're part of a pyro simulation.
 Scale set to
 1
 Scale set to
 5
In Houdini 19 and later, you can create a glowing effect in the viewport with the Bloom display option, located on the Fog tab of the 3D viewer display options dialog. This is useful to visualize what the sparks will probably look like when rendered.
Note
This won’t actually affect the render, since it is simply a viewport visualization. However, it is useful for making flipbooks and will also give you a better idea of what it will eventually look like when rendered.
Width 
If you increase the Width parameters on the Shape tab, you will be setting an attribute on the curves. However, you won’t be able to automatically see these changes in the viewport. In order to properly visualize width changes, go to the OBJ level and turn on Shade Open Curves in Viewport, which is located on the Misc tab. This will allow you to properly preview what your sparks will look like without having to render.

Without Shade Open Curves in Viewport turned on
Shade Open Curves in Viewport turned on at the object level
You can use the Tail Width and Head Width parameters to give a more custom shape to the sparks, or you can turn on Scale Along Length and use the Width Along Length Ramp for even further artistic control. Adding more Substeps will allow you to add more detail to the shape using the ramp, which is especially useful for effects like rain to create a teardrop shape.
Tail Width of 1 and Head Width of 2
Width Along Length Ramp
Scale by Noise is also useful to add some variation to the particles, so they're not all the same shape and size. Similar to color, these options can be turned on and multiplied together for a more interesting looking effect.
Length 
The length of the trails can be set on the Shape tab. You can choose to either set the length based on the number of past frames, or according to the camera’s shutter open and shutter close using either past or future frames. Using Shutter lets you match the motion blur with the motion you've rendered elsewhere.
For more detailed information, see the Length parameters on the Particle Trail node.
Splitting 
Splitting mimics the look of bursting sparks or splashing rain. The generated splits are only approximations of the real physical behavior you could achieve with a particle simulation. However, using the Particle Trail node has the benefit of providing faster iteration times without the need for complex particle simulation setups. It also gives you more directable controls over the splits, which happen near the end of the particle’s lifetime. Split Duration is the number of frames between the split and the particle’s death and Splits per Point controls how many splits occur. Increasing this value will generate more splits.
You can also choose whether the Split Path is Straight or Ballistic. The default is Straight because it’s faster and generally useful for sparks that die out quickly. However, if you have sparks that will last a long time, for example sparks falling down in the air, you may want to choose Ballistic as it’s more realistic. The trade-off is that it’s slower since the ballistic paths are generated on every frame, but the split trajectories will be affected by gravity creating a more droopy and realistic look for falling sparks.