| On this page |
Basic hair setup 
-
Create a sphere at the origin by Ctrl+LMB clicking the
 Sphere on the Create shelf tab.
 -
Dive into the sphere object and set Rows and Columns to
50to get a rounder sphere. -
Add hair to the sphere using the
 Add Fur tool on the Hair shelf tab.
 -
On the Fur object, set Length to
0.6.
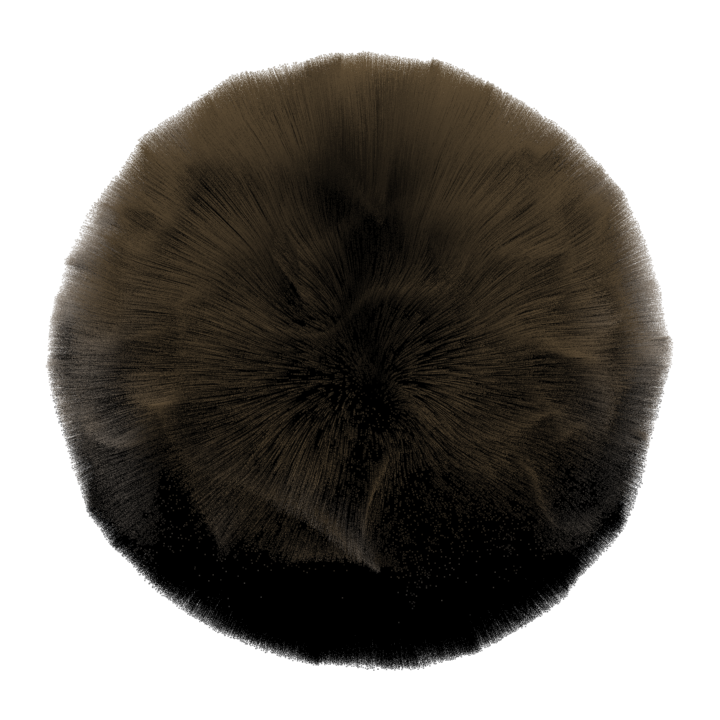
You will see the default hair look now. The guide hairs are sticking out straight, and each generated hair is a blend between multiple guides in it’s neighborhood.
Render setup 
To get a better look at the hair, set up a quick render.
-
Rotate the viewport so you are looking straight down onto the sphere.
-
Ctrl+LMB click the Area Light tool on the Lights and Cameras shelf tab. This will create the light in your viewing position.
-
Rotate the viewport back to look straight at the sphere.
-
Switch to the Render View and click Render.
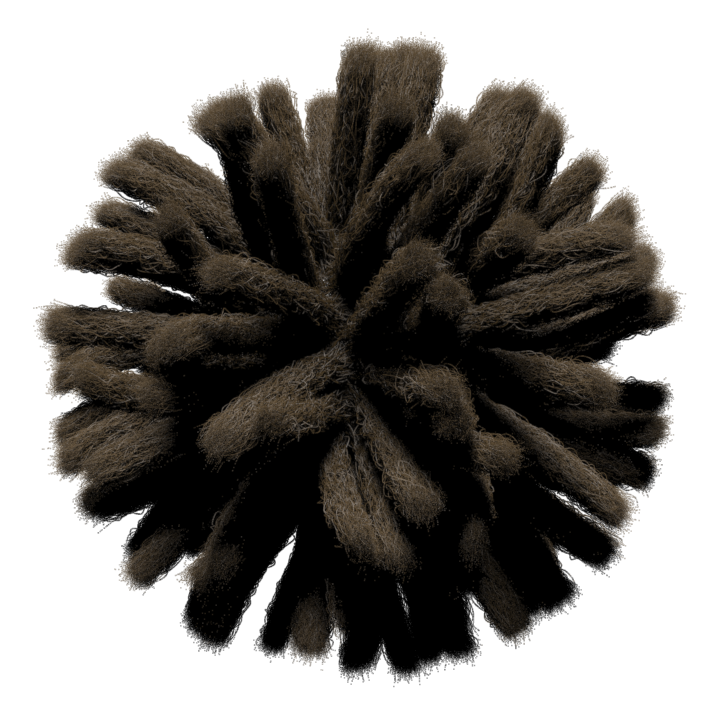
You should get something like this:
Note
As you work through this how-to, you should be able to see the effect of your changes in the Scene Viewer, but it can be a good idea to perform additional test renders as you go along.
Turn guides into thick hair strands 
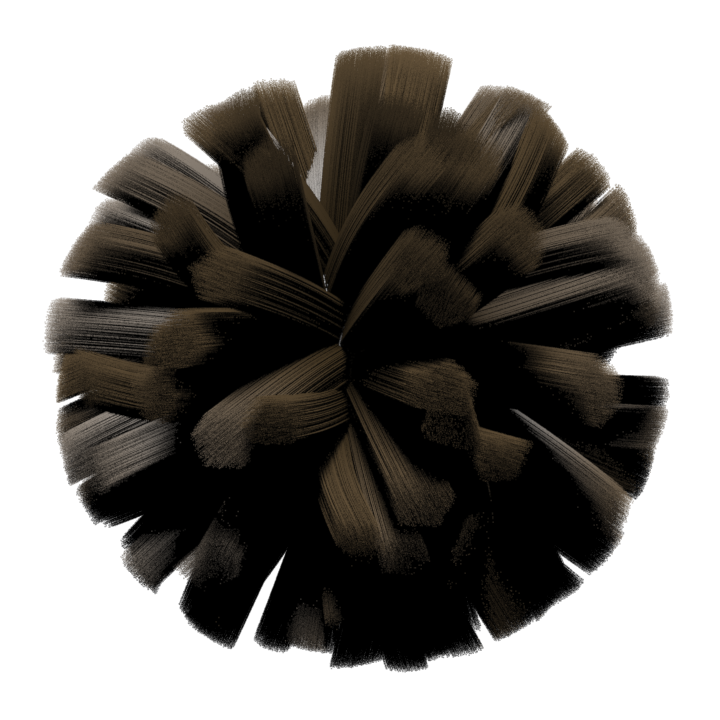
For dreadlocks, you want to have each hair follow the guide that’s closest to it, so you get a thick strand of many hairs around each guide.
To achieve this, you can use a clusterid attribute. Hair is not interpolated between guides with different clusterids, so if you assign each hair it’s own clusterid, you should get the desired effect.
-
Dive into the fur object > guides node.
-
Attach a
 Primitive Wrangle to the
 INPUT_GUIDESnode, making sure it’s display flag is set.
 -
Set the VEXpression parameter to
i@clusterid = @primnum;. This will put each primitive’s index (@primnum) into it’sclusteridattribute (i@clusterid), so each primitive will have a different value. -
Go to the Guides tab on the fur object and reduce the Density to around
50, to get fewer and thicker strands.
Here’s what you should get after these adjustments:
Tighten the strands 
Get the hairs of each strand to pull closer to their guide.
-
Go to the Appearance ▸ Clump tab on the fur object.
-
Turn on Clump Fur.
-
Set Density to
50,to match the guides. -
Set Clump Geo Source to Use Guide Curves. This will reuse the guide curves for clumping.
-
Set the curve to something like the screenshot below. This will make the hairs quickly move towards the guide and then continue straight.

-
You can now control the overall effect using Tightness. The default of
0.5moves the hair points halfway towards the guide. If you set1.0here, the hair will move all the way to the guide, resulting in a very thin strand. -
On the Basic tab, increase Segments to
20.Note
This is necessary because, with the default of
4, the hair curves don’t have enough segments to represent the steep ramp you used above, The extra segments will also be helpful to set up frizz with a high frequency.
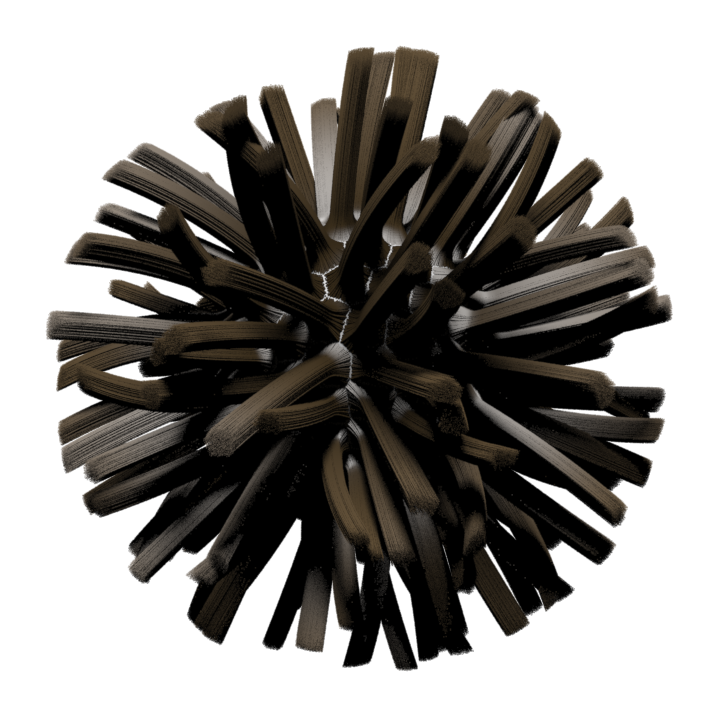
Add Frizz 
Use frizz to get rid of the perfectly straight look.
-
Go to Appearance ▸ Frizz on the fur object and set Maximum Frizz to
0.25. -
Set Frequency to
20.Note
Remember that you increased the number of hair segments in the previous section. Without this, you wouldn’t have enough points in the hair curves to represent the high frequency noise.
-
Set the ramp to something like this, to get frizz all along the hair:

Note
Alternatively you can ignore the ramp and set both Minimum Frizz and Maximum Frizz to
0.25.
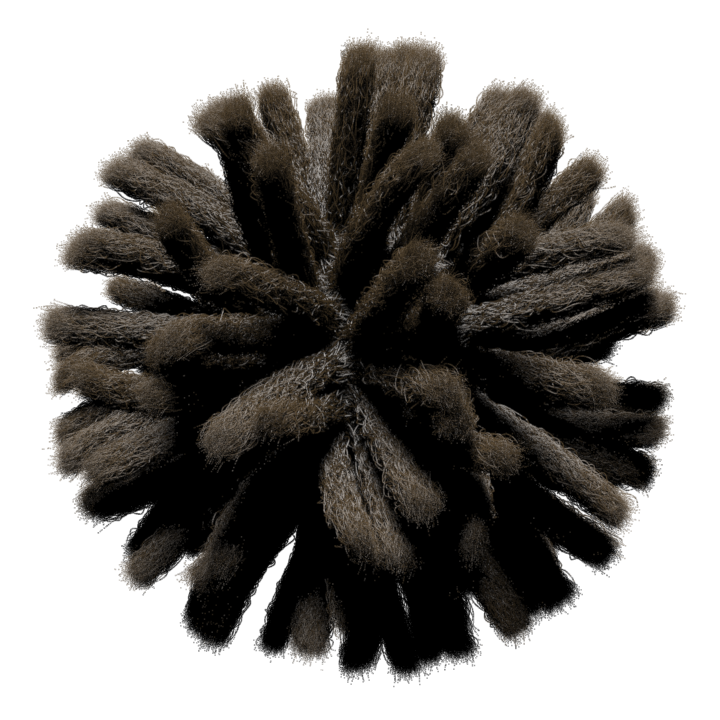
Shader Settings 
-
Navigate to the hair shader inside the fur object (Located in
fur/shopnet1/textured_hair).Note
As a shortcut, you can
 the arrow next to the Material parameter on the Fur object’s Basic tab.
Use Ctrl+LMB to open the shader parameters in a new window.
-
Reduce the hair’s reflectiveness by reducing Intensity on the Reflection tab to
0.02. -
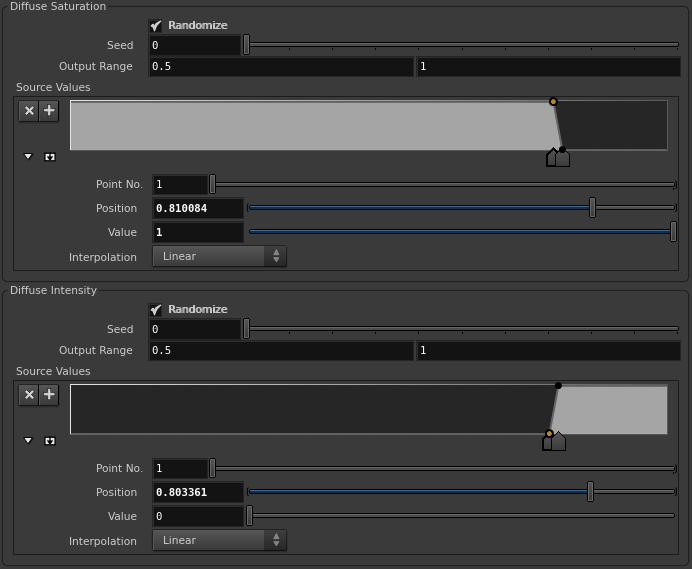
Turn on Randomize for Diffuse Saturation and Diffuse Intensity on the Randomness Tab.
-
You can use the ramps to create a few bright gray hairs. Set up the ramps according to the screenshot below.
Note
The random saturation and intensity values are picked from the Source Values ramps. You're setting 80% of hairs to have high saturation, and about 20% to have low saturation. You're setting 80% of the hair to have a dark color, and 20% to have a bright color.
Important: You're using the same seed for both ramps. This means that for each hair, the position along each ramp will be the same. In other words, a hair that is desaturated will also be bright.
To style the hair, use the ![]() Groom shelf tool.
Groom shelf tool.