| On this page |

The motion mixer pane provides a timeline-based view of the animation clips and motion effects of multiple characters. Animation clips are grouped into tracks, and additional effects can be applied to tracks to change the look and behavior of the final animation.
The motion mixer pane is populated with tracks and clips if you have a ![]() Motion Mixer SOP selected in the network editor. If you have another SOP selected, the motion mixer pane will be empty.
Motion Mixer SOP selected in the network editor. If you have another SOP selected, the motion mixer pane will be empty.
To open the motion mixer pane, click the ![]() New Tab icon at the top of a pane and select New Pane Tab Type ▸ Animation ▸ Motion Mixer. The top left of the pane displays a hierarchy of elements that are available in the motion mixer. If you select the motion mixer (top level) element in the hierarchy, the parameter editor in the motion mixer pane displays the top-level parameters in the Motion Mixer SOP:
New Tab icon at the top of a pane and select New Pane Tab Type ▸ Animation ▸ Motion Mixer. The top left of the pane displays a hierarchy of elements that are available in the motion mixer. If you select the motion mixer (top level) element in the hierarchy, the parameter editor in the motion mixer pane displays the top-level parameters in the Motion Mixer SOP:
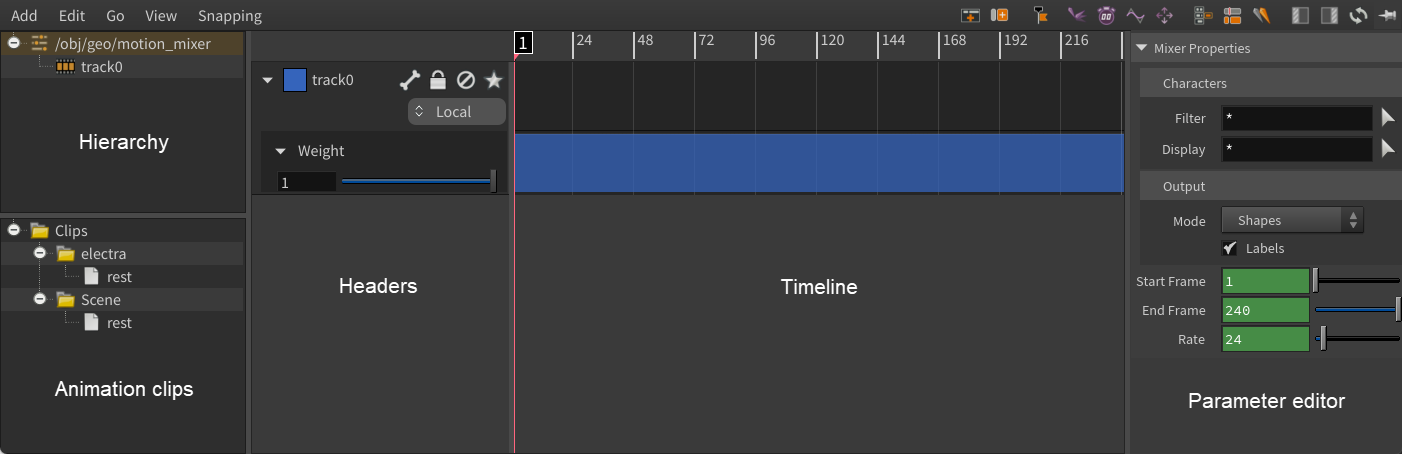
The parameter editor in the motion mixer pane is a filtered subset of the parameters in the Motion Mixer SOP. For example, if you click the track0 element in the hierarchy, the motion mixer parameter editor displays the same parameters that appear in Houdini’s regular parameter editor under the Mixer ▸ Track 0 section.
See the motion mixer page for information on how to use the motion mixer to combine and edit animation clips.
Tracks, clips, and weights 
A track is a way to group multiple animation clips for a character, and is represented as a row on the timeline. A track can contain multiple animation clips.
Each track has an associated weight that is represented as a row below the track. The weight determines the extent to which the clips in the track contribute to the overall animation.
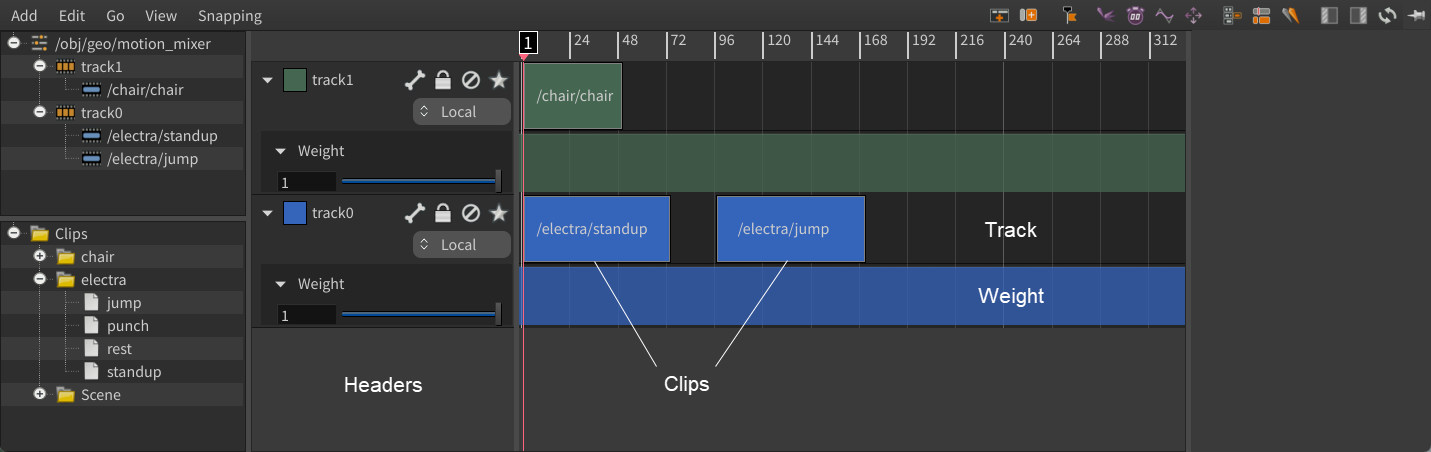
The headers in the motion mixer pane provide settings for configuring the tracks and weights. There is also a ![]() click menu on the track header, which includes some of the functionality provided by the track header icons.
click menu on the track header, which includes some of the functionality provided by the track header icons.
Navigating in the timeline 
| To... | Do this |
|---|---|
|
Pan |
|
|
Zoom |
⌃ Ctrl + |
|
Scrub along the timeline |
Drag the playhead. |
|
Frame the selected clip |
Press F. |
|
Display the entire timeline |
Press H. |
|
Move clips |
Drag the clip. |
|
Duplicate clips |
Alt drag the clip. |
|
Set a keyframe |
Hold Alt, and click the curve in the timeline or the textbox/slider in the header. |
|
Move a keyframe along the horizontal or vertical axis |
|
|
Resize the different motion mixer pane areas |
To adjust the height of the track/weight area, drag between the track/weight headers. To adjust the width of the headers, drag the separator between the headers and the timeline. You can fully collapse the headers with this action. |
Toolbar 
![]() Add Track
Add Track
Adds a track above the selected track.
![]() Add Clip
Add Clip
Adds a new clip.
![]() Add Marker
Add Marker
Adds a vertical dotted line to the timeline that allows you to mark a certain position in the animation. Double-click the marker header to open a window where you can rename, add comments, and change the color and position of the marker. You can also snap the edge of clips to markers if you turn on Snapping ▸ Markers.
![]() Add Animate Effect
Add Animate Effect
Adds an animate effect to the selected track.
![]() Add Retime Effect
Add Retime Effect
Adds a retime effect to the selected track.
![]() Add Smooth Effect
Add Smooth Effect
Adds a smooth effect to the selected track.
![]() Add Transform Effect
Add Transform Effect
Adds a transform effect to the selected track.
![]() Bake Tracks
Bake Tracks
Opens a window that provides options for exporting your animation.
![]() Split at Current Time
Split at Current Time
Splits the selected clip at the current frame.
![]() Match Joint
Match Joint
Opens a window that allows you to select joints to match between clip transitions.
![]() Show/Hide Left Pane
Show/Hide Left Pane
Toggles display of the left pane (that contains the motion mixer hierarchy and the list of animation clips).
![]() Show/Hide Parameter Editor Pane
Show/Hide Parameter Editor Pane
Toggles display of the parameter editor in the motion mixer pane.
![]() Refresh
Refresh
Refreshes the motion mixer pane. You can use this to refresh the pane if the pane is ![]() pinned and you select a different
pinned and you select a different ![]() Motion Mixer SOP.
Motion Mixer SOP.
![]() Pin Motion Mixer
Pin Motion Mixer
Pins the current motion mixer pane so that it doesn’t follow the node selection in the network editor.
Track header 
![]() Select Track Joints
Select Track Joints
Applies the track to a specific character or character’s joints.
![]() Lock
Lock
Locks the track so you can’t update the clips on this track.
![]() Mute
Mute
Mutes the track so the track doesn’t contribute to the final animation.
![]() Solo
Solo
Solos the track. Only tracks that are soloed contribute to the final animation.
How-to 
| To... | Do this |
|---|---|
|
Resize multiple clip boundaries |
|
| See also |