| On this page |
Stitch constraints 
Stitch constraints are now able to stitch a point to the closest position on a primitive, not just to another point. This is extremely useful for stitching cloth together. For example, now you can stitch a pocket to a shirt anywhere on a triangle or quad, instead of being limited to only points. Stitching to the closest position also works with polylines. This ability is very useful to create smooth and realistic looking sliding.
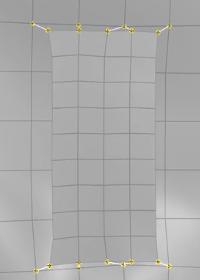
Stitching to points.
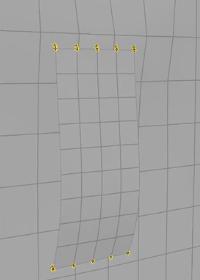
Stitching to the closest position on a primitive.

Stitching to points.
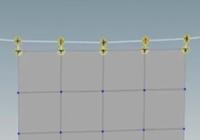
Stitching to the closest position on a polyline.
Sliding constraints 
Sliding constraints are stitch or attach constraints that can slide across the surface of target geometry. In order to create sliding constraints, you need to use Attach to Geometry or Stitch constraints, both of which have the ability to constrain points to the closest position on a primitive. To enable this, turn on the Use Closest Location on Primitive checkbox on the ![]() Vellum Constraints node. You also need to turn on Sliding Rate, which will allow the constraint to slide along the target geometry at this rate during the simulation. Set the Target Group Type to Primitives, and choose your target geometry as the Target Group.
Vellum Constraints node. You also need to turn on Sliding Rate, which will allow the constraint to slide along the target geometry at this rate during the simulation. Set the Target Group Type to Primitives, and choose your target geometry as the Target Group.
Note
Use Closest Location on Primitive is only available on poly lines, triangles, and quads.
The Sliding Rate controls how quickly the sliding will occur. A value of 1 matches the constrained point’s velocity. Decreasing this value will cause it to slide slower. It can also be scaled by attribute at simulation time.
Sliding Methods 
There are two methods for sliding along target geometry: Closest Point and Traverse Polygons. The Sliding Method drop-down can be found on the Motion collapsible menu of Advanced tab of the ![]() Vellum Solver.
Vellum Solver.
The Closest Point method is the easiest, quickest, and simplest as it just finds the next closest point. However, it can skip over gaps if there are concavities in your geometry or places where two pieces of geometry meet, for example where the arm meets the body of a character. This becomes a problem when the closest point is on non-connected target geometry.
The Traverse Polygons method walks outward from the current sliding position along the connected polygons, which can be slower but uses connectivity to avoid skipping over gaps. This is slower at high resolutions, so the general recommendation is to start with the Closest Point method (which is the default) and if you start seeing jumps between gaps that are problematic, switch to Traverse Polygons method.
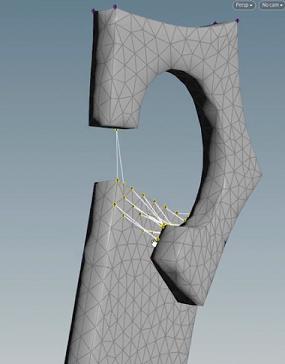
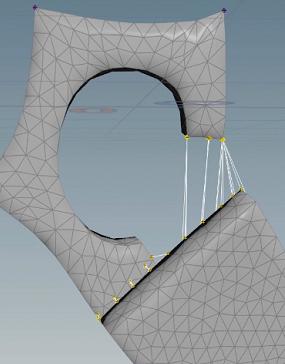
This image shows constraints skipping over the gap in geometry to the lower level with the Closest Point method.
This image shows the constraints stopping at the lowest point and not skipping over the gap with the Traverse Polygons method.
Tips and troubleshooting 
-
You can optionally use a Sliding Attribute for finer control. This attribute scales the Sliding Rate as the points move along the geometry. In the video above, the constraints in the blue area slide faster than the constraints in the red area.
-
Turning on Tangent Stiffness will slow down sliding, since the constraints are fighting with gravity to keep the points in place. You can work around this by increasing the Sliding Rate.
-
If your constraints are improperly jumping across concavities in the target geometry, you can change the Sliding Method on the Advanced tab of the
 Vellum Solver from Closest Point to Traverse Polygons. This method starts from the current target primitive and successively walks outwards, finding the closest point on the surrounding primitives. This approach is more expensive, but handles concave target geometry better. In the video above, Traverse Polygons is turned on so that the constraints don’t jump from the top of the circle to the bottom as the object slides downward.