| On this page |
Overview 
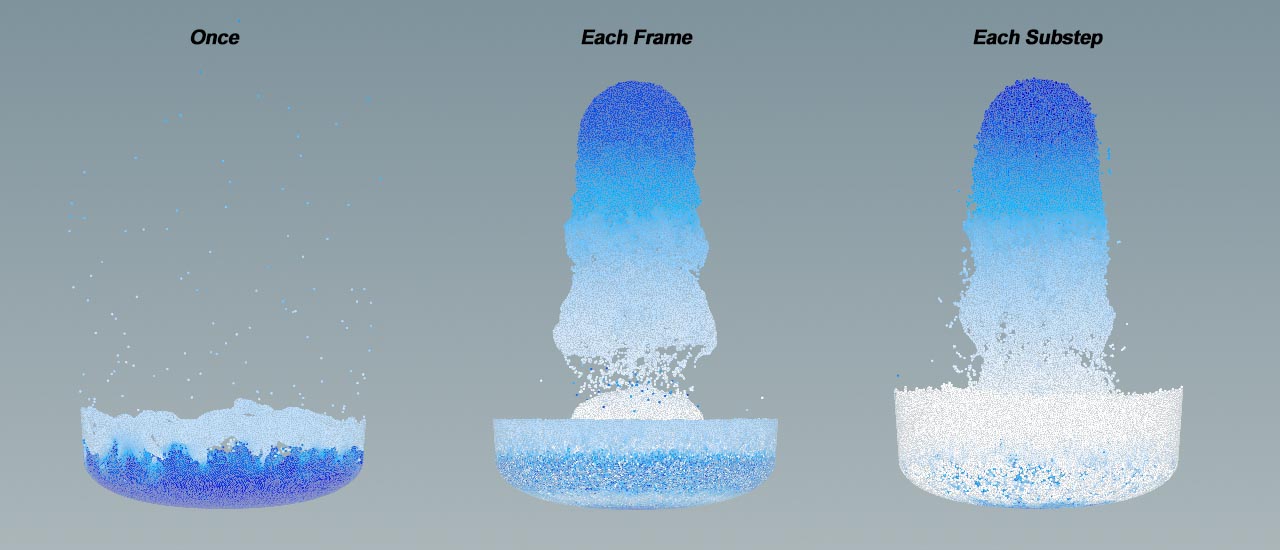
By default, the Vellum solver sources Vellum objects and constraints only on the start frame. Imagine, you want to emit water from a tap to fill a glass. In this case you need a continuous stream of particles. This configuration requires additional setup.
Working with emission types 
Create an object to emit from. You can source fluids and grain in two different ways
-
Select the object and click
 Vellum Grains tool on the Vellum tab. Dive into the
  DOP Network and click the
  Vellum Source DOP node. In the node’s parameters pane tab, look for Emission Type.
 -
Create your own node network. Dive into the network, and go to the Vellum Soruce node. There, look for Emission Type.
The standard selection is Once Only. For a continuous stream of particles, select Each Frame or Each Substep. With Each substep, emission relies on the number of Substeps in the Vellum solver node. For better results, we recommend 10 for Vellum fluids, and 5 subteps for Vellum grains. Higher substeps create a more natural emission and more particles. Note that higher subteps will also increase simulation times.
How to 
| To... | Do this |
|---|---|
|
Avoid gaps between particles |
|
|
Stop emission |
For example, you want to stop emission at frame 20 through an expression:
Another way is to animate Activation. This is, for example, helpful if you want to interrupt emission for a certain time, and reactivate it later:
|
|
Control emission direction and speed |
Vellum recognizes a velocity attribute (v) on your source points. You have two methods to control emission. The first method uses an
The second option is based on an
|
|
Avoid regular emission patterns |
|