| On this page |
Overview 
Environment lighting adds light to the scene as if it came from a sphere surrounding the scene. The light is usually colored using an image called an environment map. An environment map can match the lighting (and reflections) in a scene to a real-world location, or may simply be used to add interesting variation to the scene’s lighting.
In a PBR rendering setup, realistic environmental lighting is cheap to render.
A typical PBR lighting setup will use an environment light to create a base light level and area lights to represent motivated light sources.
How to 
| To... | Do this |
|---|---|
|
Light using an environment map |
Houdini includes a few example environment maps you can use to try out the environment light. |
|
Add outdoors environment lighting |
The |
|
Surround the scene with an environment |
|
Indirect lighting 
Photon maps are colored point clouds. The ![]() Indirect light can generate a photon map by shooting rays from the light and recording the shaded color of the surface at each hit point. This essentially caches the lighting, making subsequent uses of the light much faster.
Indirect light can generate a photon map by shooting rays from the light and recording the shaded color of the surface at each hit point. This essentially caches the lighting, making subsequent uses of the light much faster.
Photon maps are not very good at capturing “contact shadows” – where an object is close to the ground or in corners. To directly control how often the photon map is used, you can adjust the Indirect light options ▸ Photon distance threshold parameter on the Indirect Light node. Larger values will use the photon map only for more distant intersections - and will prefer to use path tracing in sharp corners or for nearby objects.
| To... | Do this |
|---|---|
|
Add indirect lighting |
To get efficient indirect light (global illumination), add an You must also increase the Diffuse Limit in the render node (On the Properties ▸ Shading tab) to make the renderer follow multiple light bounces. |
Indirect light is prone to sparkling when animated. You may need to decrease noise to make it less noticeable.
Environment maps 
Environment maps are special images that represent the view from a certain point in all directions. You can use Environment maps in several places in Houdini.
-
Area lights and Environment lights have a parameter that lets you use an environment map to control the light color emitted. Using an environment map to do this kind of image-based illumination creates the illusion that light from the surrounding environment is bouncing onto the objects in the scene.
-
Some materials, especially highly reflective ones such as chrome, often let you specify a reflection map. This map is used to control the reflections that appear on the surface of an object with the material. This is much faster, though less realistic, than actually raytracing accurate reflections.
-
Many VEX functions and VOPs can take an optional environment map argument to give the color for a ray that doesn’t hit any geometry.
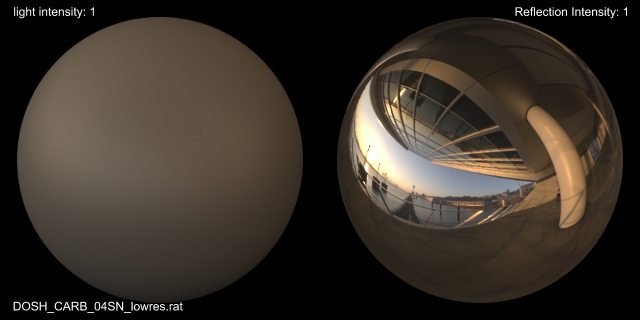
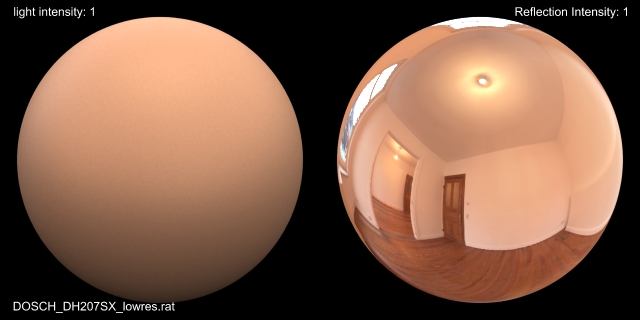
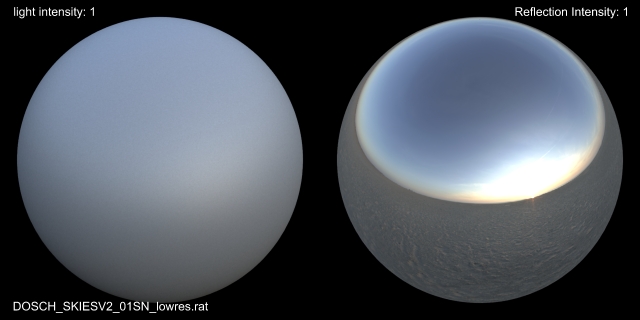
Houdini includes three sample HDRIs (high dynamic range images) (in $HFS/houdini/pic) courtesy of Dosch Design. These are low-res samples of HDRIs you can purchase from the Dosch website.
Generating cubic environment maps 
You can generate a cubic environment map from six images using the isixpack utility. Mantra also lets you automatically generate cubic environment maps for an object during rendering.
Note
Mantra also supports a cubic environment map stored as standard image files (.tif or .exr) but this format is limited to 1024×512 pixels and has poor anti-aliasing compared to .rat. You should use .rat textures instead.
The basic idea behind a cubic environment map is to render six images from the perspective of the object you want to apply the map to (i.e. up, down, forward, back, left, right), and then combine them using isixpack. You can apply properties to an object that tell mantra to automatically generate a cubic environment map for the object when it renders.
-
Select the object.
-
In the parameter editor, open the
 Gear menu and choose Edit Rendering Parameters.
 -
In the Render Properties tab, open the Mantra X.X folder.
-
Add the following properties to the object’s parameters by dragging them to the list of parameters in the middle pane, or select them and click the
 right pointing arrow.
-
In the Output folder: Auto-generate environment map (
render_envmap) and Output picture (vm_picture). -
In the View folder: Resolution (
res).
-
-
Click Accept.
-
In the object’s parameter editor, click the Output tab and set the Output picture (the default
ipis a special value that opens the rendered environment map in mplay). -
Click the View tab and set the Resolution for the generated images. The horizontal and vertical resolution must match (that is, the images must be square).
The Auto-generate environment maps parameter on the Render tab is on by default.
-
The object itself is automatically made invisible in the generated images.
-
Aperture and focal length properties will be ignored since mantra specifies these so the 6 images stitch together properly. When generating an environment map, focal length will be 1.0 and aperture will be 2.0 (giving a field of view of 45 degrees).
-
The resolution override properties do not apply to environment map generation. Only the resolution parameter is used.
You can add extra camera-related properties for more control over the rendering of the environment map, such as the following:
-
Pixel filter
-
Pixel samples
-
Quantization
-
Near/far clipping
-
Background images