Mantra user guide
These controls are on the Limits tab of the ![]() Mantra render node. See the
Mantra render node. See the ![]() help for the Mantra node for more information.
help for the Mantra node for more information.
Reflect limit
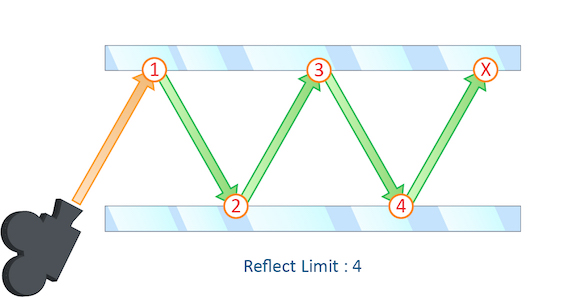
The number of times a ray can be reflected in your scene.
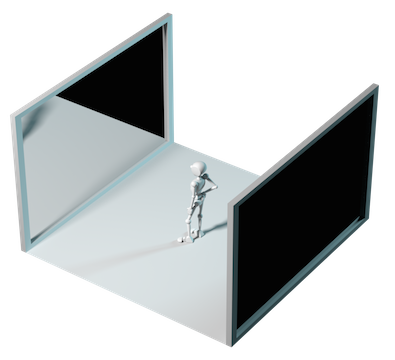
This example shows a classic “Hall of Mirrors” scenario with the subject placed between two mirrors.
This effectively creates an infinite series of reflections.
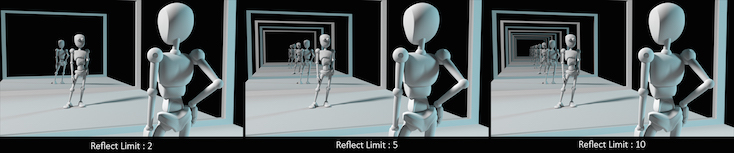
From this camera angle the reflection limits are very obvious and have a large impact on the accuracy of the final image. However, in most cases the reflection limit will be more subtle, allowing you to reduce the number of reflections in your scene and optimize the time it takes to render them.
Remember that the first time a light source is reflected in an object, it is considered a direct reflection. Therefore, even with Reflect Limit set to 0, you will still see specular reflections of light sources.
To control what happens when the maximum number of reflections is exceeded, use At Ray Limit.
Refract limit
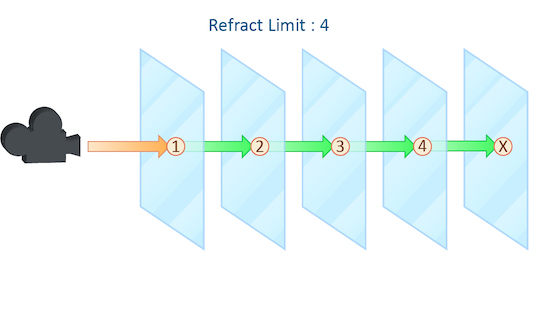
This parameter control the number of times a ray be refracted in your scene.
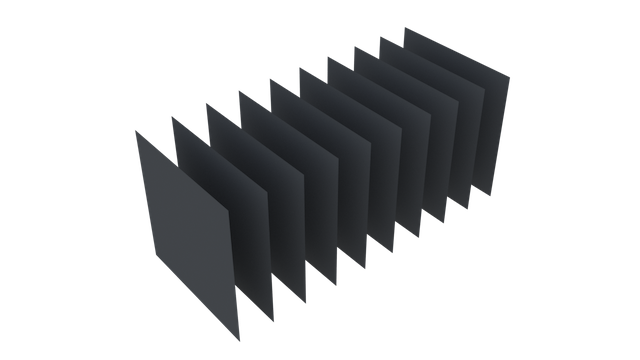
This example shows a simple scene with ten grids all in a row.
By applying a refractive shader, we will be able see through the grids to an image of a sunset in the background.
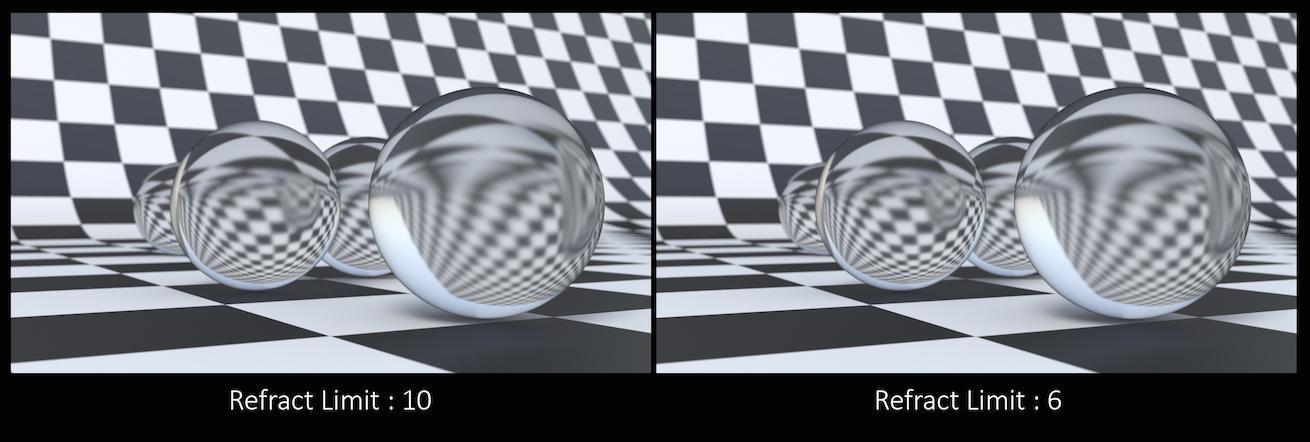
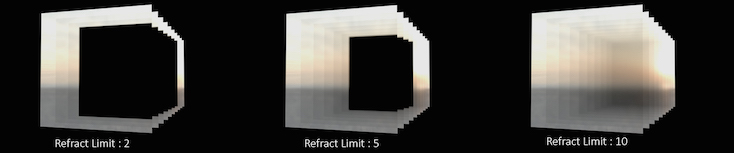
From this camera angle, in order for the image to be accurate, the refraction limit must match the number of grids that that are in the scene. However, most scenes will not have this number of refractive objects all in a row and so it is possible to reduce the refract limit without affecting the final image while also reducing the time it takes to render them.
Keep in mind that this Refract Limit refers to the number of surfaces that the ray must travel through, not the number of objects.
Remember that the first time a light source is refracted through a surface, it is considered a direct refraction. Therefore, even with Refract Limit set to 0, you will see refractions of Light Sources. However, since most objects in your scene will have at least two surfaces between it and the light source, direct refractions are often not evident in your final render.
To control what happens when the maximum number of refraction is exceeded, use At Ray Limit.
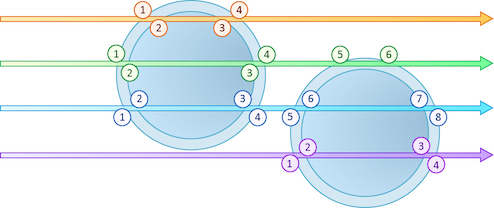
Diffuse limit
The number of times diffuse rays can propagate through your scene.

Unlike the Reflect and Refract Limits, this parameter will increase the overall amount of light in your scene and contribute to the majority of global illumination. With this parameter set above zero diffuse surfaces will accumulate light from other objects in addition to direct light sources.
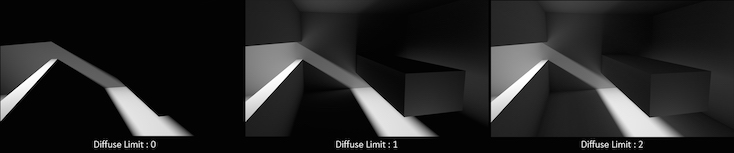
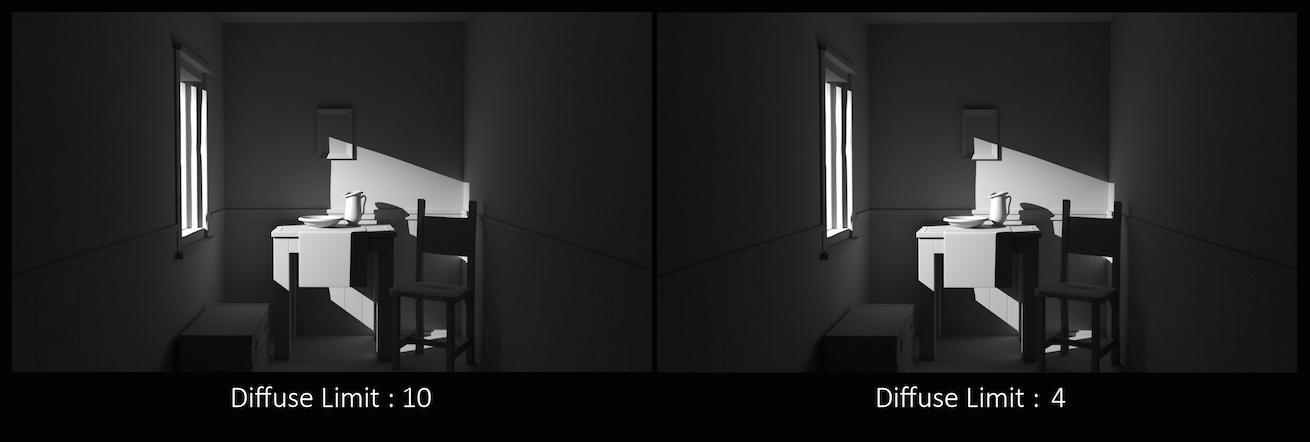
In this example, increasing the Diffuse Limit has a dramatic effect on the appearance of the final image. To replicate realistic lighting conditions, it is often necessary to increase the Diffuse Limit. However, since the amount of light contribution usually decreases with each diffuse bounce, increasing the Diffuse Limit beyond 4 does little to improve the visual fidelity of a scene. Additionally, increasing the Diffuse Limit can dramatically increase noise levels and render times.
Volume limit
The number of times a volumetric ray can propagate through a scene. It functions in a similar fashion to the Diffuse Limit parameter.
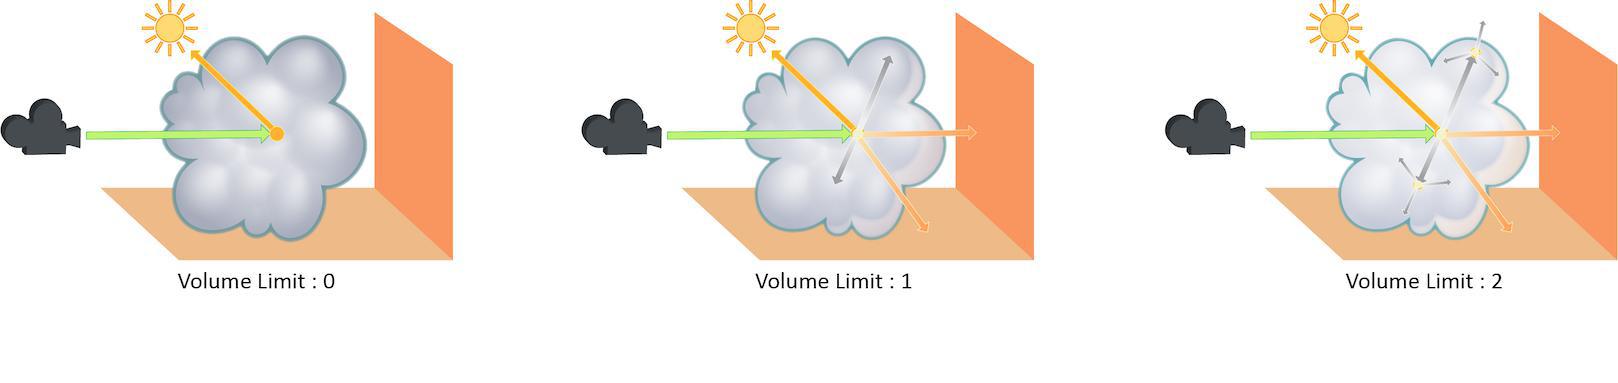
Increasing the Volume Limit parameter will result in much more realistic volumetric effects. This is especially noticeable in situations where only part of a volume is receiving direct lighting. Also, in order for a volumetric object to receive indirect light from other objects, the Volume Limit parameter must be set above 0.
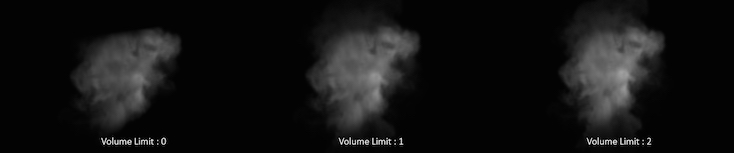
With the Volume Limit set to values above zero, the fog volume takes on the characteristic light scattering you would expect from light traveling through a volume. However, as with the Diffuse Limit, the light contribution generally decreases with each bounced ray and therefore using values above 4 does not necessarily result in a noticeably more realistic image.
Also, increasing the value of this parameter can dramatically increase the amount of time spent rendering volumetric images.
Opacity limit
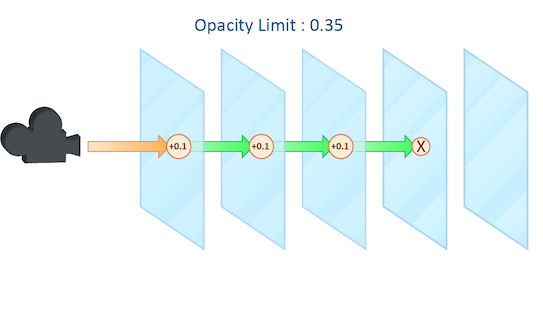
As a ray travels through many transparent surfaces, or through a volume, it will calculate the cumulative amount of Opacity. When this value exceeds the Opacity Limit mantra will assume all surfaces beyond this point are opaque.
This parameter behaves in a similar fashion to both the Reflect and Refract Limit but operates on accumulated values rather than simply the number of surfaces the ray has passed through.
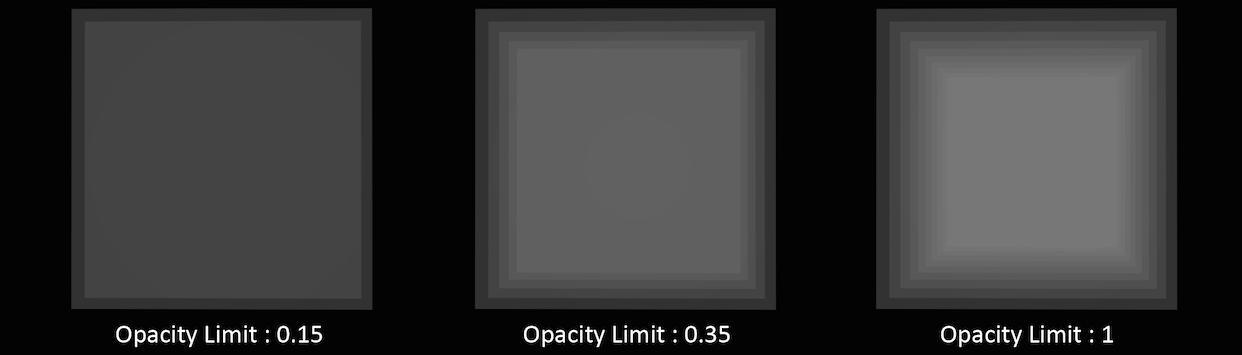
In this example, each grid has a shader attached with an opacity value of 0.1. It is important to remember that in this case “transparent” refers to objects whose opacity is less than 100% and does not include refractive objects which can appear transparent.
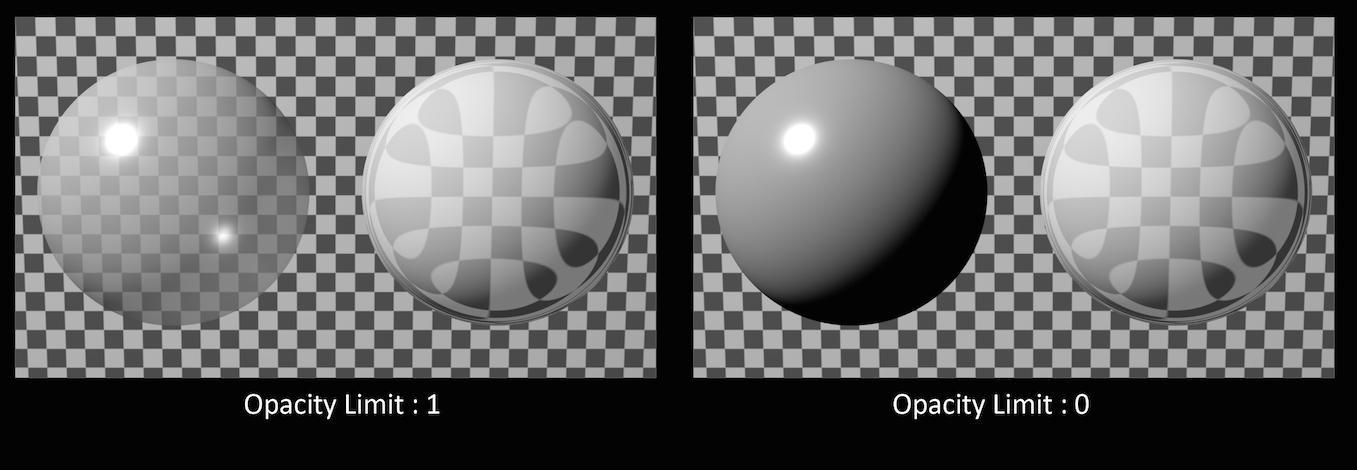
In this example, the sphere of the left has an opacity of 0.5, with no refraction. The sphere on the right has an Opacity of 1 with refraction enabled. You can see that the Opacity Limit has no effect on the amount of refraction, only affecting objects whose opacity value is less than 1.
While reducing the Opacity Limit may save a small amount of render time (1 – 5%) using low values may result in banding and other artifacts when your camera is moving or an animation is evolving. This can be especially noticeable in smoke simulations where opacity values are constantly changing.
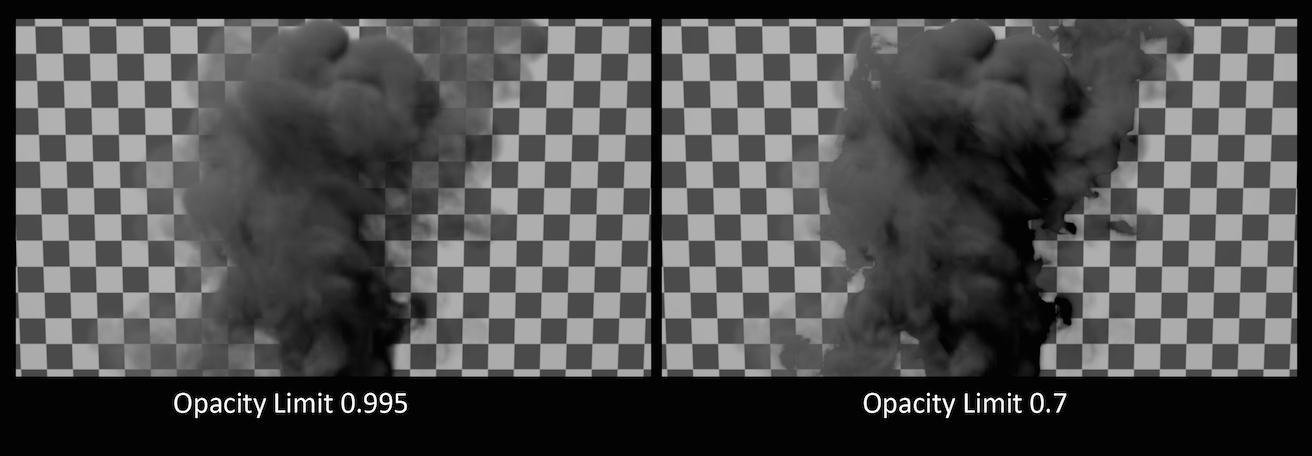
The default value for Opacity Limit is quite aggressive, changing this value should be done carefully and the results inspected across a range of frames in an animated sequence.
Color limit
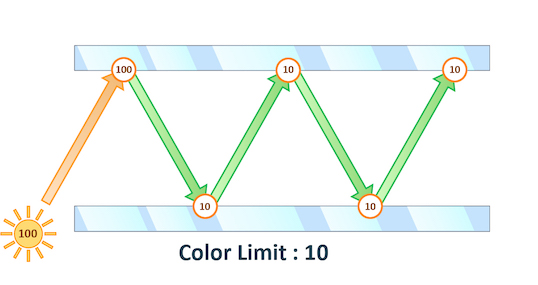
The maximum value a shading sample is allowed to return from indirect sources. When rendering using PBR the path’s total illumination is also constrained.
Physically Based Rendering can cause “spikes” in color values when extremely bright indirect light sources are under sampled. This results in “fireflies” in the final rendered image which can be very difficult to remove without very high sampling rates.
You can see in this example that even at 12×12 pixel samples, the “fireflies” still remain. Adjusting Min and Max indirect rays sample settings could remove this noise, but at the cost of longer render times.
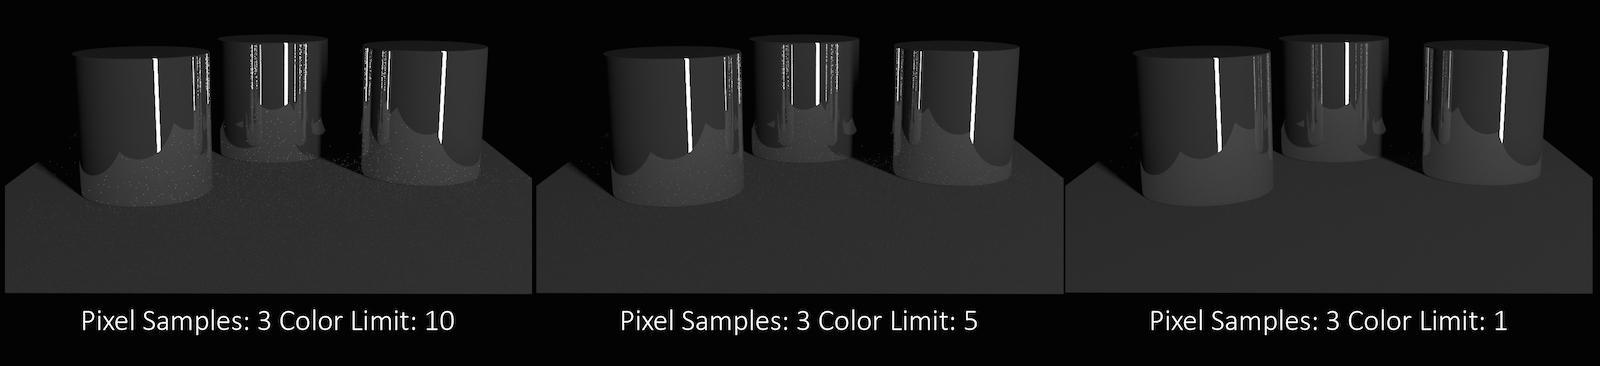
Decreasing the Color Limit parameter clamps the color values in these indirect samples and can help to avoid these “spikes”.
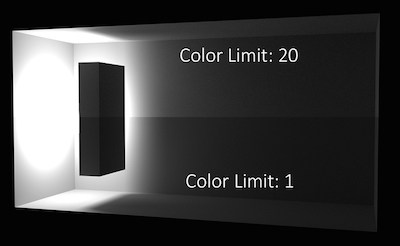
Reducing the color Limit can be an effective way of removing “fireflies” without increasing sampling rates. However, clamping the values in indirect lighting can result in an overall reduction in the amount of light in your scene. This is especially evident in scenes which are mostly illuminated by indirect light.
At ray limit
Controls how Mantra deals with rays that reach the ray tracing limit (For example the Reflect Limit or Refract Limit).
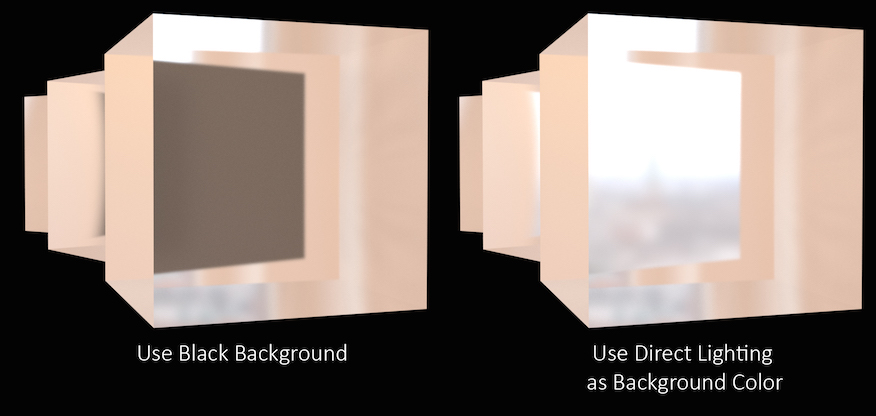
In this example, the refract Limit has been set to 2.
Setting At Ray Limit to Use Black Background will simply render black once the limits are reached. This is the default setting and will work in most scenes since the Reflect or Refract Limit is unlikely to be reached. However, in scenes where the limit is noticeable in the rendered image, the black color can be quite noticeable and stand out against the colors in the scene.
In this case, increase the limit until the effect is avoided or use the Use Direct Lighting as Background Color option. This will replace the black color with whichever color or image is used in your direct lighting, for instance an Environment Light.
For More Information about how the settings on an Environment Light affect this parameter see lighting.
Mantra user guide