| On this page |
Samples 
When generating an image, Mantra must determine a color value for each pixel by examining the scene behind the image plane. Mantra achieves this by sending out a number of rays from the camera’s position until they hit an object in the scene. Every time a ray hits an object, it will return some piece of information about the object (Its color, for instance). This process can broadly be described as “Sampling” the scene.
Sampling once per pixel, however, can cause “aliasing” where information is lost between samples. This is particularly evident in scenes with more variety in shapes and colors.
Increasing the number of samples per pixel gives an “anti-aliased” image which better represents the actual scene.
The samples described above could be described as primary rays (or pixel samples). They can determine the overall quality of the image being rendered, especially with regard to the shape and accuracy of the objects in the scene.
For other aspects of an image, like lighting, reflections and refractions, more rays must be cast into the scene, originating from the hit location of the primary rays. For each primary ray, Mantra will fire at least one secondary ray. These secondary rays can be divided into two types: direct and indirect.
Direct and indirect rays 
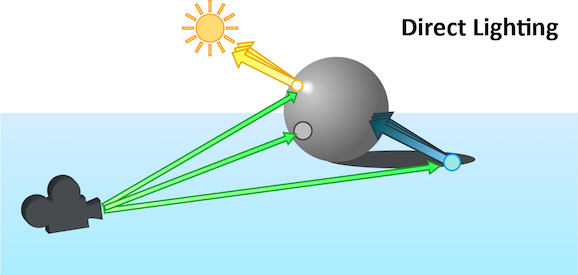
Direct Rays can be described as rays which deal with Lights. This generally means that the rays travel from some position in the scene toward the various light sources. These rays determine if a surface is in shadow, and if not, lighting information can be calculated.
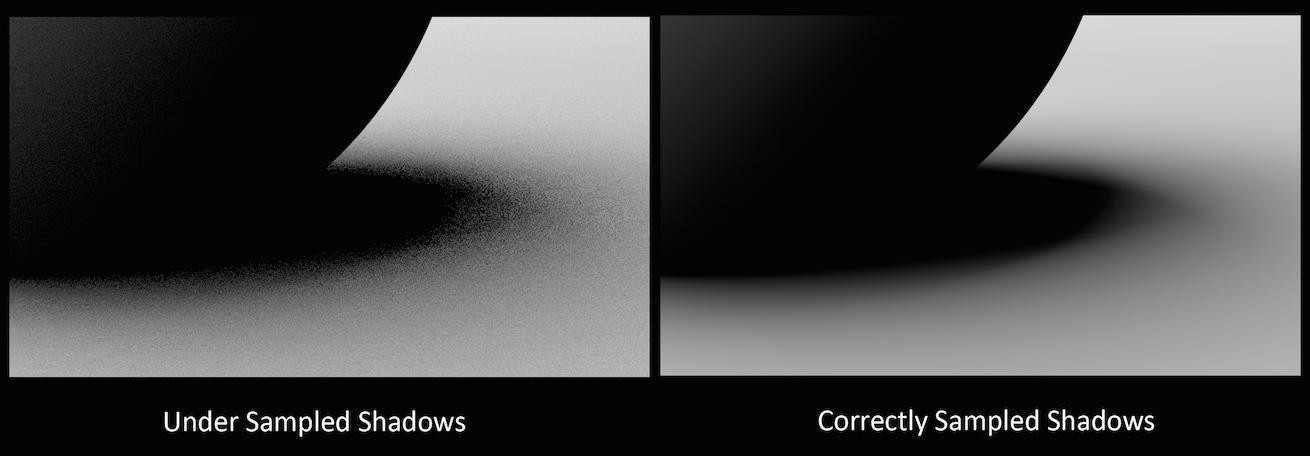
The same “aliasing” problems described previously can exist with these direct rays, resulting in a noisy image. You will usually find noise from direct sources showing up when rendering specular highlights or the soft edges of shadows cast from area lights. In these cases, it may be necessary to send more direct rays.
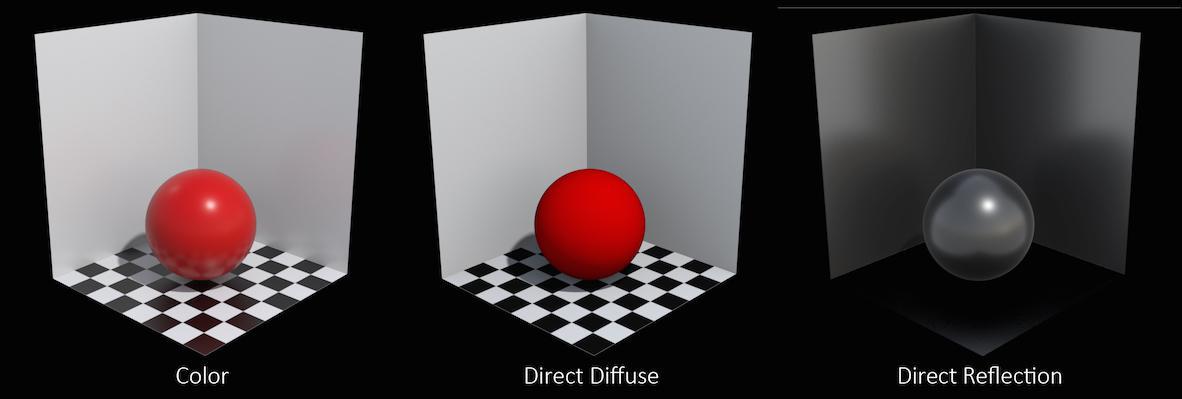
When evaluating the effect of sending more Direct Rays in your renders, it can sometimes be challenging to separate one source of noise from another. Adding the “Direct Lighting (per component)” image plane will allow you view the direct contribution of each component separately.
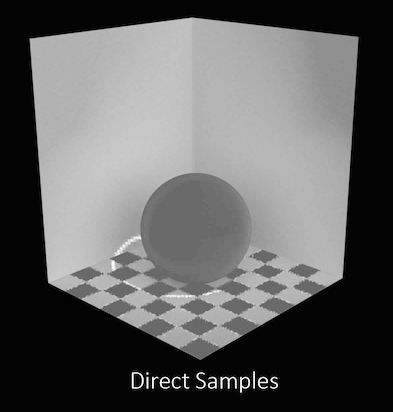
When attempting to optimize the number of direct rays in your scene, the “Direct Samples” image plane can be added. This plane will show you the number of direct rays used throughout your image displayed as intensity.
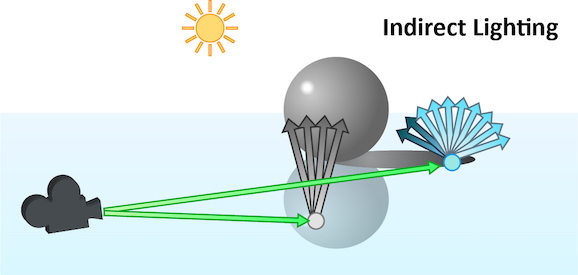
Indirect Rays can be described as rays which deal with objects and their surface properties. This generally means that rays travel from some position in the scene in directions determined by the shader attached to the object. Refraction rays will travel “through” objects, Reflection Rays will bounce, and Diffuse Rays will scatter in a random direction within a hemispherical distribution.
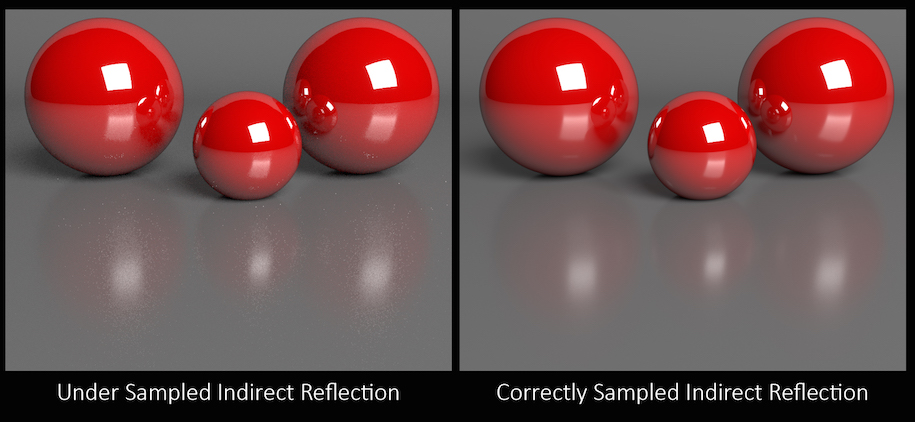
With indirect rays, “aliasing” can be much worse than with Direct rays and usually the greatest cause of noise in a render. Generally speaking, small, very bright features will cause the most noise in indirect samples – soft reflections of very bright specular highlights on other objects, for example. In these cases, it may be necessary to send more direct rays.

When evaluating the effect of sending more Indirect Rays in your renders, it can sometimes be challenging to separate one source of noise from another. Adding the “Indirect Lighting (per component)” image plane will allow you view the direct contribution of each component separately.
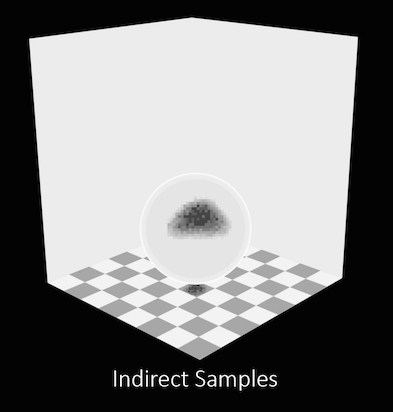
When attempting to optimize the number of indirect rays in your scene, the “Indirect Samples” image plane can be added. This plane will show you the number of indirect rays used throughout your image.
Volumes 
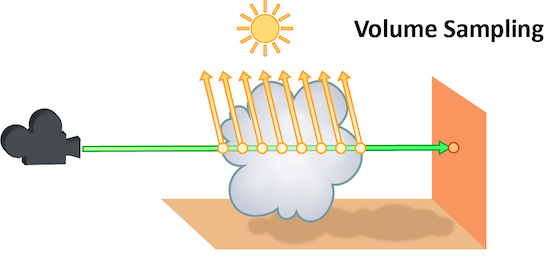
Sampling volumetric objects requires a different approach than sampling surfaces. While direct rays are still used, they must sample the volume multiple times while travelling through the volume. Indirect rays behave in a similar fashion, sent multiple times as the ray “steps” through the volumetric object. This means that sampling volumes is a much more expensive process than sampling a surface.
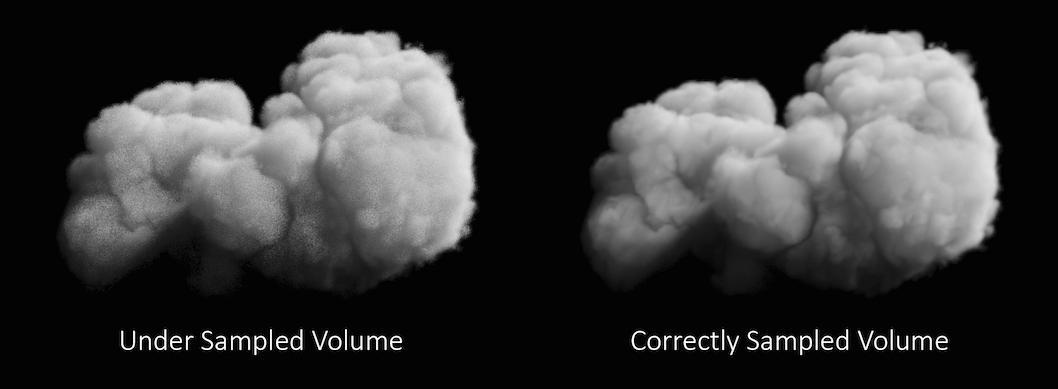
As a ray travels through a volume, it moves forward at a rate determined by the Volume Step Rate. At each step, it evaluates the shader and accumulates the density of the volume. Because these density values can vary drastically throughout the volume, nearby rays can calculate substantially different values, introducing noise into the render. In these cases, it may be necessary to send out more direct and indirect rays or to take smaller steps through the volume.
Even at low sampling rates, it can be costly to render clean images of volumetric data. This is because the shading is run for every step through the volume. However, mantra has a variety of ways to optimize volume rendering which can decrease render times without sacrificing detail.

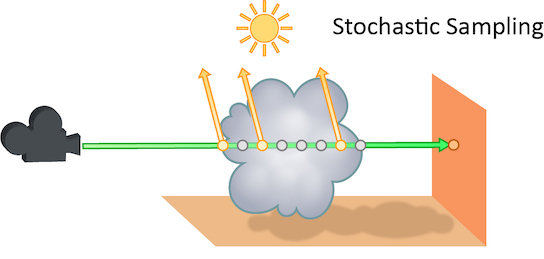
One optimization, known as stochastic transparency, decouples the accumulation of density values from the shading samples. This means that the amount of sampling can be greatly reduced as variations in lighting information is less obvious than variations in density.
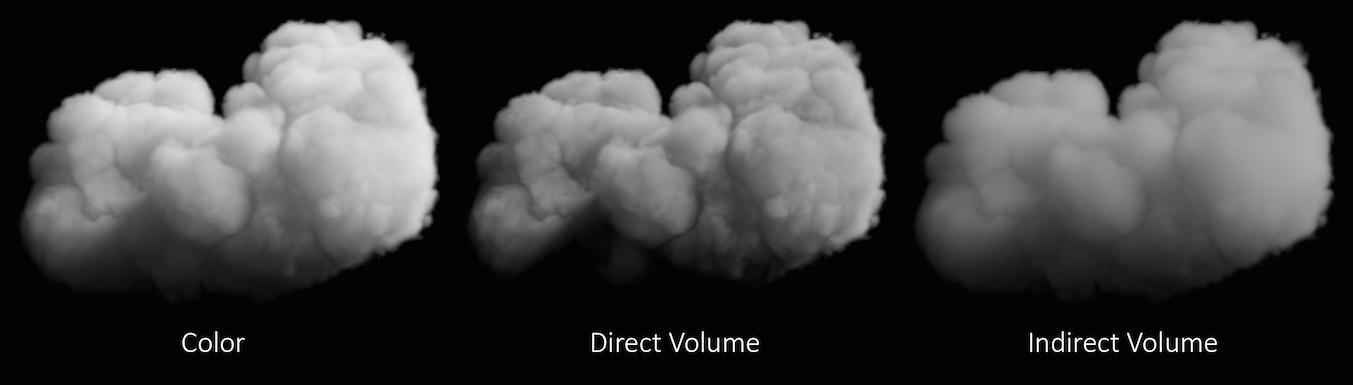
When evaluating the effect of sending more Direct and Indirect rays in your renders, it can sometimes be challenging to separate one source of noise from another. Adding the “Direct Lighting (per component)” and “Indirect Lighting (per component)” image planes will allow you view the direct and indirect volume contributions separately.