| On this page | |
| Since | 15.0 |
Overview 
Houdini typically processes the nodes in a geometry network from top to bottom, feeding the output of each node into the input of the next node, all the way down to the node that has a display or render flag turned on. However, there are times when it is useful to run the same chain of nodes multiple times in a loop.
There are three main uses for looping:
-
You want to process the input geometry over and over again.
For example, you may want to add multiple layers of noise, or create complex procedural geometry by extruding all faces multiple times.
-
You want to process each piece of the input geometry.
For example, you may want to apply the same edits to each rock in a pile of rubble.
-
You want to process one geometry using each piece of another geometry.
The classic example of this is the swiss cheese problem where you want to loop over each sphere in a set of air bubbles and then subtract them from a block of cheese.
You can use the For-Each and For-Loop menu items located in the network editor ⇥ Tab menu to set up ![]() Block Begin and
Block Begin and ![]() Block End nodes that will loop over any nodes placed between them in their node chain.
Block End nodes that will loop over any nodes placed between them in their node chain.
Repetition 
-
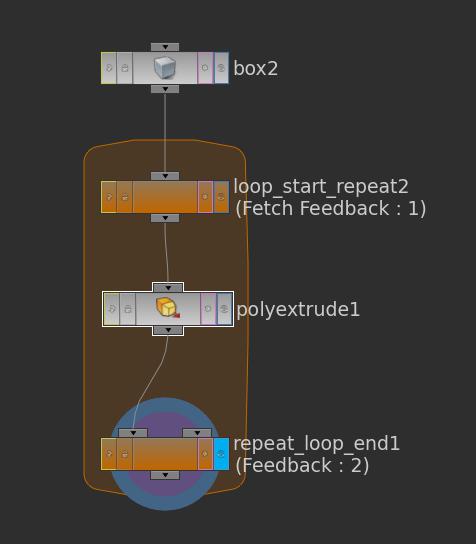
In the network editor, press ⇥ Tab to open the Tab menu, select For-Loop with Feedback from the menu, and click in the network editor to place the new nodes.
This creates a
 Block Begin SOP node and a
  Block End SOP node that are wired together. The Block Begin SOP has its Method parameter set to Fetch Feedback. This means that after the first loop, each subsequent loop will start with the output of the previous loop.
 -
Select the Block End SOP and set its Max Iterations parameter to the number of times you want the loop to run.
Warning
It is possible to unintentionally create a loop that operates on all geometry and creates new geometry in each loop, exponentially increasing the geometry size and cook time. We recommend that you first start with 1 or 2 iterations until you know the loop is working the way you want.
-
Connect the geometry you want to process to the input of the Block Begin SOP node.
-
Connect the nodes that affect the geometry between the Block Begin SOP and Block End SOP nodes.
Tip
If Houdini gets stuck in a long cook because of your loop, press ⎋ Esc to cancel the cook.
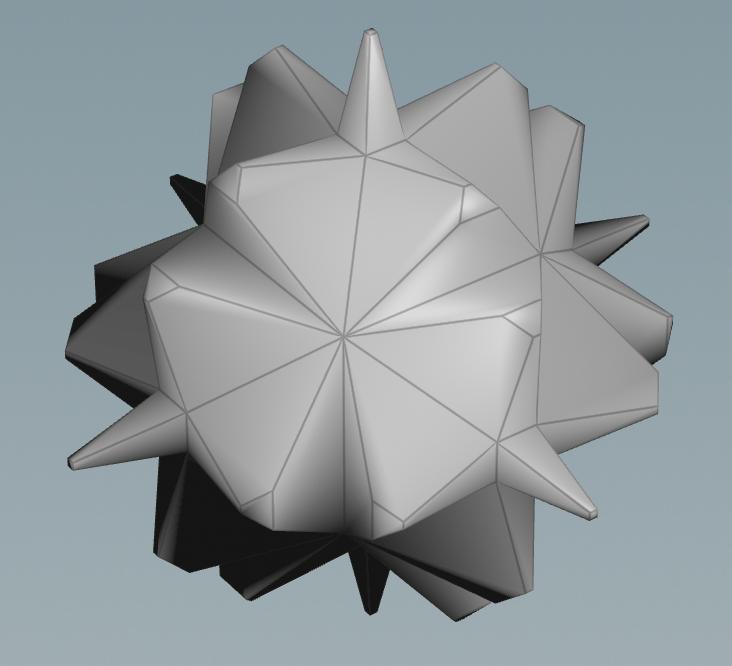
In the example below, the For-Loop extrudes and scales every face of the box for two iterations.
Tip
In this type of loop, the output of one loop becomes the input for the next loop, so any geometry you create in the loop will accumulate. If instead you want to apply the same nodes, one time, to multiple copies of the geometry, use the ![]() Copy to Points SOP.
Copy to Points SOP.
Piecewise (For-Each) looping 
A piece is usually a series of primitives that have the piece or name attribute. Several Houdini tools (for example, the ![]() Shatter shelf tool) automatically create this type of partition attribute.
Shatter shelf tool) automatically create this type of partition attribute.
You can specify an attribute name other than piece with the Piece Attribute parameter on the ![]() Block End SOP node. If no
Block End SOP node. If no piece attribute exists, the block will loop over each point or primitive on the input geometry.
Warning
Merging points and primitives at the end of a For-Each loop operation will collate the points and primitives into contiguous ranges per piece. This may change the original point and primitive order.
-
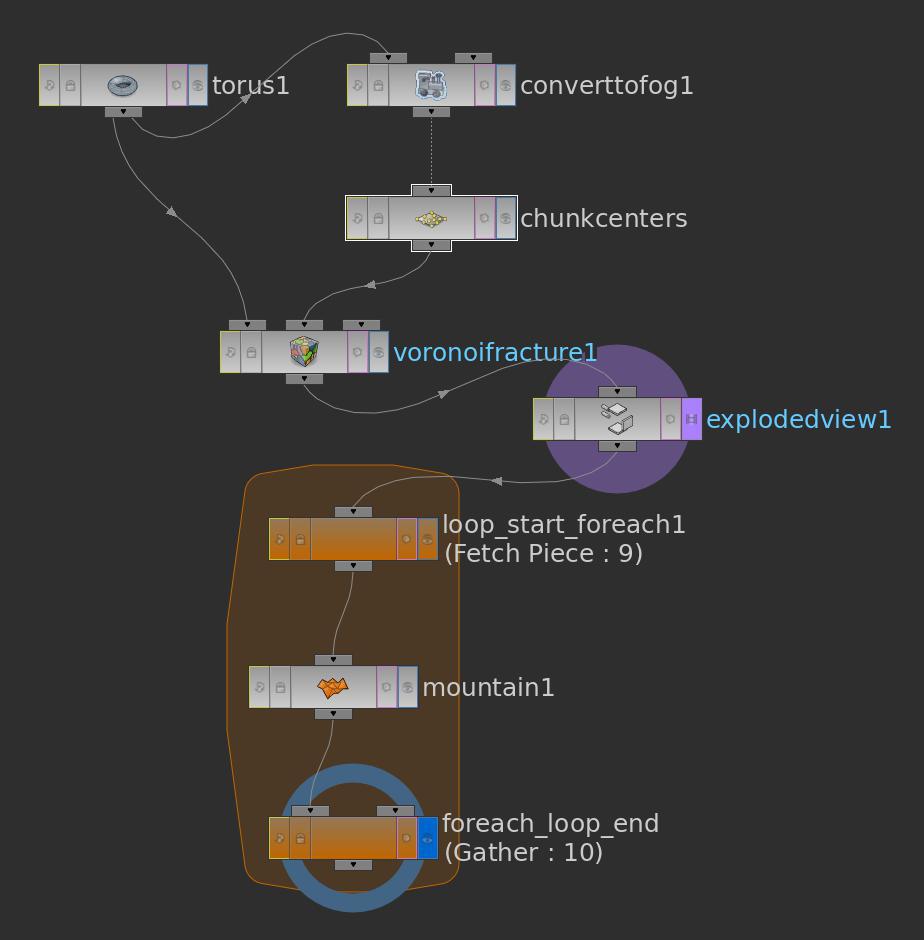
In the network editor, press ⇥ Tab to open the Tab menu, select For-Each Primitive from the menu, and click in the network editor to place the new nodes.
This creates a
Block Begin SOP node and a Block End SOP node that are wired together. The Block Begin SOP has its Method parameter set to Extract Piece or Point. This means that each loop will start with a different piece of the input. -
Select the Block End SOP and set the Piece Elements parameter to the type of pieces you are iterating over (points or primitives). This is usually primitives.
Note
If you do not set the Max Iterations parameter on the Block End SOP, the For-Each loop will loop over each piece in the input.
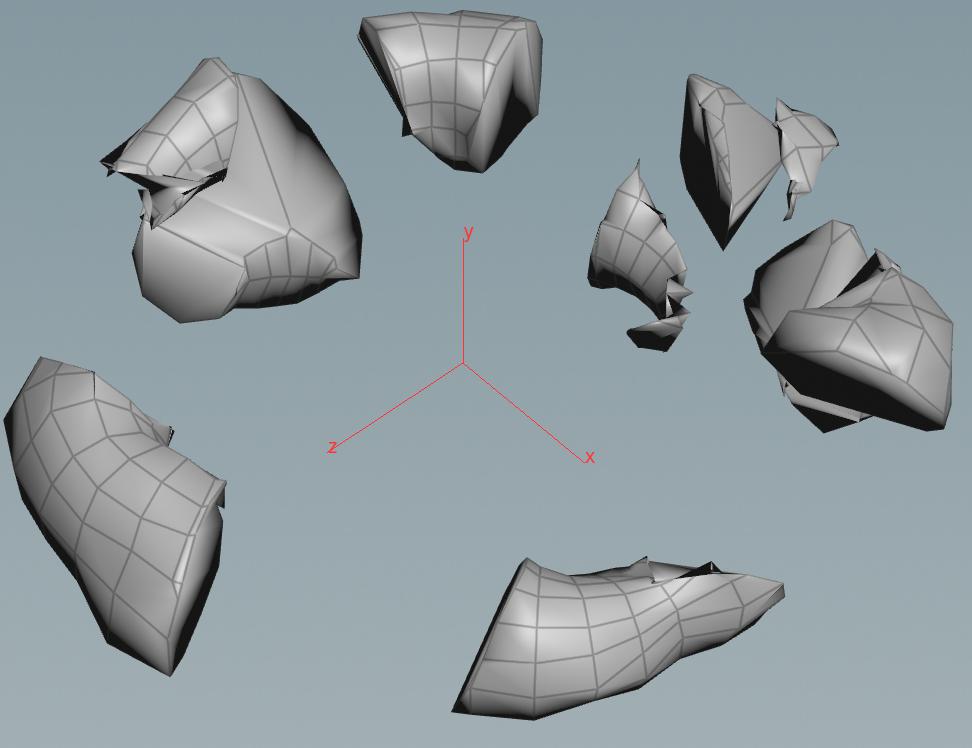
In the example below, the For-Each loop loops over the pieces of a shattered torus and applies the Mountain SOP to each individual piece.
Multiple inputs 
A loop can have more than one ![]() Block Begin SOP node. For example, one branch of a network could get its input piecewise and another branch could be simple repetition that accumulates the result of using the pieces.
Block Begin SOP node. For example, one branch of a network could get its input piecewise and another branch could be simple repetition that accumulates the result of using the pieces.
The classic example of this type of loop is making swiss cheese, where simple repetition is used to accumulate the results of processing one input geometry (the cheese block) by looping over pieces from a second input geometry (the air bubbles).
-
In the network editor, press ⇥ Tab to open the Tab menu, select For-Loop with Feedback from the menu, and click in the network editor to place the new nodes.
This loop branch will do the work of accumulating the changes for the cheese block.
-
Create another
Block Begin SOP node.-
Set its Method parameter to Extract Piece or Point.
-
Set its Block Path parameter to the Block End of the existing loop.
You can use the
 node chooser button next to the parameter, or drag the Block End from the network editor onto the parameter’s field in the parameter editor.
This loop branch will do the work of fetching each bubble from the bubble geometry.
-
In the example below, swiss cheese is created by the two loop branches in the network.

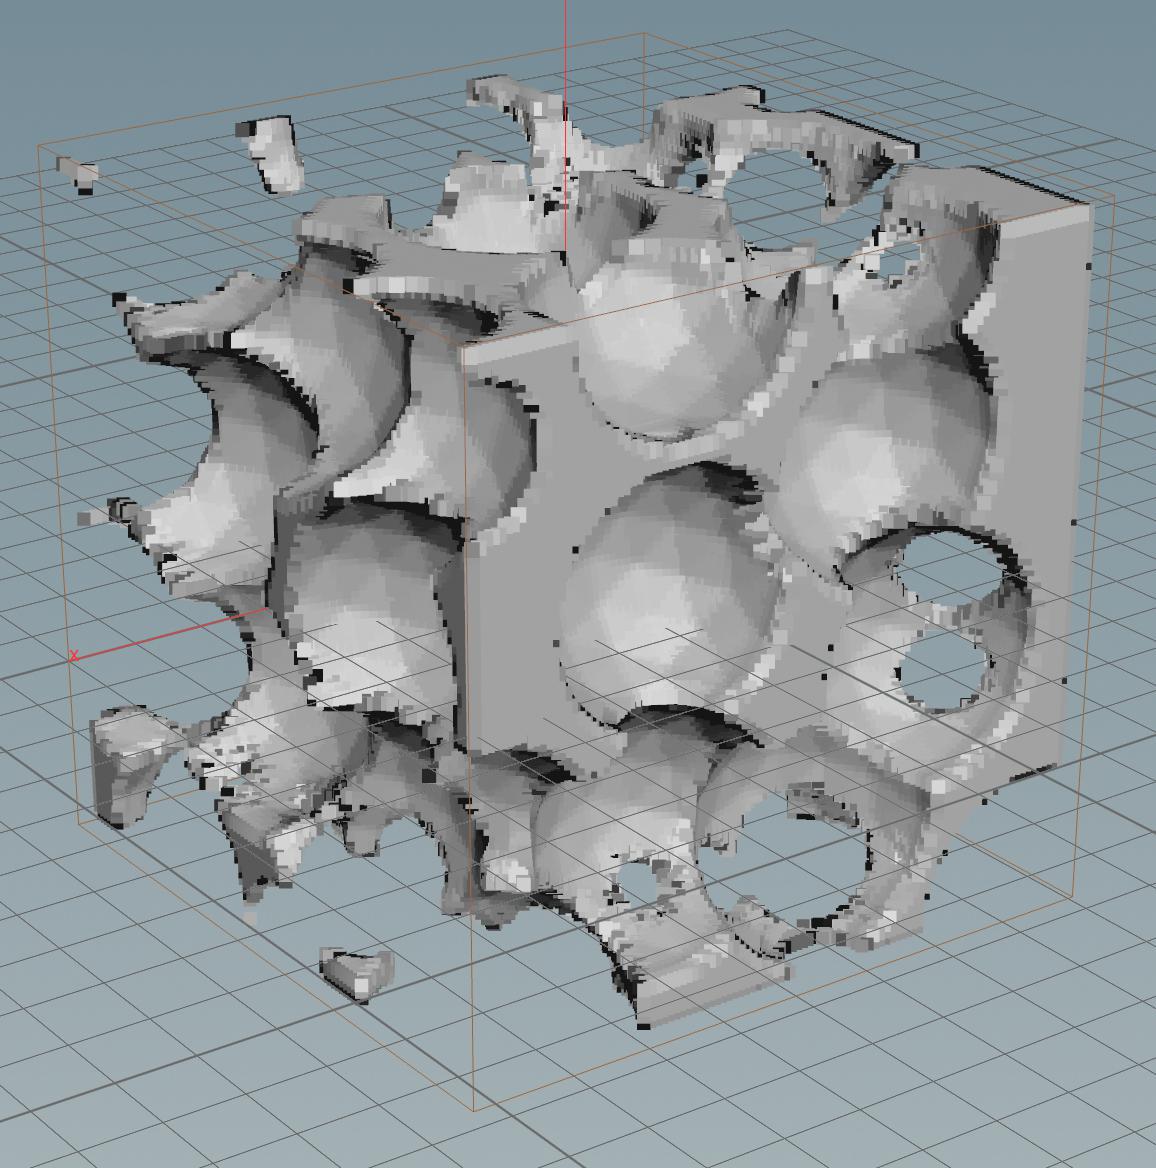
1
The network begins with a box representing the cheese block, which is turned into a VDB.
2
Points are scattered in the box, and spheres are copied onto the box to represent the air bubbles.
3
The first Block Begin is a simple repetition that takes the cheese block VDB as input and accumulates the changes inside the loop.
4
The second Block Begin uses the Extract Piece method, which takes the air bubbles as input and loops over each primitive sphere. Downstream, the spheres are turned into VDBs.
The cheese block VDB is wired into the air bubbles VDB’s second input (see 5), which copies the resolution settings from the cheese block.
3
Inside the loop, ![]() VDB Combine subtracts the
VDB Combine subtracts the ![]() VDB sphere from the cheese block.
VDB sphere from the cheese block.
How to get information about the current loop 
Sometimes you need to use some information about the current loop, in a node later on in the same loop. You can get this information with a ![]() Block Begin SOP node that uses the Fetch Metadata method.
Block Begin SOP node that uses the Fetch Metadata method.
-
Set up a looping block using the instructions above.
-
Select the
Block Begin SOP node. In the parameter editor, click Create Meta Import Node.This button adds a second Block Begin SOP node beside the existing one. This second node is set up to generate an empty geometry with some detail attributes. The detail attributes are as follows:
numiterationsThe expected total number of iterations, taking into account the Max Iterations and Single Pass parameters on the
Block End SOP node of the loop.iterationThe current iteration number, always starting at
0and increasing by 1 each loop.valueIn piecewise loops, this is the current value of the attribute. For example, the
pieceinteger ornamestring, or if there is no attribute, the current point or primitive number.In simple repetition loops, this is a floating point value starting at the Block End SOP’s Start Value and increasing by the specified Increment each loop.
ivalueIn simple repetitions, this is an integer version of
value. This can be useful if the value is naturally an integer (for example, starts at1and increments by2) and/or if values are over 24 million (where floating point numbers lose precision). -
Grab the value of these attributes in a node inside the loop:
-
In a Houdini expression, use the detail expression function.
For example:
detail("../block_begin2", "iteration", 0) -
In an
 Attribute Wrangle SOP node, use the detail VEX function.
 -
In Python, use hou.Geometry.attribValue:
node("../block_begin2").geometry().attribValue("iteration")
-
Stop condition 
The Iterations and Max Iterations parameters on the ![]() Block End SOP node are computed before the loop starts so that they can be used to stop a loop early.
Block End SOP node are computed before the loop starts so that they can be used to stop a loop early.
Making the Stop Condition parameter on the Block End SOP node evaluate to 1 before an iteration will stop the loop. This lets you write an expression that tests certain conditions. For example, you could stop looping if the number of polygons in a feedback loop passes a certain threshold.
Notes
-
This condition is evaluated before the loop is processed.
-
This is not yet supported in compiled blocks.
Debugging and testing loops 
-
You can step through the iterations of the loop by setting the Max Iterations parameter on the
Block End SOP node. For example, start it at 1and increase it to see the results of each loop. -
In piecewise loops, you can see the output of an individual piece/iteration using the Single Pass parameter on the Block End SOP node.
Tips 
-
You cannot specify pieces using groups with the
Block Begin SOP node. Since groups are not necessarily disjointed, it is very slow to translate them into pieces. If your geometry uses groups to specify their pieces, then you can create an attribute from the groups using the  Name SOP node’s Name from Group parameter and then split by the attribute you created.
 -
The color of the blob surrounding the nodes in a loop comes from the color of the
Block Begin SOP and Block End SOP nodes. To change the color of the blob, change the color of one of these nodes. -
Currently, only the nodes wired between the
Block Begin SOP and Block End SOP nodes are included in the blob. Unfortunately, the blob wraps around all the nodes that are included in the loop because of channel reference dependencies. This is a limitation of the current implementation.
| See also |