| On this page |
Overview 
Skyfields are useful when you want to create high altitude cloud patterns above your scene. However, if you want detailed hero clouds, there are several tools you can use to model them.
General workflow 
-
Choose one of the following tools to create the initial shape of your cloud.
-
 Cloud Shape Generate SOP creates primitive spheres used to model cumulus cloud-like shapes.
 -
 Cloud Shape from Line SOP creates primitive spheres used to model cumulus cloud-like shapes around a line primitive.
 -
 Cloud Shape from Polygon SOP fills a polygonal mesh with adaptively-sized primitive spheres used to model cumulus cloud-like shapes.
-
-
Optionally use these nodes to create a more interesting and detailed cloud shape.
-
Cloud Shape from Intersection SOP creates primitive spheres used to model cumulus cloud-like shapes at geometry intersection
-
 Cloud Shape Replicate SOP generates primitive spheres used to model cumulus cloud-like shapes around existing primitive spheres.
-
-
Once you have the initial cloud volume, you can use the following nodes to add detail.
-
 Cloud Billowy Noise SOP applies a billowy cloud like displacement noise to a fog volume.
 -
Cloud Wispy Noise SOP applies thin feathery like fine displacement noise to a fog volume.
-
 Cloud Clip SOP splits a fog volume in half using a clipping plane.
 -
Cloud Adjust Density Profile SOP controls the volume density based on a signed distance field.
-
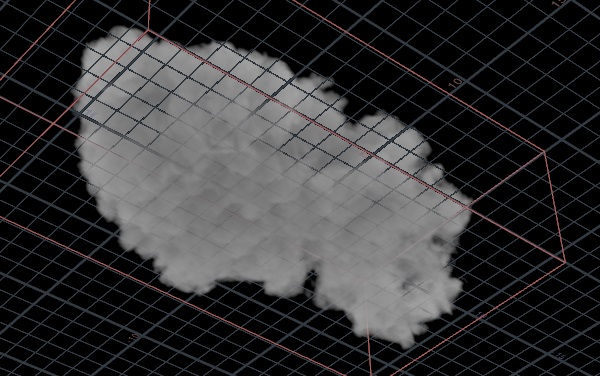
The following example shows ![]() Cloud Shape from Line creating spheres around a line. The
Cloud Shape from Line creating spheres around a line. The ![]() Cloud Shape Replicate node is then used to add smaller spheres around the initial shape, providing more detail. Next,
Cloud Shape Replicate node is then used to add smaller spheres around the initial shape, providing more detail. Next, ![]() Cloud Billowy Noise applies a billowy cloud like displacement noise to the volume, and
Cloud Billowy Noise applies a billowy cloud like displacement noise to the volume, and ![]() Cloud Wispy Noise applies a thin feather like displacement noise to the bottom of the cloud.
Cloud Wispy Noise applies a thin feather like displacement noise to the bottom of the cloud.

Note
When rendering clouds, the ![]() Karma Material Properties node found inside the Karma Cloud Material is hard coded with a default Volume Limit that the Karma Render Settings node will inherit automatically. This results in the Volume Limit setting having no effect when changed.
Karma Material Properties node found inside the Karma Cloud Material is hard coded with a default Volume Limit that the Karma Render Settings node will inherit automatically. This results in the Volume Limit setting having no effect when changed.
To override this, set the Volume Limit on the ![]() Karma Material Properties node to Do Nothing. This will return control of the Volume Limit attribute to the Karma Render Settings node.
Karma Material Properties node to Do Nothing. This will return control of the Volume Limit attribute to the Karma Render Settings node.
Example: VDB from Polygons 
VDB from polygons let you use polygon sources, which gives you greater control over shaping the incoming source. However, this method takes longer to cook than VDB from Particles.
-
Put down a
 Test Geometry: Rubber Toy.
 -
Dive inside and append a
 Transform SOP.
 -
Increase the Uniform Scale to
20to increase the size of the cloud.
-
Put down a
 Scatter and Align SOP and connect the first input to the output of the Transform node.
 -
Set the Global Seed to
4238, change the Point Count Method to Number of Points, and set the Total Points to250. -
In the Rotation Around Normal section, set the Min Angle to
53, the Max Angle to360, and the Offset Angle to222. -
Put down an
 Attribute Noise SOP and connect it to the output of the Scatter and Align node.
 -
Change the Attribute Names from
CdtoP, set the Range Values to Zero Centered, and change the Amplitude to0.1. -
Attach a
Cloud Shape Generate SOP, increase the Point Separation to 1, and turn off Flatten Bottom. -
In the Secondary Shapes section, set Displacement to
0.5.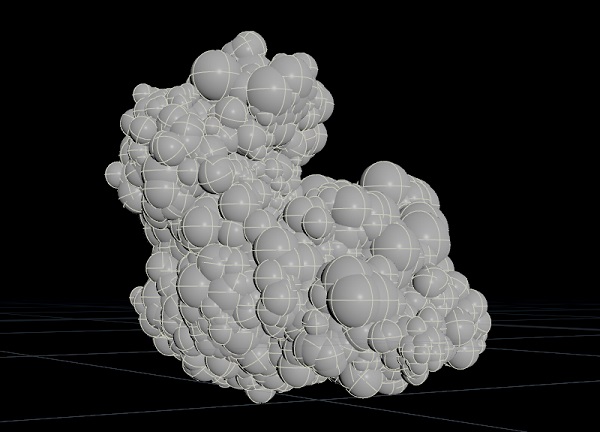
-
Put down a
 VDB from Polygons SOP and connect the first input to the output of Cloud Shape Generate node.
 -
Turn off the Distance VDB checkbox and turn on the Fog VDB checkbox (
densityattribute). -
Connect at
 VBD Smooth SOP and increase the Filter Voxel Radius to
 5. -
Put down a
Cloud Billowy Noise SOP and connect the first input to the output of the VDB Smooth node. -
Set the Amplitude to
2and the Element Size to2.5.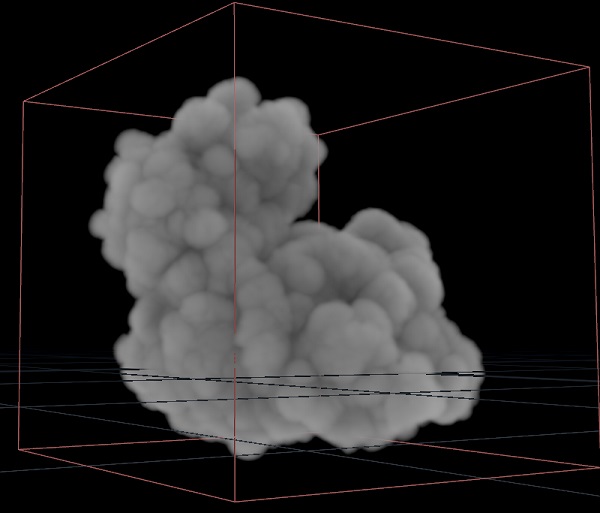
-
Put down a
Cloud Wispy Noise SOP and connect the first input to the output of the Cloud Billowy Noise node. -
Increase the Substeps to
2, the Amplitude to10, and turn off the amplitude for the Y axis. This will add some subtle variation to the cloud shape. -
Increase the Element Size to
10, turn on the Per Component button, and set the Element Scale to
 0.5, 0.5, 1. -
Append a
Cloud Adjust Density Profile SOP and set the Edge Thickness to 0.099. -
Put down a
Cloud Clip SOP and connect the first input to the output of the Cloud Adjust Density Profile node. -
Turn on Noise Displacement and increase the Amplitude to
2, and the Element Size to5. This will make the bottom of the cloud have more interesting details.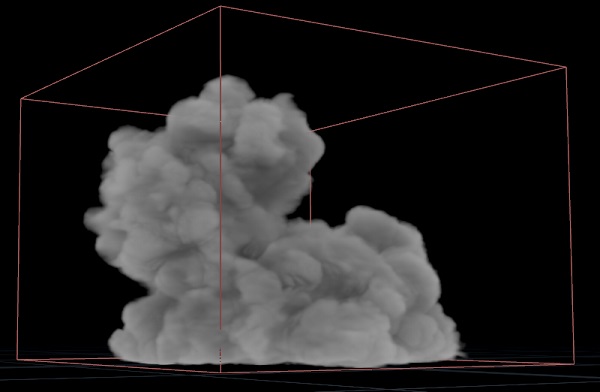
Example: VDB from Particles 
VDB from Particles does not offer as much control in source shaping as the VDB from Polygons method, but it cooks much faster.
-
Put down a
Test Geometry: Rubber Toy. -
Dive inside and append a
Transform SOP. -
Increase the Uniform Scale to
20to increase the size of the cloud.
-
Put down a
Scatter and Align SOP and connect the first input to the output of the Transform node. -
Set the Global Seed to
4238, change the Point Count Method to Number of Points. -
In the Rotation Around Normal section, set the Min Angle to
53, the Max Angle to360, and the Offset Angle to222. -
Put down an
Attribute Noise SOP and connect it to the output of the Scatter and Align node. -
Change the Attribute Names from
CdtoP, set the Range Values to Zero Centered, and change the Amplitude to7. -
Put down an
 Attribute Wrangle SOP and connect the first input to the output of the Attribute Noise node.
 -
Use the VEXpression
@pscale *= rand(@ptnum) * 4;to give each point a random scale so there is some variation in size. -
Put down a
 VDB from Particles SOP and connect the first input to the output of Attribute Wrangle node.
 -
Turn off the Distance VDB checkbox and turn on the Fog VDB checkbox (
densityattribute).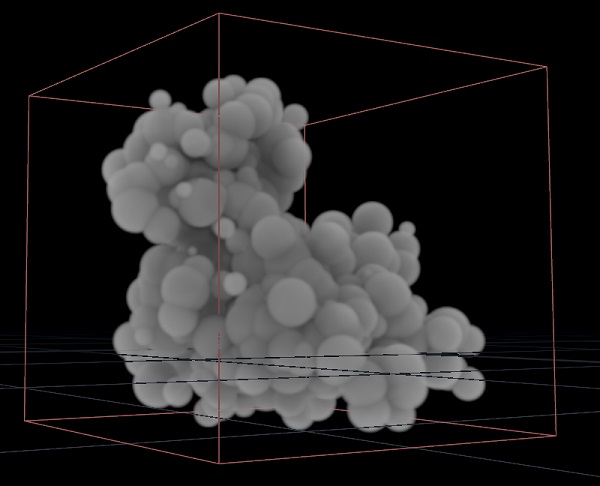
-
Connect at
VBD Smooth SOP and increase the Filter Voxel Radius to 5. -
Put down a
Cloud Billowy Noise SOP and connect the first input to the output of the VDB Smooth node. -
Set the Amplitude to
5and the Element Size to2. -
Turn on Worley Details and change the Blend value to
0.5for a more interesting look.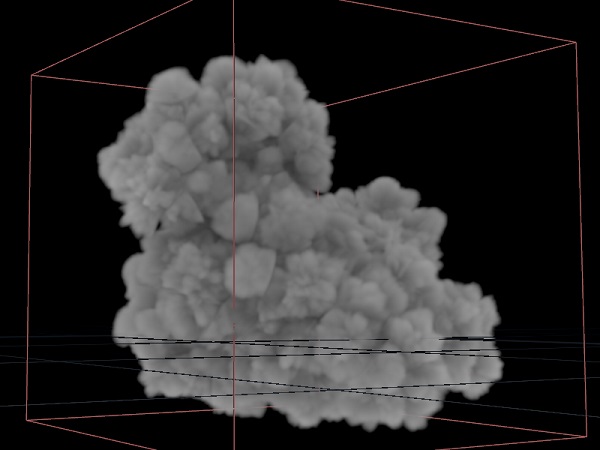
-
Put down a
Cloud Wispy Noise SOP and connect the first input to the output of the Cloud Billowy Noise node. -
Increase the Substeps to
2, the Amplitude to50, and turn off the amplitude for the Y axis. -
Increase the Element Size to
25, turn on the Per Component button, and set the Element Scale to 0.5, 0.5, 1. -
Put down a
Cloud Clip SOP and connect the first input to the output of the Cloud Wispy Noise node. -
Turn on Noise Displacement and increase the Amplitude to
2, and the Element Size to5. This will make the bottom of the cloud have more interesting details.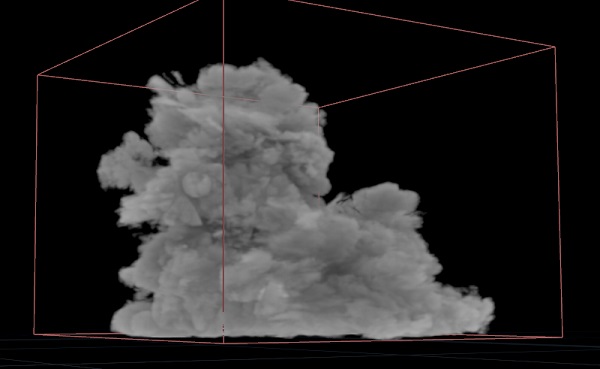
Example: Cloud from curve 
In this example, the ![]() Cloud Shape from Line node converts incoming curves to varied points that you can use to create clouds using
Cloud Shape from Line node converts incoming curves to varied points that you can use to create clouds using ![]() VDB from Particles.
VDB from Particles.
-
Use the
 Spiral SOP to create a curve.
 -
Set the Turns to
2, and the Radius Scale to25to increase the size of the cloud.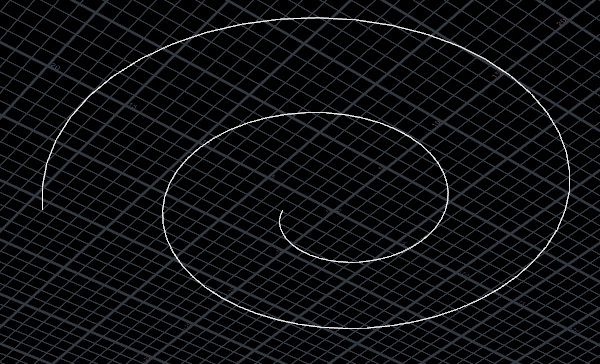
-
Put down a
Cloud Shape from Line SOP and connect it to the output of the Spiral node. -
Set the Point Separation to
0.5, and the Particle Scale to1.2 -
On the Secondary Shapes tab, turn on Scatter, and set the Particle Scale to
0.5. -
Put down a
VDB from Particles SOP and connect the first input to the output of Cloud Shape from Line node. -
Set the Voxel Size to
0.05, turn off the Distance VDB checkbox, turn on the Fog VDB checkbox (densityattribute), and increase the Point Radius Scale to2.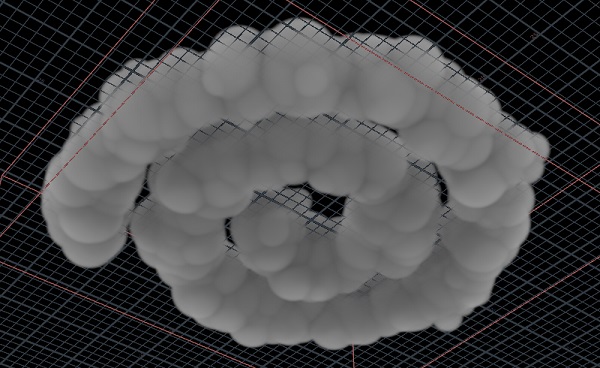
-
Put down a
Cloud Billowy Noise SOP and connect the first input to the output of the VDB from Particles node. -
Set the Amplitude to
2and the Element Size to3. -
Put down a
Cloud Wispy Noise SOP and connect the first input to the output of the Cloud Billowy Noise node. -
Increase the Amplitude to
50, the Element Size to5, and turn on the Evolve Noise checkbox to give it a more interesting look.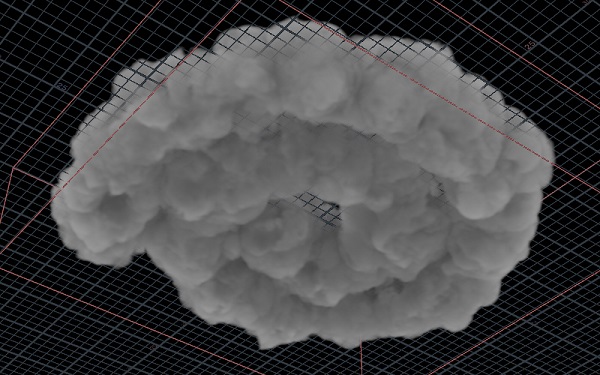
Example: Cloud from Polygons 
This example shows how to create a cloud using a polygonal shape as the source. However, it uses ![]() VDB from Particles instead of
VDB from Particles instead of ![]() VDB from Polygons since this method is faster.
VDB from Polygons since this method is faster.
-
Put down a
 Sphere SOP and change the Primitive Type to Polygon.
 -
Set the Radius to
1, 0.4, 2, increase the Uniform Scale to5, and Frequency to10. This will make your cloud larger and give it an oval shape instead of a round one. -
Put down an
Attribute Noise SOP and connect it to the output of the Sphere node. -
Change the Attribute Names from
CdtoP, set the Range Values to Zero Centered, and change the Amplitude to2.5. -
In the Noise Pattern section, change the Noise Type to Fast Simplex Cloud and increase the Element Size to
10.
-
Put down a
Cloud Shape from Polygon SOP and connect it to the output of the Sphere node. -
Set the Packing Density to
0.75.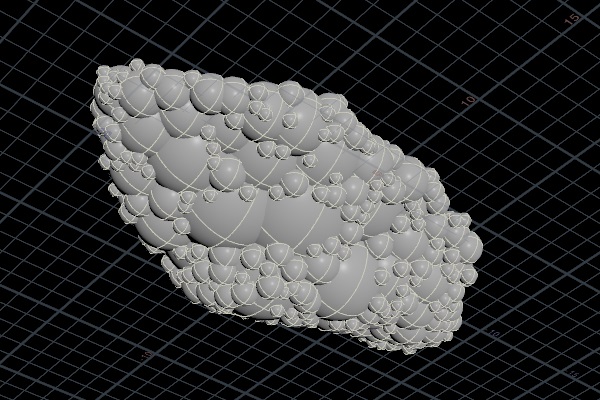
-
Put down a
VDB from Particles SOP and connect the first input to the output of Cloud Shape from Polygon node. -
Set the Voxel Size to
0.05, turn off the Distance VDB checkbox, and turn on the Fog VDB checkbox (densityattribute`). -
Put down a
Cloud Billowy Noise SOP and connect the first input to the output of the VDB from Particles node. -
Set the Amplitude to
2and the Element Size to1.5. -
Turn on Worley Details and change the Blend value to
0.5. -
Put down a
Cloud Wispy Noise SOP and connect the first input to the output of the Cloud Billowy Noise node. -
Increase the Amplitude to
50and the Element Size to7. -
Put down a
Cloud Clip SOP and connect the first input to the output of the Cloud Wispy Noise node. -
Set the Distance to
-1.3, and turn on Noise Displacement. This will flatten to bottom of the cloud and give it a more interesting look.