Guard Tower | Unity
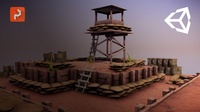
The Guard Tower project teaches new Houdini users how to construct game-ready assets. The main goal is to show the process of building the Guard Tower scene procedurally using Houdini then to deploy those assets inside Unity using the Houdini Engine plug-in.
29 チュートリアル 5:00:22
Lessons
Guard Tower | Introduction
The Guard Tower project will teach you how to create digital assets in Houdini for use in Unity 3D. Before we dive into the construction of the Guard Tower scene, let’s take a look at the final results. This will give you a good idea of the types of assets you will build throughout this course.
0:01:10
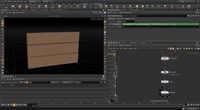
Guard Tower 1 | Ground Part 1 | Creating the Ground Asset
To get the Guard Tower scene started, you will begin with the Ground Digital Asset. In this lecture we will discuss the inner workings of a Digital Asset and introduce you to creating them with Houdini. Once created we are going to import it into Unity 3D using the Houdini Engine plug-in!
0:09:52

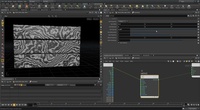
Guard Tower 1 | Ground Part 2 | Adding Noise to the Ground
With our basic ground plane in place and our Digital Asset setup, let’s take the ground to the next step and add some noise to it. This will help perturb the surface of the ground so it’s not entirely flat. We will also take a look at the process of updating our digital assets as we progress through production. By the end of the lecture we will have our basic ground with some displacement and vertex colors.
0:11:36
Guard Tower 1 | Ground Part 3 | Adding Materials with Houdini Engine
Our ground asset is almost complete. All we need to do now is learn how to assign a material to it so it doesn’t simply display the vertex colors. By the end of this lecture we will have our complete ground HDA and will be ready to move onto our next asset!
0:11:04
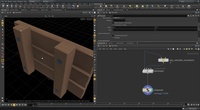
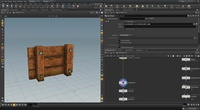
Guard Tower 2 | Wood Wall Part 1 | Creating a Wood Plank
In this lecture we are going to build the base wood plank that we can re-use throughout the rest of the construction of these assets. This will begin to give you an idea of how to create procedural parts you can use in your everyday modeling workflows.
0:14:35
Guard Tower 2 | Wood Wall Part 2 | Assembling the Wood Wall
Continuing from the last lecture, let’s take our wood plank and turn it into a digital asset so we can re-use it throughout the course. To do this we are going to turn the nodes, which build the wood plank, into an HDA. We will then take that HDA and create the wood wall from it using copying.
0:11:27
Guard Tower 2 | Wood Wall Part 3 | Creating the Wall Posts
In order for our wood wall to look a bit more realistic, we need to add the posts to it. Using the knowledge we gained from the previous lecture, let’s create a wood post that we can re-use over and over again. By the end of this lecture we will have built the post Digital Asset, and taken a look at some of Houdini’s modeling nodes.
0:11:08

Guard Tower 2 | Wood Wall Part 4 | Placing Posts
With the post Digital Asset in place, let go and take a look at a way to place the posts, onto the wall, in a procedural manner. By the end of this lecture we will have the wall and posts together as a single model, but each part is procedural and can be changed.
0:07:36
Guard Tower 2 | Wood Wall Part 5 | Creating Bolts for the Wall
Our wall is moving along at this point, but we really need to begin to add some detail. So let’s turn our attention to creating a procedural bolt asset. One that can be used over and over again for any other project. At the end we will have our bolt Digital Asset and ready to place them onto our Wood Wall.
0:12:35
Guard Tower 2 | Wood Wall Part 6 | Placing the Bolts
Now that we have a digital asset that generates a bolt for us, let’s use it to place some bolts onto the posts of our wood wall. We will take a look at a procedural way to place the bolts so they can be updated quickly, if the project or art direction changes. By the end of this lecture we will have the final wood wall with vertex colors applied.
0:10:37
Guard Tower 2 | Wood Wall Part 7 | Variation with Copies
In this lecture we are going to focus on small details. First we are going to start out by learning how to use the “Copy to Points” node. This will allow us to pass different seed values to our wood planks giving us the opportunity to use those values to create variation. Ultimately to make each plank look a bit different from the last.
0:09:17
Guard Tower 2 | Wood Wall Part 8 | Hi Res Displacement
With our wood wall completed, let’s turn our focus to the high res mesh for our wall. Houdini has an incredible amount of power here. So let’s take a look at how we can use that power to generate a high res wood pattern using noises and VDB’s.
0:16:35
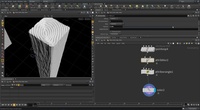
Guard Tower 2 | Wood Wall Part 9 | High Resolution Posts
Now that we know how to create high resolution details with noises, inside of Houdini, let’s take a look at some more techniques using the post models as our subject. Throughout this lecture we will learn how to utilize masks and noises to create the wood grain for our wall posts.
0:16:39
Guard Tower 2 | Wood Wall Part 10 | Baking Textures in Houdini
In this lecture we are going to take a look at how to use Houdini’s Texture baking tool. This will allow us to bake out all of our high resolution information, onto our low resolution game model. We will also prep the High Res Wall with vertex colors so we have color selection masks to use in Substance Painter. By the end of the course we will have the final low resolution ready for our game engine with its textures baked out.
0:06:09
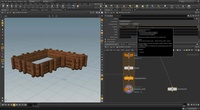
Guard Tower 2 | Wood Wall Part 11 | Layout the Wall Asset
One of the reasons Houdini is very useful to Game Production pipelines is the fact that we can create Digital Assets or HDA’s. These assets are ways to create tools to generate new assets. In this Lecture we are going to take our Wood Wall asset and create a tool that generates a complete wall based off of a user supplied curve. This will begin to show us how we can create layout tools to aid in our level design workflows.
0:14:18
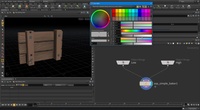
Guard Tower 2 | Wood Wall Part 12 | Completing the Wall Asset
Let’s finish up our Wall Asset by assigning materials and adding the dirt that sits at the top of the wall. By the end of this course we will have completed our Wall asset and will be ready to bring it into Unity using the Houdini Engine 2.0!
0:09:42
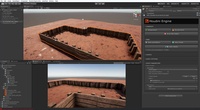
Guard Tower 2 | Wood Wall Part 13 | Setting up the Wall Asset in Unity
Now that we have our Wall Asset completed, let’s walk through the process of getting it working in Unity using the Houdini Engine.
0:09:29
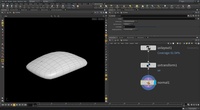
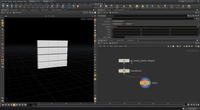
Guard Tower 3 | Sandbag Part 1 | Creating the Sandbag Asset
To get our sandbag wall going we will need some sandbags to build it with. So let’s walk through how to build the Sandbag completely inside of Houdini. We will use a mixture of hand modeling and procedural modeling to create this particular asset.
0:11:28
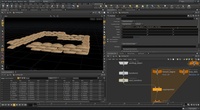
Guard Tower 3 | Sandbag Part 2 | Creating the Sandbag Wall Pattern
In this lecture we are going to walk through the steps to create the sandbag wall tool. We are going to dive a bit deeper into the power of Houdini by leveraging VEX, and more complex for loops to help us place the sandbags in a staggered manner.
0:27:14
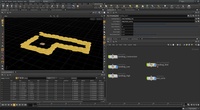
Guard Tower 3 | Sandbag Part 3 | Creating the Sandbag Wall Asset
Now that we have our sandbag wall being built in a procedural manner, let’s walk through the process of turning it into a Digital Asset or HDA. This will get us set up to test out the wall inside of Unity using the Houdini Engine.
0:05:23
Guard Tower 3 | Sandbag Part 4 | Completing the Sandbag Wall
Let’s now turn our focus to finishing up the sandbag wall by setting up the Digital Asset UI and getting it imported into Unity. By the end of this lecture we will have a complete digital asset that will layout sand bags in an offset manner and which follows the path of a curve.
0:04:38
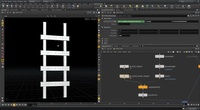
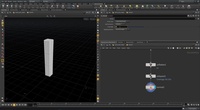
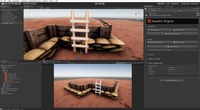
Guard Tower 4 | Ladder Part 1 | Building a Ladder
In this lecture we are going to begin to see how we can re-use our digital assets, such as the wood plank, and the wood post assets, to create a ladder. By following this workflow you dramatically speed up the time it takes to create larger more advanced digital assets.
0:11:38
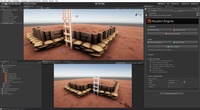
Guard Tower 4 | Ladder Part 2 | Creating the Ladder Digital Asset
With our Ladder built and ready to go, let’s set it up as a digital asset or HDA, so we can import it into unity using the Houdini Engine. It’s always a good idea to get your Digital Assets built as early as possible and to keep testing them throughout its construction. This way you are building up the UI for the asset and making sure to test the assets performance in the Houdini Engine.
0:03:54
Guard Tower 4 | Ladder Part 3 | Ladder Transform Fix
In the previous video there was an issue when a parameter was changed on the ladder digital asset. In this lecture we will go over the fix for that transform so you can place your digital asset anywhere in the scene and still update its parameters.
0:00:55
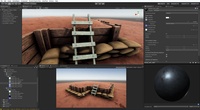
Guard Tower 4 | Ladder Part 4 | Completing the Ladder
To complete the Ladder asset we will go in and take a look at assigning materials and discuss the benefits of working this way with the Houdini Engine for Unity.
0:04:23
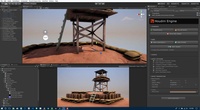
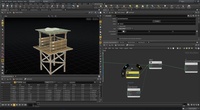
Guard Tower 5 | Tower Part 1 | Building the Base
In this Lecture we are going to switch things up a bit and walk through the graph that was built to produce the legs of the final Guard Tower. At this point in the course we are basically repeating very similar steps. So instead of seeing every node being created, let’s do a walk-through of how the legs were built.
0:12:00
Guard Tower 5 | Tower Part 2 | Building the Tower House
To close out the Guard tower section we are going to walk through the graph that constructs the Guard Tower House. Through each of the steps we will cover interesting modeling techniques that are completely procedural, making your model completely flexible to iterations and variations.
0:16:38

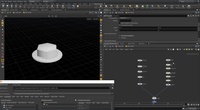
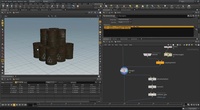
Guard Tower 6 | OilBarrel Part 1 | Building the Oil Barrel
To close out this course we are going to create one more asset. The Oil Barrel Asset. In this lecture we are going to look at how we can build the low resolution barrel. Then finally how to use the High resolution techniques we have learned in the previous lectures, to make the high resolution oil barrel.
0:10:47
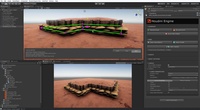
Guard Tower 6 | Oil Barrel Part 2 | Barrel Stacking
Let’s take a look at how to create a nice and elegant solution to stacking the Oil barrels we created in the previous lecture. By the end of this lecture we will have a complete stacking tool inside of Unity that will allow us to stack the oil barrels without any manual placement.
0:07:35
Houdini Content
Category: Modeling, Digital Assets, Unity