
Liesbeth Levick
Liesbeth_Levick
About Me
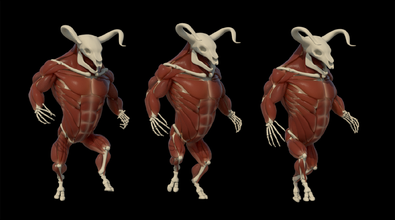
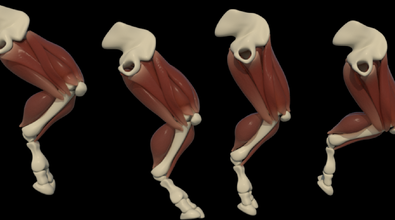
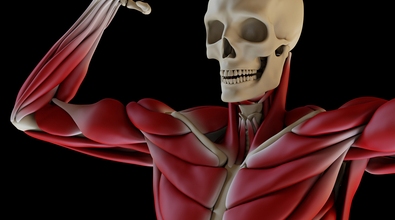
Liesbeth Levick is a Character Effects Technical Director at Side Effects Software, focusing on Muscles and Tissues. She studied Astrophysics and then moved on to work in grooming and CFX at animation and visual effects studios in South Africa and Canada. Her production experience includes creating ... more
Liesbeth Levick is a Character Effects Technical Director at Side Effects Software, focusing on Muscles and Tissues. She studied Astrophysics and then moved on to work in grooming and CFX at animation and visual effects studios in South Africa and Canada. Her production experience includes creating tools and workflows for CFX in Houdini and helping transition studios to a Houdini-based CFX pipeline. Her familiarity with both artistic and technical roles drives her to build tools to make the lives of CFX artists easier. less
専門知識
Technical Director
Connect
LOCATION
Toronto,
Canada
ウェブサイト
Houdini Engine
ADVANCED
Hair & Fur | Muscles
Availability
I am currently employed at SideFX
My Badges

SideFX Staff
Since 6月 2024
チュートリアル

Recent Forum Posts
(SOLVED) HDA Display one thing but Output something else? 2026年3月18日11:46
If you don't want your actual output to display at all, then create an output with the index -1, and then in your viewer state script you can use
You can take a look at the Otis Muscle and Tissue Configure state to see options for having the alternative output always display, or only display when you're in the viewer state.
node.setOutputForViewFlag(-1)
You can take a look at the Otis Muscle and Tissue Configure state to see options for having the alternative output always display, or only display when you're in the viewer state.
OTIS vs Vellum/Ziva – Missing Muscle Volume and Definition 2026年3月13日9:21
carthick
hi Liesbeth : thanks for the detailed writeup! Can you explain the difference between muscle ends and tendon mask ? when and where would you use muscle ends Vs Tendon mask ?
I explain it in the first two minutes of this video (the rest of the video is relevant to Vellum only, not to Otis) https://www.youtube.com/watch?v=rmWmYfKfO5U&list=PLXNFA1EysfYlEaZ7w6YbQpWqZY6-l2Onu&index=6 [www.youtube.com]
Alternatively you can watch it here https://www.sidefx.com/tutorials/muscles-masterclass-essentials/ [www.sidefx.com] where it is the sixth video.
OTIS vs Vellum/Ziva – Missing Muscle Volume and Definition 2026年3月10日9:51
I forgot to add that I unlocked the "Otis Muscle and Tissue Configure" node and tweaked the point deform settings for the "Deform to Bones on Reference Frame" option, as they weren't working properly on this large a character. I'll try to come up with a solution for this soon that doesn't change the behaviour for everyone. With the default settings it looks a bit weird on the first frame of the simulation. It's not too bad an issue, as the solver uses the stored tpose to fix it by the second frame, but just be careful to not use the first frame as the "rest" frame for any skin deformations or the like. I also added "tpose" to the output attributes on the "Otis Muscle and Tissue Configure" node so that the tpose can be extracted from the sim.