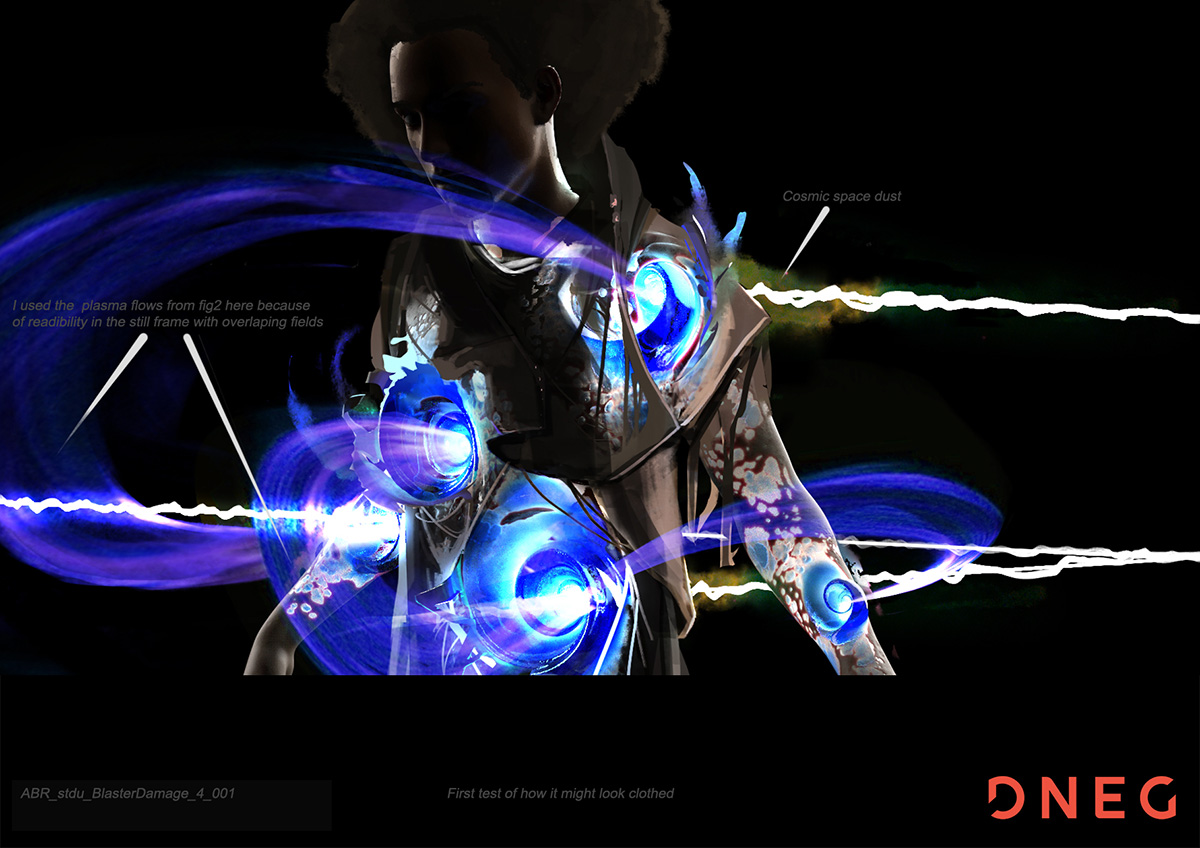
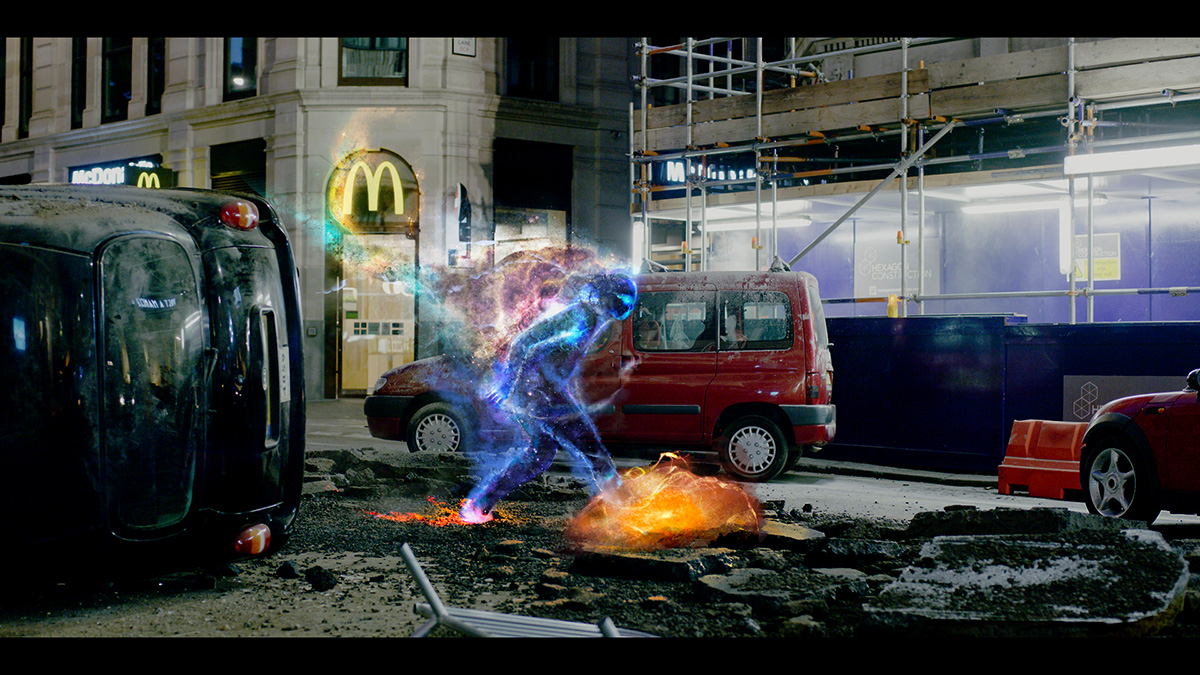
Imagine being given this brief: twin aliens whose natural state is some sort of ‘pure energy’ are shot, causing the energy to spill out of them and then ultimately coalesce back into human form.
That’s what director F. Gary Gray tasked DNEG with for one particular sequence in Men in Black: International, where the twins face off against the film’s two heroes, Agent H (Chris Hemsworth) and Agent M (Tessa Thompson). DNEG solved the energy effects for the twins using Houdini, which came about via a combination of particle and fluid simulations.
MIB International VFX breakdown - twin aliens sequence starts at 1:58
Getting Started on Creating Energy
Before DNEG launched into the final energy shots, it first underwent a concept phase. “The energy was described to us as 'cosmic matter', so we started by investigating astrophotography - galaxies, nebulas etc,” outlines DNEG FX artist Chris Mangnall. “It seemed that the most important visual difference between cosmic dust and boring, earthly dust is the presence of millions of stars. We tested both particle and smoke simulations, and found we could get the detail we needed with particle renders, and the motion we needed from fluid simulations. We ended up with a sort of nebulous volumetric thing, with tiny stars scattered throughout.”
The energy was described to us as 'cosmic matter', so we started by investigating astrophotography - galaxies, nebulas etc. It seemed that the most important visual difference between cosmic dust and boring, earthly dust is the presence of millions of stars. We tested both particle and smoke simulations, and found we could get the detail we needed with particle renders, and the motion we needed from fluid simulations. We ended up with a sort of nebulous volumetric thing, with tiny stars scattered throughout.
Chris Mangnall | FX Artist | DNEGBoth particle and fluid sims were used to craft the simulation. Mangnall says this was done in order to take advantage of the benefits of both techniques. “For example, Eulerian fluid sims are great at preserving volume, handling collisions and generating physically realistic looking flows with relatively little effort. However, the smallest details that can exist in a density grid are limited by voxel size (there are shading techniques such as using noise with advected rest-position fields which help to add more detail, but these techniques have their own drawbacks), and advected density grids suffer from numerical diffusion. Detail is lost as the simulation evolves.”

“Particles can provide sub-voxel details which won't diffuse away over time, and are easy to form into user-defined shapes. The downside of particles is that you need a lot of them to get smooth renders that don't just look like a bunch of disjoint points.”
So, to keep the total particle count to a manageable number, DNEG had to be careful with the placement. “We aimed for each particle to be roughly one pixel in diameter, which means they were larger - in world space - and correspondingly more sparse in the background, and smaller, more numerous and more transparent in the foreground where the detail was needed. This was especially important in the full-screen shots, where the particle count rose to over 100 million in number.”
We ran a fluid sim to get interaction with the characters and atmospheric motion. If the shot needed the nebula to suck back into the twins’ bodies, we ran a second fluid sim with areas of negative divergence inside the bullet holes, so the holes acted like a vacuum.
Shot-Making
For a typical shot, DNEG’s artists placed pre-made volumes where they wanted the nebula to be. The density of the volumes was adjusted based on the z-depth from camera, with particles scattered into the volume. The particles were displaced slightly using noise functions to push them into a more visually interesting shape. Then, colours and pscale were assigned.
“We then ran a fluid sim to get interaction with the characters and atmospheric motion,” describes Mangnall. “If the shot needed the nebula to suck back into the twins’ bodies, we ran a second fluid sim with areas of negative divergence inside the bullet holes, so the holes acted like a vacuum.”
“The particles were then advected by the velocity grids as a final simulation step,” adds Mangnall. “For bullet hits, we placed shaped particle caches where we wanted the expelled nebula to end up, and had the particles fly out from the wounds to their target positions before the fluid sim took over the motion.”
All of this was done in Houdini, mostly with in-built nodes. Much of the work was carried out with wrangle nodes and VEX. Mangnall notes that nearly all the initial particles attributes and positions were set using VEX, as well as a lot of the motion and lighting. “And we made good use of the VDB points SOPS, to save on disk space!” attests Mangnall.
The particles were advected by the velocity grids as a final simulation step. For bullet hits, we placed shaped particle caches where we wanted the expelled nebula to end up, and had the particles fly out from the wounds to their target positions before the fluid sim took over the motion.
Meanwhile, the fluid solver and collisions were mostly out-of-the-box Houdini nodes. DNEG used a custom drag node to damp down the motion in specific areas. “The twins needed to be able to easily push through the nebula, but the turbulent wake they made tended to destroy the look. Fortunately Houdini allows you to modify all the data in the sim as you see fit using Gas Field Wrangle DOPS. We had to crank up the number of multi-grid iterations to get accurate collisions, especially for the divergent sims, but as we could use relatively low resolution sims - all the detail is in the particles! - this wasn't an expensive problem.”
One challenge came from the subtle lighting seen in the stars within the nebula. There were many thousands of stars in most shots, so using a point light for each was impractical. Artists ended up baking the lighting from the stars onto the particles in SOPs. Here, the nebula particles and the twins geometry were rasterized into a volume for shadows. Then for each particle in the nebula, DNEG identified nearby stars using point cloud lookups, and raymarched through the shadow volume towards each nearby star to get its lighting contribution.

“Most of the stars were small and dim, with only a few hundred being large and bright,” details Mangnall. “This meant that the number of 'nearby' stars was kept fairly low for each particle and the lighting computations didn't take too long. The bright glow from the centre of the bullet holes was computed in the same way. We got a substantial speed-up by using the openCL SOP to run the lighting computations on the graphics card - which was great for faster turn-around time during lookdev.”
The nebula was rendered through Mantra. Since most of the lighting was pre-baked, the shots became relatively straightforward to render, says Mangnall. “The stars, dust and various lighting passes were all in seperate AOVs, and everything was rendered with deep camera maps to help the compositors assemble it with other passes from lighting, and with DNEG artist Ivan Larinin's excellent FX work on the twins’ disintegration. Mantra had no difficulty coping with the large amount of particles we threw at it.”


COMMENTS
Please log in to leave a comment.