PROCEDURALLY GENERATE LARGE CLOUDSCAPES
START SMALL
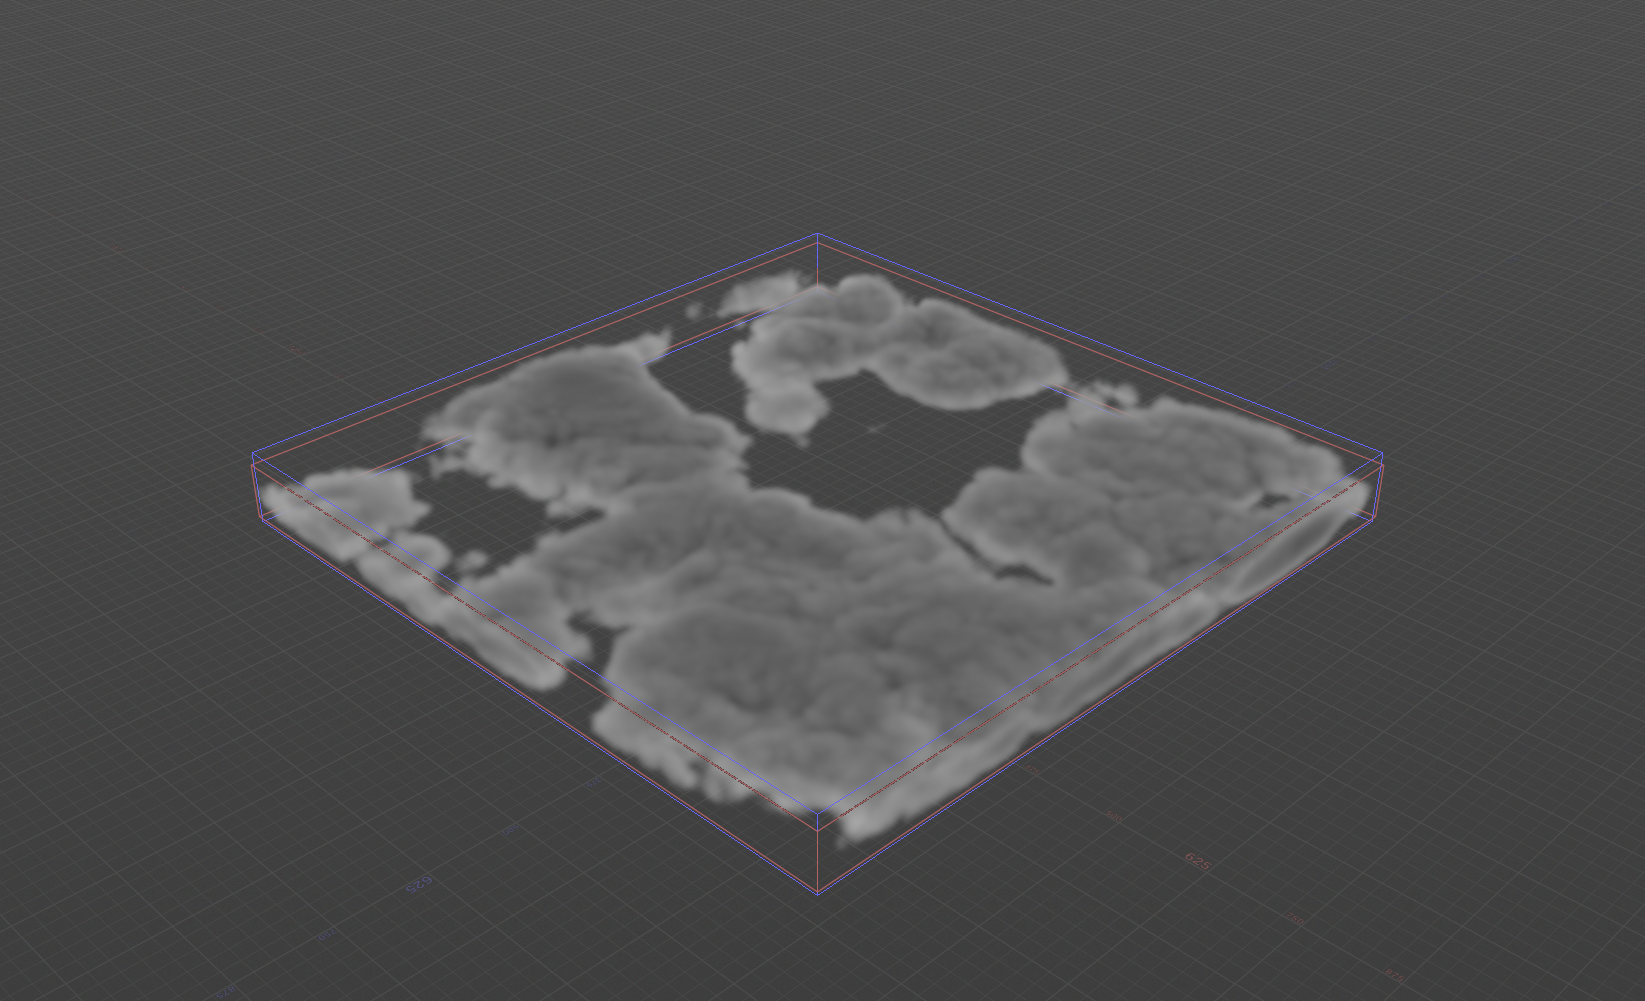
When working with volumes,
our computers may experience high
pressure. That is why it is vital to have
a coherent balance between dimensions and voxel size. When we place
Skybox node by default, the values
provided by Houdini are optimal to
start configuring our clouds (Voxel
Size 5, Bound Size 1000, 200, 1000). If
your computer tends to work harder
when processing this load, you could
increase the Voxel size to 7 or 8;
however, higher values would not
allow you to see the initial details
necessary when configuring your
clouds. Also, suppose you intend to
work on vast fields of sky. In that case,
you can increase the initial size of your Skybox to 2.000, 200, 2.000. However,
the most convenient flow is to first
configure an initial shape with details
that fit your needs and then replicate
these same result increasing the size
of your Skybox.
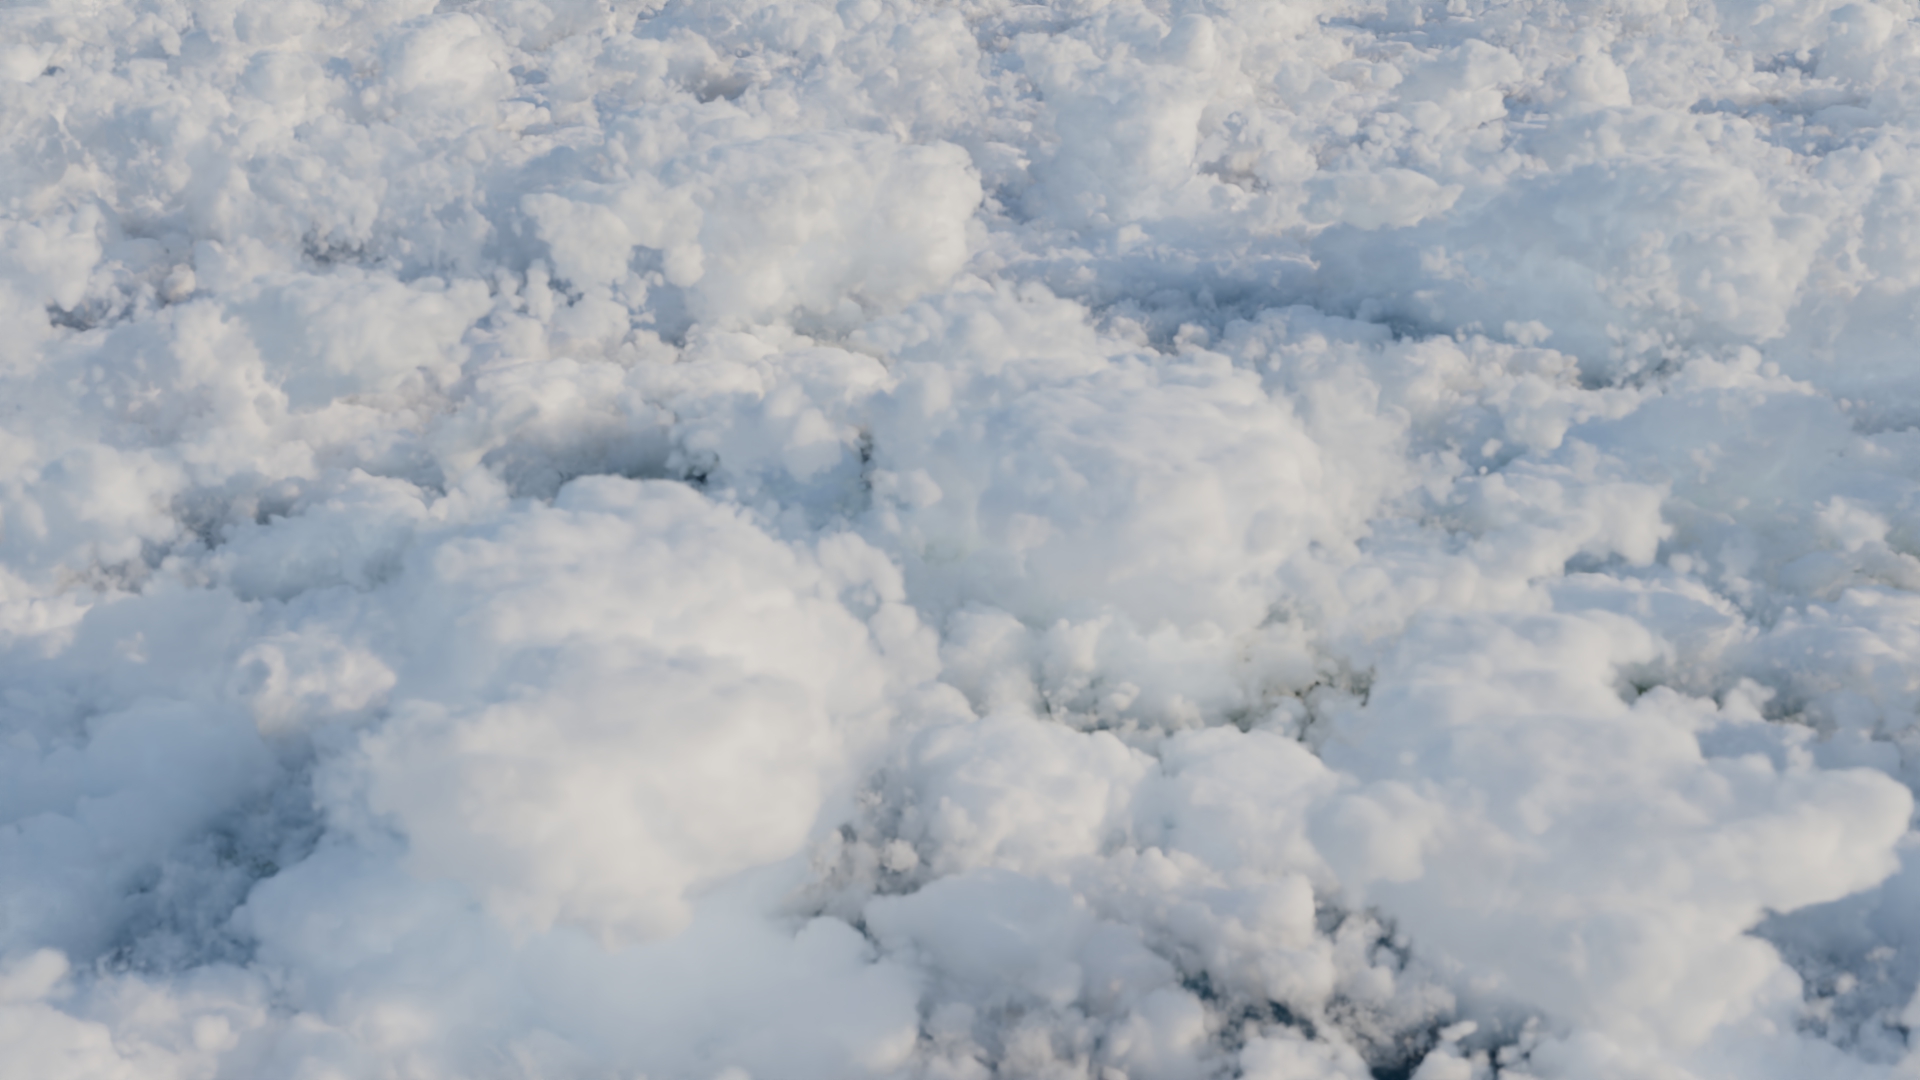
DEFINE THE TYPE OF CLOUD: Apart from doing an exhaustive search for references, it is essential to identify the type of clouds we will replicate. Knowing their characteristics, topology, structure, behaviour, measurements and composition will help us replicate those technical characteristics of clouds in our scene.
CONFIGURATE AND DETAIL CLOUDS
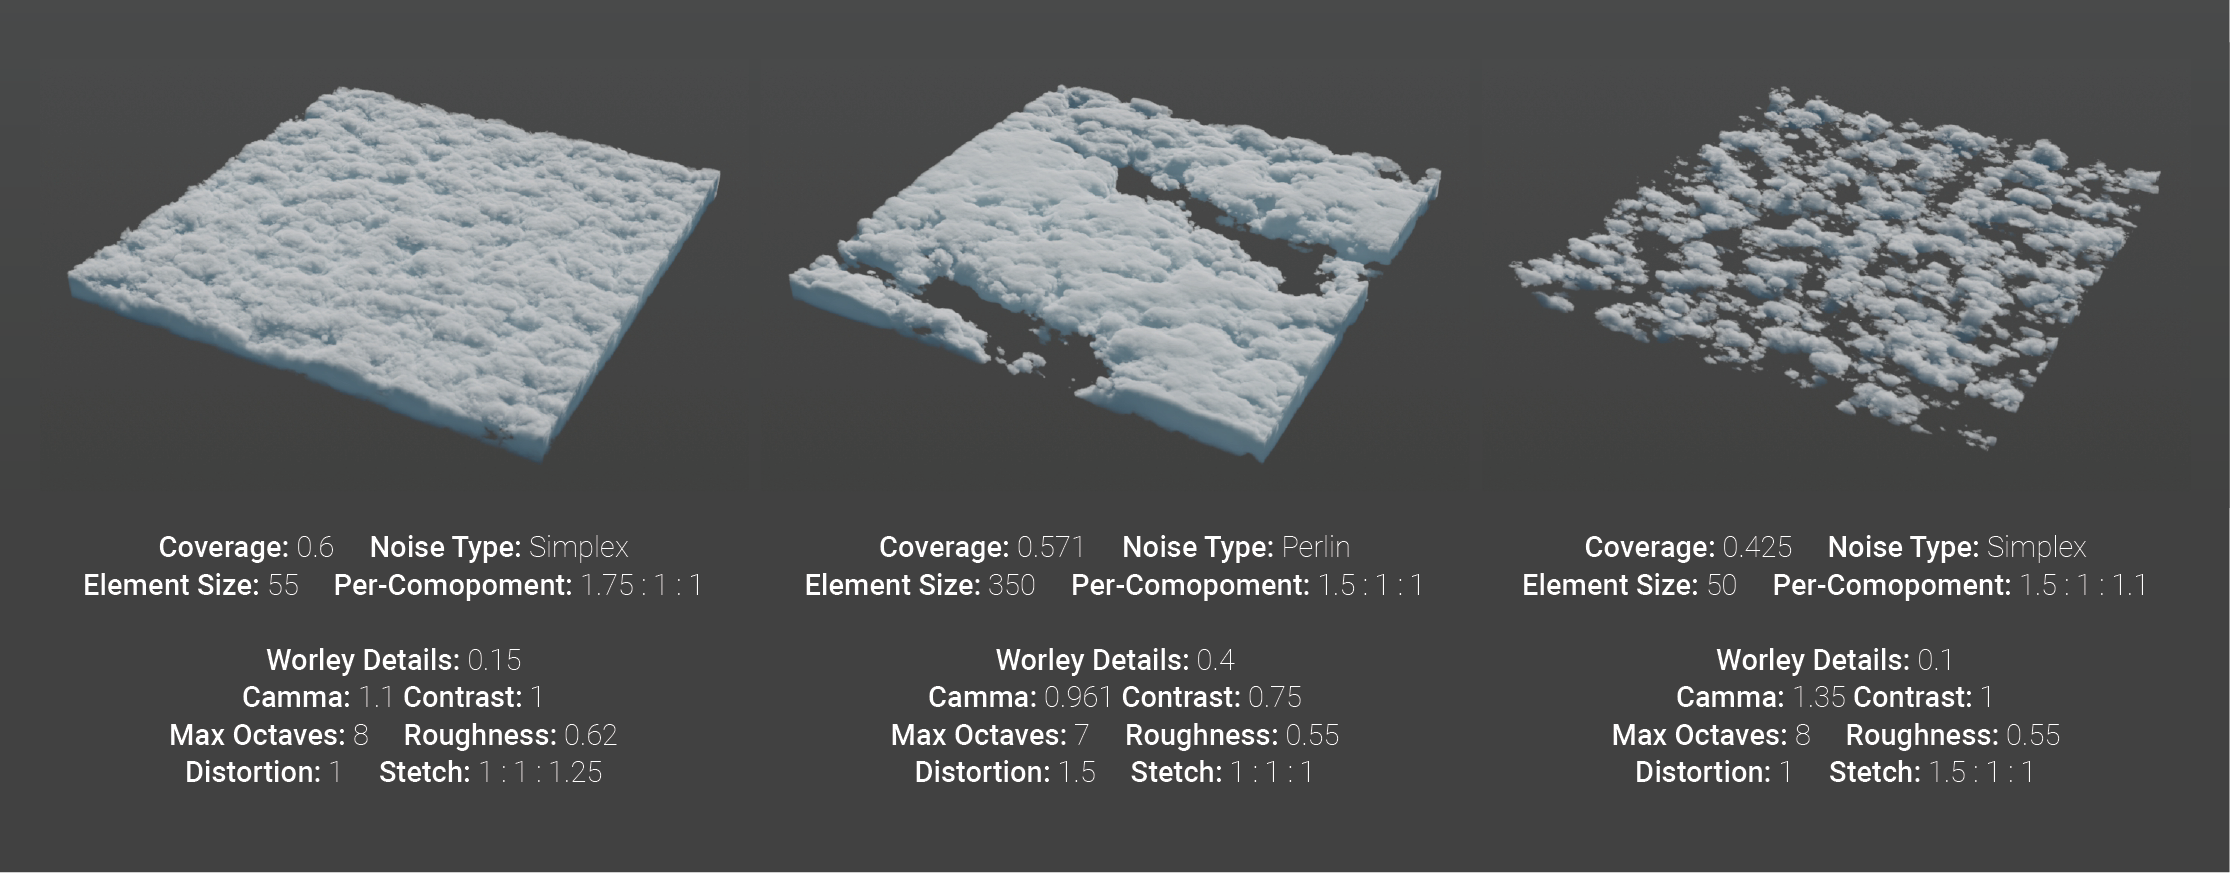
Generally, the starting point for shaping the cloud field is configuring the basic shape of each cloud that makes the field. The Billowy Noise tab is the starting point. First, define if your blanket comprises of large, medium, small clouds. In Element Size, you can start configuring these first measurements; also, by activating the By Component button, you can scale the dimensions separately along each axis to stretch them to fit your needs. I recommend choosing a Perlin-type noise for clouds resembling cumulus or small, and Simplex for large clouds.
Next step is to determine the spacing between each of the clouds. If you need a blanket of small cloud, you will need to generate large spacing. This can be achieved by lowering the Coverage values in Weather. However, I do not recommend going down to values below 0.4, as you may lose detail in your clouds.
As an additional
measure in Value Correction, you can
modify the Gamma to accentuate the
spaces further, and Contrast to
highlight its shape. If your clouds lose
a lot of size when setting the spacing,
you can always go back to Element
Size to modify your measurements.
You can use Fractal or Worley
Details to add more detail to your
clouds. Increasing Max Octaves adds
more iterations to the noise, and with
Lacunarity and Roughness, you'll be
able to play with the noise frequency and scale, respectively. If, on the other
hand, you desire to make more
straightforward clouds, you should
use lower values. Worley Details is a
great ally to add more detail to your
clouds. Mainly, you can make your
clouds appear more puffy and
increase the number of patches. To
achieve this, you should play with
scale and erosion values, and
combine them depending on how
much new detail you want to add. If
you want to vary the basic shape of
your clouds a little more, in Warping,
you can stretch or reduce the noise on
each of your axes and add more
distortion, making your clouds look
messier.
WISPY NOISE
By activating Wispy Noise in our Skybox, fragmented, fibrous and delicate clouds will be added to our sky field. Ideally, the noise amplitude in Wispy Noise should be higher than the noise element size of Billowy Noise. Thus, the added noise will stand out and expand beyond our base clouds. By default, Wispy Noise includes turbulence; this displaces faint noise and creates additional finer details. You can also be stretched and added or reduce noise iterations by using Warping and Fractal, respectively, in the same way as it works in Billowy Noise.
HOUDINI TIP: To better visualize in the Viewport, activate the Override Look option and adjust the density and shadow as needed, also add a Sky Light at the object level.
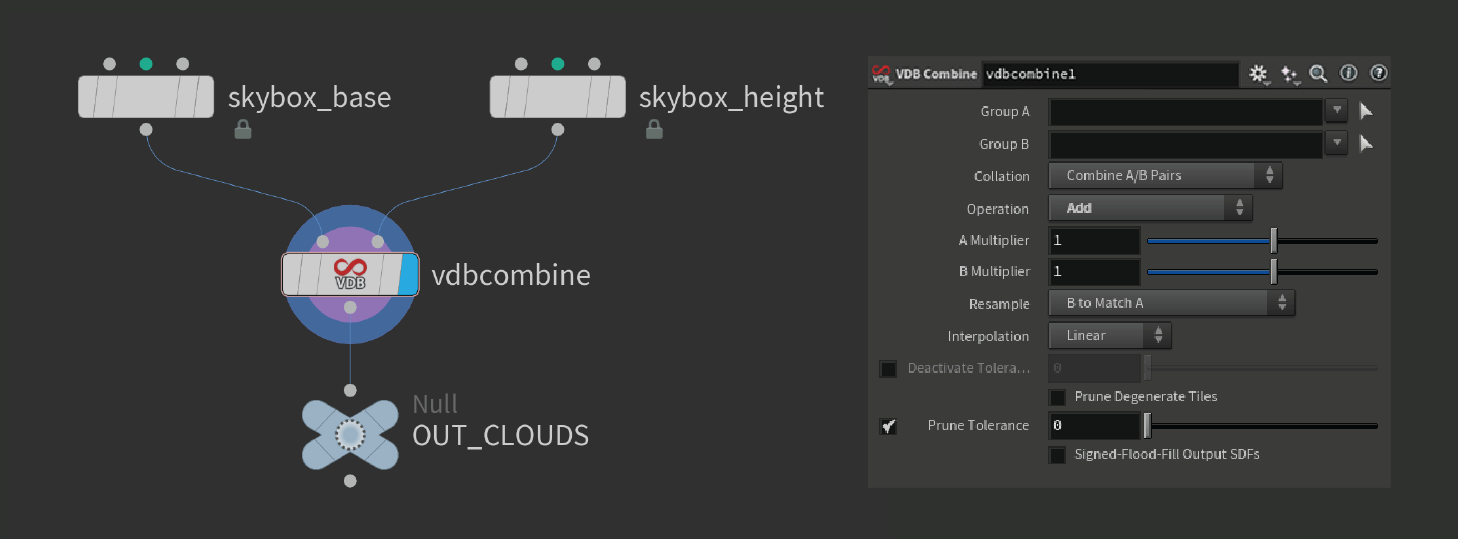
HEIGHT VARIATION
Generally, cloud fields do not maintain the same height. Some clouds have significant height variations. To create these variations, you can use a second Skybox. You can double your base Skybox, and drastically reduce the Coverage value and increase the Gamma value, generating larger spaces and eliminating small clouds, leaving only a few clouds available. Next, increase the Sky Layer Thickness and Vertical Profile Vertical Extrusion values to make your clouds grow vertically. If you want to generate patterns of a larger size, you can also increase the Element Size value. To combine your two Skyboxes (skybox_base and skybox_height), you can use VDB Combine, using Add as the mode of operation. This way, you will have clouds with a variation in height in your sky field.
CONFIGURATION IN SOLARIS
You can easily summon your clouds in Solaris/Stage using a SOP Import and follow the workflow commonly used in Solaris: Import geometry, create materials, assign materials, create lighting, import cameras, and configure Karma Render Settings. Next, we will introduce to you two useful new tools available in the new Houdini 20: Karma Cloud Material and Karma Physical Sky.
HOUDINI TIP: Remember to cache from object level
using File Cache or File so that your
clouds are loaded from disk.
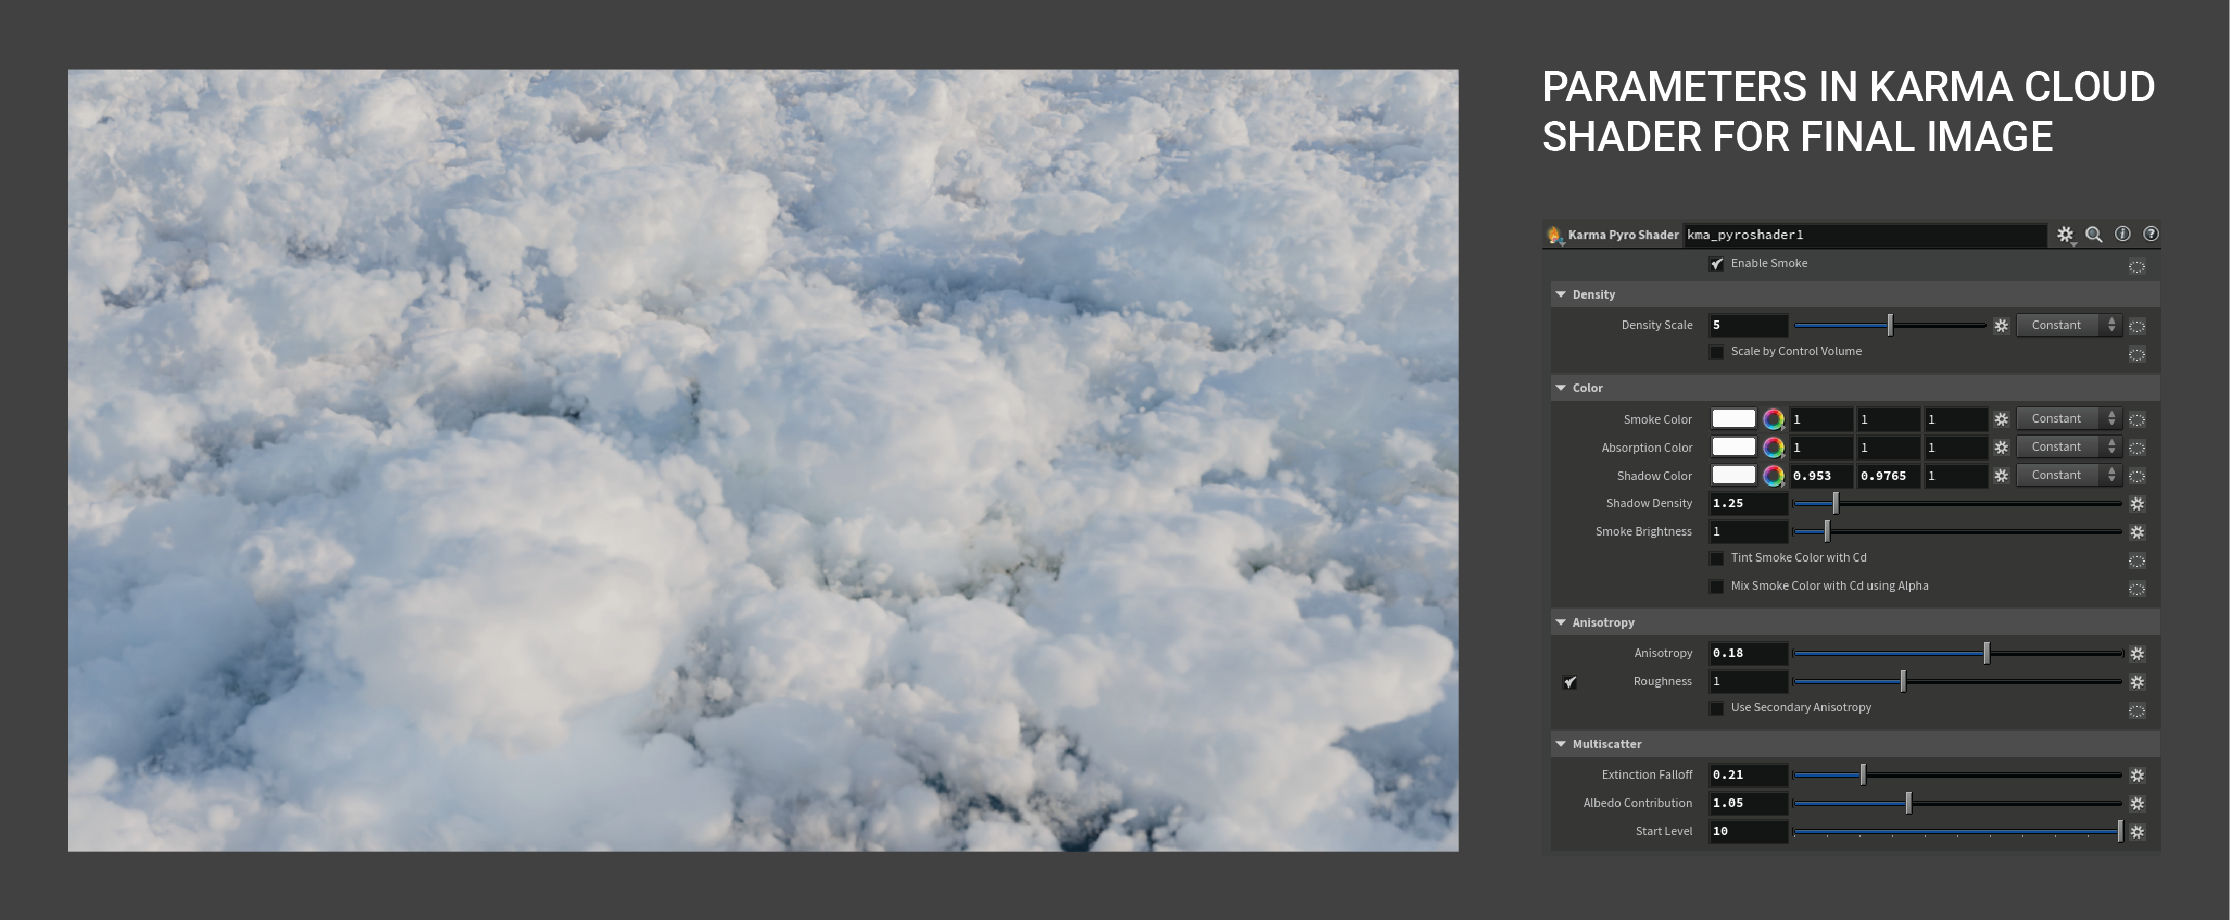
KARMA CLOUD SHADER
This new tool contains a preset configuration for Karma Pyro Shader to work optimally with clouds. Generally, the default configuration of Karma Cloud Material gives optimal results when rendering our clouds. However, there are some parameters to configure to control the results in greater detail.
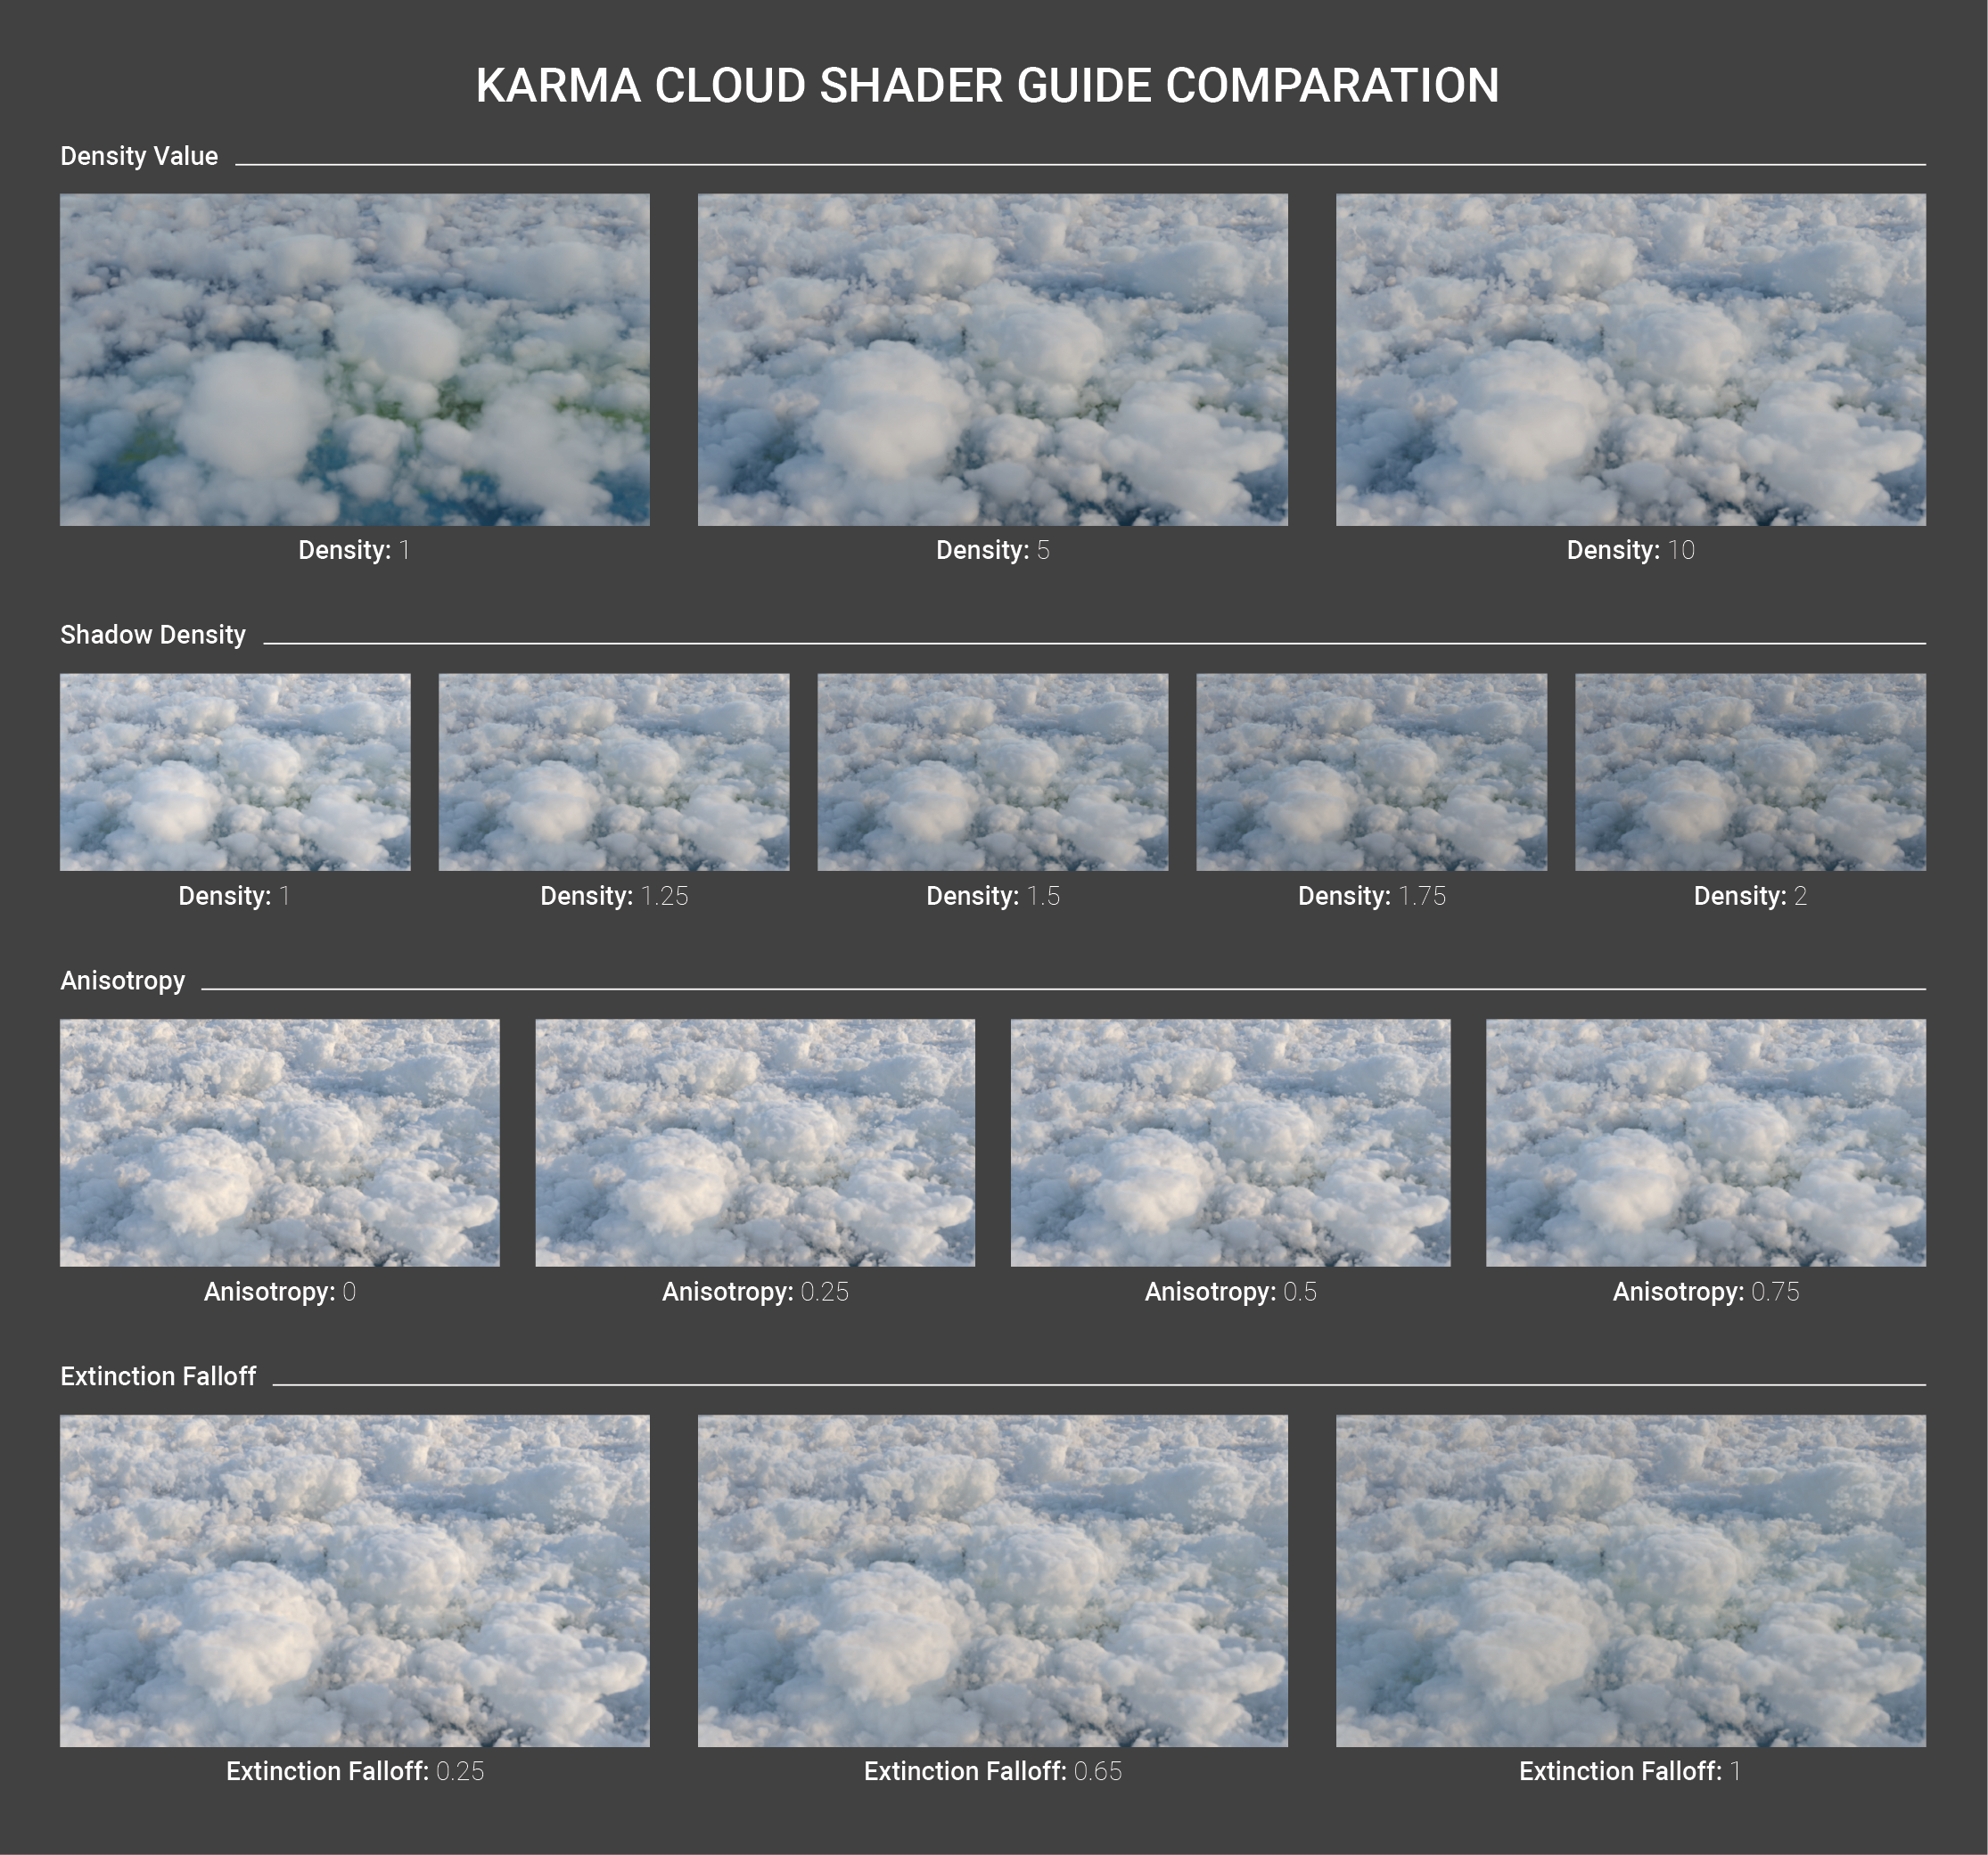
One of the first parameters to configure should be density. By increasing the value, the clouds will begin to obtain a much rougher appearance, with greater detail and crunchier. Reducing it will result in more opaque clouds with a more diffuse volume. Additionally, Shadow Density and Smoke Brightness are multipliers that affect the capacity of light that penetrates the clouds and increases their brightness.
Anisotropy and Extinction Falloff are two fundamental characteristics to configure how clouds interact with light. Anisotropy controls how the light is scattered. At lower values, the light will be dispersed uniformly; using a higher value, the light will take the same direction as the emitter. Extinction Falloff allows control of how the light dims as it passes through the clouds; decreasing this value will gradually increase the intensity.
KARMA PHYSICAL SKY
The new Karma Physical Sky combines Karma Sky Dome and Sun Light into a single node, simulating a daytime sky, a handy feature when creating sky fields with clouds. In the Sun tab, we can configure the variables determining our physical Sun, time, location, distance and intensity. Sky brings together the functions relevant to our Sky or atmosphere. The configuration of a physical ground, the distance from the horizon and the intensity are configurable values of this function.A balance between the illumination generated by the Sun and the Sky will be essential to the correct illumination of our clouds. Mainly, the Sun will provide direct light to illuminate our cloud field. It is recommended not to abuse the intensity of this value as it will tend to burn our clouds at too high a value. Ideally, use lighting from evening hours, 7 a.m. to 9 a.m., as these ranges will accentuate the shadows and shapes of clouds. Also, consider that the lighting coming from the Sky will tend to have clouds (as the intensity of our Sky increases, the clouds will tend to become bluer in colour)
RENDER
To achieve a satisfactory display of our sky fields, it is crucial to configure our Render parameters correctly. For this specific exercise, we will use Karma Render Settings. Depending on the hardware you work with, the first step is to decide which rendering engine we will use (CPU or XPU). Clouds are typically volumes, so a high processing load is required to generate suitable results. Using XPU as a rendering engine is advisable, as it will process our images much faster.CREATED BY

COMMENTS
Please log in to leave a comment.