| On this page |
The Render Gallery is an image catalogue that lets you create snapshots from the viewport’s current content. You can then use the saved states to compare and document how a scene or certain parts of it evolved.
The first chapters of this guide give you a quick overview how the gallery’s different methods work together with their pros and cons. This helps you to classify the place of live rendering compared to other modes. As in most cases, there’s not that one method, but we offer several options that let you choose the best solution for your needs. All modes can work in parallel, but this is also a matter of computer resources.
Note
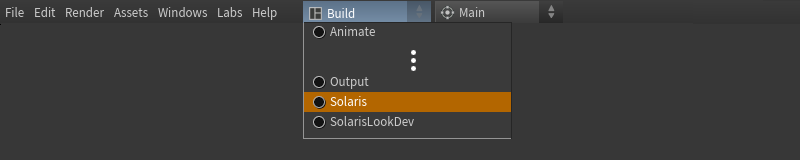
All references to UI elements are based on Houdini’s Solaris desktop. To apply this desktop, go to the main menu bar, open the first dropdown menu (set to Build by default) and choose Solaris or Solaris LookDev.
Render Gallery 
There are two ways to open the Render Gallery. You can either press Alt + ⇧ Shift + W to open a new floating window. When you click the ![]() New Tab button, you open a dropdown menu. From there, choose Solaris ▸ Render Gallery. What you can see now is a split window.
New Tab button, you open a dropdown menu. From there, choose Solaris ▸ Render Gallery. What you can see now is a split window.
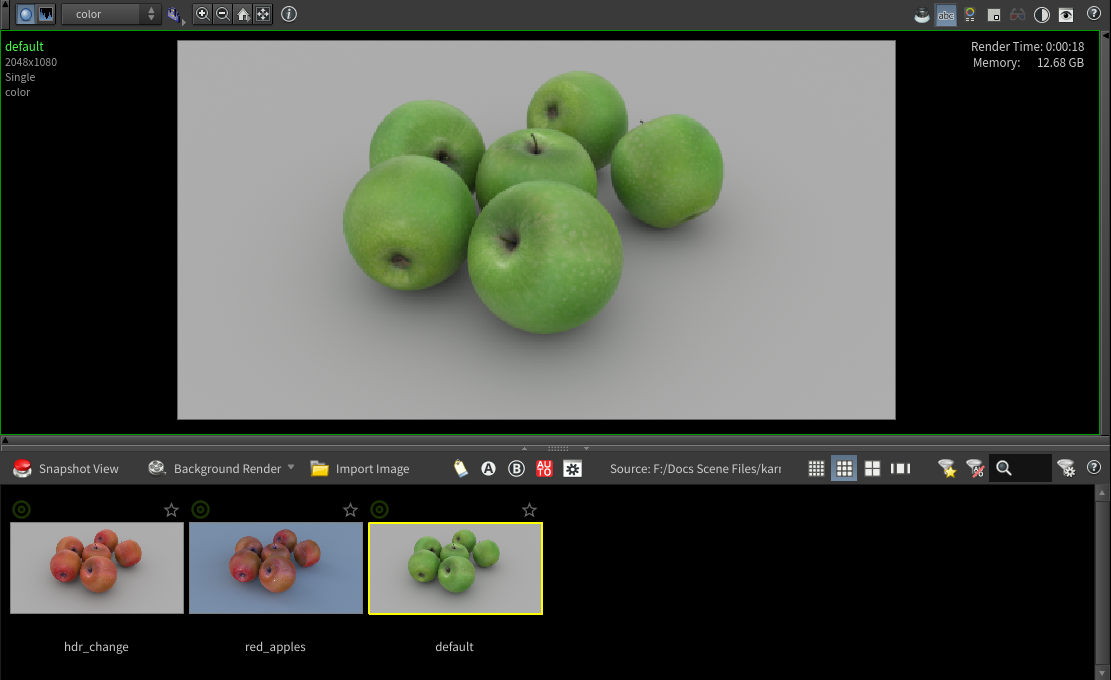
The upper part is the image viewer and provides most of the functionality of Houdini’s MPlay. The rendered images and snapshots are shown in the image strip, the gallery’s lower part. When you double-click an image in the image strip, it’ll be displayed in the image viewer.
In the viewer, you have several options like showing an image’s histogram, zooming in and out, or showing important render statistics if provided by the render delegate.
The image strip also has several buttons and the most important ones are ![]() Snapshot View and
Snapshot View and ![]() Background Render.
Background Render.
You can also open the Render Gallery from the Toolbox on the left of the viewport. There, click the ![]() Show/Hide snapshot strip button. The image strip will be attached to the viewport’s bottom.
Show/Hide snapshot strip button. The image strip will be attached to the viewport’s bottom.
Snapshots 
For snapshots you don’t need a Karma mode and you can also create images from Vulkan or Storm. You can take the snapshot directly from the Render Gallery. You’ll get a 1:1 representation of the viewport, but you also save the current state of the LOP network. To revert to a certain network, right-click a snapshot in the Render Gallery and choose Revert Network to this Snapshot.
Snapshots consider the viewport’s aspect ratio and display mode.
Background rendering 
Background rendering requires an active Karma mode and you can launch it from the Render Gallery. Houdini remains responsive while rendering, but it doesn’t react to viewport changes. As an in-process mode, background rendering will take Houdini down when it crashes. Note that this mode stores the LOP’s current state.
Clone rendering 
You can start clone rendering from the Clone Control Panel, but you’ll see the result in the Render Gallery. Clone rendering creates a 1:1 copy of the scene you want to render and responds to viewport changes. This approach requires more system resources, and if a scene takes ten minutes to prepare in Houdini, the clone process will also take ten minutes. As a separate process Houdini will not be affected when the clone rendering crashes.
Live rendering 
Live rendering fills the gap between snapshots, background rendering and clones. The mode directly reacts to viewport changes. Live rendering requires fewer resources than clone rendering, because it uses less memory and the scene does not have to be processed again. When Houdini crashes, the live render process will die as well, and vice versa. As a true render solution, live rendering requires an active Karma render engine.
Unlike its counterparts, live rendering is tied to a separate node - the ![]() Live Render LOP. The node is also where you start the process and the result will be displayed in the Render Gallery. The node and its position in the network determine what is being rendered. This means that you can add multiple Live Render LOPs and take snapshots from different parts of a scene.
Live Render LOP. The node is also where you start the process and the result will be displayed in the Render Gallery. The node and its position in the network determine what is being rendered. This means that you can add multiple Live Render LOPs and take snapshots from different parts of a scene.
Live Render LOP 
The Live Render LOP is the command center of the live rendering mode. The node utilizes render settings and camera data from upstream nodes. Please note that a ![]() Render Settings LOP and a
Render Settings LOP and a ![]() Camera LOP are mandatory, but you can also define local overrides directly on or even inside the node. You also want to render an object, for example from a
Camera LOP are mandatory, but you can also define local overrides directly on or even inside the node. You also want to render an object, for example from a ![]() SOP Create LOP. The image below shows a minimum setup for the Live Render LOP.
SOP Create LOP. The image below shows a minimum setup for the Live Render LOP.

Once you've created the network, let the Live Render LOP know where to find the scene’s Render Settings. By default, the path is /Render/rendersettings. You can also drag the ![]()
rendersettings primitive from the Scene Graph Tree to the node’s parameter.
Then, choose a Render Delegate. Note that you don’t have to turn on the delegate in the viewport to get a live render. Houdini will perform the live rendering anyway and update the image when the viewport changes. However, we do recommend to choose the delegate you want to use for the final render.
Click the Start Render button. You can now see a green ![]() badge directly at the Live Render LOP node and the rendered thumbnail in the gallery. The icon makes the image distinguishable from snapshots and background renders. You can monitor how the thumbnail in the image strip reacts to your viewport changes.
badge directly at the Live Render LOP node and the rendered thumbnail in the gallery. The icon makes the image distinguishable from snapshots and background renders. You can monitor how the thumbnail in the image strip reacts to your viewport changes.
![]()
The Live Render LOP also supports click-to-focus rendering. During an active render, you can click the full 2D view in the gallery to tell Karma on which part of the image it should focus next. Most probably you’ll only see an effect with complex and noisy render tasks.
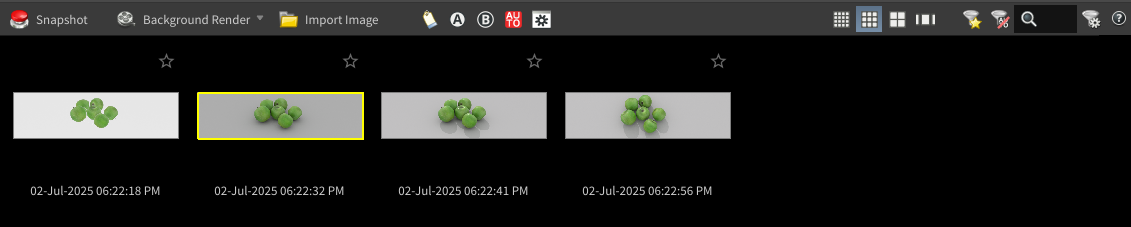
With Stop Render, the rendering process will be interrupted and the gallery thumbnail will no longer react to changes in the viewport. To finally show the image in the gallery, double-click its thumbnail. There’s also a right-click menu available for each snapshot. Please visit the Render Gallery’s help for more information. When you click Start Render again, you’ll create a new gallery entry. A progress bar on the gallery view’s top displays how much of the current render has already been completed:

You can also hit Pause Render to interrupt the render process, and Resume Render to proceed.
Tip
The Stop Render, Pause Render, and Resume Render buttons are also available through a gallery thumbnail’s right-click menu.
You can rename the thumbnails in the image strip. Just click the default name, for example liverender1 to make it editable. Then, enter a new name.
Overrides 
Overrides let you add changes to the live render without modifying the original network and its parameters. This is a convenient way if you want to try different camera perspectives or change image resolution.
The Override Camera parameter accepts a path to another camera. Again, you can drag any camera primitive from the Scene Graph Tree to the input field. The path will then be added automatically. If you need to change resolution independently from any upstream settings, open the Override Resolution dropdown. You can either use a percentage value from the original resolution or enter specific values.
Internal LOP network 
A very interesting workflow for creating overrides lies inside the Live Render LOP. When you copy/paste a LOP or want to shift it to a different part of a network, the contents inside live render operator are moved together with the node. You don’t have to reconnect the overrides, or copy and paste them separately. You can also turn the Run Internal LOP Network option on and off to see the differences with or without your overrides.
When you double-click the node, you’ll be lead to a USER_AREA subnetwork. Typical scenarios for internal overrides are changes on materials and the scene’s lighting. Let’s say you have found a nice light setup you'd like to keep, but there are some tweaks you want to try out. Instead of working on the original nodes, you can use ⌃ Ctrl + C to copy the light nodes. Then, go inside the Live Render LOP and paste the nodes with ⌃ Ctrl + V. Now you can apply your changes, play with different values, colors and HDRs. When you stop the render process, the Live Render LOP creates snapshots from your various light setups inside the node and you're able to directly compare the versions.
You can also add a new ![]() Material Library LOP and apply different shaders to specific primitives.
Material Library LOP and apply different shaders to specific primitives.
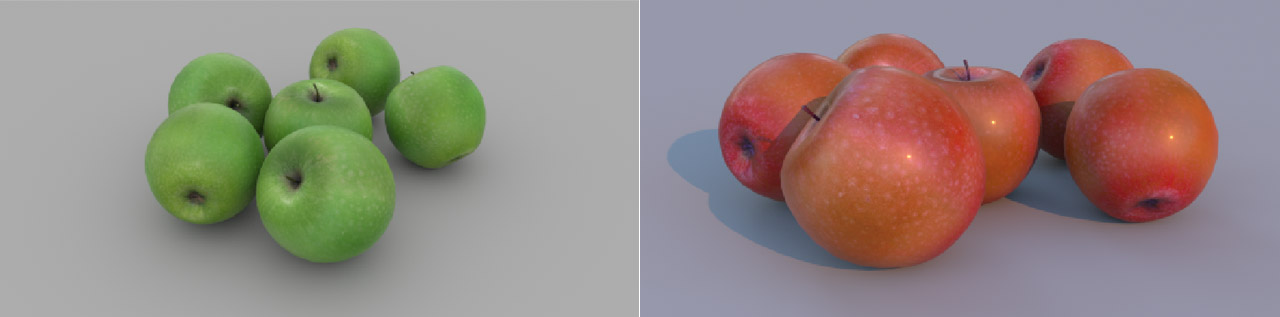
The original image on the left and a version with material, light and camera overrides on the right.
Multiple LOPs 
A network is not limited to a single Live Render LOP, but in theory you can have as many nodes as you want. And, they can also render simultaneously. This, however, is a matter of resources. A more realistic scenario would be to have Live Render LOPs at different points of a network to subdivide a scene into parts. The part you're currently working on has an active live render session.
So you can separate objects from the background, render the empty background itself, or work on the scene’s lighting part. Later you can bring everything together in Copernicus. You can also create multiple Live Render LOPs and define different overrides.
Copernicus 
You can start and stop a live render session directly from the ![]() File COP. From the Source dropdown menu, choose Live Render and point the Live Render LOP parameter to the Live Render LOP node. The most convenient method is to click the
File COP. From the Source dropdown menu, choose Live Render and point the Live Render LOP parameter to the Live Render LOP node. The most convenient method is to click the ![]() Open floating operator chooser button and choose the LOP from the panel. Note that a Live Render LOP is mandatory and it’s not possible to choose one of the upstream or downstream nodes.
Open floating operator chooser button and choose the LOP from the panel. Note that a Live Render LOP is mandatory and it’s not possible to choose one of the upstream or downstream nodes.
Click Start to “remote control” the render process. Then you can return to Solaris and make your changes on the scene/viewport. When you go back to Copernicus, the File COP’s content will be updated automatically. If the render takes long, you can even monitor the render process directly in Copernicus. To do that, open a new floating panel with Alt + ⇧ Shift + W and click the ![]() button to add a new tab. From the dropdown menu, choose New Pane Tab Type ▸ Viewers ▸ Composite View. The viewer’s functionality is very similar to Houdini’s MPlay.
button to add a new tab. From the dropdown menu, choose New Pane Tab Type ▸ Viewers ▸ Composite View. The viewer’s functionality is very similar to Houdini’s MPlay.
As in Solaris, the Stop button finalizes the render. To get a new image, click Start again.
It’s also possible to process the image from the Live Render LOP with other Copernicus nodes even when the render task is still running. The Viewing your output chapter explains how to get access to the final result.
Saving images 
There are two methods to write your gallery images to disk. One way is to save the image from the gallery’s image view that supports most of the features of MPlay.
-
Double-click the live render thumbnail in the image strip to open the image viewer. Or you open the Render Gallery tab above the viewport. When you click the active thumbnail, the live render will be displayed in the gallery viewer.
-
Right-click somewhere in the image viewer and choose Save Frame to open a Save As dialogue. There, fill in Filename, choose a Format and make the settings you consider important.
-
Click Save and write the image to disk.
Snapshots 
You can also right-click the thumbnail in the image strip and choose Snapshot Render. Alternatively, click the ![]() Snapshot Render button in the gallery’s thumbnail strip. This will “freeze” the live render’s current progress and saves it as an EXR file on disk. Now, right-click the new snapshot thumbnail. Load in File Browser, opens your operating system’s file browser and leads you directly to the saved EXR.
Snapshot Render button in the gallery’s thumbnail strip. This will “freeze” the live render’s current progress and saves it as an EXR file on disk. Now, right-click the new snapshot thumbnail. Load in File Browser, opens your operating system’s file browser and leads you directly to the saved EXR.
When you create a snapshot, you’ll also save the state of the LOP network that has been used to save the snapshot. If you want to revert to this specific network, right-click the snapshot thumbnail in the gallery, and choose Revert Network to this Snapshot.
If you don’t want to save the network with a snapshot, do the following: Click the ![]() Edit Options on top of the image strip and turn off Capture LOP Network for snapshots.
Edit Options on top of the image strip and turn off Capture LOP Network for snapshots.