| On this page |
It’s possible to identify areas that are lit by sunlight and store the result in a mask layer. You can then use this information for scattering, texturing or atmospheric effects like haze or fog. The idea is to take the direction of a light source and see where it hits/illuminates the terrain. Here you can see scatter points in the masked areas.
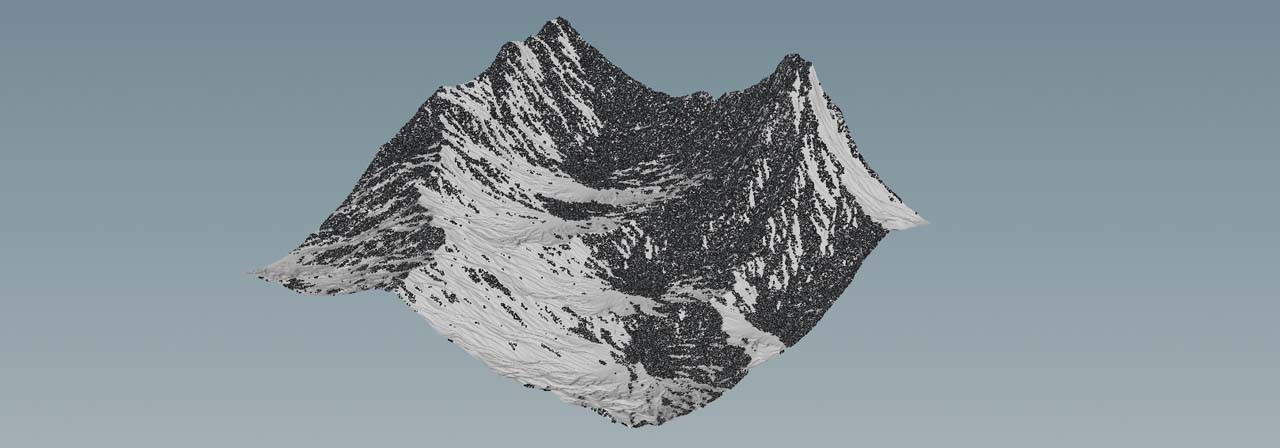
Note that this solution is just an approximation, because some aspects are not considered, e.g. the sun’s height above the horizon. However, there are methods to that, but they are more complex approach.
Create an arbitrary heightfield - the terrain’s topography doesn’t matter. If you want to learn how to get started with terrains, please read the Generating a height field from scratch chapter from the introduction to heightfields.
Light source 
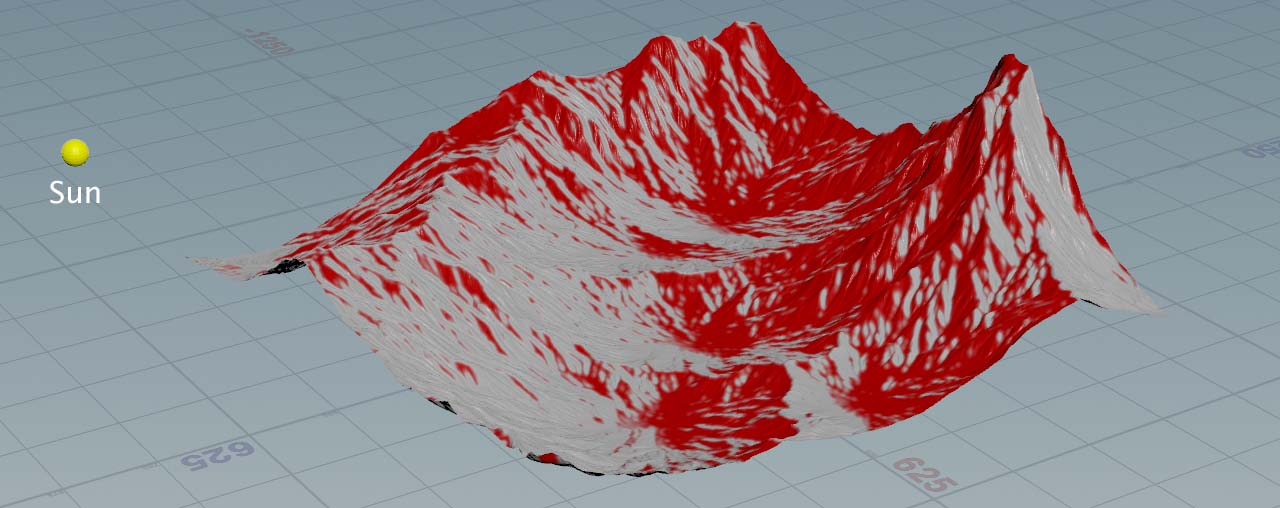
You also need a light source to calculate the map. This is not a physical light, but just an object that determines the direction of the light rays.
-
Add a
 Sphere SOP or any other geometry.
 -
Use the Center parameters to position the object. You can also animate the parameters and watch how the map changes over time.
-
If you have problems to identify the object in your scene, increase Uniform Scale.
Script 
The script calculates the terrain’s normals through a volumegradient function. Normal vector and light direction are then used to calculate the dot product. The dot product calculates the angle between two vectors and returns a scalar. You can then use the scalar value to define the mask.
To apply the script, lay down a ![]() HeightField Wrangle SOP. Connect its first input with the last input of the node that creates the terrain, for example a
HeightField Wrangle SOP. Connect its first input with the last input of the node that creates the terrain, for example a ![]() HeightField Noise SOP or
HeightField Noise SOP or ![]() HeightField Erode SOP. Then, use ⌃ Ctrl + C and ⌃ Ctrl + V to copy and paste the code below to the wrangle’s VEXpression parameter.
HeightField Erode SOP. Then, use ⌃ Ctrl + C and ⌃ Ctrl + V to copy and paste the code below to the wrangle’s VEXpression parameter.
// Custom light source parameters
vector light_pos = chv("light_pos");
float light_intensity = chf("light_intensity");

vector pos = @P;

// Get the light's direction
vector to_light = normalize(light_pos - pos);

// Calculate the heightfield's normals and illumination
// Use only the maximum values
vector normal = volumegradient(0, "height", pos);
float illumination = max(0, dot(normal, to_light));

// Multiply illumination and intensity
// Invert the mask to get the sunlit areas
@mask = 1 - illumination * light_intensity;
To create the custom light_pos and light_intensity parameters, select the wrangle and press the ![]() Create spare parameters for each unique call of ch() button. For Light Pos it’s a good solution to transfer the light source’s Center values to the new parameter.
Create spare parameters for each unique call of ch() button. For Light Pos it’s a good solution to transfer the light source’s Center values to the new parameter.
-
On the Sphere SOP, right-click the Center parameter. From the context menu, choose Copy Parameter.
-
Then, on the wrangle, right-click Light Pos and choose Paste Relative References. This choice adds expressions to the three parameters that read and transfer the sphere’s position to the wrangle. When you change the sphere’s position, the wrangle parameters will be updated automatically.
Light Intensity is a factor for scaling the mask values.
Processing the mask 
We recommend adding a ![]() HeightField Mask Blur SOP to the network to get some control over the mask’s softness and size.
HeightField Mask Blur SOP to the network to get some control over the mask’s softness and size.
You can also use a ![]() HeightField Copy Layer SOP to store the custom mask into a new layer, e.g.
HeightField Copy Layer SOP to store the custom mask into a new layer, e.g. lightmap. This will help you a) to separate the mask and prevent it from being overridden, and b) to visualize the layer if necessary.