| On this page |
Adding textures to huge terrains can be challenging, because it’s not so easy to find working texture maps. In many cases you’ll combine different maps and apply techniques like hex-tiling or tri-planar mapping to avoid seams and repitive patterns.
But, there’s another methods that’s fully procedural and doesn’t even require UV coordinates: colors. The advantage with this method is that you don’t have worry about maps if you want to change the appearance of your terrain. Instead you change color definitions and mask layers. This approach can work well for distant mountains, but also small terrains. In the latter case you can add different colors to the ground to give it a certain appearance like soil. Then, you scatter plants and debris over the ground.

Colors 
The heightfield layer system lets you combine different masks to carve out even finest details. You can add, subtract or multiply layers from various nodes, create masks from slope or curvature, and colorize each feature separately. This process even works without texture coordinates. And, to render the terrain, you can convert the terrain and bake the colors directly to the mesh as a Cd attribute. Then, Houdini will also add a uv attribute to store the texture coordinates.
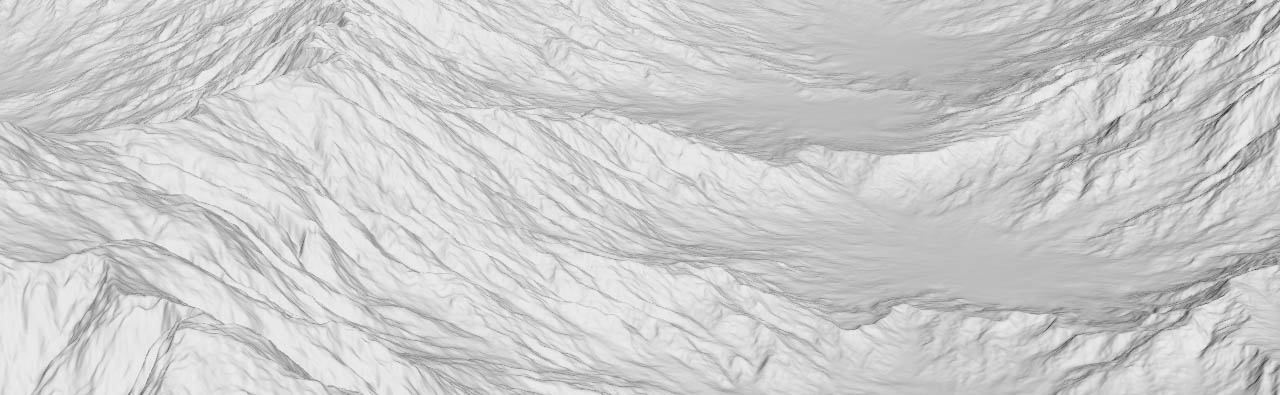
Create a base terrain to your liking. The mountain range from the images uses a ![]() HeightField Noise SOP with a Worley Cellulars F1 noise and some distortion.
HeightField Noise SOP with a Worley Cellulars F1 noise and some distortion.
Slope 
Let’s start with a custom slope layer and combine it with a noise mask to break its regular appearance. For the slope layer, lay down a ![]() HeightField Mask by Feature SOP and make it the last node of your current network. You don’t have to change anything, because the Mask by Slope option is turned on by default and the standard values give pretty good results already.
HeightField Mask by Feature SOP and make it the last node of your current network. You don’t have to change anything, because the Mask by Slope option is turned on by default and the standard values give pretty good results already.
A ![]() HeightField Mask Noise SOP will create an irregular pattern. The question is now, where to connect the upstream nodes? Should the feature mask go the the noise mask’s first or second input? This question is relevant, because it’ll create completely different results. When you connect the feature mask to the
HeightField Mask Noise SOP will create an irregular pattern. The question is now, where to connect the upstream nodes? Should the feature mask go the the noise mask’s first or second input? This question is relevant, because it’ll create completely different results. When you connect the feature mask to the
-
first input, you can profit from the noise mask’s Combine Method
-
second input, the noise mask will only be created in the areas of the feature mask.
Here, the two masks should stretch over the entire terrain and therefore, you need the first input. Once you've connected the nodes, decrease Element Size and set Combine Method to Difference. This mode subtracts the masks and creates large areas, but also spots of varying intensity.
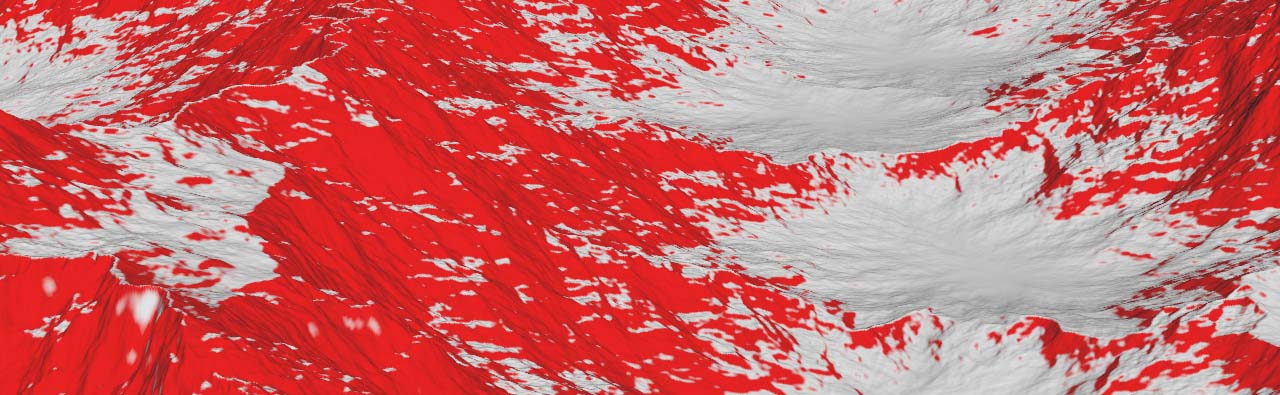
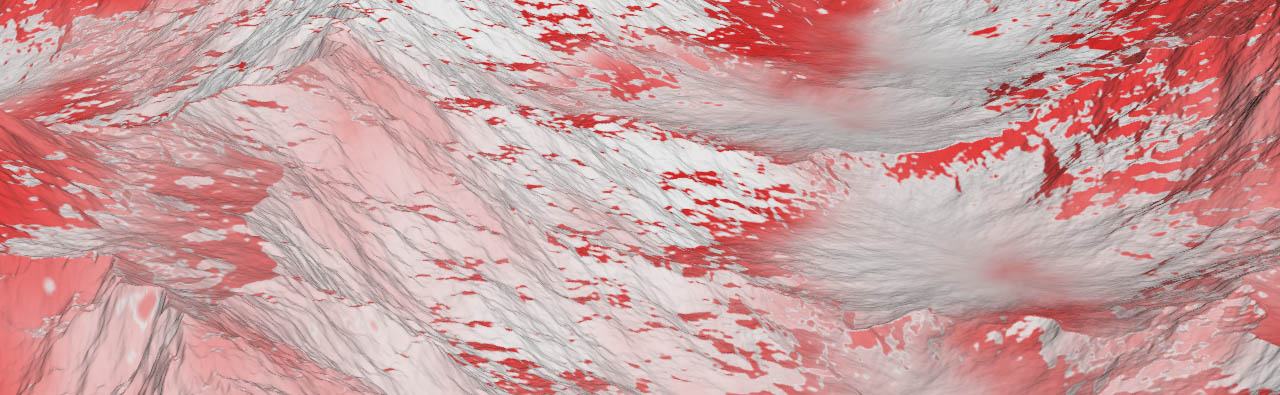
The left image shows the original mask, the right image the combined result.
To prevent the current mask from being overridden by new downstream layers, you copy the mask and apply a new name to save it as a separate layer.
-
Add a
 Heightfield Copy Layer SOP and connect it to the last upstream node.
 -
For Destination, enter
slope.
Click the Node info button from the copy layer node’s radial menu to see the newly created slope layer.
When you follow the create-copy principle, you can create and isolate many more layers to see different structures. You can, for example, mask the mountains' ridges or occluded areas, but also custom masks with VEX scripting are possible. The list is almost endless.
Erosion layers 
Erosion is something you should always add to a terrain - or at least most of the time. Erosion brings the various terrain features together and creates a realistic look. When you connect an ![]() HeightField Erosion SOP, you’ll get instantly four more layers:
HeightField Erosion SOP, you’ll get instantly four more layers: debris, sediment, flow and flowdirection. You can see them on the erosion node’s Layer Bindings tab.
The layers are directly created and appropriately named by the node itself, so you don’t have to prevent them from being overridden. However, if you want to add another HeightField Erode SOP and want to preserve the original layers, you should copy them.
Visualization 
The ![]() HeightField Visualize SOP lets you apply colors to your layers to make the different features of the terrain visible. The color palette defines the type of rock. Reddish and beige colors indicate sandstone, grayish and blue colors can stand for granite, while brown colors are often visible with iron-bearing rocks. You can, of course, add multiple visualize nodes to create variants with different colors. Colors will give your terrain a certain impression and this way you can create a desert, a grassland or a flat rocky plain with ponds and creeks.
HeightField Visualize SOP lets you apply colors to your layers to make the different features of the terrain visible. The color palette defines the type of rock. Reddish and beige colors indicate sandstone, grayish and blue colors can stand for granite, while brown colors are often visible with iron-bearing rocks. You can, of course, add multiple visualize nodes to create variants with different colors. Colors will give your terrain a certain impression and this way you can create a desert, a grassland or a flat rocky plain with ponds and creeks.
By default, the HeightField Visualize SOP applies the color gradient from the Height Ramp to visualize the height values. With Min Elevation and Max Elevation you can map the colors onto the terrain. Before you start to adjust the elevation values, we recommend clicking Compute Range to get an idea of the maximum and minimum values.
The node provides nine slots for your layers. You can choose a layer from the dropdown menu that’s associated with each parameter, or you can also enter the name directly. Then, define a color for each layer. The Layer # parameters also let you override the Height Ramp gradient when enter height to one of the slots. Instead of gradient you’ll get a single color.
Conversion 
Before you can bring your terrain to Solaris and render it with Karma, you have to convert it and bake the colors. The Solaris SOP import nodes are capable of converting heightfields on the fly, but only without colors.
-
Add a
 Convert HeightField SOP and connect its input with the output of the layer clear node.
 -
Turn on Bake Point Colors to add a
Cdattribute to each point that can be rendered in Karma. In Solaris/USD, theCdattribute is renamed todisplayColor.
For the sake of simplicity, the Solaris import is done through a single node. The example networks don’t contain any nodes that require special treatment in Solaris.
On the stage level of the Network Editor, press ⇥ Tab to open the tab menu and choose Scene Import (All). This tool is a preconfigured version of the ![]() Scene Import LOP. The importer takes what it finds on the SOP level and displays it in the viewport, but respects the SOP nodes' blue Display/Render flags. You can also use the
Scene Import LOP. The importer takes what it finds on the SOP level and displays it in the viewport, but respects the SOP nodes' blue Display/Render flags. You can also use the ![]() SOP Import LOP if you want import only a particular SOP node.
SOP Import LOP if you want import only a particular SOP node.
Copernicus 
Houdini’s Copernicus image processing framework provides many features you can use for texturing heightfields. Here are some helpful resources.